NestJS DI 따라해보기

nest JS 를 사용할 때 @Injectable을 사용해 의존성 주입을 많이 하는데 이게 어떤 원리로 돌아가는걸까?
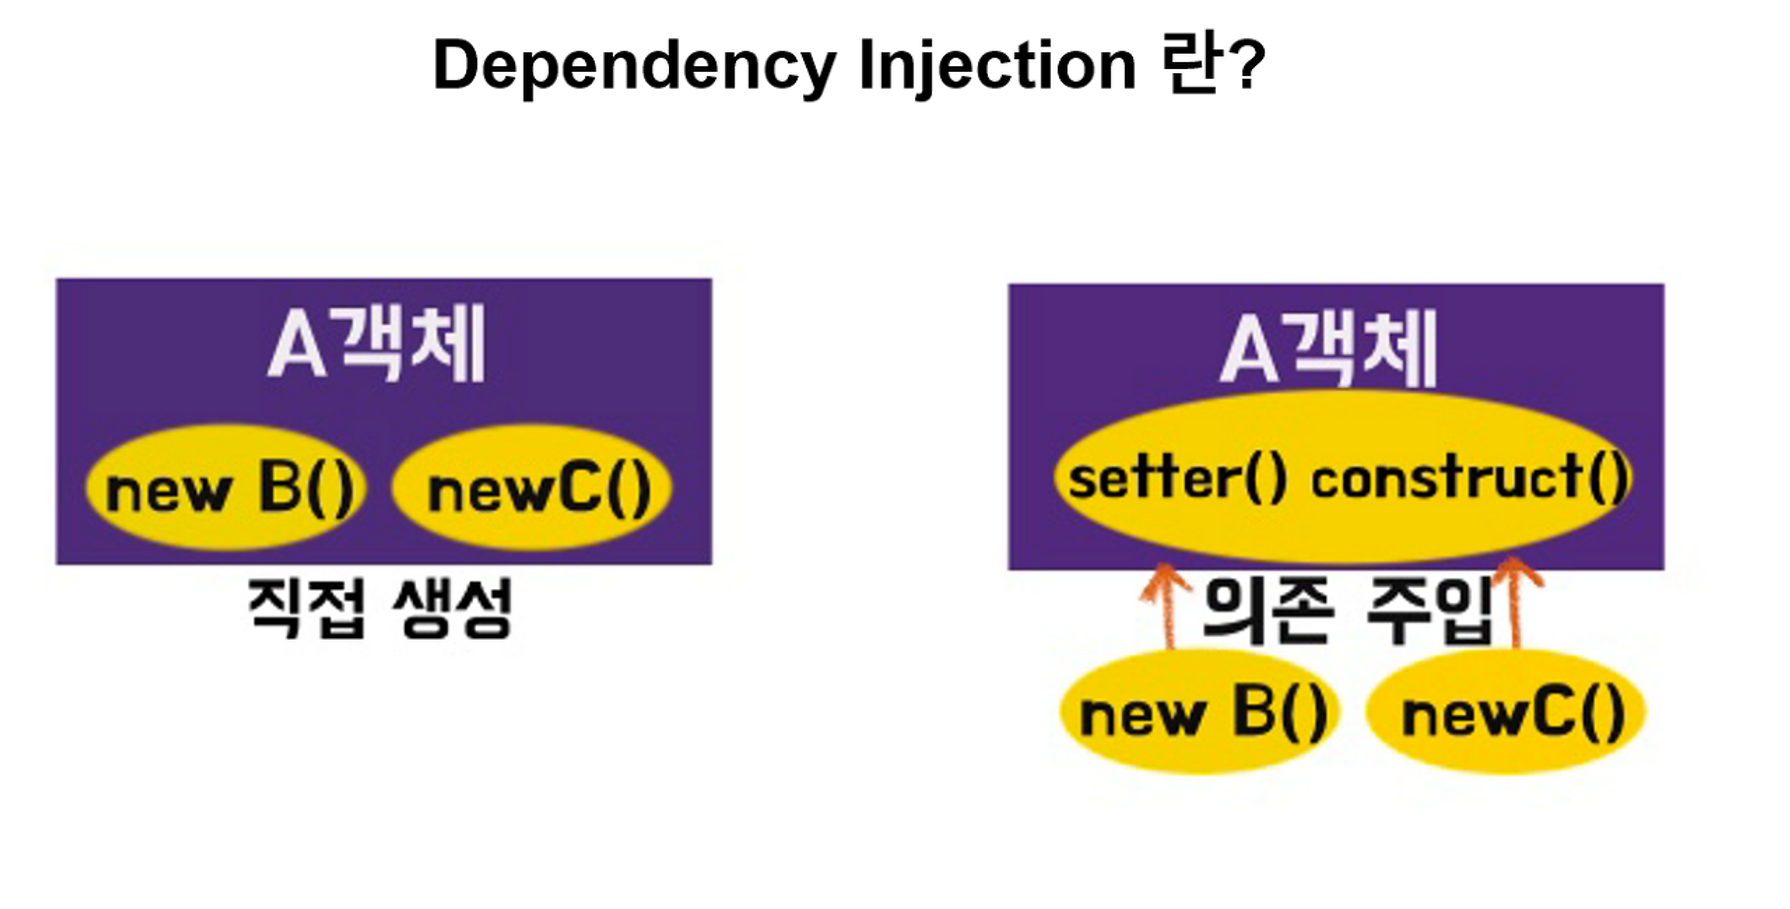
A는 B,C 의 기능에 의존한다고 한다, A에게 B,C 의 기능을 주입 시켜준다고도 한다
의존성 주입을 사용하는 이유
- 같은 객체의 재사용성을 높여준다.
- 테스트에 용이하다.
- 코드를 단순화 시켜준다.
- 사용하는 이유를 파악하기 수월하고 코드가 읽기 쉬워지는 점이 있다.
- 종속성이 감소하기 때문에 변경에 민감하지 않다.
- 결합도(coupling)는 낮추면서 유연성과 확장성은 향상 시킬 수 있다.
- 객체 간의 의존관계를 설정할 수 있다. @
DI를 더 간편하게 사용하기 위해선?
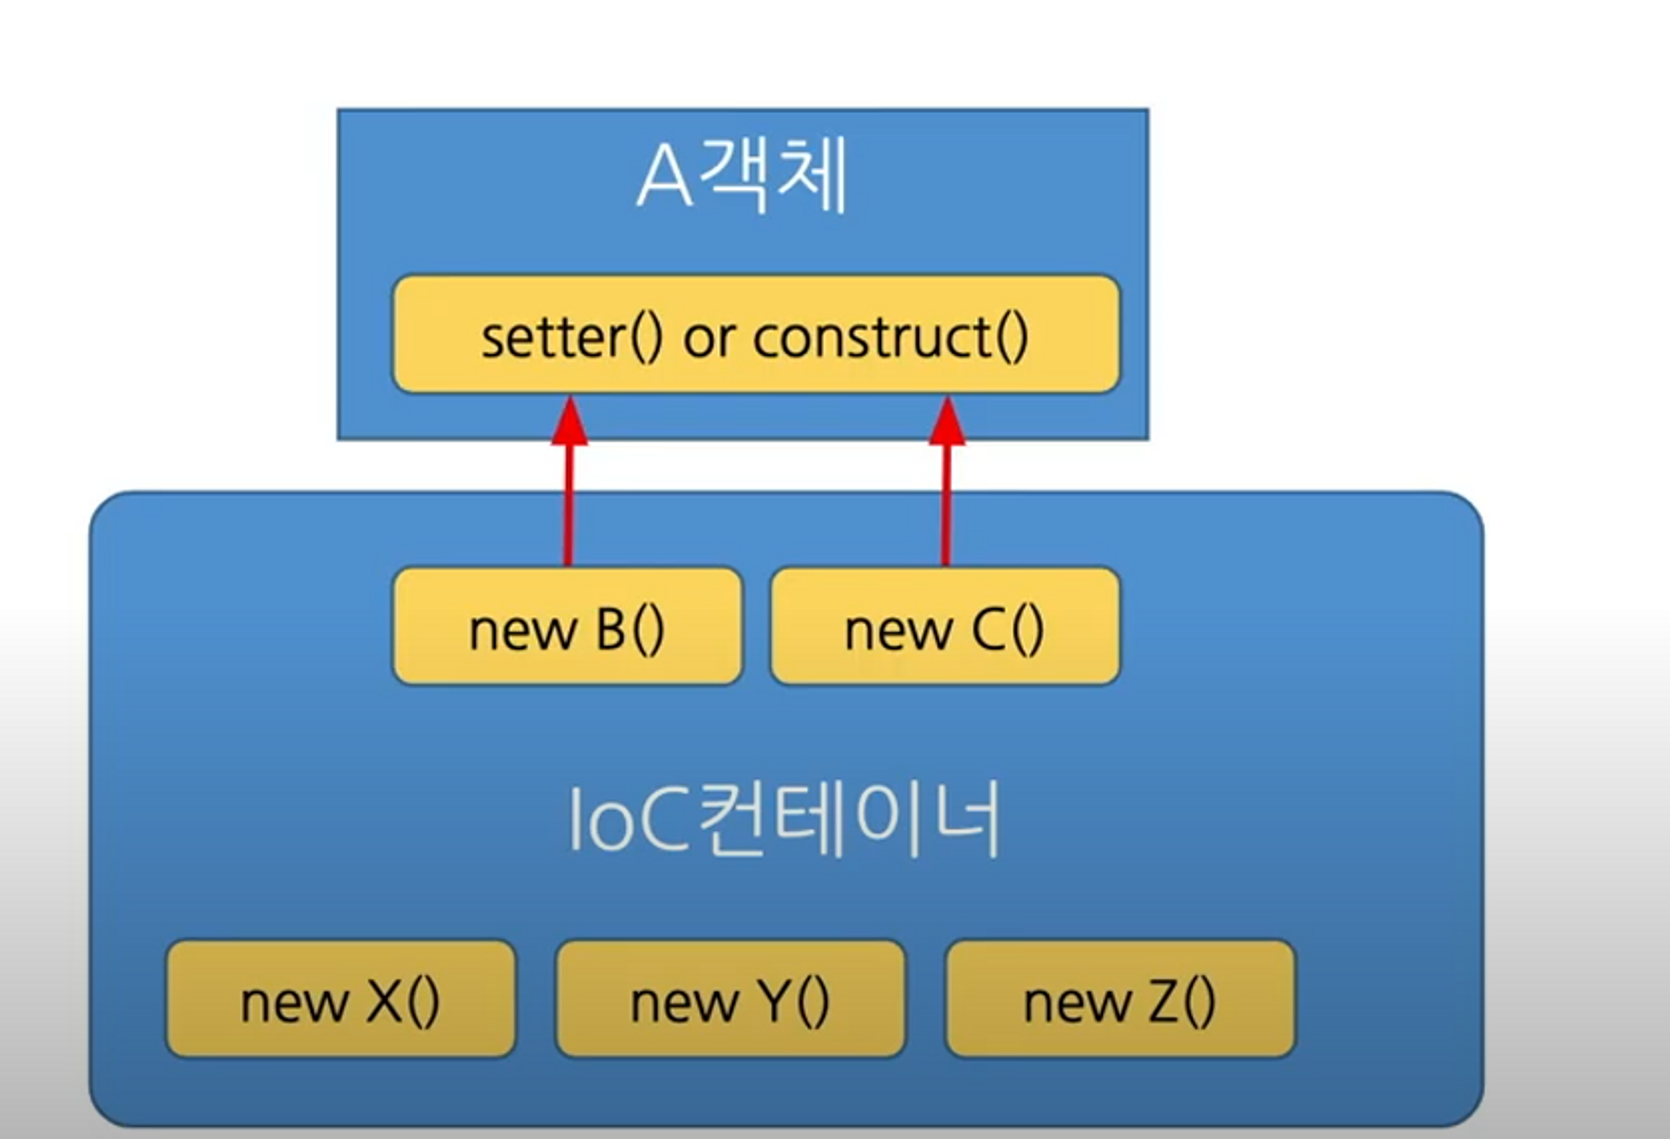
IoC (Inversion of Control) : 제어의 역전
제어 역전을 한 마디로 표현한다면 나 대신 프레임워크가 제어한다 이다.
사용자가 객체들을 제어하는것이 아닌 프레임워크의 컨테이너가 객체를 제어해 주므로 제어의 역전이라고 한다. 직접 관리하는것보다 약한 결합이 되므로 관리가 쉬워지는 장점이있다.
프레임워크 입장에서는 사용자가 컨테이너에 싣고 있는 객체의 생명주기가 다했다고 판단되면 메모리에서 해제해서 메모리를 효율적으로 사용할 수 있다.
NestJS 에서 많이 쓰는 @Injectable은 어떻게 구현되어있을까?
nest/injectable.decorator.ts at master · nestjs/nest
import { v4 as uuid } from 'uuid';
import { INJECTABLE_WATERMARK, SCOPE_OPTIONS_METADATA } from '../../constants';
import { ScopeOptions } from '../../interfaces/scope-options.interface';
import { Type } from '../../interfaces/type.interface';

/**
 * Defines the injection scope.
 *
 * @see [Injection Scopes](https://docs.nestjs.com/fundamentals/injection-scopes)
 *
 * @publicApi
 */
export type InjectableOptions = ScopeOptions;

/**
 * Decorator that marks a class as a [provider](https://docs.nestjs.com/providers).
 * Providers can be injected into other classes via constructor parameter injection
 * using Nest's built-in [Dependency Injection (DI)](https://docs.nestjs.com/providers#dependency-injection)
 * system.
 *
 * When injecting a provider, it must be visible within the module scope (loosely
 * speaking, the containing module) of the class it is being injected into. This
 * can be done by:
 *
 * - defining the provider in the same module scope
 * - exporting the provider from one module scope and importing that module into the
 *   module scope of the class being injected into
 * - exporting the provider from a module that is marked as global using the
 *   `@Global()` decorator
 *
 * Providers can also be defined in a more explicit and imperative form using
 * various [custom provider](https://docs.nestjs.com/fundamentals/custom-providers) techniques that expose
 * more capabilities of the DI system.
 *
 * @param options options specifying scope of injectable
 *
 * @see [Providers](https://docs.nestjs.com/providers)
 * @see [Custom Providers](https://docs.nestjs.com/fundamentals/custom-providers)
 * @see [Injection Scopes](https://docs.nestjs.com/fundamentals/injection-scopes)
 *
 * @publicApi
 */
export function Injectable(options?: InjectableOptions): ClassDecorator {
  return (target: object) => {
    Reflect.defineMetadata(INJECTABLE_WATERMARK, true, target);
    Reflect.defineMetadata(SCOPE_OPTIONS_METADATA, options, target);
  };
}

export function mixin<T>(mixinClass: Type<T>) {
  Object.defineProperty(mixinClass, 'name', {
    value: uuid(),
  });
  Injectable()(mixinClass);
  return mixinClass;
}
NestJS 는 Reflect 라는 프레임워크를 사용해서 객체에 의존성을 주입하고 있는 것을 볼 수 가 있었다.그럼 Reflect 는 무슨 기능을 가지고 있을까?
Reflect?
reflect가 런타임에 자기 자신을 검사, 수정할 수 있는 기능
위키피디아에서 확인해보면, 언어별 reflect 방법을 소개한 것을 확인할 수 있다.
간단한 사용법
import "reflect-metadata" // 'Reflect'라는 global object를 생성한다.

const user = {
  firstName: "우성",
 phone: '010-213'
}

// 'user'에 `phone: '010-1234-5678'`이라는 metadata property를 추가한다.
Reflect.defineMetadata("phone", "010-1234-5678", user) // 프로퍼티이름,프로퍼티값,객체
console.log(user)

// 'user.firstName'에 `lastName: '박'`이라는 metadata property를 추가한다.
Reflect.defineMetadata("lastName", "박", user, "firstName")
console.log(user)

// 'user'에서 'phone'을 key로 가지는 metadata value를 가져온다.
const number = Reflect.getMetadata("phone", user)
console.log(number)
쓰는 이유가 뭘까?
- 접근제어자 등을 무시하고 접근이 가능
- 보통 프레임워크나 라이브러리에서 사용
- 보통 코딩할 때랑 다르게 프레임워크나 라이브러리는 컴파일 시점에 객체의 타입을 몰라,
- IntelliJ 같은 ide의 자동완성도 reflection 사용한거임
- 객체 여러가지 설정 가능
- 클래스의 정보를 컴파일 시점에 알아내기 위해서 사용한다.
만들어보자
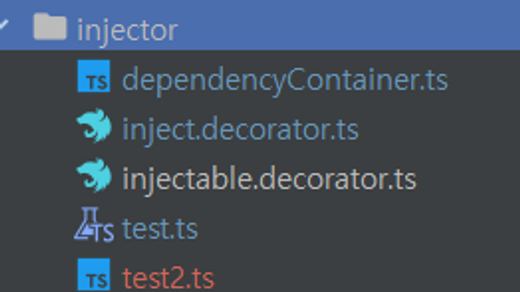
dependencyContainer
export default class DependencyContainer {
    private static container: DependencyContainer;
    private static storage: Map<string, object>;

    private constructor() {
        DependencyContainer.storage = new Map<string, object>();
    }

    public static getDependencyContainer() {
        if (!DependencyContainer.container) {
            DependencyContainer.container = new DependencyContainer();
        }
        return DependencyContainer.container;
    }

    public addDependency(target: object) {
        DependencyContainer.storage.set(target.constructor.name, target);
    }

    public getObject(targetName: string) : object{

        // @ts-ignore
        return DependencyContainer.storage.get(targetName);
    }
}
댓츠 노노..
es6의 module 은 이미 싱글톤으로 동작하기 때문에 위와 같이 싱글톤 클래스를 따로 만들어 줄 필요가 없었다.
export const dependencyContainer = {};이런식으로 간단하게만 써도 된다는 말씀..!
컨테이너를 만들었으니 컨테이너에 객체를 실어주는 데코레이터를 만들어보자.
@Injectable
import {dependencyContainer} from "./dependencyContainer";
import "reflect-metadata"

/**
 클래스에만 붙일수 있는 데코레이터
 target을 생성한뒤 dependency 컨테이너에 넣고 @inject 를 이용해 꺼낼 수 있게 한다
 클래스의 생성을 위임
 **/
export default function Injectable() {
    return (target: any) =>{
        let dependency = Reflect.getMetadata(target.name.toLowerCase(),dependencyContainer);

        if (!dependency) {
            Reflect.defineMetadata(target.name.toLowerCase(), new target, dependencyContainer);
        }
    }
}
nestJS의 @Injectable 처럼 객체 위에 달면 컨테이너에 실어 주게 된다.
@Inject
import "reflect-metadata"
import {dependencyContainer} from "./dependencyContainer"; // -S 로 install 하면 이렇게됨

/**
 클래스에만 붙일수 있는 데코레이터
 target을 생성한뒤 dependency 컨테이너에 넣고 @inject 를 이용해 꺼낼 수 있게 한다
 클래스의 생성을 위임
 **/
export default function Inject() {
    return (target: {} | any, name: string): any => {
        const descriptor = {
            get(this: any) {
                const propertyName = `__${String(name)}`;

                if (!this[propertyName]) {
                    this[propertyName] = Reflect.getMetadata(name.toLowerCase(),dependencyContainer);
                }

                return this[propertyName];
            },
            enumerable: true, // 전개연산자, 프로퍼티를 a.d 이런식으로볼수있는지 설정
            configurable: true, // delete 를 통해 객체의 속성 제거 가능여부
        };

        Object.defineProperty(target, name, descriptor);
    };
}
@Injectable 로 실어준 컨테이너를 가져와 사용 할 때는 Inject를 이용해 사용할 수 있게 하였다. 그럼 만든게 잘 동작하는지 테스트를 해보겠다.
test1.ts
import Injectable from "./injectable.decorator";

@Injectable()
class UserRepository{
    name='hi';
}

@Injectable()
export class CamperRepository extends UserRepository{
    name2='hihi';
}
test2.ts
import Inject from "./inject.decorator";
import {CamperRepository} from "./test";

export class Component {
    @Inject()
    private readonly camperRepository : CamperRepository;

    log() {
        console.log('id', this.camperRepository);
    }
}

const component = new Component();

component.log(); // id CamperRepository { name: 'hi', name2: 'hihi' }
의도한 대로 동작한다면 상속을 해도 그 정보를 가져올 것이다. 콘솔로그로 객체의 정보를 찍어보면 CamperRepository의 객체 정보를 받아오는 것을 볼 수 있다.
참고