저번 포스트에 이어 본격적으로 이슈를 해결해보겠습니다
이슈 분석🧐
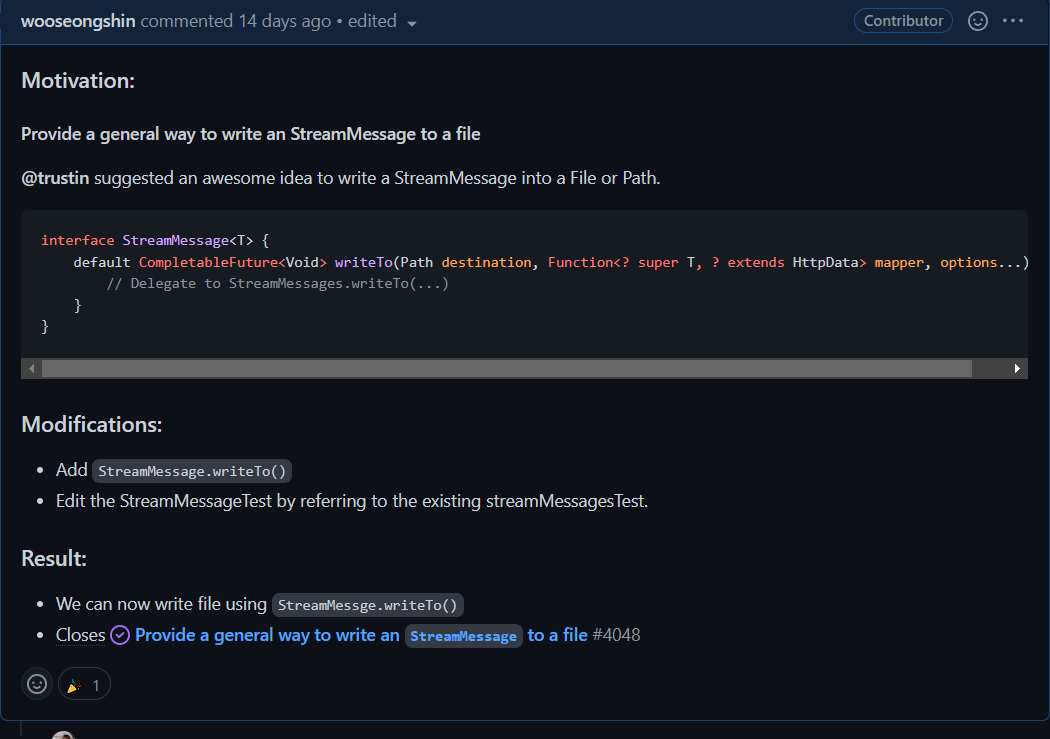
Provide a general way to write an StreamMessage to a file
write a StreamMessage into a File or Path
interface StreamMessage<T> {
    default CompletableFuture<Void> writeTo(Path destination,
  Function<? super T, ? extends HttpData> mapper, options...) {
        // Delegate to StreamMessages.writeTo(...)
    }
}
StreamMessage에 담긴내용을 파일로 쓰는 기능을 제공하는 기존의 StreamMessages.writeTo 를 StreamMessage에서 사용할 수 있게 하는 이슈 입니다.
먼저 StreamMessages.writeTo를 사용하기위해 어떤 것인지 StreamMessages API문서를 통해 살펴보겠습니다.
StreamMessages.writeTo 알아보기 📕
A utility class for StreamMessage.
StreamMessages는 StreamMessage의 유틸리티 클래스라고 간단히 정의되어있습니다. 온전히 writeTo를 사용하기 위한 클래스였군요.
이번엔 writeTo 메서드입니다.
Writes the specified StreamMessage to the given Path with OpenOptions. If the OpenOptions are not specified, they default to StandardOpenOption.CREATE, StandardOpenOption.TRUNCATE_EXISTING and StandardOpenOption.WRITE.
writeTo의 파라미터인 options에 관한 내용입니다. options는 파일을 여는방법을 지정하는 변수입니다. 입력하지 않아도 디폴트값이 있다고 합니다. 그런데 기능에 관한 자세한 설명이 없습니다.. 😢
직접 코드를 보고 파악해보겠습니다.
public static CompletableFuture<Void> writeTo(StreamMessage<? extends HttpData> publisher,
                                                  Path destination, OpenOption... options) {
        requireNonNull(publisher, "publisher");
        requireNonNull(destination, "destination");
        requireNonNull(options, "options");

        final RequestContext ctx = RequestContext.currentOrNull();
        EventExecutor eventExecutor = null;
        ExecutorService blockingTaskExecutor = null;
        if (ctx != null) {
            eventExecutor = ctx.eventLoop();
            if (ctx instanceof ServiceRequestContext) {
                blockingTaskExecutor = ((ServiceRequestContext) ctx).blockingTaskExecutor();
            }
        }
        if (eventExecutor == null) {
            eventExecutor = CommonPools.workerGroup().next();
        }
        if (blockingTaskExecutor == null) {
            blockingTaskExecutor = CommonPools.blockingTaskExecutor();
        }

        return writeTo(publisher, destination, eventExecutor, blockingTaskExecutor, options);
    }

public static CompletableFuture<Void> writeTo(StreamMessage<? extends HttpData> publisher, Path destination,
                                                  EventExecutor eventExecutor,
                                                  ExecutorService blockingTaskExecutor, OpenOption... options) {
        requireNonNull(publisher, "publisher");
        requireNonNull(destination, "destination");
        requireNonNull(eventExecutor, "eventExecutor");
        requireNonNull(blockingTaskExecutor, "blockingTaskExecutor");
        requireNonNull(options, "options");

        final Set<OpenOption> writeOptions = checkWriteOptions(options);
        return new AsyncFileWriter(publisher, destination, writeOptions, eventExecutor,
                                   blockingTaskExecutor).whenComplete();
    }
파라미터부터 보겠습니다.
publisher-HttpData를 소스로 갖는StreamMessage<HttpData>destination-StreamMessage를 파일로 쓸 경로options- 파일을 여는 방법eventExcutor- 주어진publisher를subscribe하기 위한EventExecutor.blockingTaskExecutor- 파일 I/O 이벤트 및 쓰기 작업을 처리하기 위해 차단 작업이 제출되는ExecutorService
전체적인 흐름을 살펴보면
writeTo 메서드에서 eventExcutor와 blockingTaskExecutor 를 안넣을 경우 CommonPool기능을 통해 디폴트값을 넣어 오버로딩된 메서드를 호출하여 Subscriber의 구현체인AsynFileWriter 객체로 파라미터를 보내서 publisher를 구독하고CompletableFuture 객체를 반환 하며 주어진 경로에 파일을 쓰는 것 같습니다.
흐름을 보아하니 StreamMessage<HttpData> 객체인publisher와 Path 객체destination을 제외하곤 디폴트값이 있기 때문에 이 둘만 제대로 넣어 주면 정상적으로 작동할 것으로 보입니다.
드디어 길이 보이는것 같습니다😀
흐름을 파악했으니 이슈를 해결해보겠습니다
이슈 코드 작성
만들어야 하는 메서드를 다시한번 보겠습니다.
interface StreamMessage<T> {
    default CompletableFuture<Void> writeTo(Path destination,
  Function<? super T, ? extends HttpData> mapper, options...) {
        // Delegate to StreamMessages.writeTo(...)
    }
}객체T를 HttpData로 변환해주는 Function,파일을 쓸 경로 그리고 option을 파라미터로 받아서 StreamMessage.writeTo를 사용해 리턴해주면 될 것 같습니다.
기여자를 위한 개발자가이드를 보면 requireNonNull()를 사용하여 파라미터가 null인지 항상 확인하라고 하니 파라미터 확인도 필수입니다. 두개를 적용해보면
interface StreamMessage<T> {
    default CompletableFuture<Void> writeTo(Path destination,
  Function<? super T, ? extends HttpData> mapper, options...) {
        requireNonNull(mapper, "mapper");
        requireNonNull(destination, "destination");
        requireNonNull(options, "options");
        return StreamMessages.writeTo(???, destination, options);
    }
}
이렇게 코드를 작성할 수 있습니다.
이제 Function객체인 mapper를 이용해 StreamMessage<HttpData>만 만들어서 넣어주면 되겠습니다.
이런 기능을 만들기전에 혹시 기존에 Function을 매개변수로 이용해 StreamMessage를 반환하는 기능이 있나 확인해 보겠습니다.
이 글을 읽게 될 오픈소스를 기여해보고자하는 여러분들도 어떤 기능을 넣기전에 그 기능이 존재하는지 확인해 보시는걸 추천드립니다.
저는 무식하게 인텔리제이의 Ctrl+Shift+f 기능을 이용해서 하나하나 찾아보았습니다.
Transforms values emitted by this StreamMessage by applying the specified Function. As per Reactive Streams Specification 2.13, the specified Function should not return a null value
default <U> StreamMessage<U> map(Function<? super T, ? extends U> function) {
        requireNonNull(function, "function");
        if (function == Function.identity()) {
            @SuppressWarnings("unchecked")
            final StreamMessage<U> cast = (StreamMessage<U>) this;
            return cast;
        }
        return FuseableStreamMessage.of(this, function);
    }
StreamMessage에 있는 map기능입니다. javadoc에 써있는 설명을 읽어보니 제가 찾던 기능에 부합합니다.
그럼 이 기능을 이용하여 메서드를 완성해보겠습니다.
interface StreamMessage<T> {
    default CompletableFuture<Void> writeTo(Path destination,
  Function<? super T, ? extends HttpData> mapper, options...) {
        requireNonNull(mapper, "mapper");
        requireNonNull(destination, "destination");
        requireNonNull(options, "options");
        return StreamMessages.writeTo(map(mapper), destination, options);
    }
}
기존기능을 이용하여 간단히 코드를 작성할 수 있었습니다
그럼 잘동작하는지 테스트를 해봐야겠죠?
테스트코드짜기 ⚒
테스트코드를 작성하기에 앞서 기존에 StreamMessages.writeTo는 어떻게 테스트코드를 짰는지 StreamMessagesTest를 살펴보겠습니다.
    @TempDir
        static Path tempDir;

    @Test
    void writeStream() throws IOException {
        final List<ByteBuf> bufs = new ArrayList<>();
        for (int i = 0; i < 10; i++) {
            bufs.add(Unpooled.wrappedBuffer(Integer.toString(i).getBytes()));
        }
        final HttpData[] httpData = bufs.stream().map(HttpData::wrap).toArray(HttpData[]::new);
        final byte[] expected = Arrays.stream(httpData)
                                      .map(HttpData::array)
                                      .reduce(Bytes::concat).get();

        final StreamMessage<HttpData> publisher = StreamMessage.of(httpData);
        final Path destination = tempDir.resolve("foo.bin");
        StreamMessages.writeTo(publisher, destination).join();
        final byte[] bytes = Files.readAllBytes(destination);
        assertThat(bytes).contains(expected);

        for (ByteBuf buf : bufs) {
            assertThat(buf.refCnt()).isZero();
        }
    }
코드를 보니
1~10까지 ByteBuf에 담아 HttpData 로 변환시켜 StreamMessage에 넣고 임시경로를 만들어서 그곳에 파일을 생성한뒤 잘 쓰여졌는지 확인해보는 흐름을 가지고 있네요. 여기서 ByteBuf객체를 HttpData로 바꾸는 방법으로 이전 포스트에서 알아본 HttpData의 wrap 을 사용하고 있는것을 볼 수 있습니다. ByteBuf 를 wrap 했으니 pooled HttpData가 되어 StreamMessage에 들어갈 수 있는 걸 알 수 있습니다 😊
새로 만들 테스트 코드에도 이것을 writeTo 에 넣어줄 Function으로 사용하면 될 것 같습니다.
그렇게 StreamMessageTest에 작성한 테스트코드입니다.
	@Test
    void writeToFile(@TempDir Path tempDir) throws IOException {
        final ByteBuf[] bufs = new ByteBuf[10];
        for (int i = 0; i < 10; i++) {
            bufs[i]= Unpooled.wrappedBuffer(Integer.toString(i).getBytes());
        }
        final byte[] expected = Arrays.stream(bufs)
                                      .map(ByteBuf::array)
                                      .reduce(Bytes::concat).get();

        final StreamMessage<ByteBuf> publisher = StreamMessage.of(bufs);
        final Path destination = tempDir.resolve("foo.bin");
        publisher.writeTo( x -> HttpData.wrap(x), destination).join();
        final byte[] bytes = Files.readAllBytes(destination);

        assertThat(bytes).contains(expected);
        for (ByteBuf buf : bufs) {
            assertThat(buf.refCnt()).isZero();
        }
    }
메서드이름과 기능에 맞게 이름은 writeToFile 이라고 지었습니다
StreamMessageTest에서는 @TempDir을 또 사용할 일이 없기 때문에 파라미터로 넣어주었습니다. StreamMessage에 ByteBuf를 담아줘야 HttpData로 wrap을 할 수 있으니 기존의 HttpData를 없애고 기대값으로도 ByteBuf 를 입력했습니다
 이렇게 작성 했더니 정상 작동하는것을 볼 수 있습니다
글에서는 물흐르듯 해결한것처럼 작성했지만 초록체크모양을 보기위해서 수많은 시도가 있었습니다 ㅋㅋ..
기능이 정상적으로 돌아가는것을 확인했으니 이제 이 기능의 사용자들을 위해 javadoc을 작성 해보겠습니다.
Javadoc 작성하기 🖋
javadoc는 작성한 메서드위에 설명과 간단한 테스트를 작성하면 됩니다. 같은 클래스에있는 javadoc가 어떻게 작성되어있는지 보면 참고가 됩니다.
	/**
     * Writes this {@link StreamMessage} to the given {@link Path} with {@link OpenOption}s.
     * See {@link StreamMessages#writeTo} for the details.
     *
     * <p>Example:<pre>{@code
     * Path destination = Paths.get("foo.bin");
     * ByteBuf[] bufs = new ByteBuf[10];
     * for(int i = 0; i < 10; i++) {
     *     bufs[i] = Unpooled.wrappedBuffer(Integer.toString(i).getBytes());
     * }
     * StreamMessage<ByteBuf> streamMessage = StreamMessage.of(bufs);
     * streamMessage.writeTo( x -> HttpData.wrap(x),destination).join;
     *
     * assert Files.readAllBytes(destination).contains(bufs.map(ByteBuf::array).reduce(Bytes::concat).get());
     * }</pre>
     */
    default CompletableFuture<Void> writeTo(Path destination,
  Function<? super T, ? extends HttpData> mapper, options...) {
        requireNonNull(mapper, "mapper");
        requireNonNull(destination, "destination");
        requireNonNull(options, "options");
        return StreamMessages.writeTo(map(mapper), destination, options);
    }
설명은 StreamMessages를 참고했고 작성한 테스트코드를 사용했습니다.
로컬에서 빌드해보기 👩🔧
javadoc 까지 작성했다면 가이드에 따라 PR을 하기전 마지막으로 로컬에서 빌드를 해서 오류가 없나 확인해야합니다.
./gradlew --parallel build
이 명령어를 터미널에 입력하면 전체 빌드를 해볼 수 있습니다. 보통 컴퓨터로 하면 매우 오래 걸리니 에러가 난다면
./gradlew --parallel build -p core(수정한부분)
로 수정한 폴더만 돌려보며 수정해보시는게 시간도 절약하고 좋습니다!
로컬빌드도 통과했다면 이제 드디어 PR을 해보겠습니다 😊
PR하고 merge까지 🥳
PR을 할때에도 개발자 가이드를 따라 PR을 해야합니다. 다른분들이 하신 PR을 참고하시면 도움이 되실겁니다.
https://github.com/line/armeria/pull/4130
이렇게 양식에 맞춰 작성하고 PR을 날리시면 적어도 2주안에는 피드백을 주십니다.
 메인테이너분들과 커미터분들께서 스윗하게 주시는 피드백🙇을 받아 코드를 고치고 떠오른 아이디어도 에러 안나게 잘 적용해주고 나면..
 merge를 해주십니다!
간단한 이슈를 해결한 것이지만 저도 이제 Armeria의 컨트리뷰터가 되었습니다 🥳🥳🥳
끝으로
쉬운이슈를 만난덕에 어려워만 보이던 오픈소스기여를 맨땅에 헤딩하여 성공했습니다
정말 뿌듯하네요 😀 😀
오픈소스 기여를 통해서
이전에는 모르는기능이 있으면 누군가 작성한 블로그만 보았었는데
Armeria의 기능에 대한 글은 거의 없으니 어쩔수 없이 공식문서를 보게되면서 공식문서를 보는 능력도 좋아지고 수정하고자하는 기능에 대해 알아보면서 지식도 더 쌓을 수 있었습니다.
상위 2% 개발자가 뚝딱 되진 않았겠지만 성장하는게 느껴지는 보람찬 활동이었습니다
괜히 많은 분들이 오픈소스 기여를 추천하시는게 아닌것같습니다 ㅎㅎ
앞으로도 Armeria의 컨트리뷰터로 활동하며 성장해봐야겠습니다.
오픈소스기여를 고민하고 있는분들이라면 한번쯤 도전하시는걸 추천드립니다!
지금까지 긴글 읽어 주셔서 감사합니다🥰

3편다 너무 잘 읽었습니다. ㅎㅎ 진짜 2프로 개발자시네요!