플러터에서 Firebase 연동하는 방법에 대해서 소개하고자 글을 남긴다.
목차는 Firebase와 연동하는 패키지 , Android 연동 , Ios 연동 으로 나누어 보았다.
Firebase Core 패키지
firebase_core 설치
Flutter에서 Firebase를 사용하기 위해, firebase_core 패키지를 설치할 필요가 있다.
터미널에서 다음 명령어를 사용하여 firebase_core를 설치한다.
flutter pub add firebase_core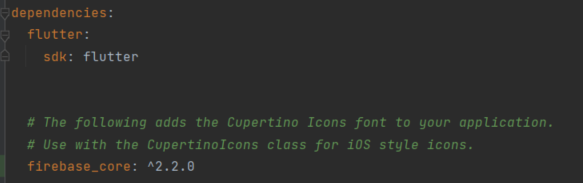
Firebase 초기화
firebase_core 패키지를 설치한 후, Firebase를 초기화해야 한다.
main.dart 파일을 열고 다음과 같이 수정하여 Firebase를 초기화 한다.
import 'package:firebase_core/firebase_core.dart';

void main() async {
  WidgetsFlutterBinding.ensureInitialized();
  await Firebase.initializeApp(); // Firebase 초기화

  runApp(const MyApp());
}
ios 설치시 추가사항
iOS에서 firebase_core를 사용하기 위해서는 ios/Podfile을 수정해야 한다.
또한 firebase_core는 다음 플랫폼 버전 이상을 요구한다.
- iOS 버전11 이상
- 맥OS 10.13 이상
ios/Podfile 파일을 열고 다음과 같이 수정한다.

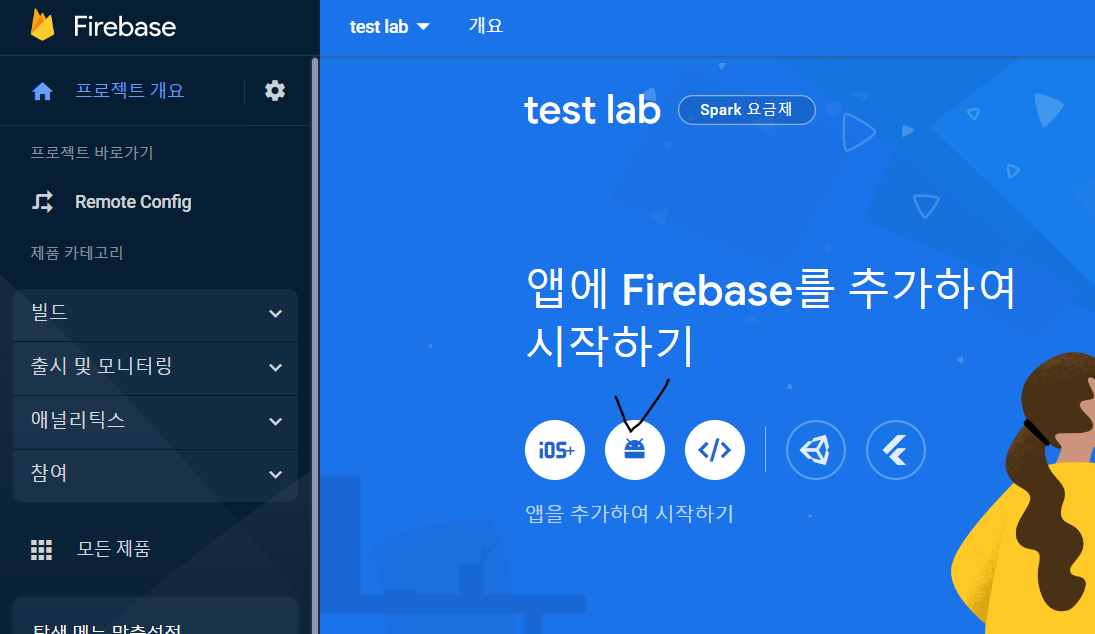
Android 연동
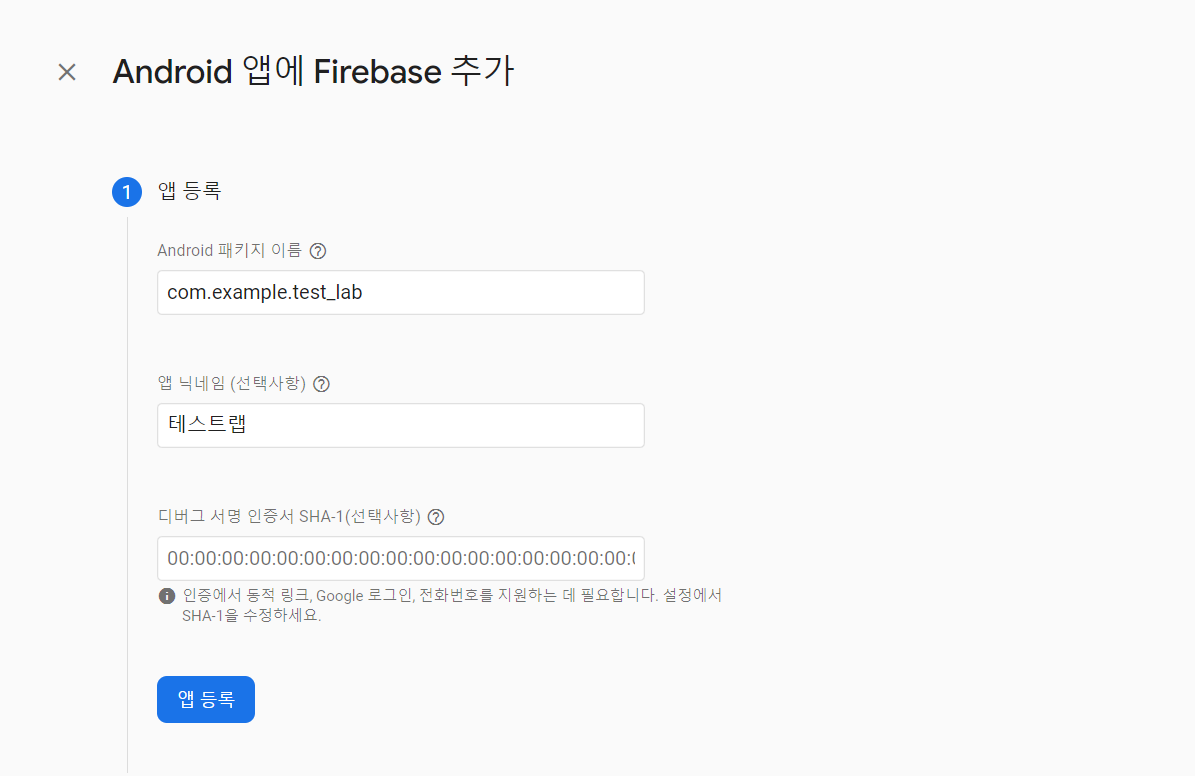
1. 파이어베이스 프로젝트 생성 후 Android 앱에 Firebase 추가
Android 앱에 Firebase 추가
Android 패키지 이름과 닉네임 작성
패키지 이름은 AndroidManifest.xml에 있는걸 그대로 복사한다.

2. google-services.json 다운로드 및 추가

3. SDK 설정
buildscript {
  repositories {
    // Make sure that you have the following two repositories
    google()  // Google's Maven repository

    mavenCentral()  // Maven Central repository

  }
  dependencies {
    ...
    // Add the dependency for the Google services Gradle plugin
        classpath 'com.google.gms:google-services:4.3.13' // 추가
        classpath 'com.android.tools.build:gradle:4.1.0'
        classpath "org.jetbrains.kotlin:kotlin-gradle-plugin:$kotlin_version"
  }
}

allprojects {
  ...
  repositories {
    // Make sure that you have the following two repositories
    google()  // Google's Maven repository

    mavenCentral()  // Maven Central repository

  }
}
Ios 연동
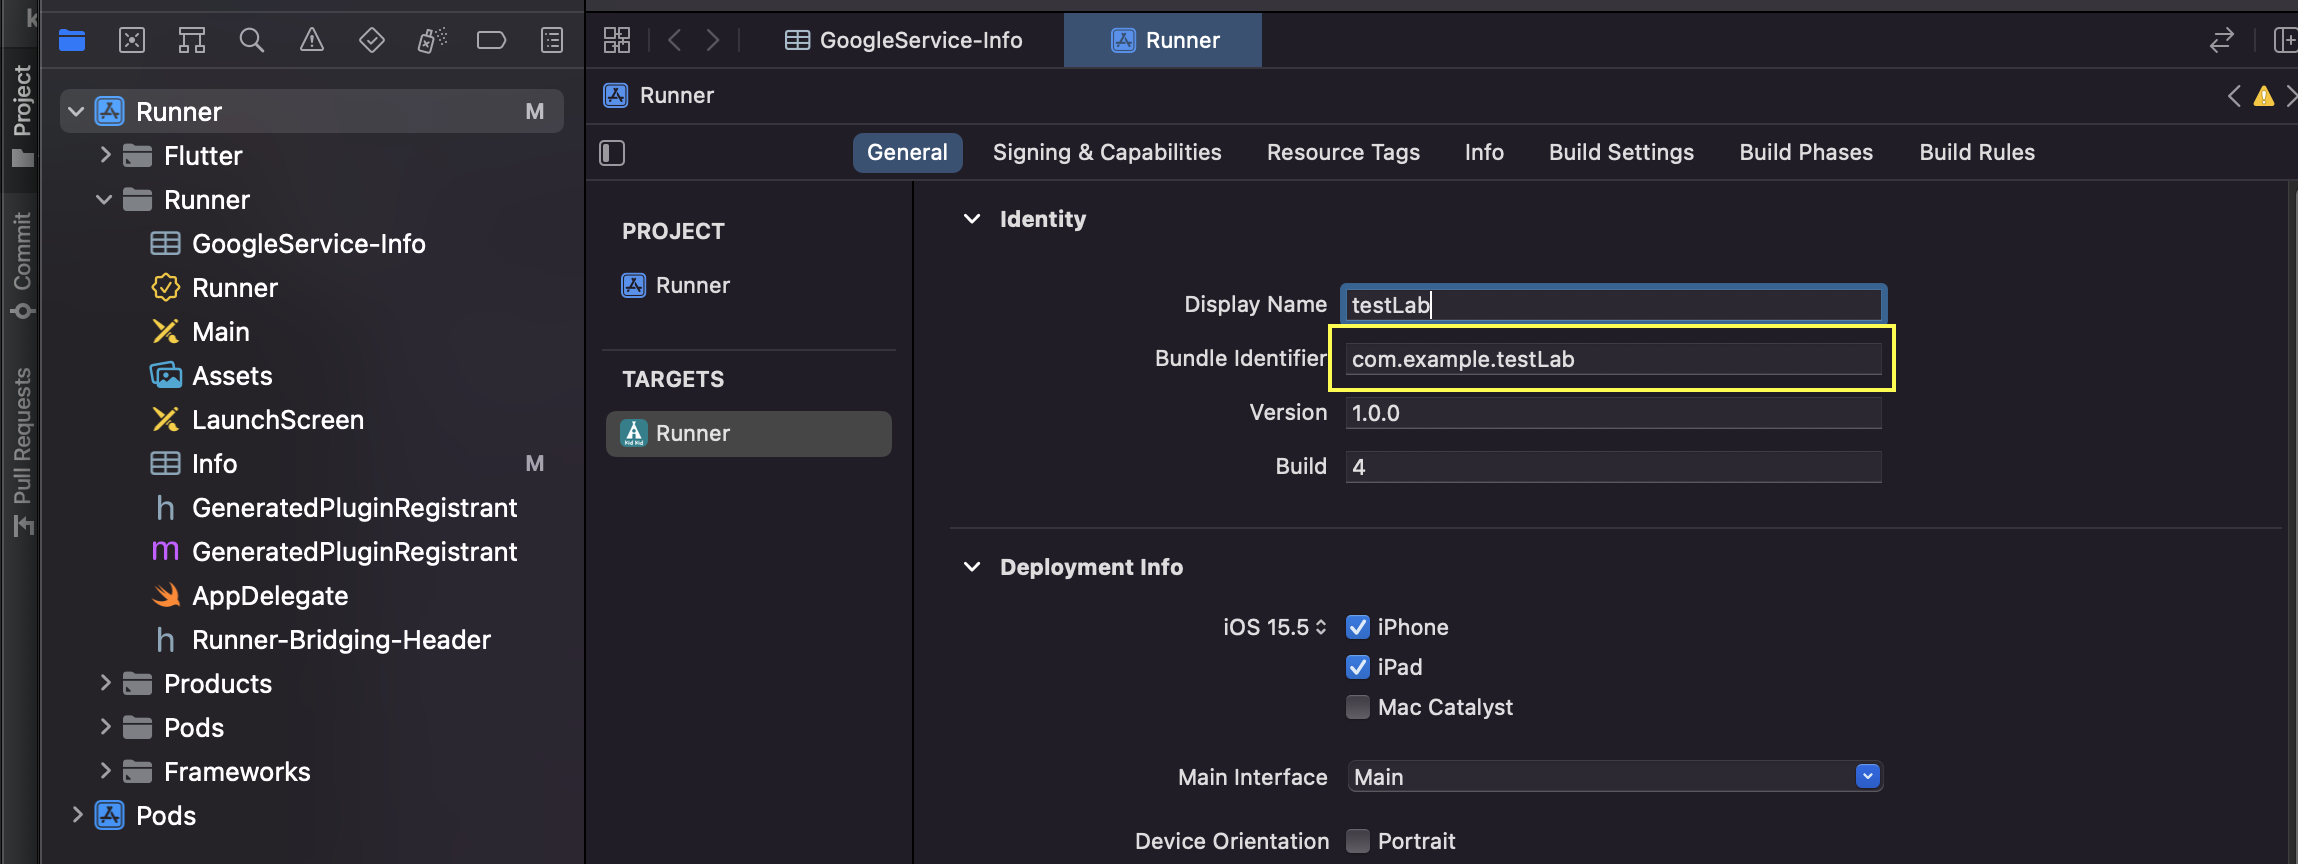
1. 파이어베이스 프로젝트 생성 후 Apple 앱에 Firebase 추가
Apple 앱에 Firebase 추가

IOS 번들 ID(bundle ID)를 입력
2. GoogleService-Info.plist 다운로드 및 추가
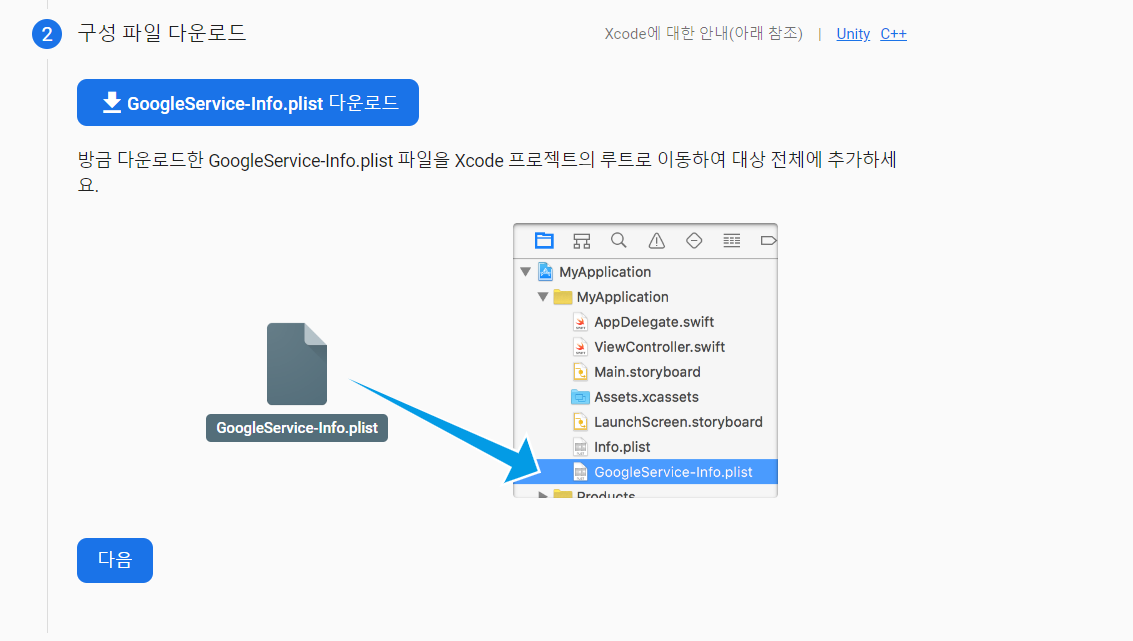
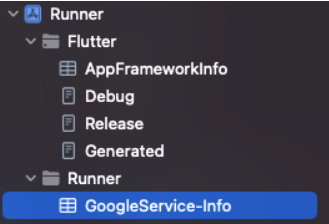
xcode -> Runner 폴더에 추가
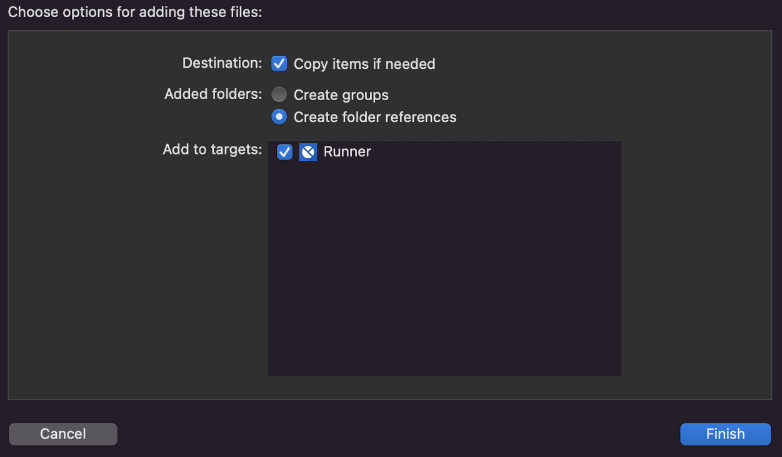
Runner 폴더에 추가 시 발생할 수 있는 Error
- 실행 시 발생하는 오류
Unable to install /Users/hoon/AndroidStudioProjects/medication_manage/build/ios/iphonesimulator/Runner.app on 83A2E900-4206-4EFD-A263-0B5E1D56AF8A. This is sometimes caused by a malformed plist file:
ProcessException: Process exited abnormally:
An error was encountered processing the command (domain=NSPOSIXErrorDomain, code=22):
Failed to install the requested application
The bundle identifier of the application could not be determined.
Ensure that the application's Info.plist contains a value for CFBundleIdentifier.
  Command: xcrun simctl install 83A2E900-4206-4EFD-A263-0B5E1D56AF8A /Users/hoon/AndroidStudioProjects/medication_manage/build/ios/iphonesimulator/Runner.app
Error launching application on iPhone- 에러 발생 원인 및 해결 : GoogleService-Info.plist 을 Runner 아래에 넣을때 Destination 에 Copy items if needed 가 체크되지 않아서 복사가 되지 않고 외부 파일을 참고하도록 설정이 된 것.
3. URL Types 설정
GoogleService-Info.plist -> REVERSED_CLIENT_ID 를 복사
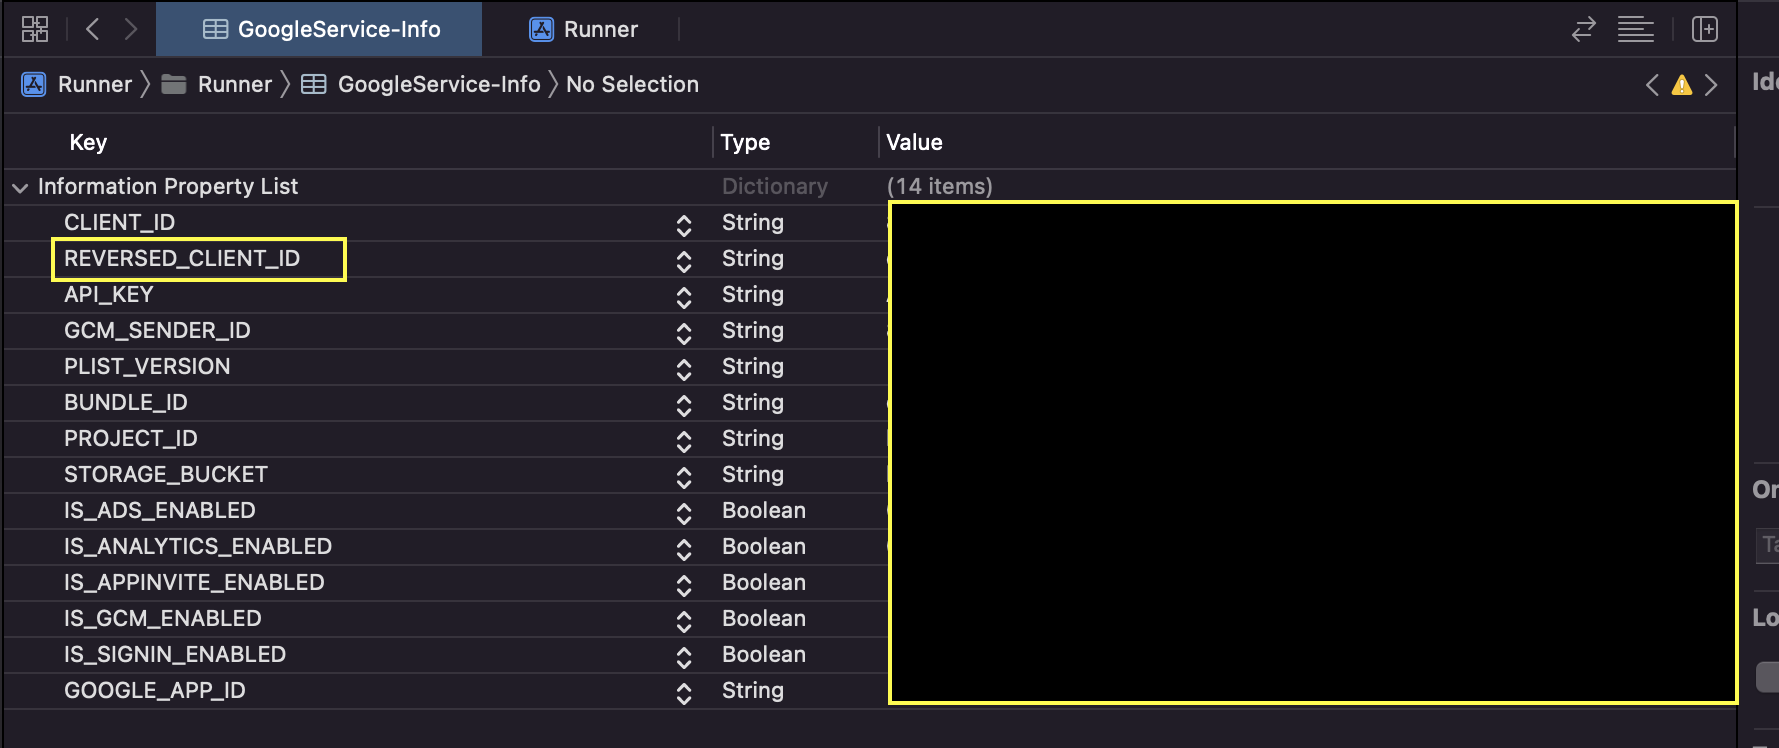
URL Types 에 추가


개인 공부 및 기록겸 벨로그 시작