https://uwsgi-docs.readthedocs.io/en/latest/tutorials/Django_and_nginx.html
Concept
- 어떤 웹서버가 세상으로 나갈 준비가 되어있다. 웹서버는 이제 filesystem으로 부터 HTML, CSS와 같은 정적파일을 서비스할 것이다.
- 그러나 Django 앱은 서버에서 바로 서비스할 수 없다.
- Client의 request를 받아서 Django 앱을 실행하고 서비스를 제공할 수 있게 도와줄 무언가가 필요하다.
- WSGI가 바로 그 일을 해준다. WSGI는 Python 표준이다.
- uWSGI는 WSGI 구현체이다.
uWSGI 셋팅을 시작하기 전에
virtualenv
Django
About the domain and port
기본적인 uWSGI설치 및 설정
virtualenv에 uWSGI 설치
pip install uwsgi
[x86_64-linux-gnu-gcc -pthread] plugins/python/python_plugin.o
    In file included from plugins/python/python_plugin.c:1:0:
    plugins/python/uwsgi_python.h:2:10: fatal error: Python.h: No such file or directory
     #include <Python.h>
              ^~~~~~~~~~
위와 같은 오류가 발생 -> 구글링을 결과 python3-dev를 설치해야함.
sudo apt-get install python3-dev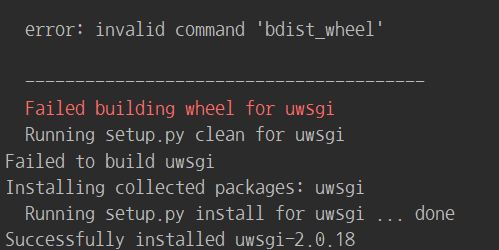
Basic test
- 임의의 경로에 아래 test.py 파일을 작성하고 uwsgi로 실행해본다.
def application(env, start_response):
    start_response('200 OK', [('Content-Type','text/html')])
    return [b"Hello World"] # python3
    #return ["Hello World"] # python2
uwsgi --http :8000 --wsgi-file test.py- 그리고 8000 포트로 접속해본다.
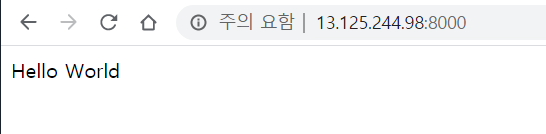
 2020] GET / => generated 11 bytes in 0 msecs (HTTP/1.1 200) 1 headers in 44 bytes (1 swi
tches on core 0)- 위 작업은 다음과 같은 구조로 동작한 것이다.

Django project test
- 위에서는 python 파일을 실행한 것이고, 이제는 Django 앱을 uwsgi를 통해 실행 해보자.
- 실행할 Django 앱은 이전에 만든 polls 앱이다.
- polls 앱을 만들 때 생성된 mysite.wsgi를 실행 해보자.

- 이러한 에러가 발생한다
nginx 기본
nginx 설치
sudo /etc/init.d/nginx start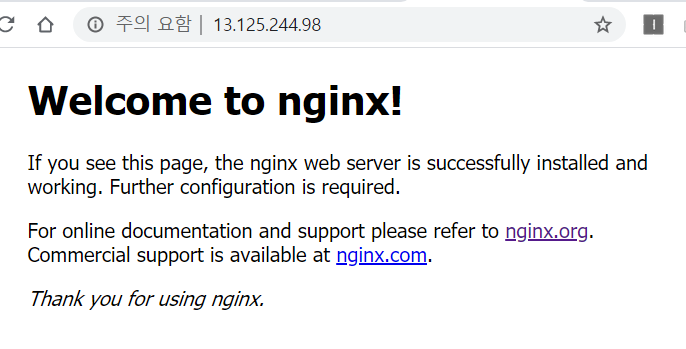

nginx 설정
- uwsgi_params 파일을 설정해주어야 한다.
https://github.com/nginx/nginx/blob/master/conf/uwsgi_params
: uwsgi_params는 프로젝트 디렉토리에 복사하여 위치시킨다. (~/mysite/uwsgi_params)
- "mysite_nginx.conf" 설정을 추가한다.
# /etc/nginx/site-avaliable/mysite_nginx.conf

# the upstream component nginx needs to connect to
upstream django {
    # server unix:///path/to/your/mysite/mysite.sock; # for a file socket
    server 127.0.0.1:8001; # for a web port socket (we'll use this first)
}

# configuration of the server
server {
    # the port your site will be served on
    listen      8000;
    # the domain name it will serve for
    server_name example.com; # substitute your machine's IP address or FQDN
    charset     utf-8;

    # max upload size
    client_max_body_size 75M;   # adjust to taste

    # Django media
    location /media  {
        alias /path/to/your/mysite/media;  # your Django project's media files - amend as required
    }

    location /static {
        alias /path/to/your/mysite/static; # your Django project's static files - amend as required
    }

    # Finally, send all non-media requests to the Django server.
    location / {
        uwsgi_pass  django;
        include     /path/to/your/mysite/uwsgi_params; # the uwsgi_params file you installed
    }
}
: 위 설정은 media와 static은 filesystem이 처리하고, 나머지 요청은 Django App에서 처리되도록 nginx를 설정하는 것이다.
sudo ln -s /etc/nginx/site-avaliable/mysite_nginx.conf /etc/nginx/sites-enabled/mysite_nginx.conf: 실제로 nginx에서 conf파일을 보도록 symbolik link를 걸어준다.
정적파일 배포
- nginx를 실행하기 전에, Django의 static 파일들을 static 폴더에 모아야한다.
- ~/mysite/setting.py의 다음 코드를 수정한다.
STATIC_ROOT = os.path.join(BASE_DIR, "static/")그리고 다음 명령어를 수행한다.
python manage.py collectstatic기본적인 nginx 테스트
- nginx restart :
sudo /etc/init.d/nginx restart - static 파일 경로에 접속하여, nginx가 static파일을 정상적으로 리턴하는지 확인
nginx & uWSGI & test.py
- nginx에서 'hello world'를 출력하는 test.py App을 돌려보자. 먼저, uwsgi를 아래와 같이 실행하자.
uwsgi --socket :8001 --wsgi-file test.py - 기존 방식과의 차이점은 uwsgi를 실행할 때, http 옵션 대신 socket 옵션을 사용하고 port는 8001번을 사용했다.
- nginx는 현재 8000번 포트에서 실행되고 있다.
- client는 8000번 포트를 통해 nginx와 통신하고, uwsgi는 8001번 포트를 통해 nginx와 통신한다.

port 대신 Unix socket을 이용
- 기존에는 TCP port socket을 사용하였다. 이는 간단하다.
- 그러나 overhead를 줄이기 위해 Unix socket을 사용하는 것이 더 좋다.
- /etc/nginx/site-avaliable/mysite_nginx.conf 설정에서 다음 부분을 수정한다.
server unix:///path/to/your/mysite/mysite.sock; # for a file socket
# server 127.0.0.1:8001; # for a web port socket (we'll use this first)- 그리고 nginx를 restart한다.
/etc/init.d/nginx restart - uwsgi를 socket옵션으로 실행한다.
uwsgi --socket mysite.sock --wsgi-file test.py
오류가 발생할 것이다.
- /var/log/nginx/error.log 를 확인하면, (13: Permission denied) 에러가 발생했을 것이다.
- uwsgi를 socket옵션으로 추가할 때, Unix socket 파일의 perssion을 666으로 지정해준다.
uwsgi --socket mysite.sock --wsgi-file testpy --chmod-socket=666
Django App을 uwsgi와 nginx로 돌리기
- 이제 test.py 대신 Django App을 실행해보자
uwsgi --socket mystie.sock --module mysite.wsgi --chomd-socket=666 - 8000번 포트로 접속하면 Django App이 실행되는 것을 확인 할 수 있다.
.ini파일로 실행하도록 uWSGI 설정하기
- uwsgi option을 ini파일로 실행할 수 있다.
- 실행을 간단히 할 수 있고, option 관리도 된다.
- mysite 프로젝트에 mysite_uwsgi.ini 파일을 생성한다.
# mysite_uwsgi.ini file
[uwsgi]

# Django-related settings
# the base directory (full path)
chdir           = /path/to/your/project
# Django's wsgi file
module          = project.wsgi
# the virtualenv (full path)
home            = /path/to/virtualenv

# process-related settings
# master
master          = true
# maximum number of worker processes
processes       = 10
# the socket (use the full path to be safe
socket          = /path/to/your/project/mysite.sock
# ... with appropriate permissions - may be needed
# chmod-socket    = 664
# clear environment on exit
vacuum = true- 그리고 uwsgi을 실행한다.
uwsgi --ini mysite_uwsgi.ini
uWSGI를 system-wide로 설치하기
- 지금 까지 uwsgi를 virtualenv환경에만 설치하였다.
- 실제 배포할 때는 system-wide하게 설치할 필요가 있다.
deactivate - uWSGI system-wide 설치
sudo pip3 install uwsgi
Emperor mode
- uWSGI는 'emperor' 모드가 있다.
- uWSGI config file이 담긴 디렉토리를 계속 지켜보고, 'vassals'라는 인스턴스를 각각 생성한다.
- config file이 변경되면, emperor는 vassal 인스턴스를 재시작한다.
# create a directory for the vassals
sudo mkdir /etc/uwsgi
sudo mkdir /etc/uwsgi/vassals
# symlink from the default config directory to your config file
sudo ln -s /path/to/your/mysite/mysite_uwsgi.ini /etc/uwsgi/vassals/
# run the emperor
uwsgi --emperor /etc/uwsgi/vassals --uid www-data --gid www-data- uwsgi를 sudo권한으로 실행해야 한다.
sudo uwsgi --emperor /etc/uwsgi/vassals --uid www-data --gid www-data
emperor: where to look for vassals (config files)
uid: the user id of the process once it’s started
gid: the group id of the process once it’s started
system 부팅할 때 uWSGI가 실행되도록 설정
- 마지막 단계는 system 시작 시, 자동실행이다.
- 가장 간단한 방법으로는 rc.local 파일을 사용하는 것이다.
# /etc/rc.local
/usr/local/bin/uwsgi --emperor /etc/uwsgi/vassals --uid www-data --gid www-data --daemonize /var/log/uwsgi-emperor.log
python developer