
안녕하세요 오늘은 SwiftUI Tutorial3를 정리해 보겠습니다. 사진을 통해 결과를 먼저 확인해 보겠습니다.
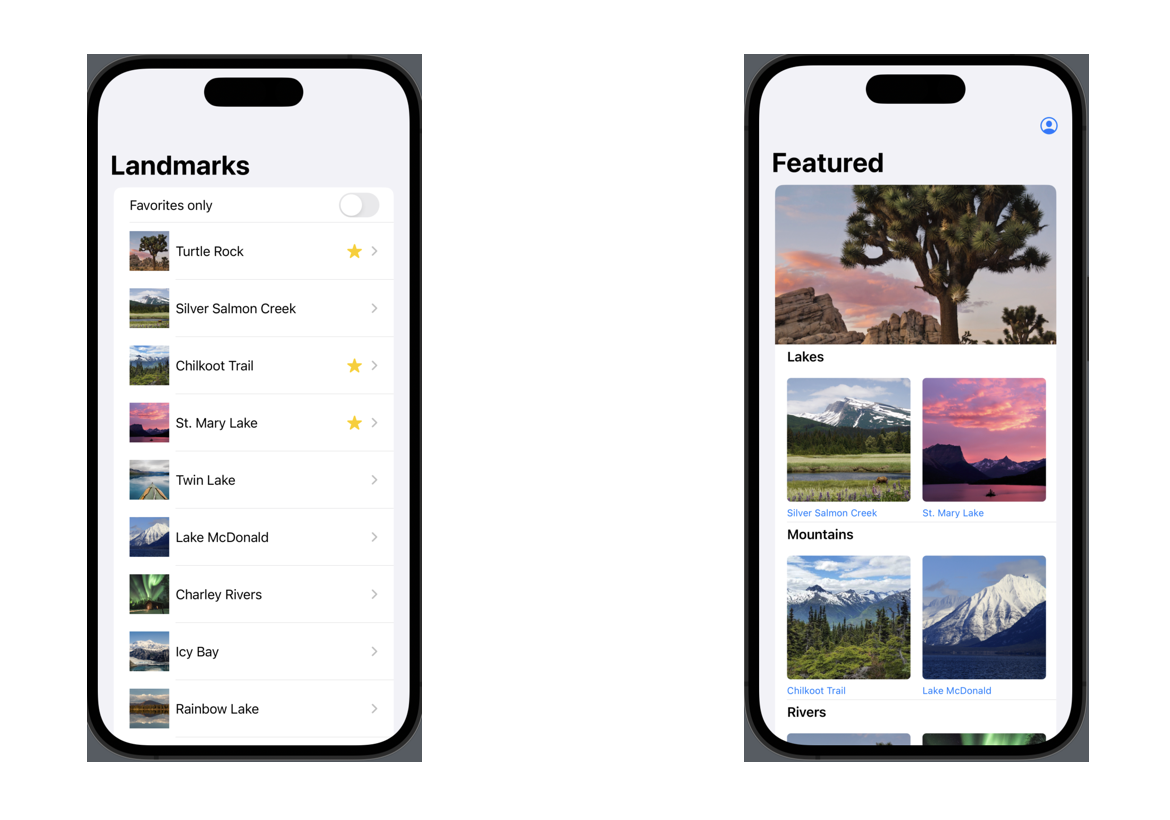
왼쪽 사진은 Tutorial1을 통해 만들 수 있는 화면이었습니다. 오른쪽이 Tutorial3를 통해 구현된 화면입니다.
만약 UIKit을 이용해 오른쪽 화면을 구현한다면 CollectionView를 이용할 것 같습니다. 하지만 SwiftUI에는 CollectionView 객체가 존재하지 않습니다. List, ForEach, ScrollView를 이용해 오른쪽 화면을 구현할 수 있습니다.
ScrollView는 익숙한 개념이기 때문에 List와 ForEach에 대해 알아보겠습니다.
List
List는 이름처럼 정렬된 데이터를 표시하는 기능을 제공합니다. List에 각각의 View를 추가해서 사용할 수 있지만 똑같은 요소를 반복적으로 표현할 수도 있습니다.
List {
Text("A List Item")
Text("A Second List Item")
Text("A Third List Item")
}
var textList = ["A List Item", "A Second List Item", "A Third List Item"]
List(textList) {
Text($0)
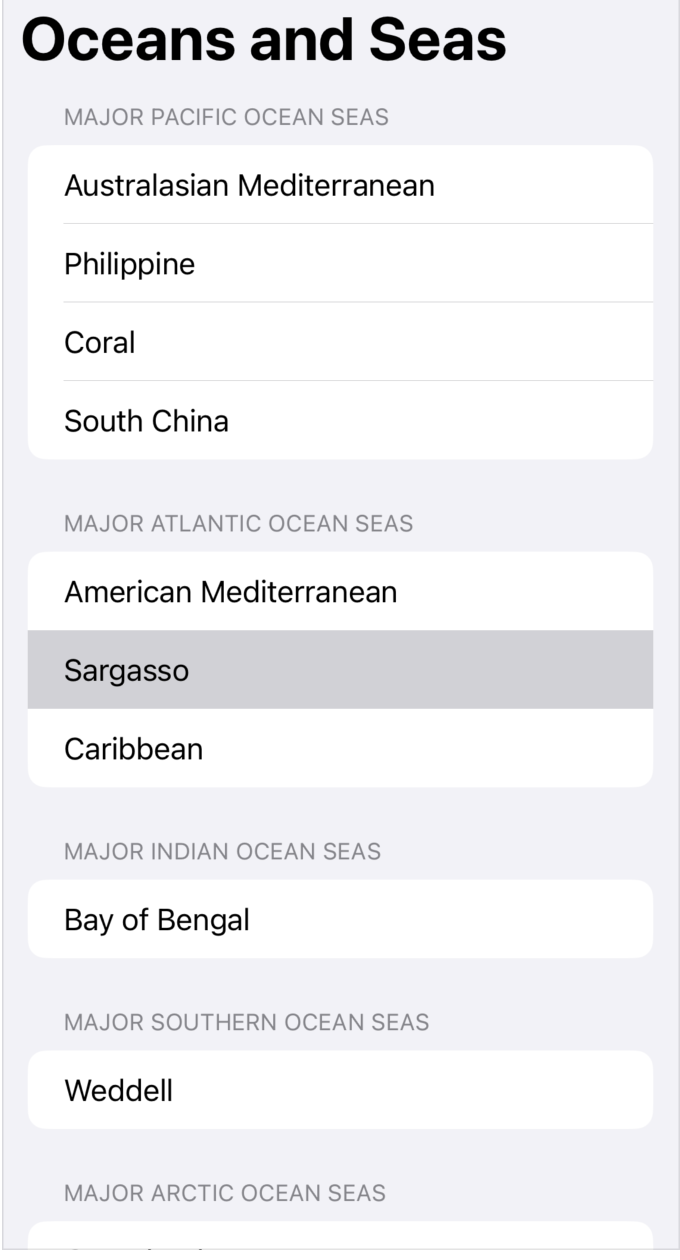
}또한 List 내부에 Section을 활용해 그룹을 분리할 수 있습니다.
struct ContentView: View {
    struct Sea: Hashable, Identifiable {
        let name: String
        let id = UUID()
    }


    struct OceanRegion: Identifiable {
        let name: String
        let seas: [Sea]
        let id = UUID()
    }


    private let oceanRegions: [OceanRegion] = [
        OceanRegion(name: "Pacific",
                    seas: [Sea(name: "Australasian Mediterranean"),
                           Sea(name: "Philippine"),
                           Sea(name: "Coral"),
                           Sea(name: "South China")]),
        OceanRegion(name: "Atlantic",
                    seas: [Sea(name: "American Mediterranean"),
                           Sea(name: "Sargasso"),
                           Sea(name: "Caribbean")]),
        OceanRegion(name: "Indian",
                    seas: [Sea(name: "Bay of Bengal")]),
        OceanRegion(name: "Southern",
                    seas: [Sea(name: "Weddell")]),
        OceanRegion(name: "Arctic",
                    seas: [Sea(name: "Greenland")])
    ]


    @State private var singleSelection: UUID?


    var body: some View {
        NavigationView {
            List(selection: $singleSelection) {
                ForEach(oceanRegions) { region in
                    Section(header: Text("Major \(region.name) Ocean Seas")) {
                        ForEach(region.seas) { sea in
                            Text(sea.name)
                        }
                    }
                }
            }
            .navigationTitle("Oceans and Seas")
        }
    }
}
ForEach
ForEach는 고차 함수에서 봤던 것처럼 ForEach를 초기화한 데이터를 반복적으로 사용해 View를 생성하는 기능을 가지고 있습니다.
 private struct NamedFont: Identifiable {
    let name: String
    let font: Font
    var id: String { name }
}


private let namedFonts: [NamedFont] = [
    NamedFont(name: "Large Title", font: .largeTitle),
    NamedFont(name: "Title", font: .title),
    NamedFont(name: "Headline", font: .headline),
    NamedFont(name: "Body", font: .body),
    NamedFont(name: "Caption", font: .caption)
]


var body: some View {
    ForEach(namedFonts) { namedFont in
        Text(namedFont.name)
            .font(namedFont.font)
    }
} 
List와 ForEach 둘 다 초기화를 위해 제공하는 데이터 타입은 Identifiable 프로토콜을 채택해야 합니다.
정리
처음 봤던 오른쪽 화면을 구현하기 위해서는 List 내부에 ForEach를 통해 스크롤 가능한 View를 추가하면 됩니다. 또한 SwiftUI에는 List뿐만 아니라 LazyVGrid와 격자형의 UI를 구현할 수 있는 객체도 존재합니다.
List와 ForEach를 적절히 활용한다면 좀 더 동적인 UI를 구현할 수 있습니다.
참고 자료
SwiftUI Tutorial 3.App Design and Layout - Composing complex interfaces
SwiftUI List docs