1. Github 참고
: https://github.com/derailed/k9s/tree/master
2. 나의 k9s 정보 확인
# local
$ k9s info

 ____  __.________
|    |/ _/   __   \______
|      < \____    /  ___/
|    |  \   /    /\___ \
|____|__ \ /____//____  >
        \/            \/

Configuration:   /Users/gimjaemin/Library/Application Support/k9s/config.yml
Logs:            /var/folders/_5/xrjm64nn57l128gw9v30hsrm0000gn/T/k9s-gimjaemin.log
Screen Dumps:    /var/folders/_5/xrjm64nn57l128gw9v30hsrm0000gn/T/k9s-screens-gimjaemin
3. 클러스터 별로 서로 다른 스킨 적용하는 방법
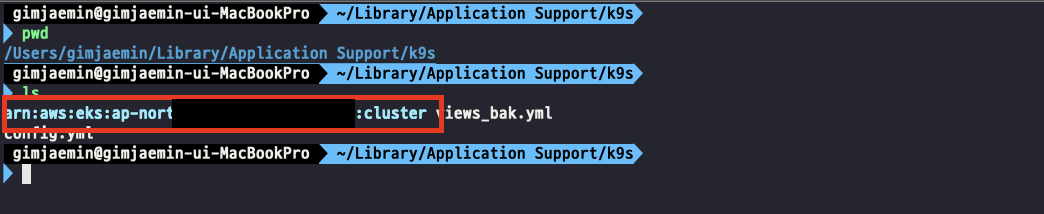
1) 클러스터 이름으로 된 디렉토리 생성
: MacOS 일 경우 ~/Library/Application Support/k9s/ 경로에 cluster arn 이름으로 된 디렉토리를 하나 생성하면 된다. 나의 경우 aws eks 서비스에 접근 중이기 때문에 arn 으로 시작하는 이름이 클러스터 이름이 된다.
2) {클러스터이름}_skin.yml 생성
: 생성한 디렉토리 안에 {클러스터이름}_skin.yml 파일을 위치 시킨다.

ex) monokai 스킨 예제 // 위에 github 레포지토리에서 다양한 스킨을 확인할 수 있다. 그리고 해당 클러스터에 접속하면 스킨이 적용된다.
# -----------------------------------------------------------------------------
# Monokai skin
# -----------------------------------------------------------------------------
# Styles...
foreground: &foreground "#ffffff"
background: &background "default"
backgroundOpaque: &backgroundOpaque "#333333"
magenta: &magenta "#f72972"
orange: &orange "#e47c20"
lightBlue: &lightBlue "#c3eff7"
blue: &blue "#69d9ed"
darkBlue: &darkBlue "#3174a2"
green: &green "#a7e24c"
purple: &purple "#856cc4"
yellow: &yellow "#e1df8f"
darkGray: &darkGray "#666666"
# Skin...
k9s:
# General K9s styles
body:
fgColor: *foreground
bgColor: *background
logoColor: *purple
logoColorMsg: *foreground
logoColorInfo: *lightBlue
logoColorWarn: *orange
logoColorError: *magenta
# Command prompt styles
prompt:
fgColor: *foreground
bgColor: *background
suggestColor: *darkGray
# ClusterInfoView styles.
info:
fgColor: *magenta
sectionColor: *yellow
# Help Menu styles
help:
fgColor: *foreground
bgColor: *background
keyColor: *green
numKeyColor: *green
sectionColor: *blue
# Dialog styles.
dialog:
fgColor: *yellow
bgColor: *background
buttonFgColor: *foreground
buttonBgColor: *background
buttonFocusFgColor: *foreground
buttonFocusBgColor: *purple
labelFgColor: *magenta
fieldFgColor: *darkBlue
frame:
# Borders styles.
border:
fgColor: *darkGray
focusColor: *darkGray
menu:
fgColor: *foreground
keyColor: *magenta
# Used for favorite namespaces
numKeyColor: *green
# CrumbView attributes for history navigation.
crumbs:
fgColor: *yellow
bgColor: *backgroundOpaque
activeColor: *purple
# Resource status and update styles
status:
newColor: *blue
modifyColor: *purple
addColor: *green
pendingColor: *orange
errorColor: *magenta
highlightColor: *blue
killColor: *magenta
completedColor: *darkBlue
# Border title styles.
title:
fgColor: *purple
bgColor: *background
highlightColor: *yellow
counterColor: *green
filterColor: *orange
# Specific views styles
views:
# Charts skins...
charts:
bgColor: *background
dialBgColor: *background
chartBgColor: *backgroundOpaque
defaultDialColors:
- *blue
- *magenta
defaultChartColors:
- *blue
- *magenta
resourceColors:
batch/v1/jobs:
- *blue
- *magenta
v1/persistentvolumes:
- *blue
- *magenta
cpu:
- *blue
- *magenta
mem:
- *blue
- *magenta
v1/events:
- *blue
- *magenta
v1/pods:
- *blue
- *magenta
# TableView attributes.
table:
fgColor: *foreground
bgColor: *background
cursorFgColor: *foreground
cursorBgColor: *backgroundOpaque
markColor: *magenta
# Header row styles.
header:
fgColor: *foreground
bgColor: *backgroundOpaque
sorterColor: *magenta
# Xray view attributes.
xray:
fgColor: *foreground
bgColor: *background
cursorColor: *blue
cursorTextColor: *foreground
graphicColor: *blue
# YAML info styles.
yaml:
keyColor: *green
colonColor: *magenta
valueColor: *foreground
# Logs styles.
logs:
fgColor: *foreground
bgColor: *background
indicator:
fgColor: *foreground
bgColor: *backgroundOpaque
toggleOnColor: *green
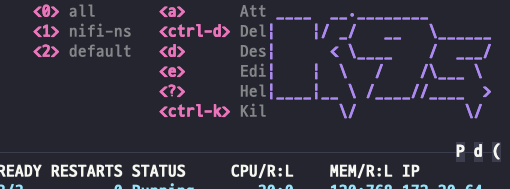
toggleOffColor: *magenta4. k9s 접속 후 Object 별 정보 컬럼 커스텀 하는 방법
📍참고: k9s 로 클러스터에 접근했는데 CPU, MEM 등의 정보가 보이지 않으면 ctrl + W 단축키를 사용하여 확인할 수 있다.
1) views.yml 생성
: MacOS 일 경우 ~/Library/Application Support/k9s/ 경로에 views.yml 을 위치 시키면 된다. 아래와 같이 작성할 경우 작성한 컬럼 순으로 k9s pod 창에서 확인할 수 있다.

# views.yml example
k9s:
  views:
    v1/pods:
      columns:
        - NAMESPACE
        - NAME
        - PF
        - READY
        - RESTARTS
        - STATUS
        - CPU
        - %CPU/R
        - %CPU/L
        - MEM
        - %MEM/R
        - %MEM/L
        - IP
        - NODE
        - AGE
안녕하세요. 데이터 엔지니어 김재민 입니다.