[ 📄 문 제 ]
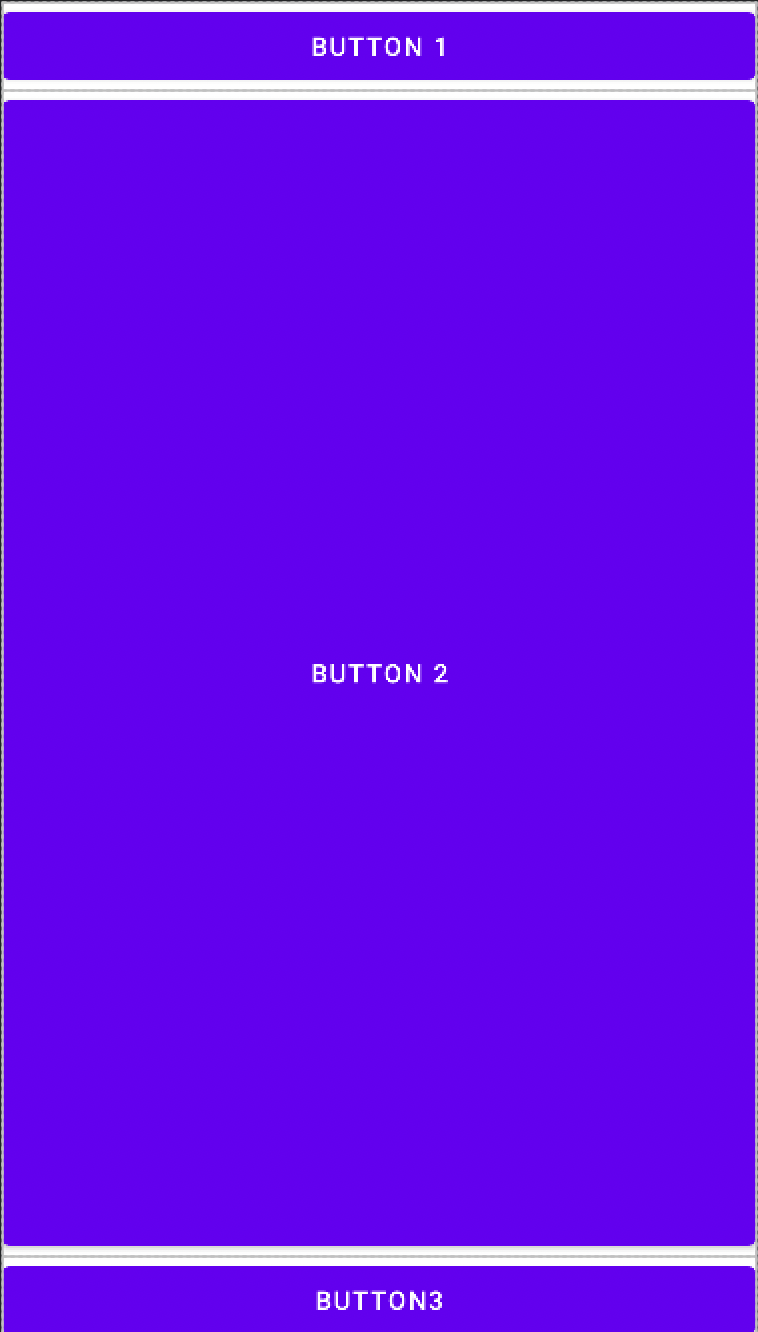
새로운 프로젝트를 만들고 위쪽과 아래쪽에 가로로 긴 모양의 버튼을 배치하고 비어있는 가운데 공간에 또 다른 버튼을 배치해 보세요.
-
중급 과정
-전형적인 화면 구성하기 -
프로젝트 소스
-DoitMission-02
[ 📚 설 명 ]
- 제약 레이아웃을 사용해 화면을 구성합니다.
- 화면의 위쪽에 버튼을 추가하고 가로 방향으로 꽉 차도록 만듭니다.
- 화면의 아래쪽에 버튼을 추가하고 가로방향으로 꽉 차도록 만듭니다.
- 화면의 가운데에 버튼을 추가하고 위쪽 버튼과 아래쪽 버튼 사이의 중앙 공간을 꽉 채우도록 만듭니다.
[ 💻 코 드 ]
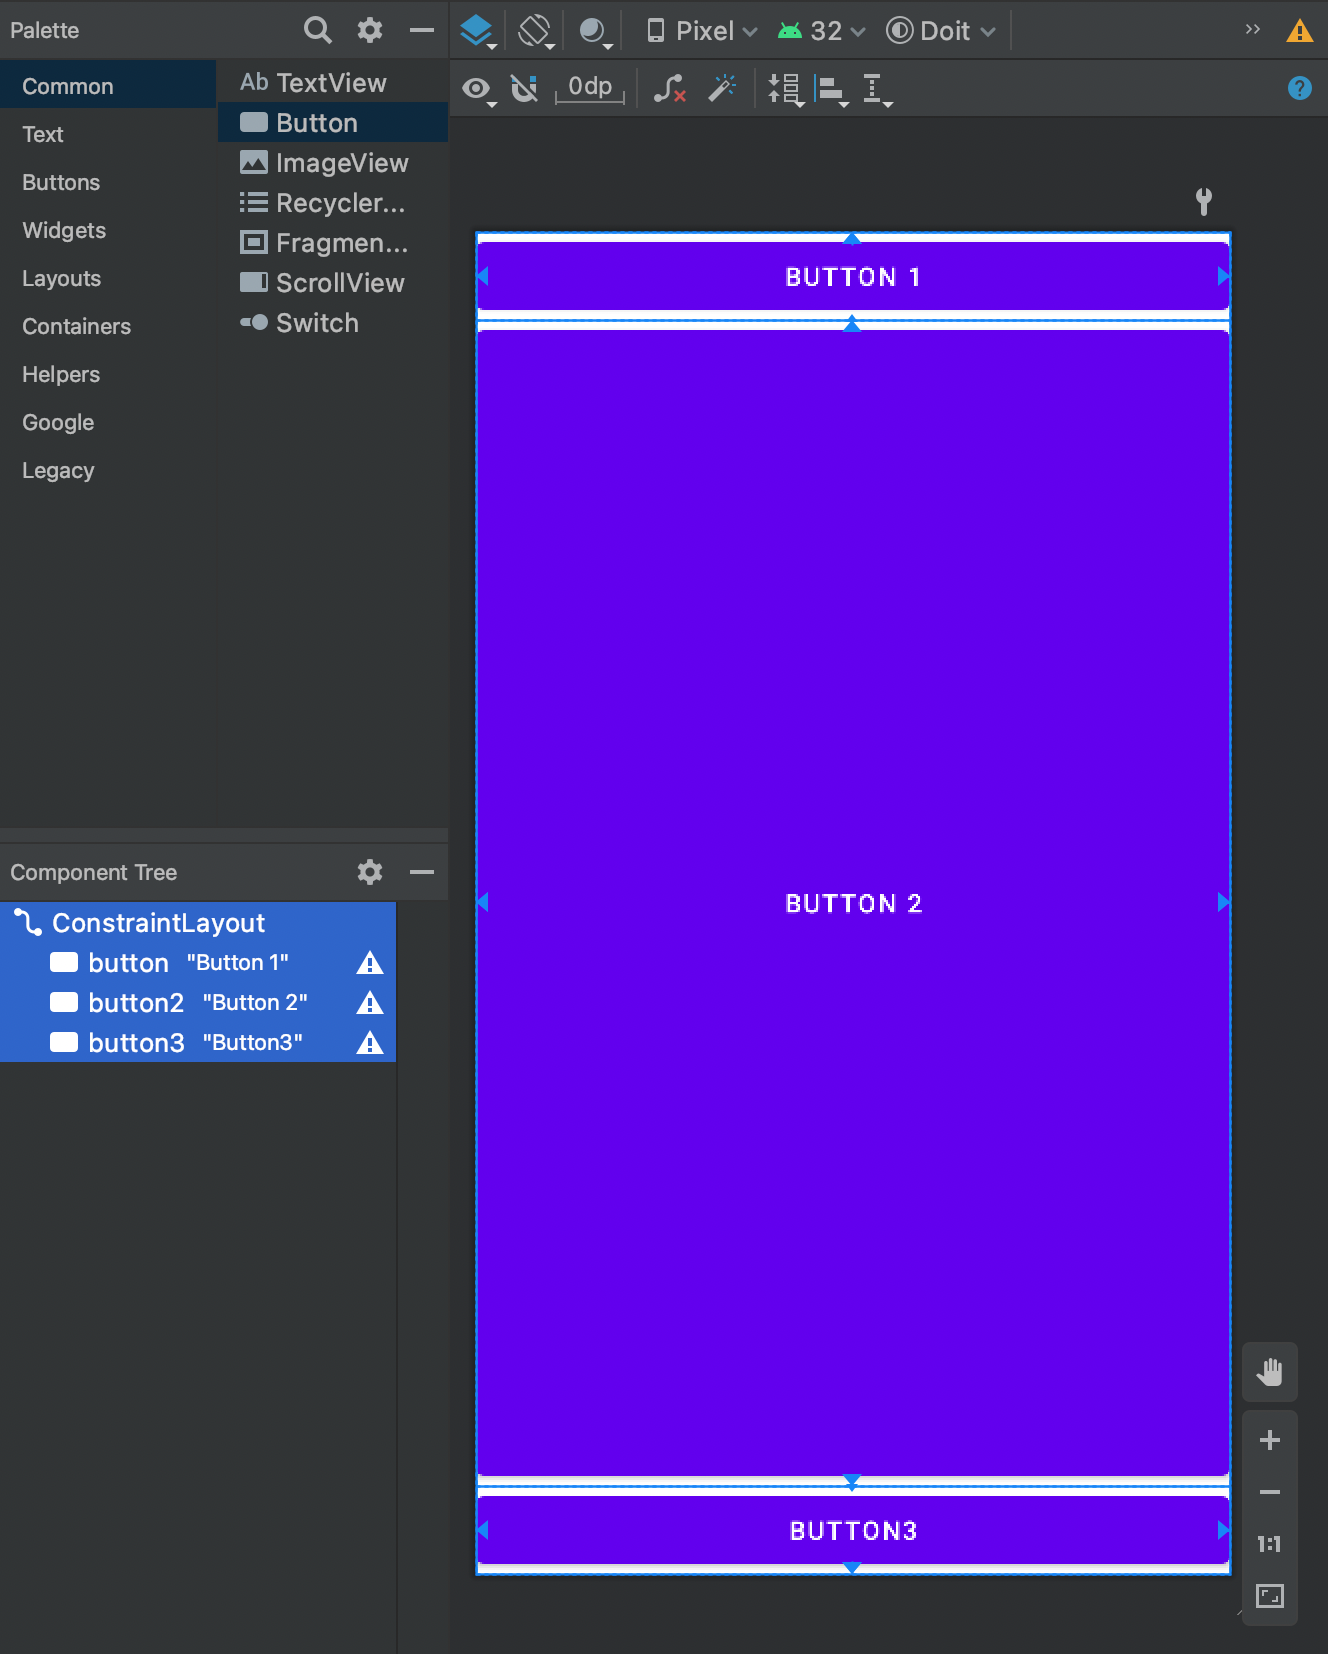
// activity_main.xml

<?xml version="1.0" encoding="utf-8"?>
<androidx.constraintlayout.widget.ConstraintLayout xmlns:android="http://schemas.android.com/apk/res/android"
    xmlns:app="http://schemas.android.com/apk/res-auto"
    xmlns:tools="http://schemas.android.com/tools"
    android:layout_width="match_parent"
    android:layout_height="match_parent"
    tools:context=".MainActivity">


    <Button
        android:id="@+id/button"
        android:layout_width="match_parent"
        android:layout_height="0dp"
        android:text="Button 1"
        app:layout_constraintEnd_toEndOf="parent"
        app:layout_constraintStart_toStartOf="parent"
        app:layout_constraintTop_toTopOf="parent" />

    <Button
        android:id="@+id/button2"
        android:layout_width="match_parent"
        android:layout_height="0dp"
        android:text="Button 2"
        app:layout_constraintBottom_toTopOf="@+id/button3"
        app:layout_constraintEnd_toEndOf="parent"
        app:layout_constraintHorizontal_bias="0.0"
        app:layout_constraintStart_toStartOf="parent"
        app:layout_constraintTop_toBottomOf="@+id/button"
        app:layout_constraintVertical_bias="0.0" />

    <Button
        android:id="@+id/button3"
        android:layout_width="match_parent"
        android:layout_height="0dp"
        android:text="Button3"
        app:layout_constraintBottom_toBottomOf="parent"
        app:layout_constraintEnd_toEndOf="parent"
        app:layout_constraintStart_toStartOf="parent" />
</androidx.constraintlayout.widget.ConstraintLayout>
[ 🖋 디자인 ]
[ 💡 학습한 내용 ]
android:layout_width / android:layout_height="0dp"로 줄 경우
해당 위젯이 사용할 수 있는 최대 크기로 설정할 수 있습니다.

다른 사람이 만든 것을 소비하는 활동보다, 내가 생산적인 활동을 하는 시간이 더 많도록 생활화 하자.