VS Code와 Git
- 내가 일하기 편하고 다른 사람들과 일하기 편하기 위해...
Github내 환경 세팅
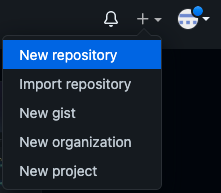
1- 홈 화면에서 우측 상단 메뉴를 클릭하여 New Repository를 클릭한다
2- 새로운 나온 화면 내 Repository name 칸에 원하는 이름을 기입한 후 아래 Create repository를 클릭한다

3- 2단계를 실행하고 나면 아래와 같이 Quick setup 페이지가 뜬다

..or create a new repository on the command lne라는 문구 아래를 Terminal에 입력해줄 예정이다
Terminal 내 환경 세팅
Mac에서 VS Code를 사용하고 있다면 아래 shortcut을 쓰면
New Terminal을 불러올 수 있다control + shift + `

- 혹은 위와 같이 Terminal > New Terminal 을 눌러도 된다
[완전히 새로 시작하는 Project일 경우]
생성된 Terminal 창에
1- Repository 생성하기
git init아래와 같은 메세지를 보게 될 것이다
Initialized empty Git repository in [저장된 주소].git/
2- 생성된 Repo에 올릴 파일 추가하기
git add .- "." 을 사용할 시 해당 프로젝트 내 모든 파일이 불러와진다
- 원하는 파일만 가져오고 싶을 시에는
git add 파일명.확장자로 불러오면 된다- 이 명령어는 실행해도 별다른 메세지가 없다
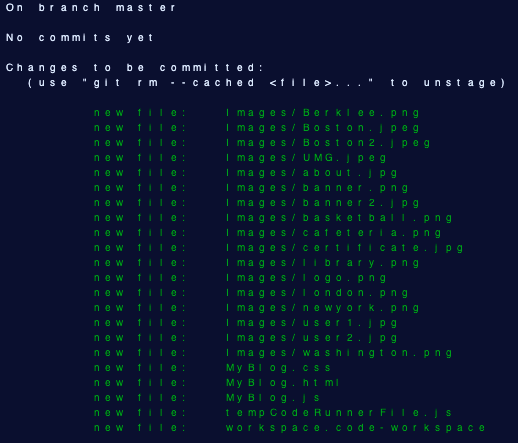
3- 로딩된 파일 확인하기
git status- 이 단계는 사실 해도 되고 안 해도 되지만 그래도 항상 모든 작업이 잘 진행되었는지 확인하는 습관은 좋다
나는
git add .를 활용해서 폴더 내 모든 파일을 올렸다
4- 로딩시킨 파일을 커밋하기
git commit -m "커밋 메세지"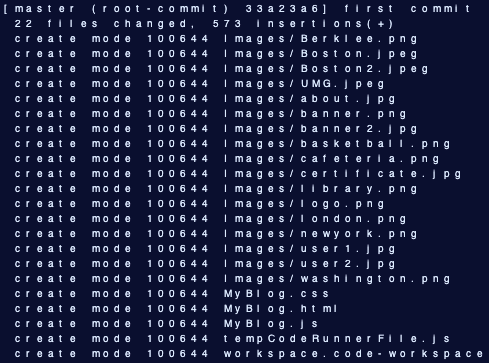
- 위 명령어를 실행시키고 나면 위 이미지와 같이 3단계에서 확인할 수 있었던 파일들이 commit된 것을 확인할 수 있다
- 해당 예시에서 나는
first commit이라는 커밋 메세지를 작성하였고 위 이미지 최상단 최우측에 보면 확인할 수 있다
5- Repository끼리의 연결고리 생성하기
git remote add origin https://github.com/ohandysh/Blog_Idea_1.git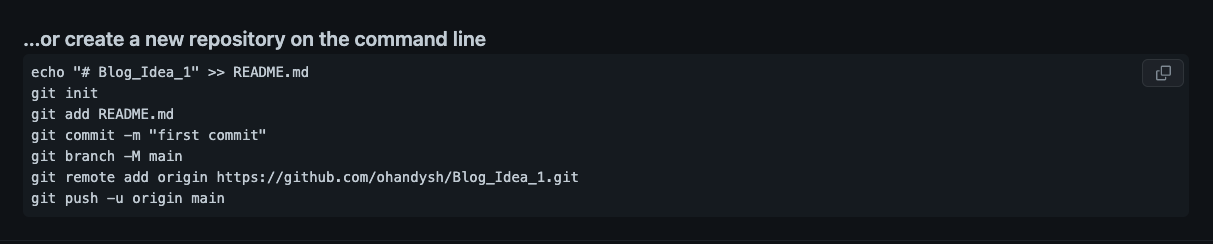
-
위 Github 환경 세팅하기 부분에서 보았던
...or create a new repository on the command line내 ---git remote add origin--- 이라는 부분을 복사해서 Terminal에 ctrl+c 와 ctrl+v해준다 -
난
Blog_Idea_1이라는 이름으로 Github에 생성했기 때문에 주소가 위와 같다- 이 명령어도 실행해도 별다른 메세지가 없다
6- 연결고리 확인하기
git remote -v- 잘 연결되었는지 확인해준다

- 위와 같이 출력 되면 잘 연결된 것이다 (**https://github.com/ 이후부터는 다를 수 밖에 없으니 명심하자)
7- PUSH 실행하기
git push origin master- Terminal에 이제 저 문장을 넣어주면
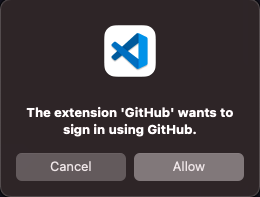
- VS Code에서 이렇게 연락이 올수도 있다 ->
Allow눌러주자

- 그럼 위와 같이 Github페이지로 연결되며
Authorize Visual-Studi-Code를 실행해준다
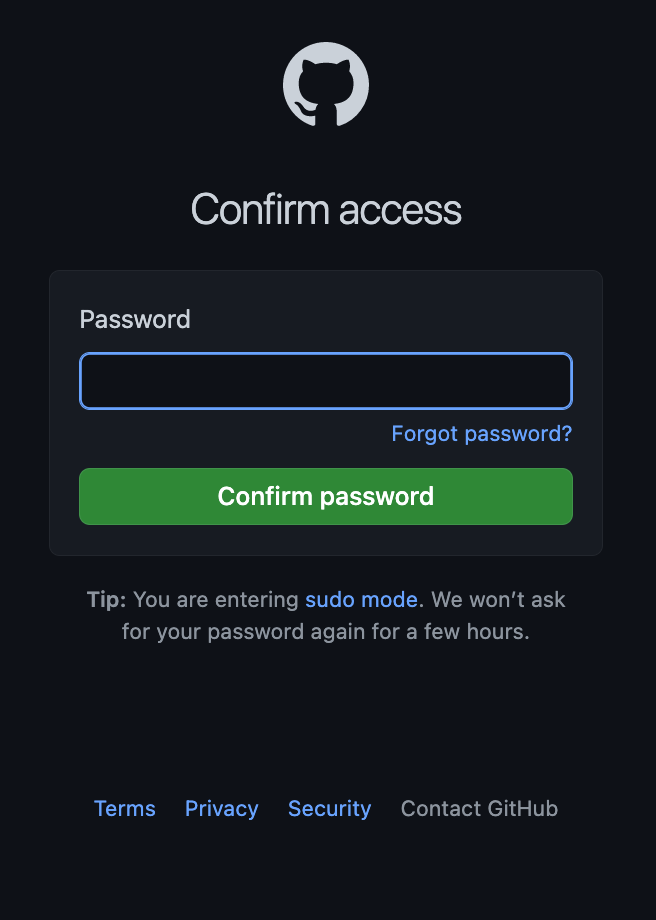
- 비밀번호 입력을 하고 나면 또 다른 알림이 오는데 그것도 마찬가지로
Allow눌러주자

- 다 끝내고 다시 VS Code로 돌아오면 위와 같이 가장 아래에
master -> master가 나오는지 중간에 누락된 파일은 없는지 잘 확인해주자
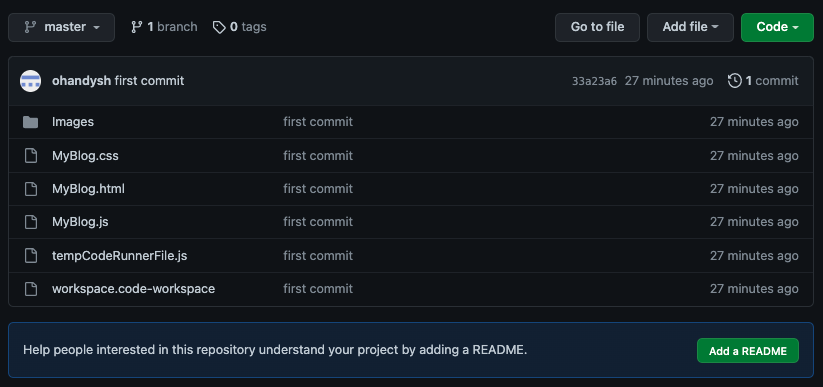
- 마지막으로 Github으로 돌아와 새로고침을 눌러주면 위와 같이 변환된 것을 확인할 수 있다
코드를 수정하게 된다면?
git add .혹은git add 파일.확장자를 하면 staging area로 이동하게 되고git commit -m "커밋 메세지"를 쳐주고 commit을 한 후git push origin master를 실행 하면 끄-ㅌ
**3번까지 진행하고 난 후 github을 확인 해보면 "커밋 메세지"가 가장 최근에 변경된 것으로 바뀌어진 것을 확인할 수 있다

데이터 분석가