2021 GDSC React Study
❗ Git 규칙
- master 브랜치에서 작업하지 마세요
(자신의 이름으로 된 브랜치인지 수시로 확인해주기) - 자신의 이름으로 된 폴더를 만들고 그 안에서만 작업하기
(merge 충돌 방지)
🚩 Git 사용법
(Git을 잘 알더라도 꼭 읽어보세요!!)
1. Fork하기
- 해당 링크(https://github.com/turtle601/GDSC_React_Study)에 들어가서 Fork 버튼을 누른다.
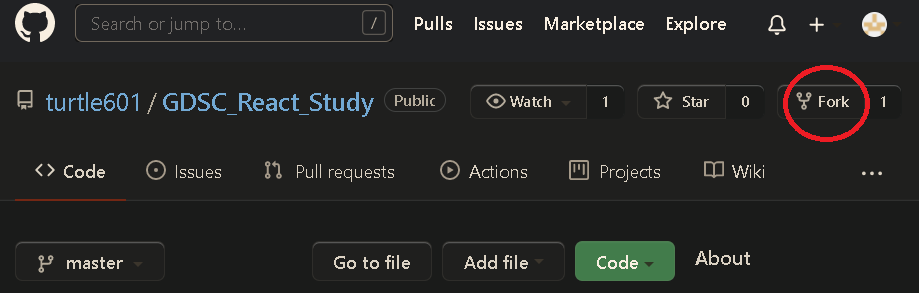
- 자신이 깃허브로 들어가 Fork 되었는지 확인하기
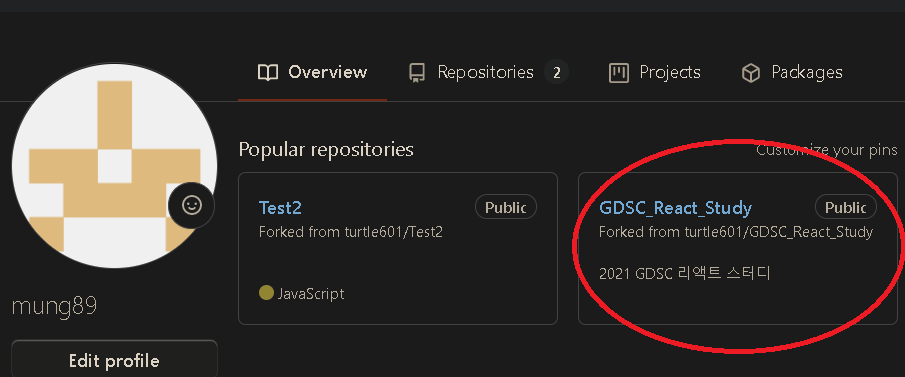
- mung89 는 부계정입니다. (스터디원 각자의 계정이라고 생각하시면 됩니다.)
2. git clone 하기
- 저장소 url을 아래 버튼을 눌러 복사합니다.

- 내가 작업하고자 하는 환경에 아래와 같이 입력한다.
git config --global user.name 깃허브아이디
git config --global user.email 깃허브연동이메일
git clone [복사한 저장소 url]
3. 브랜치 생성 및 변경
- 내가 클론한 폴더로 이동
cd GDSC_React_Study- 브랜치 생성 및 변경
브랜치 명은 영어로 된 자신의 이름으로
git checkout -b [자신의 이름 두 글자 영어로]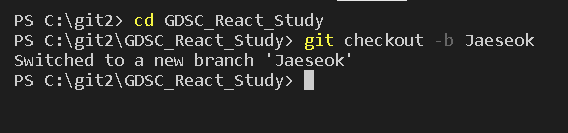
- 브랜치 확인하기
자신이 지금 어떤 브랜치에 있는지 알려준다.
git branch
4. add ,commit ,push
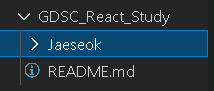
- ✨ 자신의 이름으로 된 폴더 생성하기 ✨
이 안에서 파일 생성 및 각자 프로젝트 코드를 작업하시고
add, commit push를 해주세요!!
Ex) Jaeseok 폴더 안에 test.txt 만들어서 add,commit, push 해보기
- add
git add 폴더 및 파일 명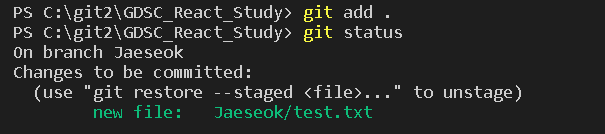
- commit
git commit -m "[자신의 이름] 커밋메시지 작성
- ✨ push ✨
git push origin 자신의 이름으로 된 branch 명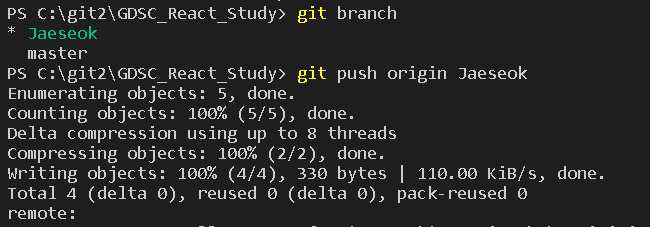
- 확인하기
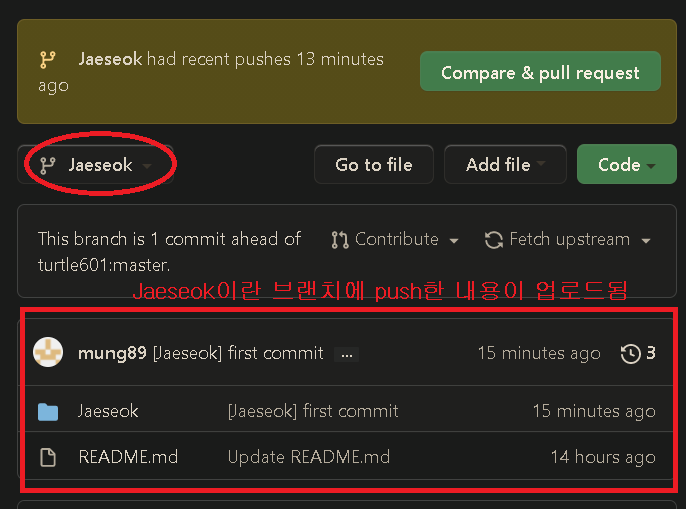
5. Pull Request 보내기
- 이렇게 PUSH 까지 마치면 내 깃허브 계정이 다음과 같이 뜬다.
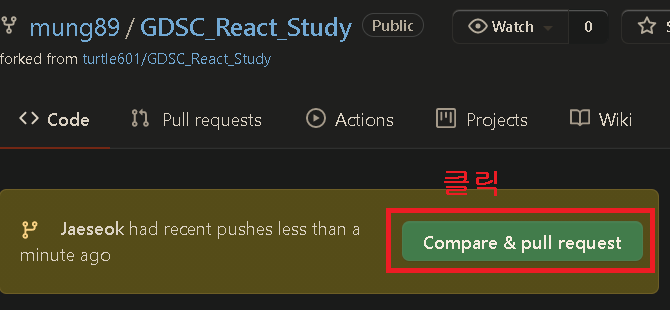
- 안 뜨면 여기서 클릭
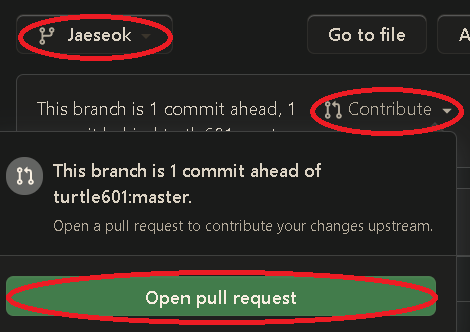
- 받는 사람과 보내는 사람을 정해서 보낸다.

- 자신의 이름으로 된 폴더, 자신의 이름으로 된 브랜치 내에서만 작업을 했다면 다음과 같이 뜰 겁니다. (성공)


다른 사람들이 이해하기 쉽게 기록하고 공유하자!!