오늘 배운 것
- Update, Delete 하기
- Validation
Project, Employee Update, Delete
- 수정, 삭제버튼 추가

Project Update, Delete
- 수정버튼 클릭 시 선택한 Project 와 Employee 데이터까지 불러온다
	@GetMapping("/update")
	public String updateProjects(@RequestParam("id") long id, Model model) {
		Project project = projectService.findByProjectId(id);

		model.addAttribute("project", project);

		List<Employee> empList = employeeService.findAll();

		model.addAttribute("empList", empList);
		return "projects/new-project";
	}
- 추가 페이지 form 태그 안에 id 값을 받아서 새로 저장이 아닌 수정을 할 수 있도록 함
      <form th:action="@{/projects/save}" method="post" th:object="${project}">
        <input type="hidden" th:field="*{projectId}" />
- id 값의 유무로 Insert와 Update를 구분
- 유효성검사 결과 문제가 있을 시 Errors로 데이터 넘어옴
@PostMapping("/save")
public String createProject(@Valid Project project, Errors errors, Model model) {
if (errors.hasErrors()) {
List<Employee> empList = employeeService.findAll();
model.addAttribute("empList", empList);
return "projects/new-project";
}
Long id = project.getProjectId();
if(id != null) {
projectService.update(project);
} else {
projectService.save(project);
}
return "redirect:/projects";
}
- 저장 버튼 클릭 시 넘어온 데이터를 저장
save 메소드는 Insert, Update 두가지 기능을 가지고 있음
	public void update(Project project) {
		Project pro = projectRepository.findByProjectId(project.getProjectId());

		pro.setName(project.getName());
		pro.setStage(project.getStage());
		pro.setDescription(project.getDescription());
		pro.setEmployees(project.getEmployees());

		projectRepository.save(pro);
	}
<a th:href="@{/projects/delete(id=${project.projectId})}" class="btn btn-outline-danger btn-sm" onclick="if((!confirm('정말로 삭제할까요?'))) return false">삭제</a>

- Controller에서 "/delete"로 받아서 Service 클래스의 메소드로 연결, Repository로 메소드 실행
	public void delete(long id) {
		projectRepository.deleteById(id);
	}
Employee Update, Delete
@GetMapping("/update")
public String displayEmployeeUpdateForm(@RequestParam("id") long id, Model model) {
Employee employee = employeeService.findByEmployeeId(id);
model.addAttribute("employee", employee);
return "employees/new-employee";
}
- 유효성검사 결과 문제가 있을 시 Errors로 데이터 넘어옴
@PostMapping("/save")
public String createProject(@Valid Employee employee, Errors errors ) {
if(errors.hasErrors()) return "employees/new-employee";
Long id = employee.getEmployeeId();
if(id != null) {
employeeService.update(employee);
} else {
employeeService.save(employee);
}
return "redirect:/employees";
}
Validation(유효성검사)
- POM.XML에서 오른쪽 마우스 클릭 -> Add Starters -> Validation 선택
- Bean 클래스에서 유효성검사를 시행할 변수 위에 Anotation으로 설정
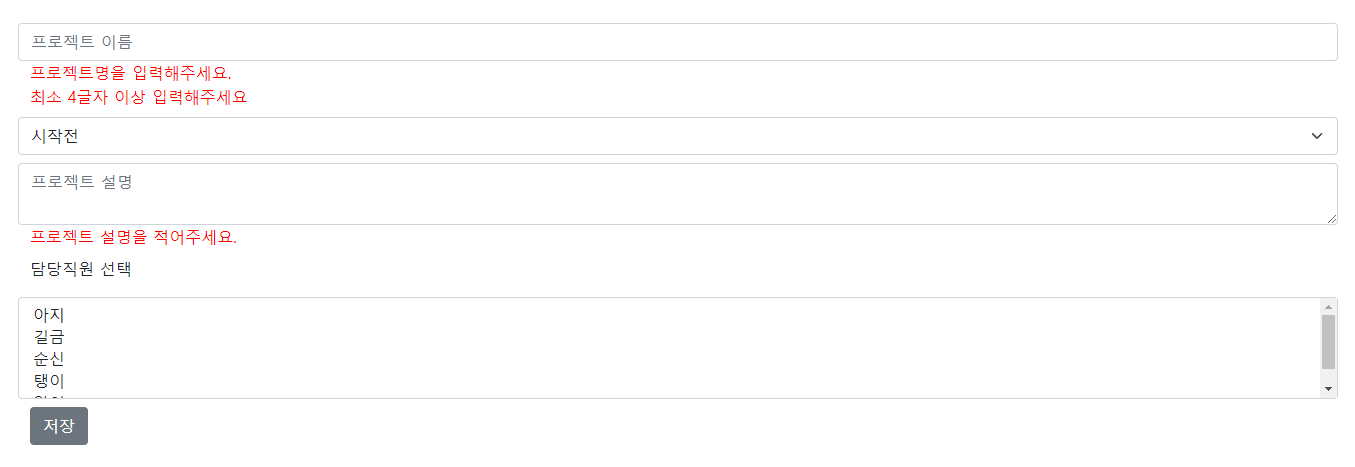
Project
@NotBlank(message = "프로젝트명을 입력해주세요.")
@Size(min = 4, message = "최소 4글자 이상 입력해주세요")
private String name;
private String stage;
@NotBlank(message = "프로젝트 설명을 적어주세요.")
private String description;
- Errors 로 Validation 결과를 받아서 체크
@PostMapping("/save")
public String createProject(@Valid Project project, Errors errors, Model model) {
if (errors.hasErrors()) {
List<Employee> empList = employeeService.findAll();
model.addAttribute("empList", empList);
return "projects/new-project";
}
Long id = project.getProjectId();
if(id != null) {
projectService.update(project);
} else {
projectService.save(project);
}
return "redirect:/projects";
}
- th:if="{#fields.hasErrors('변수명')}" th:errors="{project.변수명}" 유효성검사 에러가 있을 시 설정한 Error에 따른 Message를 출력
<form th:action="@{/projects/save}" method="post" th:object="${project}">
<input type="hidden" th:field="*{projectId}" />
<div class="row my-2">
<input class="form-control" type="text" placeholder="프로젝트 이름" th:field="*{name}" />
<span style="color: red" th:if="${#fields.hasErrors('name')}" th:errors="${project.name}"></span>
</div>
<div class="row my-2">
<select class="form-select" th:field="*{stage}">
<option th:value="시작전">시작전</option>
<option th:value="진행중">진행중</option>
<option th:value="완료">완료</option>
</select>
</div>
<div class="row my-2">
<textarea class="form-control" placeholder="프로젝트 설명" th:field="*{description}"></textarea>
<span style="color: red" th:if="${#fields.hasErrors('description')}" th:errors="${project.description}"></span>
</div>
<div class="row my-2">
<p>담당직원 선택</p>
<select class="form-select" th:field="*{employees}" multiple>
<option th:each="employee : ${empList}" th:value="${employee.employeeId}" th:text="${employee.firstName}"></option>
</select>
</div>
<button class="btn btn-secondary" type="submit">저장</button>
</form>
</div>
<footer th:replace="layouts::푸터"></footer>
</body>
</html>
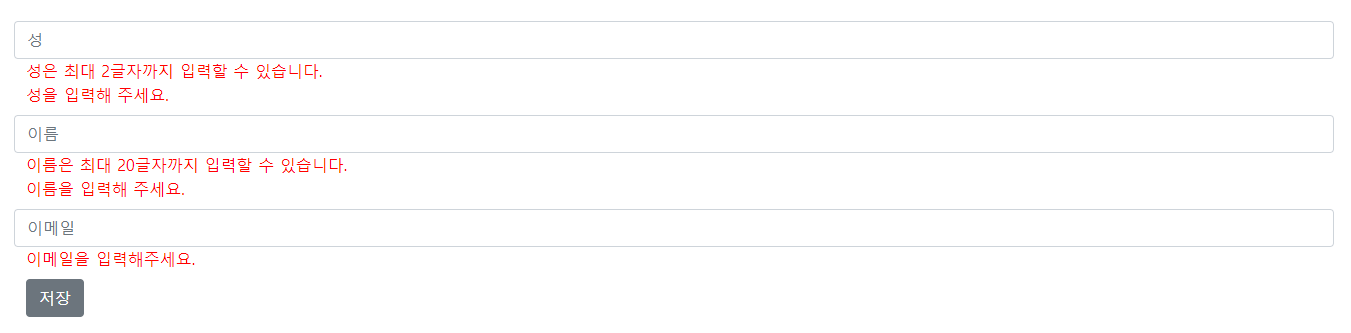
Employee
@NotBlank(message = "이름을 입력해 주세요.")
@Size(min = 1, max = 20, message = "이름은 최대 20글자까지 입력할 수 있습니다.")
private String firstName;
@NotBlank(message = "성을 입력해 주세요.")
@Size(min = 1, max = 2, message = "성은 최대 2글자까지 입력할 수 있습니다.")
private String lastName;
@NotBlank(message = "이메일을 입력해주세요.")
@Email(message = "이메일이 올바르지 않습니다.")
private String email;
- Errors 로 Validation 결과를 받아서 체크
@PostMapping("/save")
public String createProject(@Valid Employee employee, Errors errors ) {
if(errors.hasErrors()) return "employees/new-employee";
Long id = employee.getEmployeeId();
if(id != null) {
employeeService.update(employee);
} else {
employeeService.save(employee);
}
return "redirect:/employees";
}
- th:if="{#fields.hasErrors('변수명')}" th:errors="{employee.변수명}" 유효성검사 에러가 있을 시 설정한 Error에 따른 Message를 출력
<form th:action="@{/employees/save}" method="post" th:object="${employee}">
<input type="hidden" th:field="*{employeeId}" />
<div class="row my-2">
<input class="form-control" type="text" placeholder="성" th:field="*{lastName}" />
<span style="color: red" th:if="${#fields.hasErrors('lastName')}" th:errors="${employee.lastName}"></span>
</div>
<div class="row my-2">
<input class="form-control" type="text" placeholder="이름" th:field="*{firstName}" />
<span style="color: red" th:if="${#fields.hasErrors('firstName')}" th:errors="${employee.firstName}"></span>
</div>
<div class="row my-2">
<input class="form-control" type="text" placeholder="이메일" th:field="*{email}" />
<span style="color: red" th:if="${#fields.hasErrors('email')}" th:errors="${employee.email}"></span>
</div>
<button class="btn btn-secondary" type="submit">저장</button>
</form>