오늘 배운 것
- Products 만들기
products 만들기
DB만들기
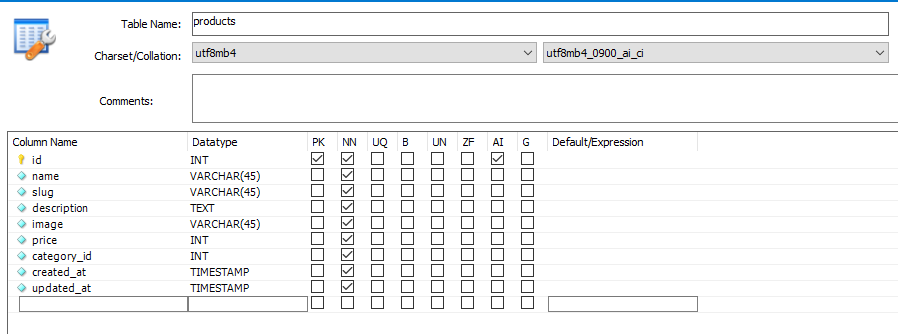
application.properties 설정
# Upload파일 설정
# 파일 하나의 최대사이즈 10MB (-1 이면 무제한)
spring.servlet.multipart.file-size-threshold = 10MB
# 여러 파일 업로드 시 전체 합 30MB (-1 이면 무제한)
spring.servlet.multipart.max-request-size = 30MB
Product Bean 객체 만들기
- price와 categoryId 정규표현식으로 표현에 제한을 둠
- 생성될 때, 수정할 때 자동으로 날짜와 시간을 입력해 줄 수 있도록
@CreationTimestamp, @UpdateTimestamp를 사용
package com.myapp.shoppingmall.entities;

import java.time.LocalDateTime;

import javax.persistence.Column;
import javax.persistence.Entity;
import javax.persistence.GeneratedValue;
import javax.persistence.GenerationType;
import javax.persistence.Id;
import javax.persistence.Table;
import javax.validation.constraints.NotBlank;
import javax.validation.constraints.Pattern;
import javax.validation.constraints.Size;

import org.hibernate.annotations.CreationTimestamp;
import org.hibernate.annotations.UpdateTimestamp;

import lombok.Data;

//실제 Table과 매칭
@Entity
@Table(name = "products")
@Data // Get, Set, Construct, toSring 생성됨
public class Product {

	@Id
	@GeneratedValue(strategy = GenerationType.IDENTITY)
	private int id;

	@NotBlank(message = "상품명을 입력해주세요.")
	@Size(min = 2, message = "최소 2글자 이상 입력해주세요.")
	private String name;

	private String slug;

	@Size(min = 5, message = "최소 5자 이상 입력해주세요.")
	private String description;	// 상품 설명
	private String image;	// 상품 이미지 파일 이름

	@Pattern(regexp = "^[1-9][0-9]*") // 맨앞자리 1~9만 사용가능, 나머지는 0~9 사용가능 숫자만 1 ~ 99999999 이런 식으로 표현 가능
	private String price; // 문자열로 하고 int로 변환해서 사용

	@Pattern(regexp = "^[1-9][0-9]*", message = "카테고리를 선택해주세요") // 생성 후 Update는 안됨
	@Column(name = "category_id", updatable = false)
	private String categoryId;	// 상품의 카테고리 id

	@Column(name = "created_at")
	@CreationTimestamp			// Insert 시 자동으로 날짜 입력
	private LocalDateTime createdAt;	// 상품 등록 날짜

	@Column(name = "updated_at")
	@UpdateTimestamp			// Update 시 자동으로 날짜 입력
	private LocalDateTime updatedAt;	// 상품 수정 날짜

}
@CreationTimestamp, @UpdateTimestamp 참고
https://velog.io/@koo8624/Spring-CreationTimestamp-UpdateTimestamp
날짜 타입 참고(MYSQL DATE, DATETIME, TIME, TIMESTAMP)
날짜 타입 참고(JAVA LocalDate,LocalTime,LocalDateTime)
index 페이지
- 모든 상품과 카테고리들을 DB에서 검색 후 Category들은 HashMap에 담아 전송
	@GetMapping
	public String index(Model model) {
		List<Product> products = productRepo.findAll();
		List<Category> categories = categoryRepo.findAll();

		// Category id와 name을 map에 담아 index페이지에 전송
		HashMap<Integer, String> cateIdAndName = new HashMap<>();

		for (Category category : categories) {
			cateIdAndName.put(category.getId(), category.getName());
		}

		model.addAttribute("products", products);
		model.addAttribute("cateIdAndName", cateIdAndName);

		return "/admin/products/index";
}- 다른 index 페이지 이용
- Image를 문자가 아닌 이미지파일로 표현하도록 함
- categoryId를 DB join을 하지 않고 Controller에서 MAP으로 데이터를 받아와 id값으로 데이터선택
- Thymeleaf문법에서 ${}안에 한번 더 ${} 사용하려면 중복사용하는 곳 앞,뒤에 _(언더바) 2번 입력해줘야함
<!DOCTYPE html>
<html xmlns:th="http://www.thymeleaf.org">
  <head th:replace="/fragments/head :: head-admin"></head>
  <body>
    <nav th:replace="/fragments/nav :: nav-admin"></nav>
    <main role="main" class="container">
      <div class="display-2">Products</div>
      <a th:href="@{/admin/products/add}" class="btn btn-primary my-3">추가하기</a>
      <div th:if="${message}" th:object="${message}" th:text="${message}" th:class="'alert ' + ${alertClass}"></div>
      <div th:if="${!products.empty}">
        <table class="table sorting" id="products">
          <tr>
            <th>상품명</th>
            <th>이미지</th>
            <th>카테고리</th>
            <th>가 격</th>
            <th>수 정</th>
            <th>삭 제</th>
          </tr>
          <tr th:each="product : ${products}">
            <td th:text="${product.name}"></td>
            <td>
              <!-- 이미지 파일이름이 한글이면 이미지 파일을 찾지를 못 함, 영어로 해야함-->
              <img th:src="@{'/media/' + ${product.image}}" style="height: 2em" />
            </td>
            <!-- Thymeleaf문법에서 ${}안에 한번 더 ${} 사용하려면 중복사용하는 곳 앞,뒤에 __(언더바) 2번 앞에다가 입력해줘야함-->
            <td th:text="${cateIdAndName[__${product.categoryId}__]}"></td>
            <td th:text="${product.price} + '원'"></td>
            <td><a th:href="@{'/admin/products/edit/' + ${product.id}}">수정</a></td>
            <td><a th:href="@{'/admin/products/delete/' + ${product.id}}" class="deleteConfirm">삭제</a></td>
          </tr>
        </table>
      </div>
      <div th:if="${products.empty}">
        <div class="display-4">현재 페이지가 없습니다.</div>
      </div>
    </main>
    <footer th:replace="/fragments/footer :: footer"></footer>
  </body>
</html>
add 페이지
- add페이지로 이동시에 category값들을 같이 전송
	@GetMapping("/add")
	public String add(@ModelAttribute Product product, Model model) {
		List<Category> categories = categoryRepo.findAll();

		model.addAttribute("categories", categories);
//		model.addAttribute("product", new Product()); // @ModelAttribute Product product 동일함

		// 상품을 추가하는 add 페이지에 product 객체와 product의 category를 선택할 수 있게 리스트 전달
		return "/admin/products/add";
}- 업로드된 Image파일을 byte[]에 데이터를 담고, 경로는 Path에 저장
- 이미지 확장자를 jpg,png만 사용하도록 제한을 둠
- 유효성검사를 통과 시 DB에 product를 저장하고 설정한 경로에 이미지파일을 저장
	@PostMapping("/add")
	public String add(@Valid Product product, BindingResult bindingResult, MultipartFile file, RedirectAttributes attr,
			Model model) throws IOException { // 유효성검사 실패시 bindingResult로 데이터 넘어옴, 파일은 따로 받아서 정리

		if (bindingResult.hasErrors()) {
			List<Category> categories = categoryRepo.findAll();

			model.addAttribute("categories", categories);
			return "/admin/products/add";
		}

		boolean fileOk = false;
		byte[] bytes = file.getBytes(); // Upload된 이미지 파일의 데이터
		String fileName = file.getOriginalFilename(); // Upload된 파일의 이름
		Path path = Paths.get("src/main/resources/static/media/" + fileName); // 파일을 저장할 위치와 이름까지

		if (fileName.endsWith("jpg") || fileName.endsWith("png")) {
			fileOk = true; // 확장자가 .jpg, .png 만 등록 가능
		}

		// 성공적으로 추가됨
		attr.addFlashAttribute("message", "상품이 성공적으로 등록되었습니다.");
		attr.addFlashAttribute("alertClass", "alert-success");
		// slug 만들기
		String slug = product.getName().toLowerCase().replace(" ", "-");
		// 똑같은 상품명이 있는지 확인
		Product prductExists = productRepo.findByName(product.getName());

		if (!fileOk) { // 파일 Upload가 안됬거나 확장자가 jpg, png가 아님
			attr.addFlashAttribute("message", "이미지는 jpg나 png 확장자를 사용해주세요");
			attr.addFlashAttribute("alertClass", "alert-danger");
			attr.addFlashAttribute("product", product);
		} else if (prductExists != null) {
			attr.addFlashAttribute("message", "이미 등록된 상품입니다. 상품명을 변경해주세요.");
			attr.addFlashAttribute("alertClass", "alert-danger");
			attr.addFlashAttribute("product", product);
		} else { // product와 image를 저장한다.
			product.setSlug(slug);
			product.setImage(fileName); // 이미지는 파일의 이름만 입력(주소는 /media/폴더 이므로 동일)
			productRepo.save(product); // product 저장

			Files.write(path, bytes); // (이미지파일이 저장될 이미지파일 이름이 포함된 주소, 파일데이터)
		}
		return "redirect:/admin/products/add";
}- 파일전송 시 form태그안에 enctype="multipart/form-data" 필수적으로 넣어야함
- 페이지이동시 전송된 Category List들을 select의 option에 반복문으로 입력'
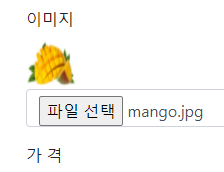
- JavaScript로 이미지선택 시 이벤트로 페이지에 이미지를 미리보기로 띄워준다.
<!DOCTYPE html>
<html xmlns:th="http://www.thymeleaf.org">
<head th:replace="/fragments/head :: head-admin"></head>
<body>
<nav th:replace="/fragments/nav :: nav-admin"></nav>
<main role="main" class="container">
<div class="display-2">상품 등록</div>
<a th:href="@{/admin/products}" class="btn btn-primary my-3">돌아가기</a>
<!-- enctype="multipart/form-data" 파일이나 이미지전송에 필요-->
<form method="post" enctype="multipart/form-data" th:object="${product}" th:action="@{/admin/products/add}">
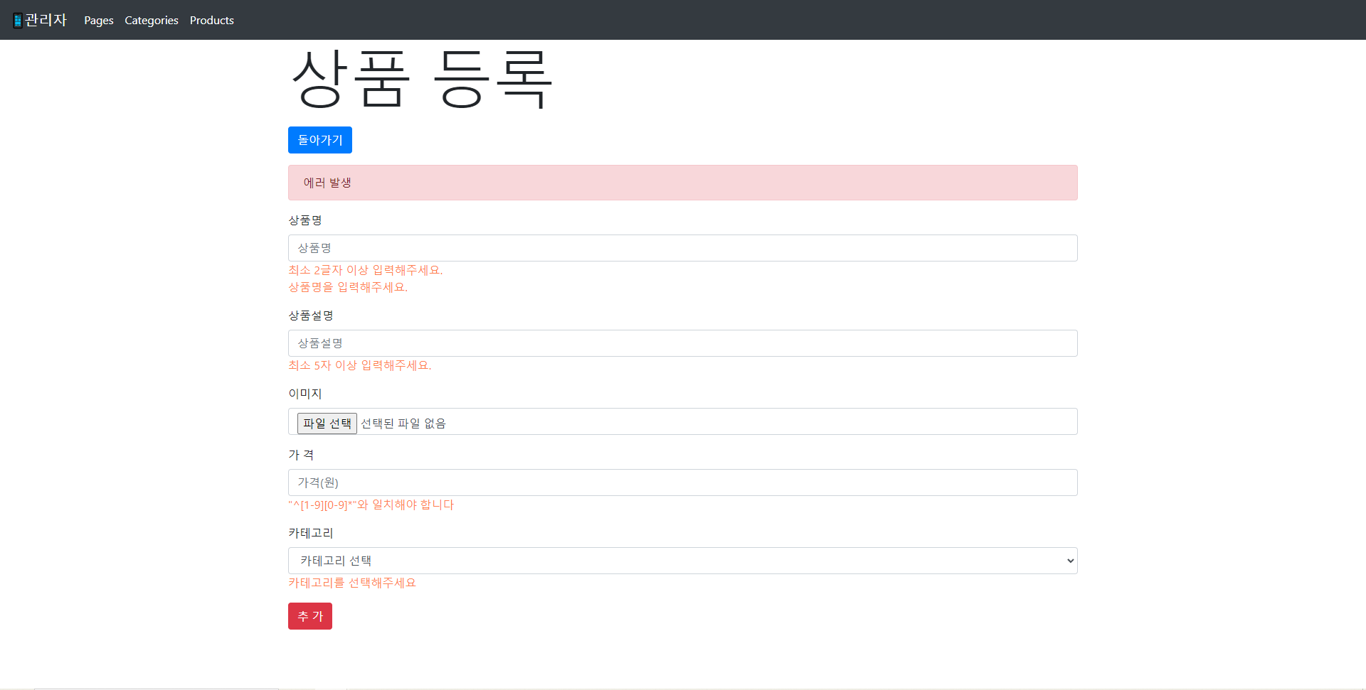
<div th:if="${#fields.hasErrors('*')}" class="alert alert-danger">에러 발생</div>
<div th:if="${message}" th:class="${'alert ' + alertClass}" th:text="${message}"></div>
<div class="form-group">
<label for="">상품명</label>
<input type="text" class="form-control" th:field="*{name}" placeholder="상품명" />
<span class="error" th:if="${#fields.hasErrors('name')}" th:errors="*{name}"></span>
</div>
<div class="form-group">
<label for="">상품설명</label>
<input type="text" class="form-control" th:field="*{description}" placeholder="상품설명" />
<span class="error" th:if="${#fields.hasErrors('description')}" th:errors="*{description}"></span>
</div>
<label for="">이미지</label>
<div class="form-group">
<img src="#" id="imgPreview" />
<input class="form-control" type="file" th:id="file" th:name="file" />
</div>
<div class="form-group">
<label for="">가 격</label>
<input type="text" class="form-control" th:field="*{price}" placeholder="가격(원)" />
<span class="error" th:if="${#fields.hasErrors('price')}" th:errors="*{price}"></span>
</div>
<div class="form-group">
<label for="">카테고리</label>
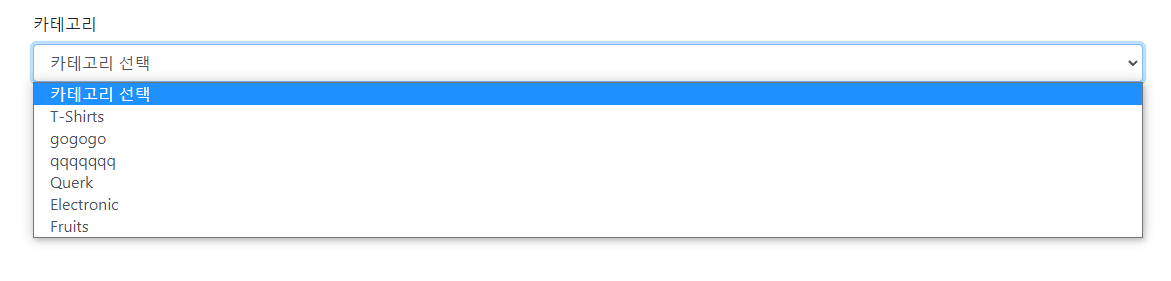
<select th:field="*{categoryId}" class="form-control">
<option value="0">카테고리 선택</option>
<option th:each="category : ${categories}" th:value="${category.id}" th:text="${category.name}"></option>
</select>
<span class="error" th:if="${#fields.hasErrors('categoryId')}" th:errors="*{categoryId}"></span>
</div>
<button type="submit" class="btn btn-danger">추 가</button>
</form>
</main>
<footer th:replace="/fragments/footer :: footer"></footer>
<script>
$(function () {
$('#imgPreview').hide(); // 처음엔 숨김
$('#file').change(function () {
// 파일이 변경되었을 때(새 등록 or 파일교체)
readURL(this); // readURL 함수 실행
});
});
function readURL(input) {
// 파일(이미지) 있을 경우에 실행
if (input.files && input.files[0]) {
let reader = new FileReader(); // 파일리더 객체 생성
reader.readAsDataURL(input.files[0]); // 파일리더로 첫번째 파일 경로 읽기
// reader가 주소를 다읽으면 onload 이벤트가 발생하고 이 때 화면에 사진을 표시한다.
reader.onload = function (e) {
$('#imgPreview').attr('src', e.target.result).width(50).height(50).show();
};
}
}
</script>
</body>
</html>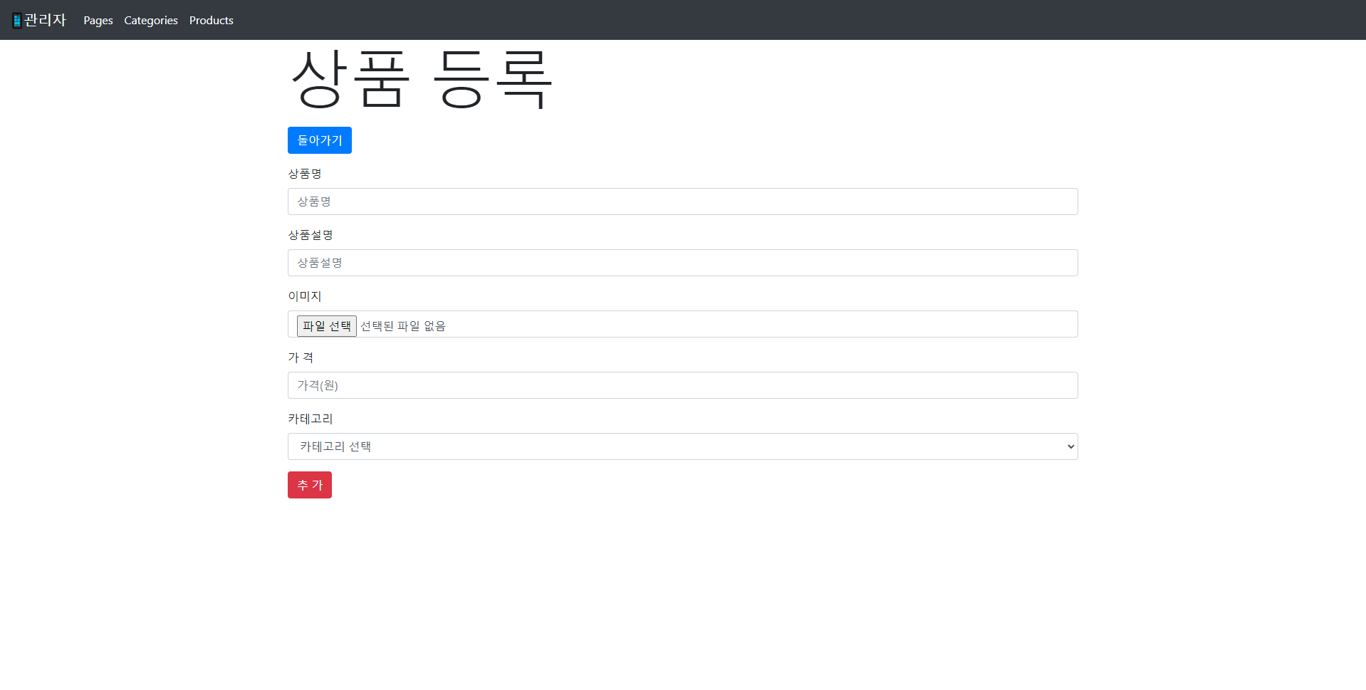
- 이미지 미리보기
- 카테고리 선택
참고(JavaScript로 이미지 미리보기)
참고(input에 file타입 File객체에 대하여)
edit 페이지
- Category List를 보내주는 것을 제외하고 동일
	@GetMapping("/edit/{id}")
	public String edit(@PathVariable("id") int id, Model model) {
		Product product = productRepo.getById(id);

		List<Category> categories = categoryRepo.findAll();

		model.addAttribute("product",product);
		model.addAttribute("categories",categories);

		return "admin/products/edit";
	}
- 에러 발생시 CategoryList는 전송해주고 다른 입력값들은 BindingResult로 인해 값이 남아있는데 이미지는 값이 사라져서 null값이 되므로 image값을 전송해준다.
- Image파일 변경 시 기존의 Image파일을 삭제 후 저장 할 수 있도록 하고 변경하지 않을 시 기존의 이미지 파일을 그대로 사용할 수 있도록 함
- 나머지는 add와 동일
@PostMapping("/edit")
	public String edit(@Valid Product product, BindingResult bindingResult,
						MultipartFile file, RedirectAttributes attr, Model model) throws IOException { // 유효성검사 실패시 bindingResult로 데이터 넘어옴, 파일은 따로 받아서 정리
		// 미리 id로 수정하기전의 상품 정보를 불러옴
		Product currentProduct = productRepo.getById(product.getId());

		if (bindingResult.hasErrors()) {
			List<Category> categories = categoryRepo.findAll();

			model.addAttribute("categories", categories);
			product.setImage(currentProduct.getImage());
			return "/admin/products/edit";
		}

		boolean fileOk = false;
		byte[] bytes = file.getBytes(); // Upload된 이미지 파일의 데이터
		String fileName = file.getOriginalFilename(); // Upload된 파일의 이름
		Path path = Paths.get("src/main/resources/static/media/" + fileName); // 파일을 저장할 위치와 이름까지

		if(!file.isEmpty()) { // 이미지 파일이 존재하면
			if (fileName.endsWith("jpg") || fileName.endsWith("png")) {
				fileOk = true; // 확장자가 .jpg, .png 만 등록 가능
			}
		} else { // 이미지는 수정 안함
			fileOk = true; // 기존 이미지 사용함
		}

		// 성공적으로 수정됨
		attr.addFlashAttribute("message", "상품이 성공적으로 수정되었습니다.");
		attr.addFlashAttribute("alertClass", "alert-success");

		String slug = product.getName().toLowerCase().replace(" ", "-");
		// 이름으로 찾고 현재 product의 id 값을 제외한 데이터만 검색
		Product prductExists = productRepo.findByNameAndIdNot(product.getName(), product.getId());

		if (!fileOk) {
			attr.addFlashAttribute("message", "이미지는 jpg나 png 확장자를 사용해주세요");
			attr.addFlashAttribute("alertClass", "alert-danger");
			attr.addFlashAttribute("product", product);
		} else if (prductExists != null) {
			attr.addFlashAttribute("message", "이미 등록된 상품입니다. 상품명을 변경해주세요.");
			attr.addFlashAttribute("alertClass", "alert-danger");
			attr.addFlashAttribute("product", product);
		} else { // product와 image를 저장한다.
			product.setSlug(slug);

			if(!file.isEmpty()) {
				Path currentpath = Paths.get("src/main/resources/static/media/" + currentProduct.getImage());
				Files.delete(currentpath); // 새로운 이미지파일이 있기 때문에 기존 파일을 삭제
				product.setImage(fileName);
				Files.write(path, bytes); // 새 이미지 파일 저장
			} else {
				product.setImage(currentProduct.getImage());
			}
			productRepo.save(product);
		}
		return "redirect:/admin/products/edit/" + product.getId();
	}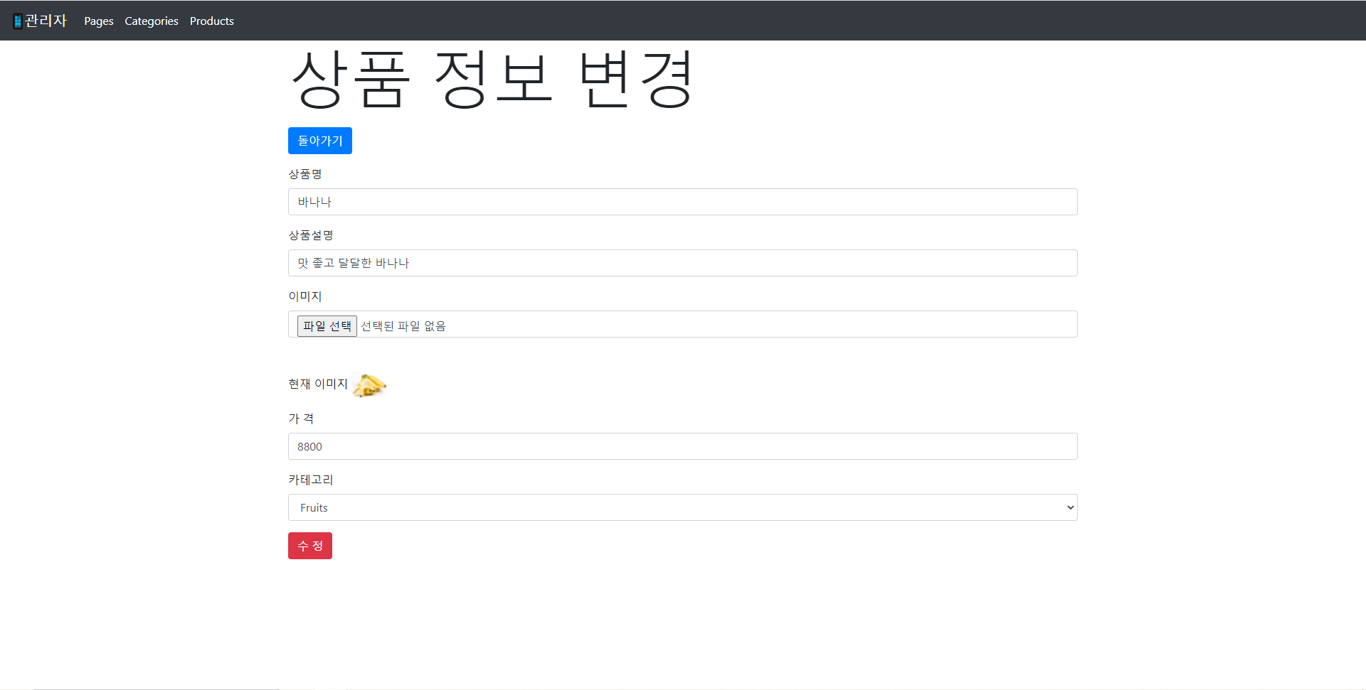
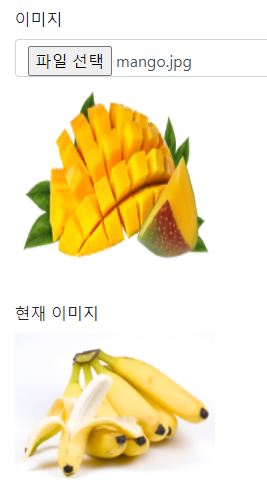
- 현재 이미지는 입력된 이미지, 위의 이미지는 파일선택한 이미지
delete 만들기
- delete시 저장된 이미지 파일을 삭제, DB에서 삭제 2가지를 진행해야함
	@GetMapping("delete/{id}")
	public String delete(@PathVariable("id") int id, RedirectAttributes attr) throws IOException {
		// id로 상품을 삭제하기 전에 먼저 id로 제품객체를 불러와서 이미지 파일을 삭제한 후 제품 삭제
		Product currentProduct = productRepo.getById(id);

		Path currentPath = Paths.get("src/main/resources/static/media/" + currentProduct.getImage());

		Files.delete(currentPath);

		productRepo.deleteById(id);

		attr.addAttribute("message", "성공적으로 삭제되었습니다.");
		attr.addAttribute("alertClass", "alert-success");

		return "redirect:/admin/products";
	}