자율적으로 Todo를 수행하는 에이전트 만들어보기
서론
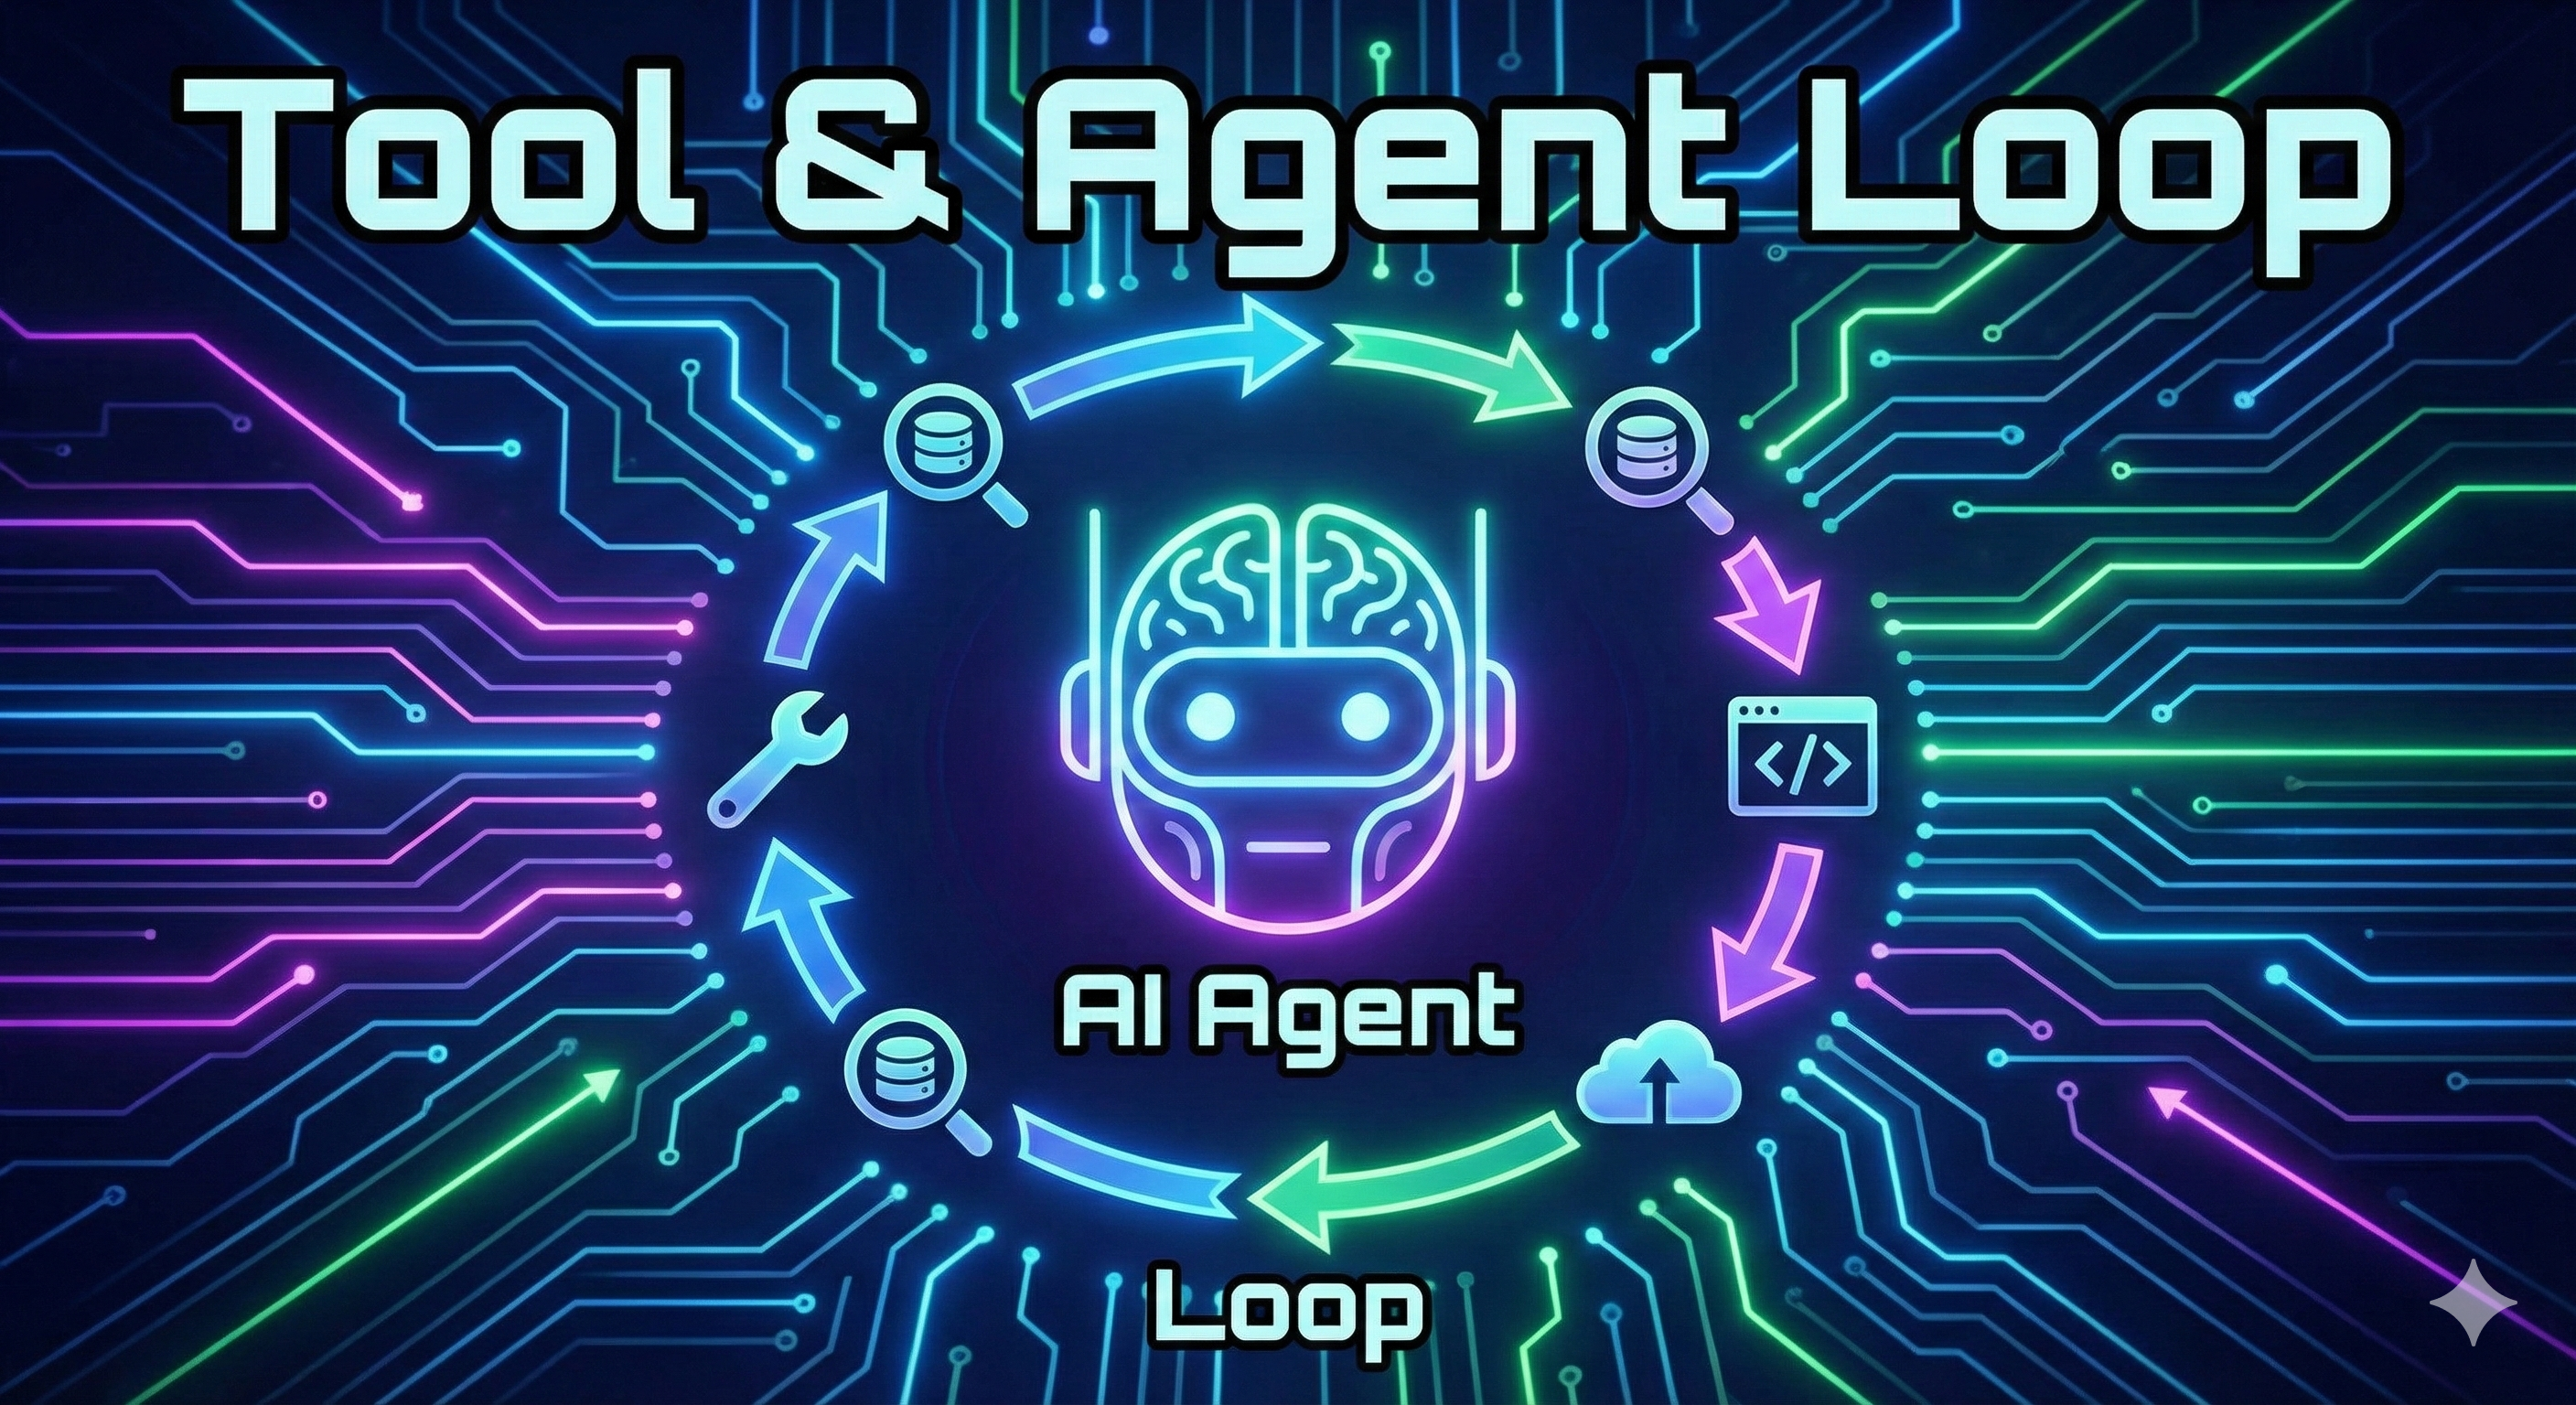
AI 에이전트를 라이브러리 없이 순수하게 구현해보면서 에이전트의 핵심 작동 원리를 이해해봅시다. 이 글에서는 OpenAI의 Function Calling 기능과 반복 루프(Agent Loop)만으로 목표를 달성하기 위한 Todo 리스트를 자동으로 생성하고, 각 항목을 순차적으로 실행하는 완전한 에이전트 시스템을 구축하는 방법을 다룹니다.
개념 소개
Agent란 무엇인가?
에이전트에는 몇 가지 논의된 정의가 있습니다:
- Sam Altman의 정의: 독립적으로 작업을 수행할 수 있는 AI 시스템
- Anthropic의 정의: LLM이 워크플로우를 제어하는 시스템
- 새로운 표준 정의: LLM이 목표를 달성하기 위해 도구를 반복적으로 실행하는 시스템
이 글에서는 세 번째 정의, 즉 "도구를 반복 실행하며 목표를 달성하는 에이전트"를 실제로 구현해봅니다.
Todo 관리 도구 만들기
에이전트가 사용할 도구를 먼저 만들어야 합니다. 여기서는 간단한 Todo 관리 시스템을 구현합니다.
# 필요한 라이브러리 import 및 환경변수 로드
from rich.console import Console #콘솔 print 를 이쁘게 꾸미기 위함
from dotenv import load_dotenv
from openai import OpenAI
import json
load_dotenv(override=True)

def show(text):
    try:
        Console().print(text)
    except Exception:
        print(text)

openai = OpenAI()
# 기본 데이터 구조
todos = [] # Todo 항목들을 저장하는 리스트
completed = [] # 각 Todo의 완료 여부를 저장하는 리스트
def create_todos(descriptions: list[str]) -> str:
"""
새로운 Todo 항목들을 생성하는 도구
Args:
descriptions: Todo 항목들의 설명 리스트
Returns:
현재 Todo 리스트 상태를 문자열로 반환
"""
todos.extend(descriptions)
completed.extend([False] * len(descriptions))
return get_todo_report()
def mark_complete(index: int, completion_notes: str) -> str:
"""
특정 Todo를 완료 처리하는 도구
Args:
index: 완료할 Todo의 인덱스 (1부터 시작)
completion_notes: 완료 과정에 대한 설명
Returns:
업데이트된 Todo 리스트 상태
"""
if 1 <= index <= len(todos):
completed[index - 1] = True
else:
return "No todo at this index."
Console().print(completion_notes) # 완료 노트를 출력
return get_todo_report()
def get_todo_report() -> str:
"""
현재 Todo 리스트 상태를 시각적으로 표시
완료된 항목은 취소선과 녹색으로 표시
"""
result = ""
for index, todo in enumerate(todos):
if completed[index]:
# Rich 라이브러리의 마크업을 사용한 시각적 표현
result += f"Todo #{index + 1}: [green][strike]{todo}[/strike][/green]\n"
else:
result += f"Todo #{index + 1}: {todo}\n"
show(result)
return result이 도구들은 에이전트가 계획을 세우고(create_todos), 실행하고(mark_complete), 진행 상황을 확인(get_todo_report)할 수 있게 해줍니다.
Function Calling을 위한 JSON Schema
OpenAI의 Function Calling 기능을 사용하려면 각 도구를 JSON Schema 형식으로 정의해야 합니다.
# 🔧 Tool 정의: create_todos
create_todos_json = {
    "name": "create_todos",
    "description": "Add new todos from a list of descriptions and return the full list",
    "parameters": {
        "type": "object",
        "properties": {
            "descriptions": {
                'type': 'array',           # 배열 타입
                'items': {'type': 'string'},  # 문자열 항목들
                'title': 'Descriptions'
            }
        },
        "required": ["descriptions"],      # 필수 파라미터
        "additionalProperties": False
    }
}

# 🔧 Tool 정의: mark_complete
mark_complete_json = {
    "name": "mark_complete",
    "description": "Mark complete the todo at the given position (starting from 1) and return the full list",
    "parameters": {
        'properties': {
            'index': {
                'description': 'The 1-based index of the todo to mark as complete',
                'title': 'Index',
                'type': 'integer'
            },
            'completion_notes': {
                'description': 'Notes about how you completed the todo in rich console markup',
                'title': 'Completion Notes',
                'type': 'string'
            }
        },
        'required': ['index', 'completion_notes'],
        'type': 'object',
        'additionalProperties': False
    }
}

# OpenAI API에 전달할 tools 리스트
tools = [
    {"type": "function", "function": create_todos_json},
    {"type": "function", "function": mark_complete_json}
]
💡 JSON Schema는 LLM에게 도구의 사용법을 알려주는 명세서입니다. LLM은 이 스키마를 보고 언제, 어떻게 도구를 호출해야 하는지 결정합니다.
Agent Loop 구현하기
이제 핵심인 Agent Loop를 구현합니다.
# 🚀 Tool Call 처리 함수
def handle_tool_calls(tool_calls):
    """
    LLM이 요청한 도구 호출들을 실제로 실행

    Args:
        tool_calls: LLM이 요청한 tool call 객체들
    Returns:
        실행 결과를 담은 메시지 리스트
    """
    results = []
    for tool_call in tool_calls:
        tool_name = tool_call.function.name  # 호출할 함수 이름
        arguments = json.loads(tool_call.function.arguments)  # 함수 인자를 파싱

        # globals()에서 함수 찾기 - 실제 Python 함수 참조
        tool = globals().get(tool_name)

        # 함수 실행 및 결과 반환
        result = tool(**arguments) if tool else {}

        # OpenAI API 형식에 맞는 결과 메시지 생성
        results.append({
            "role": "tool",
            "content": json.dumps(result),
            "tool_call_id": tool_call.id
        })
    return results

# 🔄 핵심 Agent Loop
def loop(messages):
    """
    에이전트의 핵심 반복 루프
    LLM이 도구를 호출할 때마다 실행하고,
    더 이상 도구 호출이 없을 때까지 반복
    """
    done = False
    while not done:
        # 1. LLM에게 현재 상황 전달 및 응답 받기
        response = openai.chat.completions.create(
            model="gpt-4",
            messages=messages,
            tools=tools
        )

        finish_reason = response.choices[0].finish_reason

        # 2. 응답 유형에 따라 분기
        if finish_reason == "tool_calls":
            # LLM이 도구를 호출하려고 함
            message = response.choices[0].message
            tool_calls = message.tool_calls

            # 3. 도구 실행
            results = handle_tool_calls(tool_calls)

            # 4. 대화 기록에 추가 (LLM의 요청 + 도구 실행 결과)
            messages.append(message)
            messages.extend(results)
            # 루프 계속 - LLM이 다시 판단하도록
        else:
            # LLM이 최종 답변을 제공함 - 루프 종료
            done = True

    # 최종 결과 출력
show(response.choices[0].message.content)💡Agent Loop의 핵심 원리
1. LLM에게 현재 상태와 가용 도구를 제공
2. LLM이 도구 호출을 요청하면 실행
3. 실행 결과를 대화 기록에 추가
4. LLM이 "완료"라고 판단할 때까지 1-3 반복이 간단한 패턴으로 복잡한 여러 단계의 문제도 해결할 수 있습니다!
실제 사용 예시
목표 지향적인 시스템 프롬프트와 함께 실행해봅시다:
# 📋 시스템 프롬프트 - 에이전트의 역할 정의
system_message = """
당신은 주어진 문제를 해결하기 위해 '할 일 목록(todo)' 도구를 사용하여 계획을 세우고,
각 단계를 순차적으로 실행하는 해결사입니다.
계획을 세우고, 실행하고, 최종 해결책을 응답하세요.
수치가 명확하지 않다면 합리적인 추정치를 포함하세요.
코드 블록 없이 Rich 콘솔 마크업으로 답변하고, 사용자에게 질문하지 마세요.
"""
# 💬 실제 문제 제시
user_message = """
서울역에서 오후 2시에 출발하는 시속 250km KTX가 있습니다.
오후 3시에 부산역에서 서울을 향해 출발하는 시속 300km 열차가 있습니다.
두 열차는 언제 만날까요? (서울-부산 거리는 약 400km로 가정합니다)
"""
messages = [
{"role": "system", "content": system_message},
{"role": "user", "content": user_message}
]
# 🎯 에이전트 실행
todos, completed = [], []
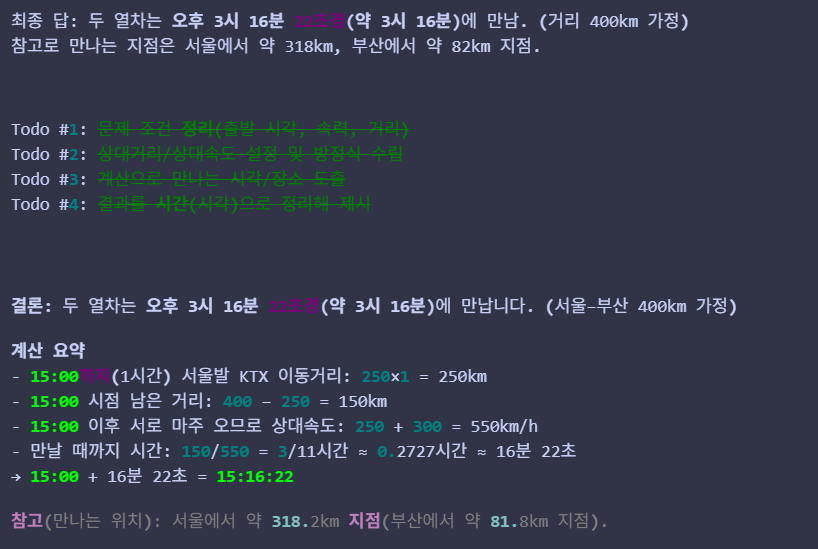
loop(messages)에이전트가 수행하는 과정
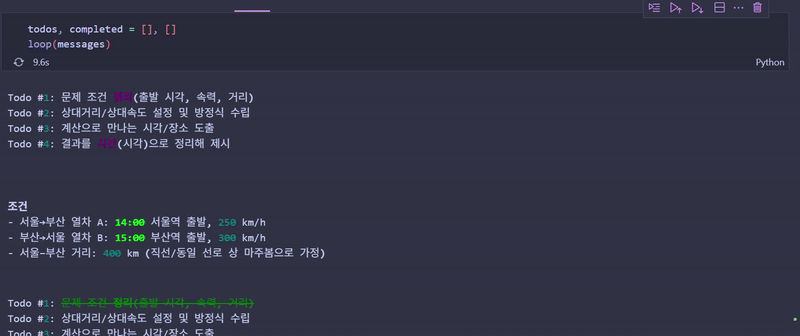
- 계획 수립:
create_todos호출 - 순차 실행: 각 Todo를
mark_complete로 처리 - 최종 답변: 모든 Todo 완료 후 결과 제시
- 결과 예시
💡 저는 단순히 질문을 했을 뿐이지만, AI 가 직접 문제를 해결하기 위한 조건을 생성하고 차례대로 해결해 나가는 것을 볼 수 있습니다. 이 패턴은 단순한 계산뿐만 아니라 웹 검색, 파일 조작, API 호출 등 다양한 도구와 결합하여 복잡한 작업을 자동화할 수 있습니다.
주의사항
1. 무한 루프 방지
- 실제 프로덕션에서는 최대 반복 횟수 제한 필요
- 예:
max_iterations = 10
2. 에러 핸들링 필요
- 에러 내용에 대한 로그를 확인할 수 있는 시스템 구축 필요
3. 비용 관리
- 각 루프마다 API 호출이 발생하므로 토큰 사용량 모니터링 필요
response.usage로 토큰 사용량 추적
4. 도구 보안
globals().get(tool_name)은 편리하지만 보안 위험 존재- 프로덕션에서는 허용된 도구 목록을 명시적으로 관리:
ALLOWED_TOOLS = {
    "create_todos": create_todos,
    "mark_complete": mark_complete
}
tool = ALLOWED_TOOLS.get(tool_name)
5. 평가-피드백 루프 추가
- Evaluator Agent 를 추가하여 각 Agent 의 답변이 올바른지 평가하고 피드백 Loop 를 추가하여 답변의 퀄리티를 높일 수 있습니다.
핵심 정리
- 기본적인 Agent Loop 패턴: LLM이 도구 호출과 결과 확인을 반복하며 목표를 달성하는 패턴
- 자율성: 도구 실행 결과를 대화 기록에 추가하여 LLM이 다음 행동을 스스로 결정
- 구현의 단순함: OpenAI Function Calling + while 루프만으로 강력한 에이전트 구현 가능
- 확장성: Todo 관리 도구를 웹 검색, 데이터베이스 조작, 코드 실행 등으로 대체하면 실용적인 에이전트로 발전
Next Step:
- 멀티 에이전트 시스템: 여러 에이전트가 협력하여 작업 수행
- 메모리 관리: 대화 기록이 너무 길어질 때 요약 기법 적용
- 고급 도구: 파일 시스템 접근, API 호출, 데이터베이스 쿼리 등
- 에이전트 프레임워크: LangChain, AutoGen 등의 프레임워크가 이 패턴을 어떻게 추상화하는지 학습