Nest-Guards
Guards:
NestJS에서 JWT토큰을 이용한 인증신에는 Guard를 사용한다.
Guard는 라우팅 전에 작동하는 일종의 미들웨어이다.
사용할 패키지: passport
npm install --save @nestjs/passport @types/passport-jwt예시) 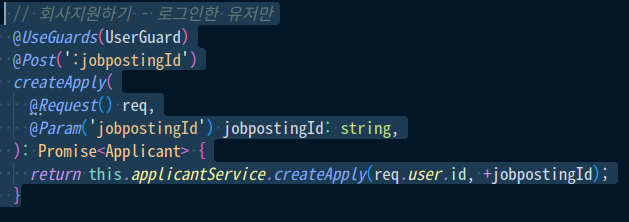
위의 사진처럼 클라이언트가 createApply라는 함수가 있다고 하자
createApply는 로그인 상태여야 하는데 함수위에 UserGuards데코레이터 안에 Guard모듈을 가져와서 넣어주면 된다.
Guard생성하기
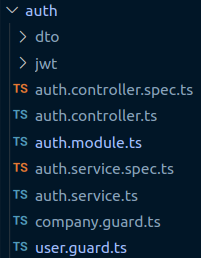
1. Guard는 auth폴더 안에 만들기로 한다.
- Guard.ts파일에서 사용할 common을 import한다.
import {
  CanActivate,
  ExecutionContext,
  HttpException,
  HttpStatus,
  Injectable,
  UnauthorizedException,
} from '@nestjs/common';

import { JwtService } from '@nestjs/jwt';
import { ConfigService } from '@nestjs/config';
import { Request } from 'express'
3. Guard클래스에 CanActivate 인터페이스를 implements한다
export class Guard implements CanActivate4. Guard클래스안에 canActivate함수를 만들고 context: ExecutionContext를 인수로 받아 context.switchToHttp().getRequest();로 request에 접근한다.

5. request에 성공적으로 접근되면 extractTokenFromHeader함수를 만들어 token값과 Bearer와 불리시켜 순수 token값만 받는다.
- 먼저 Guard클래스안에 extractTokenFromHeader함수를 만들자
  private extractTokenFromHeader(request: Request): string | undefined {
    const [type, token] = request.cookies.authorization.split(' ') ?? [];
    return type === 'Bearer' ? token : undefined;
  }
cookies안에 authorization이라는 bearer타입의 토큰을
split으로 나눈뒤 token값을 반환한다.
- 그렇게 반환된 token값이 undefined이면 에러처리를 한다.
const token = this.extractTokenFromHeader(request); // Request의 token을 가지고 온다
    if (!token) {
      // 토큰이 없으면 에러처리
      throw new UnauthorizedException();
}- 토큰값을 성공적으로 받아온 경우 verifyAsync로 토큰을 해석하여 request에 담아서 createApply함수에 넘겨준다.
try {
      const payload = await this.jwtService.verifyAsync(token, {
        secret: this.configService.get<string>('ACCESS_TOKEN_KEY'),
      });

      // 💡 We're assigning the payload to the request object here
      // so that we can access it in our route handlers
      request['user'] = payload;
    } catch {
      throw new UnauthorizedException();
    }
    return true;
꿈을 꾸는 개발자