TIL- 20230809
프론트를 할 때 마다 매번 헷갈리는거 정리
1. 프론트상에서 URL정보 가져오기:
/api/example/:exampleId 에서 exampleId가 필요 할 때 처럼 프론트를 구현하다 보면 URL정보가 필요할 때 가 있다. 그럴때는 window.location.pathname.split('/')을 쓰면 된다.
예)

에서 1이 필요하다면
const boardId = window.location.pathname.split('/')으로 URL의 정보를 split('/')으로 나누면

이런 배열로 URL정보를 받을 수 있다.
2. event.target으로 요소의 값 찾기:
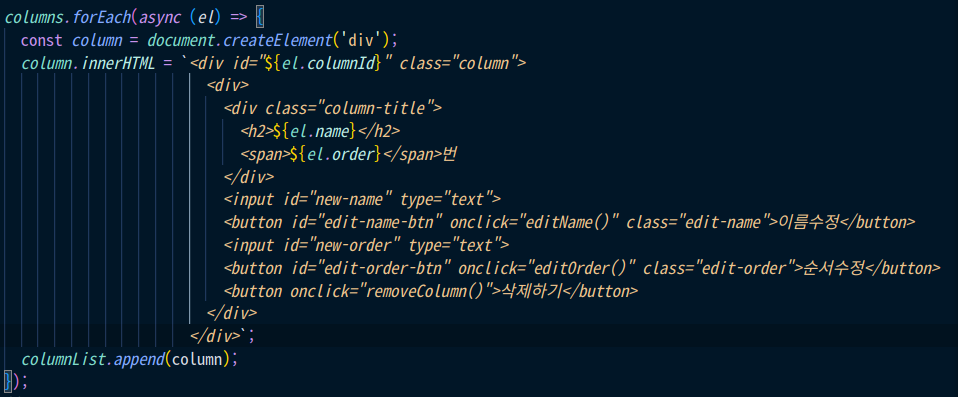
이런 식으로 for문을 돌리면
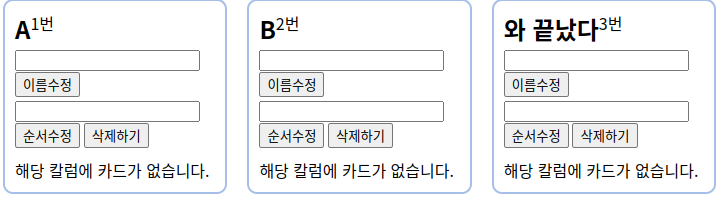
같은 요소들이 생성된다. 이때 A라는 박스의 맨위에 있는 input박스의 value값을 가져오고 싶으면
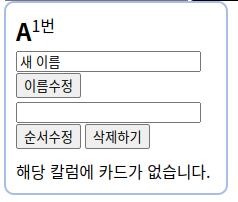
input박스에 값을 적고 "이름수정"이라는 버튼을 누르고
// 컬럼 이름 변경
async function editName ($event) {
  const parentElement = event.target.parentElement
  const newName = parentElement.childNodes[3].value

  const columnId = event.target.parentElement.parentElement.id
  await fetch(`/api/${boardId}/column/${columnId}`, {
    method: 'PUT',
    headers: {
      "Content-Type": "application/json",
    },
    body: JSON.stringify({
      name: newName,
    }),
  })
  .then((response) => response.json())
  .then((result) => {
    alert(result.message);
  });
  location.reload();
};
$event를 파라미터로 받는다.
($event는 현재 자신의 마우스가 클릭한 곳의 요소정보를 가져오는 파라미터)
이때 input박스와 이름수정버튼은 형재노드이므로 바로 접근을 할수 가 없어서 두 요소의 공통부모로 올라가야하는 고생을 해야한다.
const parentElement = event.target.parentElement위처럼 마우스가 클릭한 요소에서 parentElement로 한단계 바로 위의 부모요소로 접근하고 parentElement 변수에 담는다.
parentElement.childNodes를 console.log()로 찍어보면
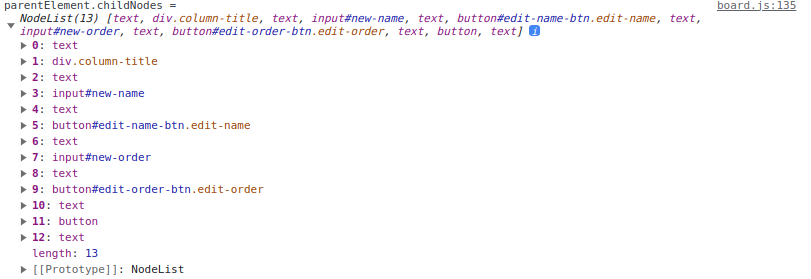
위와 같이 부모요소가 가지고 있는 자식요소들의 정보를 얻게 되는데 그 중 자신이 원하는 요소에 id값을 설정 했다면 해당 요소의 순서로 접근한다.
나는 new-name이라는 id를 가진 input의 값이 필요하니까

로 받으면 배열 3번 요소의 value구할 수 있다.

꿈을 꾸는 개발자
좋은 정보 얻어갑니다, 감사합니다.