참고❕: Ajax는 jQuery를 임포트한 페이지에서만 동작 가능하다.
<script src="https://ajax.googleapis.com/ajax/libs/jquery/3.4.1/jquery.min.js"></script>
Ajax 기본 골격
<script>
    $.ajax({
        type: "GET",   🔺 GET 방식으로 요청한다.
        url: "요청할 url",
        data: {},   🔺 요청하면서 함께 줄 데이터 (GET 요청시엔 비움)
        success: function(response){   🔺 서버에서 준 결과를 response라는 변수에 담음
          console.log(response)   🔺 서버에서 준 결과를 이용해서 나머지 코드를 작성
        }
    })
</script>
1 - 리스트 뽑기
[1] 기본틀 입력, console.log로 확인
'RealtimeCityAir'안에 있는 'row'를 사용
▶ ['RealtimeCityair']['row']
<head>
    <script>
        function q1() {
            $.ajax({
                type: "GET",
                url: "http://openapi.seoul.go.kr:8088/6d4d776b466c656533356a4b4b5872/json/RealtimeCityAir/1/99",
                data: {},
                success: function (response) {
                    let rows = response["RealtimeCityAir"]["row"];
                    for (let i = 0; i < rows.length; i++) {
                    console.log(rows[i]) ✅잘 나오는지 확인하고 진행!
                    }
                }
            })
        }
    </script>

</head>

<body>
    <div class="question-box">
        <h2>1. 서울시 OpenAPI(실시간 미세먼지 상태)를 이용</h2>
        <p>모든 구의 미세먼지를 표기</p>
        <p>업데이트 버튼을 누를 때마다 지웠다 새로 씌여진다.</p>
        <button onclick="q1()">업데이트</button>
        <ul id="names-q1">
        </ul>
    </div>
</body>
[2-1] let으로 표기할 데이터 정하고, console.log로 확인
<script>
    function q1() {
        $.ajax({
            type: "GET",
            url: "url",
            data: {},
            success: function (response) {
                let rows = response["RealtimeCityAir"]["row"];
                for (let i = 0; i < rows.length; i++) {
                    let gu_name = rows[i]['MSRSTE_NM'];
                    let gu_mise = rows[i]['IDEX_MVL'];
                    console.log(gu_name, gu_mise)   ✅확인!
                }
            }
        })
    }
</script>
[2-2] temp_html = ` ` 사용, console.log으로 확인
<script>
    function q1() {
        $.ajax({
            type: "GET",
            url: "url",
            data: {},
            success: function (response) {
                let rows = response["RealtimeCityAir"]["row"];
                for (let i = 0; i < rows.length; i++) {
                    let gu_name = rows[i]['MSRSTE_NM'];
                    let gu_mise = rows[i]['IDEX_MVL'];

                    let temp_html = `<li>${gu_name}: ${gu_mise}</li>`   ❗ backtick ``
                    console.log(temp_html)   ✅확인!
                    $('#names-q1').append(temp_html)
                }
            }
        })
    }
</script>
temp_html = <li>${이렇게 넣는다}</li>
[3] empty( ) 사용
<script>
    function q1() {
        $('#names-q1').empty();
        $.ajax({
              ...
        })
    }
</script>
2 - if문 리스트 뽑기
[1-1] CSS Style
미세먼지수치 > 70 빨갛게
<style>
    .bad {
        color: red;
    }
</style>
bad를 li에 먹여준다.
<script>
    let temp_html = `<li class="bad">${gu_name}: ${gu_mise}</li>`
</script>
[1-2] if문 사용해서 선택적으로 먹인다
<script>
    function q1() {
        $('#names-q1').empty();
        $.ajax({
            type: "GET",
            url: "url",
            data: {},
            success: function (response) {
                let rows = response["RealtimeCityAir"]["row"];
                for (let i = 0; i < rows.length; i++) {
                    let gu_name = rows[i]['MSRSTE_NM'];
                    let gu_mise = rows[i]['IDEX_MVL'];

                🔸  let temp_html = ``;  ✅비워둔다
                    if (gu_mise > 70) {
                        temp_html = `<li class="bad">${gu_name}: ${gu_mise}</li>`
                    } else {
                        temp_html = `<li>${gu_name}: ${gu_mise}</li>`  ✅else 70이상 아닌 경우는 class="bad"를 지운다.
                    }
                    $('#names-q1').append(temp_html)
                }
            }
        })
    }
</script>
즉, 70이상이면 .bad라는 문자열을 붙여주고,
아닌 경우에는 .bad가 떼어진 li문자열을 그대로 붙여준다.
그리고 그걸로 'names-q1'에다 붙였다라는 뜻이다.
3 - if문 리스트 뽑기
연습2랑 매우 유사하다.
<script>
    function q1() {
        $('#names-q1').empty();
        $.ajax({
            type: "GET",
            url: "http://spartacodingclub.shop/sparta_api/seoulbike",
            data: {},
            success: function (response) {
                let rows = response["getStationList"]["row"];
                for (let i = 0; i < rows.length; i++) {
                    let rack_name = rows[i]['stationName'];
                    let rack_cnt = rows[i]['rackTotCnt'];
                    let bike_cnt = rows[i]['parkingBikeTotCnt'];

                    let temp_html = '';
                    if (bike_cnt < 5) {
                        temp_html = `<tr class="urgent">
                                        <td>${rack_name}</td>
                                        <td>${rack_cnt}</td>
                                        <td>${bike_cnt}</td>
                                     </tr>`
                    } else {
                        temp_html = `<tr>
                                        <td>${rack_name}</td>
                                        <td>${rack_cnt}</td>
                                        <td>${bike_cnt}</td>
                                     </tr>`
                    }
                    $('#names-q1').append(temp_html);
                }
            }
        })
    }
</script>
4 - 🔶이미지 변경/실행
구글링!!! ▶ jQuery img src 변경
<img id="img-cat">

위 img의 src 변경하는 방법.

$("#img-cat").attr("src", imgurl);
[1-1] 역시나 console에 찍어보기
<script>
    function q1() {
        $.ajax({
            type: "GET",
            url: "https://api.thecatapi.com/v1/images/search",
            data: {},
            success: function(response){
                console.log(response)
            }
        })
    }
</script>
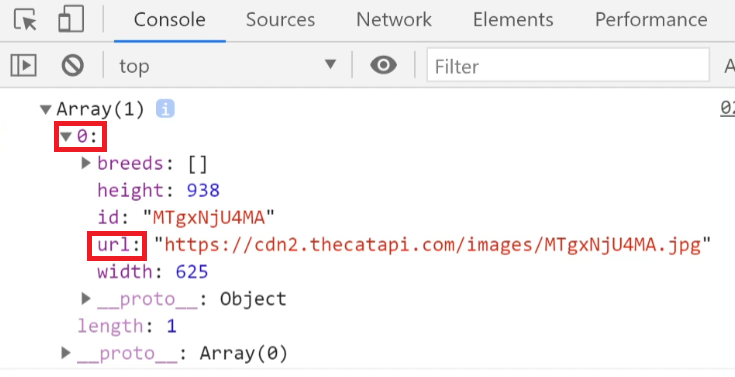
찍어보니, 0번째의 url을 가져와야함.
console.log(reponse[0]['url'])
[1-2] 다시 확인
<script>
    function q1() {
        $.ajax({
            type: "GET",
            url: "https://api.thecatapi.com/v1/images/search",
            data: {},
            success: function(response){
                console.log(response[0]['url'])
            }
        })
    }
</script>
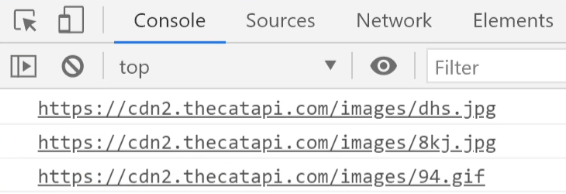
url만 잘 찍혀 나오는 거 확인.
[2] 마무리
<script>
    function q1() {
        $.ajax({
            type: "GET",
            url: "https://api.thecatapi.com/v1/images/search",
            data: {},
            success: function(response){
                let imgurl = response[0]['url'];
                $('#img-cat').attr('src',imgurl);
            }
        })
    }
</script>


<div>
    <img id="img-cat" width="300" src="이미지url붙이기"/>
</div>
5 - 🔶새로고침/로딩 후 바로실행
구글링!!! ▶ jQuery 로딩 후 실행
[1-1] 로딩 후 호출하기
<script>
    $(document).ready(function () {
        alert('로딩이 완료됐다!')
    });
</script>
잘 작동되는지, 새로고침 후 얼럿이 뜨는걸로 확인.
[1-2] function으로 넘어가게끔 변경
<script>
    $(document).ready(function () {
        refresh()
    });

    function refresh() {
        alert('로딩이 완료됐다!')
    }
</script>
refresh를 부르면 function에 있는 refresh를 불러서 얼럿을 띄움.
[2-2] ajax 콜하기
<script>
    $(document).ready(function () {
        refresh()
    });

    function refresh(){
        $.ajax({
            type: "GET",
            url: "https://api.manana.kr/exchange/rate.json",
            data: {},
            success: function (response) {
                console.log(response)
            }
        })
    }
    </script>
response의 [1]번 째의 ['rate']를 가져온다
[2-3] console.log에 찍어보기
<script>
    $(document).ready(function () {
        refresh()
    });

    function refresh(){
        $.ajax({
            type: "GET",
            url: "https://api.manana.kr/exchange/rate.json",
            data: {},
            success: function (response) {
            🔸  console.log(response[1]['rate']);
            }
        })
    }
    </script>
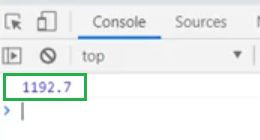
잘 찍힌거 확인!
[3] .text 사용하기
<script>
    $(document).ready(function () {
        refresh()
    });

    function refresh(){
        $.ajax({
            type: "GET",
            url: "https://api.manana.kr/exchange/rate.json",
            data: {},
            success: function (response) {
                let num = response[1]['rate'];
            🔸  $('#now-rate').text(num);
            }
        })
    }
</script>


<p id="now-rate">1192.7</p>
id 값 넣어주기
