오늘의 코드카타
표 병합
- stringstream
- Union-find 알고리즘
- LV3 - 29% (복습 필요)
-> 문제 풀이
오늘의 공부
팀 프로젝트 진행 내용
1. 기존에 진행했던 내용에서 데이터 에셋을 분리하기
- 기존에는 각 태스크에서 임의로 설정해서 사용하던 것을 데이터 에셋으로 분리
- AI 컨트롤러에서 해당 데이터 에셋을 가지고 있어서 태스크 사용 시에 데이터를 사용
- 기존에는 랜덤으로 상태변화가 발생했는데, 가중치를 두어서 정해진 확률대로 상태변화 발생
// AIConfigData.h

#pragma once

#include "AI/EGAIState.h"
#include "Engine/DataAsset.h"
#include "AIConfigData.generated.h"

USTRUCT(BlueprintType)
struct FAIActionProbability
{
	GENERATED_BODY()

	UPROPERTY(EditAnywhere, BlueprintReadOnly)
	EAIState ActionState = EAIState::Idle;

	UPROPERTY(EditAnywhere, BlueprintReadOnly)
	float Probability = 0.f;
};

UCLASS(BlueprintType)
class EG_API UAIConfigData : public UDataAsset
{
	GENERATED_BODY()

public:
	UAIConfigData();

	// Idle Action
	UPROPERTY(EditAnywhere, BlueprintReadOnly, Category = "Idle")
	float MinWaitTime;

	UPROPERTY(EditAnywhere, BlueprintReadOnly, Category = "Idle")
	float MaxWaitTime;

	// Move Action
	UPROPERTY(EditAnywhere, BlueprintReadOnly, Category = "Move")
	float MoveRadius;

	UPROPERTY(EditAnywhere, BlueprintReadOnly, Category = "Move")
	float MoveSpeed;

	// Action State Probability
	UPROPERTY(EditAnywhere, BlueprintReadOnly)
	TArray<FAIActionProbability> ActionProbabilities;
};
2. 지정한 시간 안에서 랜덤 시간만큼 기다리는 태스크 작성
- 기본으로 제공되는 Wait 태스크가 있으나, 추후에 대기하면서 애니메이션을 재생하거나 할 수도 있기 때문에 별도로 태스크를 작성
- 랜덤 시간을 설정한 후에 Tick을 통해서 시간을 줄여가면서 남은 시간이 0 이하가 되면 해당 태스크 종료
// BTTask_RandomWait.cpp

#include "AI/Tasks/BTTask_RandomWait.h"
#include "AI/EGAIController.h"
#include "AI/DataAsset/AIConfigData.h"

UBTTask_RandomWait::UBTTask_RandomWait()
	: RemainingTime(0.f)
{
	bNotifyTick = true;
	NodeName = TEXT("Random Wait");
}

EBTNodeResult::Type UBTTask_RandomWait::ExecuteTask(UBehaviorTreeComponent& OwnerComp, uint8* NodeMemory)
{
	if (AAIController* AIController = OwnerComp.GetAIOwner())
	{
		if (AEGAIController* EGAIController = Cast<AEGAIController>(AIController))
		{
			float MinWaitTime = EGAIController->GetConfigData()->MinWaitTime;
			float MaxWaitTime = EGAIController->GetConfigData()->MaxWaitTime;

			RemainingTime = FMath::FRandRange(MinWaitTime, MaxWaitTime);

			return EBTNodeResult::InProgress;
		}
	}

	return EBTNodeResult::Failed;
}

void UBTTask_RandomWait::TickTask(UBehaviorTreeComponent& OwnerComp, uint8* NodeMemory, float DeltaSeconds)
{
	Super::TickTask(OwnerComp, NodeMemory, DeltaSeconds);

	RemainingTime -= DeltaSeconds;
	if (RemainingTime <= 0.f)
	{
		FinishLatentTask(OwnerComp, EBTNodeResult::Succeeded);
	}
}
3. 지정한 이동 속도로 이동하는 태스크 작성
- 기본으로 제공되는 MoveTo 태스크가 있으나, 이동속도를 제어하고 추후에 별도의 로직이 추가가 될 수도 있기 때문에 별도로 태스크를 작성
MoveToLocation()함수는 비동기로 처리가 되기 때문에 노드가 종료될 때까지 기다리는 것이 아니라 자동으로 종료가 되기 때문에, Tick을 통해서 이동이 완료될 시에 태스크 종료
// BTTask_CustomMoveTo.cpp

#include "AI/Tasks/BTTask_CustomMoveTo.h"
#include "BehaviorTree/BlackboardComponent.h"
#include "GameFramework/CharacterMovementComponent.h"
#include "Navigation/PathFollowingComponent.h"
#include "AI/EGAICharacter.h"
#include "AI/EGAIController.h"
#include "AI/DataAsset/AIConfigData.h"

UBTTask_CustomMoveTo::UBTTask_CustomMoveTo()
{
	bNotifyTick = true;
	NodeName = TEXT("Custom Move To");
}

EBTNodeResult::Type UBTTask_CustomMoveTo::ExecuteTask(UBehaviorTreeComponent& OwnerComp, uint8* NodeMemory)
{
	if (AAIController* AIController = OwnerComp.GetAIOwner())
	{
		if (AEGAIController* EGAIController = Cast<AEGAIController>(AIController))
		{
			if (AEGAICharacter* EGAICharacter = Cast<AEGAICharacter>(EGAIController->GetPawn()))
			{
				float Speed = EGAIController->GetConfigData()->MoveSpeed;
				EGAICharacter->GetCharacterMovement()->MaxWalkSpeed = Speed;

				if (UBlackboardComponent* Blackboard = OwnerComp.GetBlackboardComponent())
				{
					FVector TargetLocation = Blackboard->GetValueAsVector("TargetLocation");

					EPathFollowingRequestResult::Type Result = EGAIController->MoveToLocation(TargetLocation);

					if (Result == EPathFollowingRequestResult::Type::RequestSuccessful)
					{
						return EBTNodeResult::InProgress;
					}
				}
			}
		}
	}

	return EBTNodeResult::Failed;
}

void UBTTask_CustomMoveTo::TickTask(UBehaviorTreeComponent& OwnerComp, uint8* NodeMemory, float DeltaSeconds)
{
	Super::TickTask(OwnerComp, NodeMemory, DeltaSeconds);

	if (AAIController* AIController = OwnerComp.GetAIOwner())
	{
		EPathFollowingStatus::Type Status = AIController->GetMoveStatus();

		if (Status == EPathFollowingStatus::Idle)
		{
			FinishLatentTask(OwnerComp, EBTNodeResult::Succeeded);
		}
	}
}
오늘의 CS
push_back vs emplace_back
-
공통점 : vector에서 가장 뒤에 원소를 추가함
-
push_back()
- 이미 만들어진 객체를 복사하거나 이동해서
vector에 넣음 - 객체가 반드시 먼저 생성되고, 그 객체가 복사/이동되기 때문에 복사/이동 비용이 듬
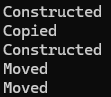
#include <iostream> #include <vector> #include <string> using namespace std; struct Person { string name; int age; Person(string n, int a) : name(move(n)), age(a) { cout << "Constructed\n"; } Person(const Person& p) { cout << "Copied\n"; } Person(Person&& p) noexcept { cout << "Moved\n"; } }; int main() { vector<Person> v; Person p("Alice", 20); // Constructed v.push_back(p); // Copied v.push_back(Person("Bob", 25)); // Constructed + Moved }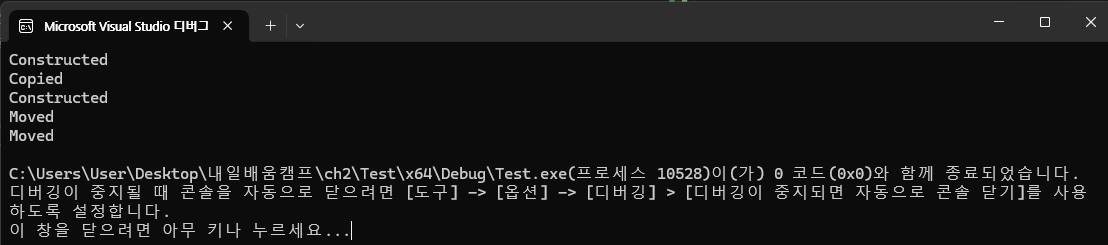 -> vector 내부 capacity 부족으로 재할당이 발생했기 때문에 Moved가 2번 발생
 - 이미 만들어진 객체를 복사하거나 이동해서
-
emplace_back()
vector안에서 직접 객체를 생성- 불필요한 복사/이동을 하지 않기 때문에 더 효율적임
- 전달된 인자는
vector내부에서 바로 생성자 호출에 쓰임
v.emplace_back("Charlie", 30); // Constructed

게임 개발자를 향해..