void main() {
  runApp(const MyApp());
}
runApp 함수는 말 그대로 앱을 시작해주세요 ~ 라는 의미이다
그러니까 runApp에 메인페이지를 넣어줘야 구동이 되겠죠
플러터는 위젯의 개념으로 움직인다.
1. 글자 위젯
Text()
void main() {
  runApp(const MyApp());
}

class MyApp extends StatelessWidget {
  const MyApp({super.key});

  @override
  Widget build(BuildContext context) {
    return MaterialApp(home: Text('안녕'));
  }
}
2. 아이콘 위젯
Icon()
void main() {
  runApp(const MyApp());
}

class MyApp extends StatelessWidget {
  const MyApp({super.key});

  @override
  Widget build(BuildContext context) {
    return MaterialApp(home: Icon(Icons.star));
  }
}
3. 이미지 위젯
Image.assets('이미지경로')
- assets 디렉토리를 만들고 내가 쓰고 싶은 이미지 파일을 넣는다.
- pubspec.yaml 파일에 이미지 등록을 한다. (assets 폴더를 쓰겠다고 명시해줘야 함)
flutter:
  assets:
    - assets/
이렇게 명시해주면 assets 폴더 안의 모든 이미지를 갖다 쓸 수가 있다.
- Main.dart code
import 'package:flutter/material.dart';

void main() {
  runApp(const MyApp());
}

class MyApp extends StatelessWidget {
  const MyApp({super.key});

  @override
  Widget build(BuildContext context) {
    return MaterialApp(home: Image.asset('assets/IMG_4247.JPG'));
  }
}
4. 박스 위젯
네모박스는 Container()
자식 위젯의 기준점을 중앙으로 설정해주는 Center()
import 'package:flutter/material.dart';

void main() {
  runApp(const MyApp());
}

class MyApp extends StatelessWidget {
  const MyApp({super.key});

  @override
  Widget build(BuildContext context) {
    return MaterialApp(
      home: Center(
          child: Container(width: 50, height: 50, color: Colors.purpleAccent)),
    );
  }
}
MaterialApp()은 무엇인가?
일단 대문자로 시작하고 ()가 있으니 위젯이다.
마테리얼 테마를 이용할 수 있는데 구글 스타일이다. 아이폰 스타일을 원하면 Cupertino~()를 이용하면 되는데, 커스터마이징을 하고 싶어도 MaterialApp() 으로 시작하는 것이 좋다.
왜냐하면 코드양이 3배로 늘어나기 때문이다 ...
MateralApp()으로 시작하고, 나중에 구글 물을 빼는 작업을 하면 된다.
상단,중간,하단 나누기
보통 앱은 상단, 중간 내용, 하단으로 나누어져있다. 대표 예시로 인스타그램과 카카오톡 앱을 확인하면 된다.
상중하로 나누는 Scaffold()
import 'package:flutter/material.dart';

void main() {
  runApp(const MyApp());
}

class MyApp extends StatelessWidget {
  const MyApp({super.key});

  @override
  Widget build(BuildContext context) {
    return MaterialApp(
        home: Scaffold(
      appBar: AppBar(),
      body: Center(),
      bottomNavigationBar: BottomAppBar(),
    ));
  }
}
위젯 가로, 세로 배치
가로배치 : Row(Children[])
세로배치 : Column(Children[])
코드 예시는 가로배치 입니다!
import 'package:flutter/material.dart';

void main() {
  runApp(const MyApp());
}

class MyApp extends StatelessWidget {
  const MyApp({super.key});

  @override
  Widget build(BuildContext context) {
    return MaterialApp(
      home: Scaffold(
        body: Row(
          children: [
            Icon(Icons.star),
            Icon(Icons.star),
            Icon(Icons.star),
          ],
        ),
      ),
    );
  }
}
실습 1
속성들 연습을 하기 위해 간단한 실습을 해보았다.
import 'package:flutter/material.dart';

void main() {
  runApp(const MyApp());
}

class MyApp extends StatelessWidget {
  const MyApp({super.key});

  @override
  Widget build(BuildContext context) {
    return MaterialApp(
        home: Scaffold(
      appBar: AppBar(title: Text('앱개발 스타트')), // 앱의 제목
      body: Center(
        child: Container(
          width: double.infinity, height: 100,
          decoration: BoxDecoration(
            color: Colors.yellowAccent,
            border: Border.all(color: Colors.black),
          ),
          margin: EdgeInsets.fromLTRB(0, 0, 30, 0), // 바깥 여백
          padding: EdgeInsets.all(20), // 안쪽 여백
          child: Text('플러터 고수되기'),
        ),
      ),
      bottomNavigationBar: BottomAppBar(
        child: SizedBox(
          height: 70,
          child: Row(
            mainAxisAlignment: MainAxisAlignment.spaceEvenly, // Row안에서 정렬하기
            children: [
              Icon(Icons.phone),
              Icon(Icons.message),
              Icon(Icons.contact_page),
            ],
          ),
        ),
      ),
    ));
  }
}
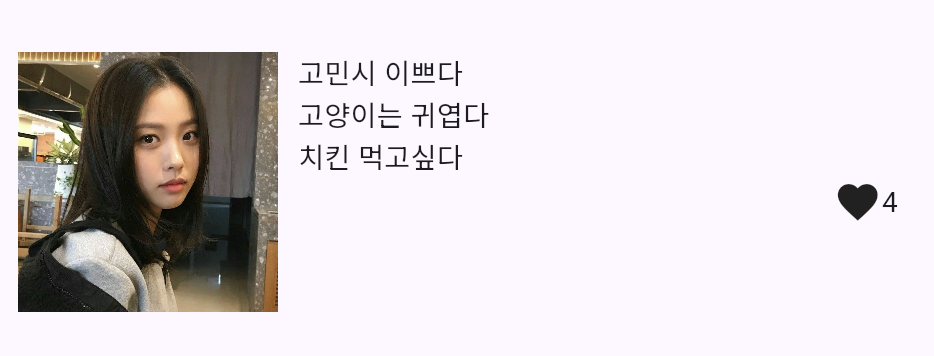
실습 2
import 'package:flutter/material.dart';

void main() {
  runApp(const MyApp());
}

class MyApp extends StatelessWidget {
  const MyApp({super.key});

  @override
  Widget build(BuildContext context) {
    return MaterialApp(
      home: Scaffold(
        appBar: AppBar(),
        body: Container(
          height: 150,
          padding: EdgeInsets.all(10),
          child: Row(
            children: [
              Image.asset(
                'assets/gominsi.JPG',
                width: 150,
              ),
              Container(
                width: 300,
                child: Column(
                  crossAxisAlignment: CrossAxisAlignment.start, // x축 왼쪽 정렬
                  children: [
                    Text('고민시 이쁘다'),
                    Text('고양이는 귀엽다'),
                    Text('치킨 먹고싶다'),
                    Row(
                      mainAxisAlignment: MainAxisAlignment.end, //Row안에서 가로축 정렬
                      children: [
                        Icon(Icons.favorite),
                        Text('4'),
                      ],
                    ),
                  ],
                ),
              )
            ],
          ),
        ),
      ),
    );
  }
}

아기 개발자의 험난한 개발 성장 일기
깔끔한 정리 좋아요 :)