react-recoil-todo
이번 포스팅을 마지막으로 TodoApp을 완성해보도록 하겠습니다.
현재 남은 기능은
- 모든 아이템 체크/해제
- 남은 아이템 갯수(
done:false) 확인 - 아이템 내용(
text) 수정
위와 같이 3개입니다. 하나 하나 차근차근 가보도록 하겠습니다.
모든 아이템 체크/해제
새로운 아이템을 입력하는 input창 옆에있는 버튼이 모든 아이템을 체크/해제 하는 체크박스입니다. 이 체크박스는 현재 모든 아이템이 체크되어 있다면 체크되어 있어야 하고, 하나라도 체크되어 있지 않다면 체크되어 있으면 안됩니다.
마찬가지로 이 체크박스를 체크하면 모든 아이템이 체크되고, 체크해제하면 모든 아이템이 체크해제가 됩니다. 즉, 서로 영향을 줍니다.
이 체크박스는 Main 컴포넌트에 있으므로, 바로 구현에 들어가도록 하겠습니다. 우선 현재 Main 컴포넌트의 모습은 아래와 같습니다.
// src/components/Main/index.js

import { useRecoilValue } from 'recoil'
import * as state from '../../state/todos'

import Todo from './Todo'

function Main() {
  const todos = useRecoilValue(state.filteredTodos)
  const Todos = todos.map(todo => <Todo key={todo.id} todo={todo} />)

  return (
    <section className="main">
      <input id="toggle-all" className="toggle-all" type="checkbox" />
      <label htmlFor="toggle-all">Mark all as complete</label>
      <ul className="todo-list">
        { Todos }
      </ul>
    </section>
  )
}

export default Main
기능을 구현하기 위해서는
- 모든
todos의 상태를 알아야 하고 todos의 상태를 바꿀 수 있어야 합니다.
따라서 useRecoilState를 import하고 체크박스와 연동해주도록 합니다.
기존의 todos 변수 이름을 filteredTodos로 변경하고, 코드를 작성해보겠습니다.
// 👇👇👇
import { useRecoilValue, useRecoilState } from 'recoil'
import * as state from '../../state/todos'

import Todo from './Todo'

function Main() {
  // 👇👇👇
  const filteredTodos = useRecoilValue(state.filteredTodos)
  const Todos = filteredTodos.map(todo => <Todo key={todo.id} todo={todo} />)

  // 👇👇👇
  const [todos, setTodos] = useRecoilState(state.todos)
  const isAllDone = todos.every(todo => todo.done)
  const handleToggle = e => {
    const { checked } = e.target

    setTodos(todos => todos.map(todo => {
      return {
        ...todo,
        done: checked,
      }
    }))
  }

  return (
    <section className="main">
      {/* 👇👇👇 */}
      <input id="toggle-all" className="toggle-all" type="checkbox" checked={ isAllDone } onChange={ handleToggle }/>
      <label htmlFor="toggle-all">Mark all as complete</label>
      <ul className="todo-list">
        { Todos }
      </ul>
    </section>
  )
}

export default Main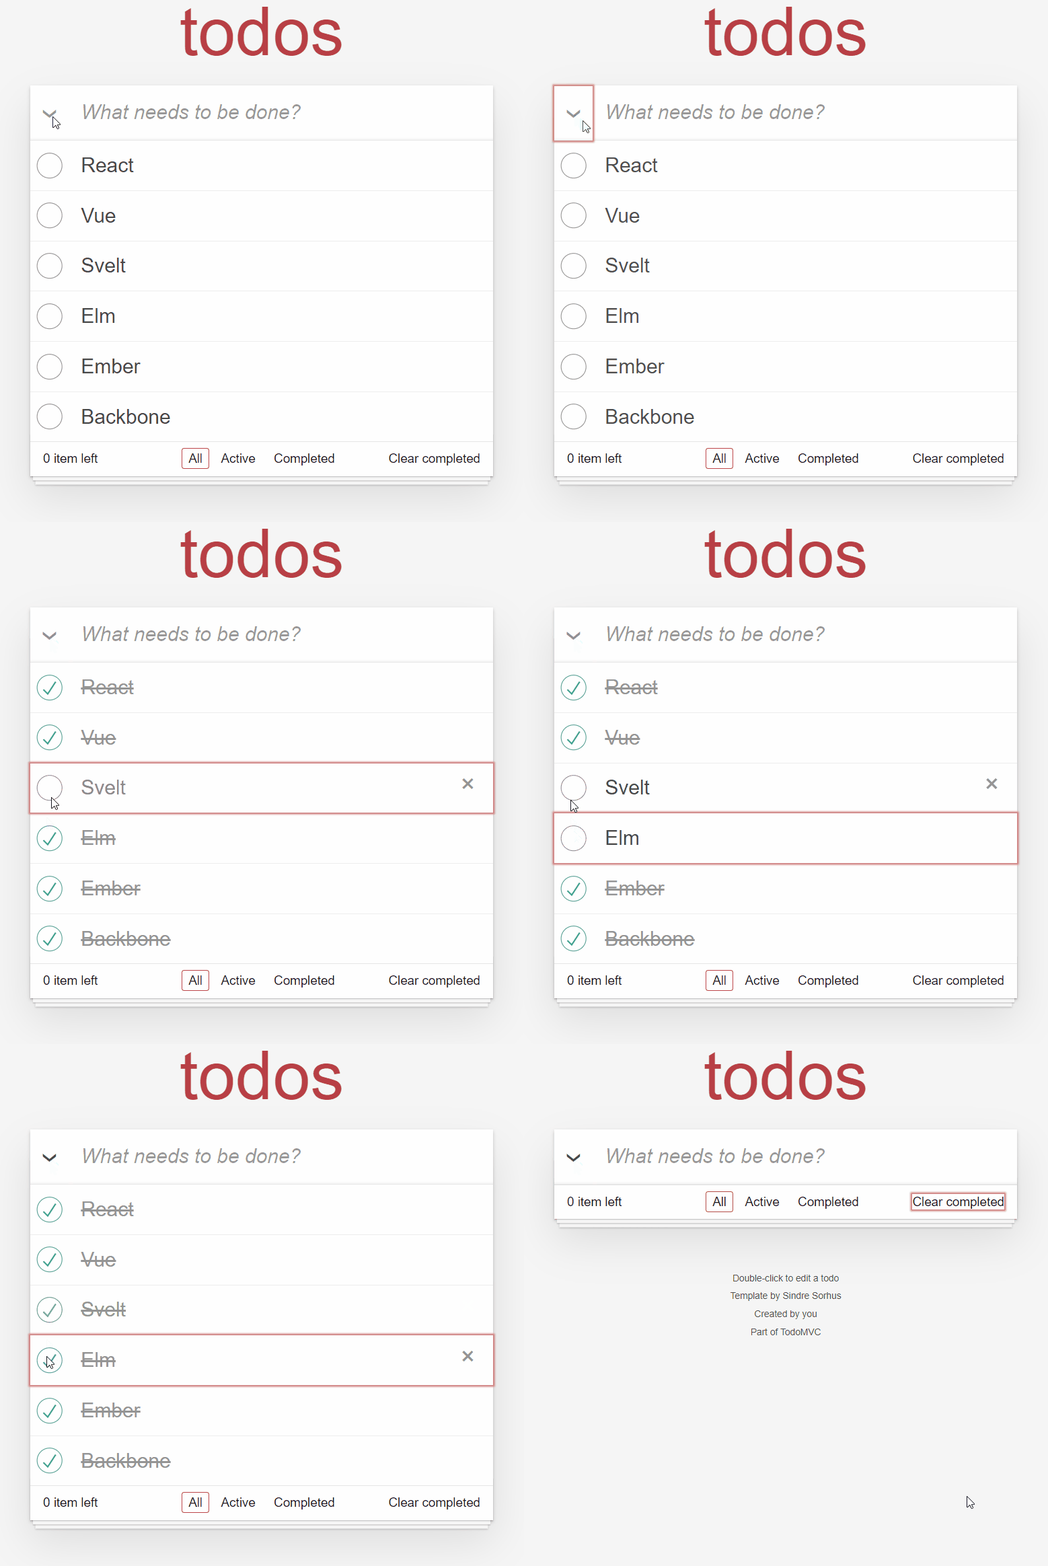
남은 아이템 갯수 확인
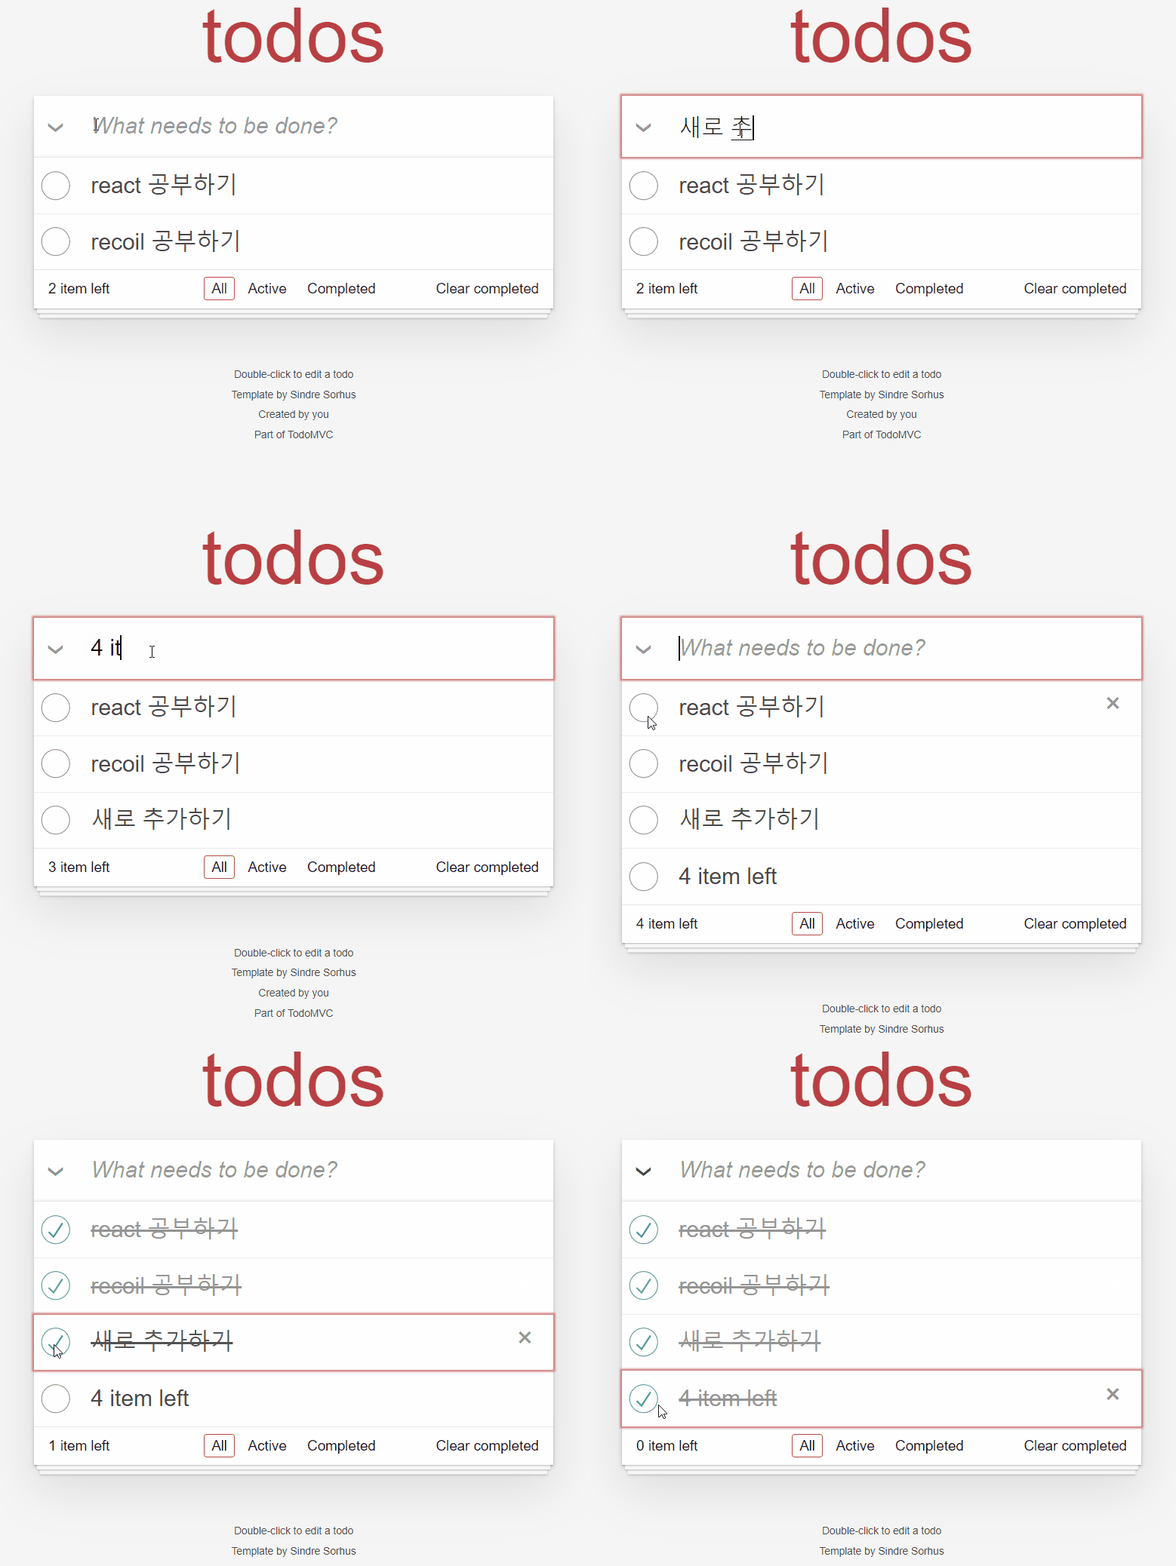
이는 todos 중 done: false인 아이템만 확인하면 됩니다. 이는 Footer 컴포넌트에 있으며, 바로 구현된 코드를 보도록 하겠습니다.
// src/components/Footer/index.js

// 👇👇👇
import { useRecoilValue, useRecoilState, useSetRecoilState } from 'recoil'
import * as state from '../../state/todos'

function Footer() {
  const [filterType, setFilterType] = useRecoilState(state.filterType)
  const setTodos = useSetRecoilState(state.todos)

  const handleClearCompleted = () => {
    setTodos(todos => todos.filter(todo => !todo.done))
  }

  // 👇👇👇
  const todos = useRecoilValue(state.todos)
  const todoCount = todos.filter(todo => !todo.done).length

  return (
    <footer className="footer">
      {/* 👇👇👇 */}
      <span className="todo-count"><strong>{ todoCount }</strong> item left</span>
      <ul className="filters">
        <li>
          <a className={ filterType === 'all' ? 'selected' : '' } href="#/" onClick={ () => setFilterType('all') }>All</a>
        </li>
        <li>
          <a className={ filterType === 'do' ? 'selected' : '' } href="#/active" onClick={ () => setFilterType('do') }>Active</a>
        </li>
        <li>
          <a className={ filterType === 'done' ? 'selected' : '' } href="#/completed" onClick={ () => setFilterType('done') }>Completed</a>
        </li>
      </ul>
      <button className="clear-completed" onClick={ handleClearCompleted }>Clear completed</button>
    </footer>
  )
}

export default FooteruseRecoilValue를 이용해 todos를 가져온 뒤, 필터링하여 done이 false인 것들의 갯수를 보여주면 됩니다.
아이템 내용 수정
이제 마지막 기능인 더블클릭으로 텍스트를 수정하는 내용을 구현하도록 하겠습니다. 특정 아이템 내용을 수정하는 것은 이미 여러번 했었기 때문에 따로 기능에 대한 설명은 하지 않도록 하겠습니다.
다만 TodoMVC css 사용법을 알아야 하는데, Todo 컴포넌트의 루트 엘리먼트인 li에 editing 클래스가 있는 경우에만 수정 input창이 보여진다는 점을 기억하셔야 합니다. 따라서, 현재 수정중인지 여부를 알 수 있는 컴포넌트 state가 하나 필요합니다. 이를 위해 useState를 import합니다.
또한, 내용을 변경하는 키보드 타이핑마다 todos를 수정하기보다는 내용 수정이 완료된 뒤 todos에 반영하도록 구현하겠습니다. 이렇게 하기 위해서는 input과 연동된 컴포넌트 state가 또 필요합니다.
정리하자면, editing 상태가 되면 Todo의 루트 엘리먼트인 li에 editing 클래스가 들어가게 되고, 그러면 숨겨져있던 edit input이 보여지게 됩니다. 이 때, 이 input에 포커스를 줘야 합니다. 이를 위해 useEffect와 useRef를 import해야 합니다.
하나씩 차근차근 구현해보도록 하겠습니다.
useState
현재 수정모드인지를 확인하는 editing과, 입력되고 있는 input의 value를 저장할 컴포넌트 state를 정의하겠습니다.
우선, useState를 import합니다.
// src/components/Main/Todo.js

import { useState } from 'react'
그 다음, handleDestroy 밑에 이어서 코드를 작성합니다.
// ... 생략

const handleDestroy = () => {
  setTodos(todos => todos.filter(todo => todo.id !== id))
}

const [isEditing, setEditing] = useState(false)
const [input, setInput] = useState(text)
수정 input의 기본값은 현재 아이템의 text여야 합니다.
useRef
input 엘리먼트에 포커스를 주기 위해서는 해당 DOM 엘리먼트를 참조해야 하기 때문에 useRef를 사용하고, input의 value와 ref에 할당해줍니다.
import { useState, useRef } from 'react'
// ...

function Todo(props) {
  // ...

  const [isEditing, setEditing] = useState(false)
  const [input, setInput] = useState(text)
  const editInputEl = useRef(null)

  return (
    <li // ...
      // ...
      <input
        className="edit"
        value={ input }
        ref={ editInputEl }
      />
    </li>
  )
}
useEffect
수정모드가 되는 경우, input에 focus가 가야합니다. 이는 렌더링이 된 이후에 발생해야 하므로 useEffect를 import하여 사용합니다.
import { useState, useRef, useEffect } from 'react'
// ...

function Todo(props) {
  // ...

  const [isEditing, setEditing] = useState(false)
  const [input, setInput] = useState(text)
  const editInputEl = useRef(null)

  useEffect(() => {
    if (isEditing) {
      editInputEl.current.focus()
    }

  }, [isEditing])

  // ...
}
isEditing 값이 바뀔 때에만 useEffect가 실행되도록 합니다([isEditing]).
이제 어느정도 기본 값 셋팅이 끝났으니, 기능을 구현하도록 하겠습니다.
에디팅 모드 들어가기
label을 더블클릭하면 에디팅 모드에 들어가도록 합니다. 에디팅모드에 들어가면 li에 editing 클래스를 추가하도록 합니다. 기존 코드에서는 done 여부에 따라 completed만 추가하도록 했는데, editing도 관리되어야 하므로 따로 코드를 작성해야 합니다.
우선, 더블클릭시 에디팅 모드로 들어가는 코드부터 구현합니다.
// ...
function Todo(props) {
  // ...

  useEffect(() => {
    if (isEditing) {
      editInputEl.current.focus()
    }

  }, [isEditing])

  // 👇👇👇
  const handleEditTextDbClick = () => {
    setEditing(true)
  }

  return (
    <li className={ done ? 'completed' : '' }>
      <div className="view">
        <input className="toggle" type="checkbox" checked={ done } onChange={ handleToggle } />
        {/* 👇👇👇 */}
        <label onDoubleClick={ handleEditTextDbClick }>{ text }</label>
        // ...
    </li>
  )
}

export default Todo
간단히 setEditing(true)를 호출하면 됩니다. 사실 이렇게 간단한 코드면 인라인으로 넣어도 되긴 합니다.
그리고 li에 넣을 클래스 이름 목록은 isEditing과 done에 따라 달라지기 때문에, 이를 코드로 구현합니다.
여러 방법이 있겠으나, 전 배열에 push하고 join하는 방법을 사용하겠습니다.
function Todo(props) {
  // ...

  const classNames = []
  if (isEditing) {
    classNames.push('editing')
  }

  if (done) {
    classNames.push('completed')
  }

  const className = classNames.join(' ')

  return (
    <li className={ className }>
    // ...
    </li>
  )
}
이 코드는 return 바로 위에 위치하도록 합니다.
현재까지의 동작은 아래와 같습니다.
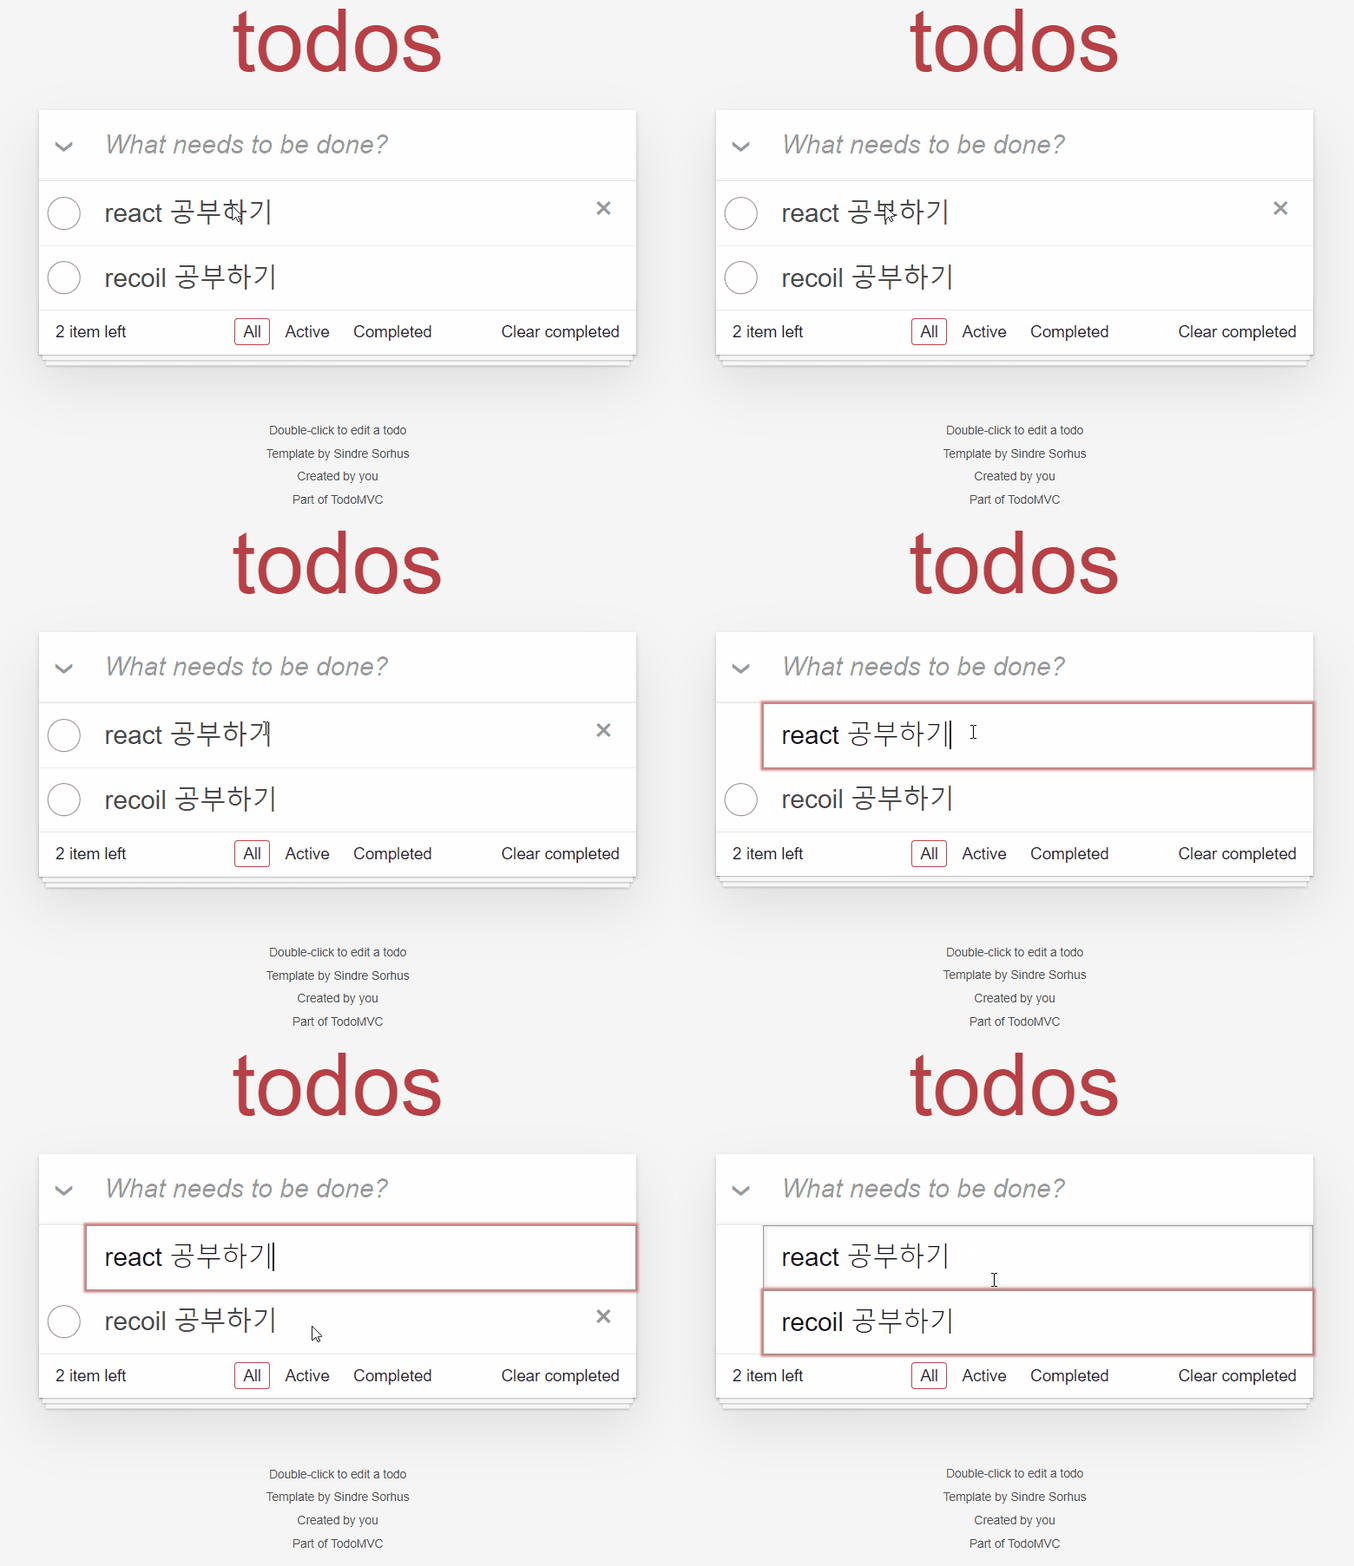
더블클릭하면 input창이 수정모드로 변하면서 포커싱이 가는 것을 확인할 수 있습니다.
내용 변경
내용 변경은 [input, setInput] = useState(text)를 이용하여, onInput 이벤트 핸들러를 할당해서 구현해줍니다.
// ...
function Todo(props) {
  // ...

  const handleEditTextDbClick = () => {
    setEditing(true)
  }

  // 👇👇👇
  const handleEditTextInput = e => {
    setInput(e.target.value)
  }

  // ..

  return (
    <li className={ className }>
      <div className="view">
        <input className="toggle" type="checkbox" checked={ done } onChange={ handleToggle } />
        <label onDoubleClick={ handleEditTextDbClick }>{ text }</label>
        <button className="destroy" onClick={ handleDestroy }/>
      </div>
      <input
        className="edit"
        value={ input }
        {/* 👇👇👇 */}
        onInput={ handleEditTextInput }
        ref={ editInputEl }
      />
    </li>
  )
}
변경내용 저장
내용을 변경한 뒤, 저장하는 방법은 두 가지로 정의하겠습니다.
- blur되는 경우
- Enter키를 누르는 경우
각각 onBlur와 onKeyDown 이벤트로 구현할 수 있습니다. 그리고 이 두 이벤트 핸들러는 내용을 저장한다는 공통의 기능이 있기 때문에, 내용을 저장하는 함수를 먼저 구현하도록 하겠습니다.
editTodo
editTodo는 현재 input의 내용을 todos state에 저장합니다. 아래와 같이 쉽게 구현할 수 있습니다.
// ...
function Todo(props) {
  // ...

  const handleEditTextInput = e => {
    setInput(e.target.value)
  }

  // 👇👇👇
  const editTodo = () => {
    // 현재 입력된 input값을 trim하여 가져옵니다.
    const value = input.trim()

    if (value === '') {
      setInput('')
      return
    }

    // 타겟 todo를 찾아 변경된 text값으로 매핑하여 새로운 todos를 set합니다.
    setTodos(todos => todos.map(todo => {
      return todo.id === id
        ? { ...todo, text: value }
        : todo
    }))

    // 수정 모드를 종료합니다.
    setEditing(false)
  }

  // ..
}editTodo는 blur되는 경우와 Enter키가 입력되는 경우에 호출하도록 합니다. blur되는 경우는 그냥 editTodo를 호출하면 되기 때문에, 이번엔 인라인으로 넣어주도록 하겠습니다. Enter키가 입력되는 경우에는 Enter키 입력을 감지하므로 따로 구현합니다.
// ...
function Todo(props) {
  // ...

  const editTodo = () => {
    // ...
  }

  // 👇👇👇
  const handleEditTextEnter = e => {
    if (!(e.key === 'Enter' || e.keyCode === 13)) {
      return
    }

    editTodo()
  }

  return (
    <li className={ className }>
      <div className="view">
        <input className="toggle" type="checkbox" checked={ done } onChange={ handleToggle } />
        <label onDoubleClick={ handleEditTextDbClick }>{ text }</label>
        <button className="destroy" onClick={ handleDestroy }/>
      </div>
      <input
        className="edit"
        value={ input }
        onInput={ handleEditTextInput }
        {/* 👇👇👇 */}
        onKeyDown={ handleEditTextEnter }
        {/* 👇👇👇 */}
        onBlur={ editTodo }
        ref={ editInputEl }
      />
    </li>
  )
}
이 모든 코드를 합치면 아래와 같은 코드가 됩니다.
import { useState, useEffect, useRef } from 'react'
import { useSetRecoilState } from 'recoil'
import { todos } from '../../state/todos'

function Todo(props) {
  const { id, done, text } = props.todo
  const setTodos = useSetRecoilState(todos)

  const toggleTodo = checked => {
    setTodos(todos => todos.map(todo => {
      return todo.id === id
        ? { ...todo, done: checked, }
        : todo
    }))
  }

  const handleToggle = e => {
    const { checked } = e.target

    toggleTodo(checked)
  }

  const handleDestroy = () => {
    setTodos(todos => todos.filter(todo => todo.id !== id))
  }

  const [isEditing, setEditing] = useState(false)
  const [input, setInput] = useState(text)
  const editInputEl = useRef(null)

  useEffect(() => {
    if (isEditing) {
      editInputEl.current.focus()
    }

  }, [isEditing])

  const handleEditTextDbClick = () => {
    setEditing(true)
  }

  const handleEditTextInput = e => {
    setInput(e.target.value)
  }

  const editTodo = () => {
    const value = input.trim()

    if (value === '') {
      setInput('')
      return
    }

    setTodos(todos => todos.map(todo => {
      return todo.id === id
        ? { ...todo, text: value }
        : todo
    }))

    setEditing(false)
  }

  const handleEditTextEnter = e => {
    if (!(e.key === 'Enter' || e.keyCode === 13)) {
      return
    }

    editTodo()
  }

  const classNames = []
  if (isEditing) {
    classNames.push('editing')
  }

  if (done) {
    classNames.push('completed')
  }

  const className = classNames.join(' ')

  return (
    <li className={ className }>
      <div className="view">
        <input className="toggle" type="checkbox" checked={ done } onChange={ handleToggle } />
        <label onDoubleClick={ handleEditTextDbClick }>{ text }</label>
        <button className="destroy" onClick={ handleDestroy }/>
      </div>
      <input
        className="edit"
        value={ input }
        onInput={ handleEditTextInput }
        onKeyDown={ handleEditTextEnter }
        onBlur={ editTodo }
        ref={ editInputEl }
      />
    </li>
  )
}

export default Todo
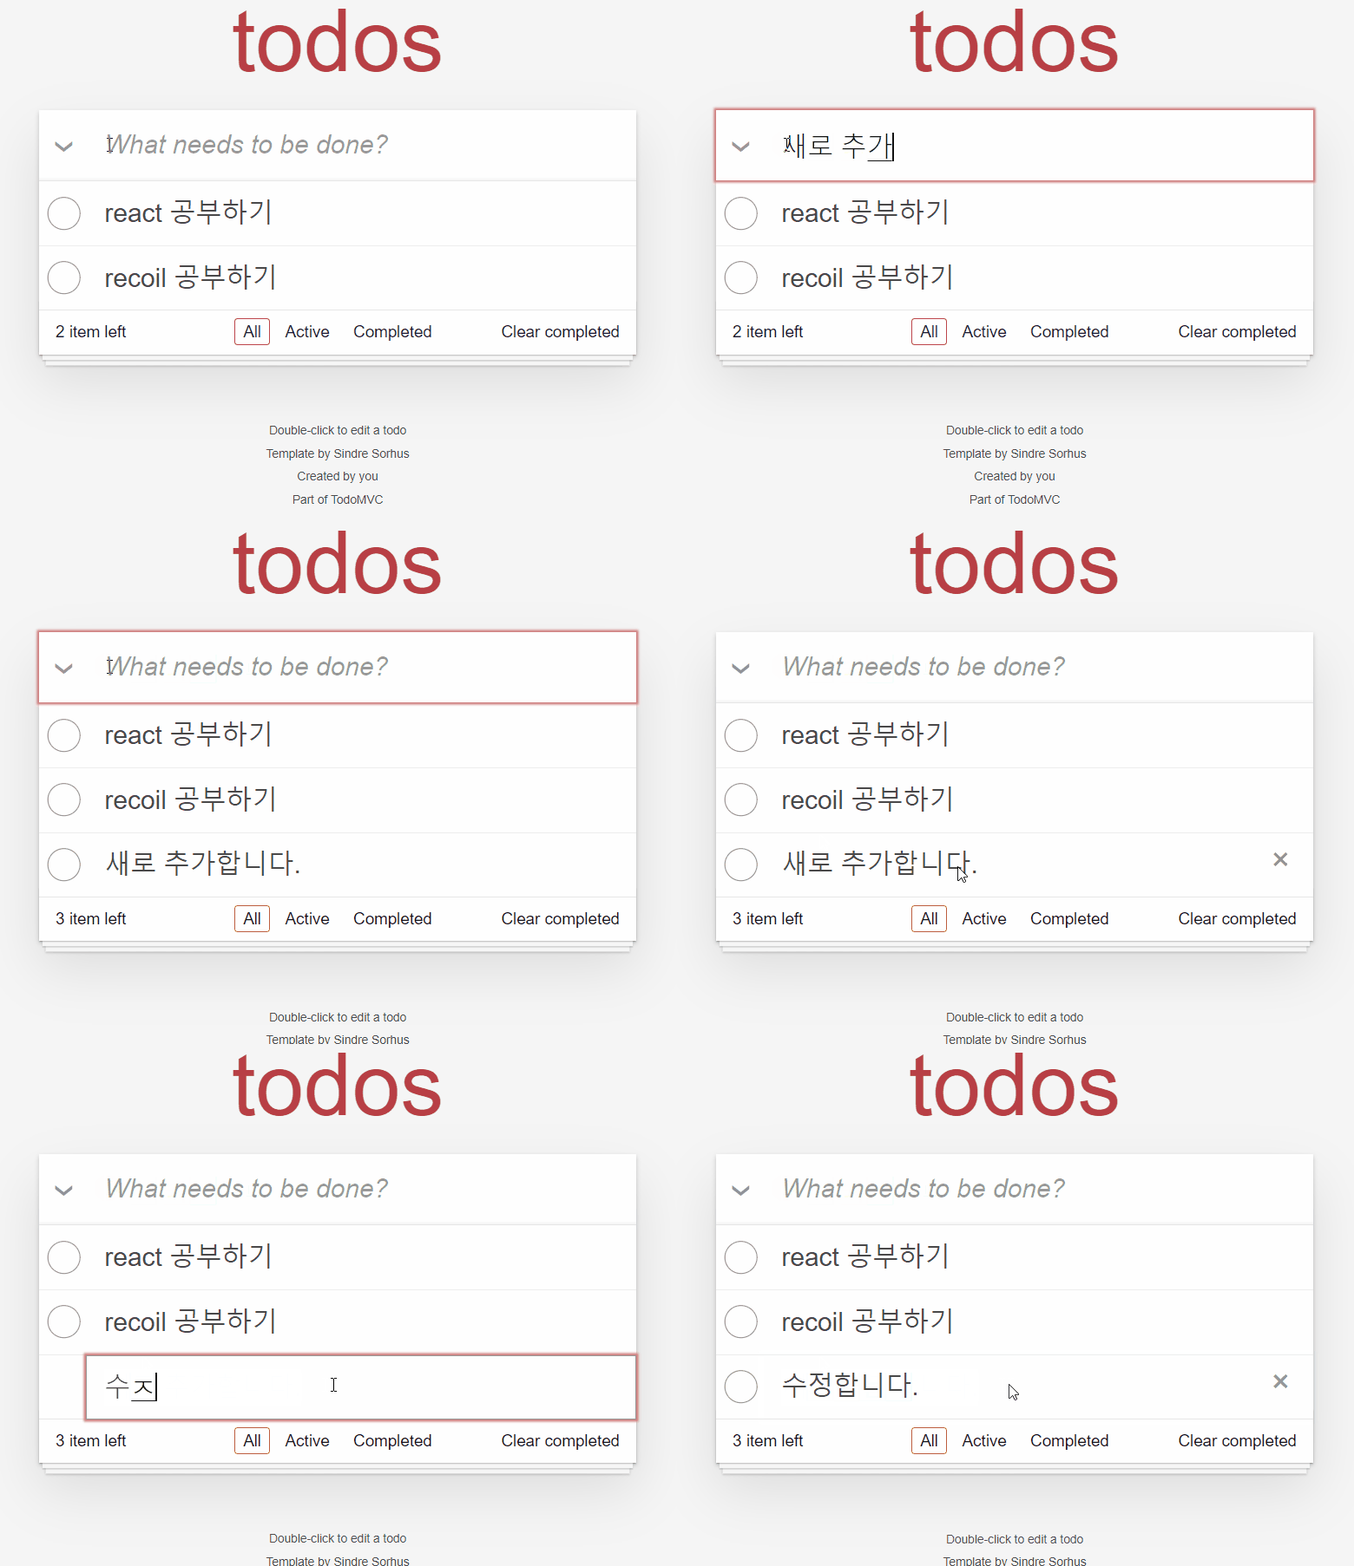
최종 동작은 아래와 같습니다.
마치며
이번 포스팅 시리즈에서는 recoil의 아주 기본적인 기능들(그러나 핵심적인 기능들)을 알아보았습니다. 더불어 react hook도 알아보았습니다. react hook은 기존 클래스 컴포넌트를 어느 정도 알고 계신 분이라면, 쉽게 사용할 수 있을 정도로 간결한 API인 것 같습니다. 물론 이를 활용하여 예쁜 코드를 만드는 것은 아무래도 어려운 일이겠죠..
다음 포스팅 시리즈는 새로운(?) redux API인 Redux Toolkit을 이용하여 TodoApp을 만들어 보겠습니다.
그럼, 다음 시리즈에서 만나요~
(전체 코드는 요기에서 확인하실 수 있습니다.)
