Anntation 장점 및 @Autowired DI
Annotation
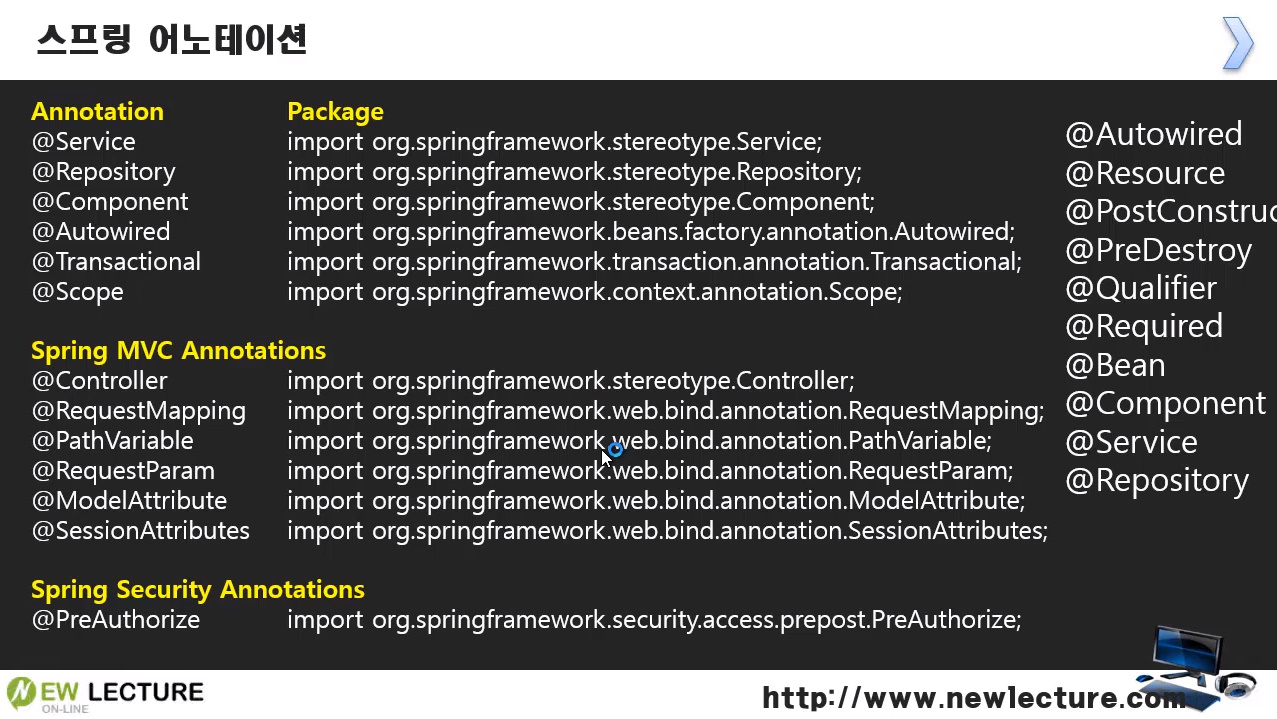
어노테이션은 스프링에서 xml을 통해 DI 설정을 하는 방법에서 더 발전된 방법으로 등장하게 되었고 최신 트렌트화 되었다. 다음과 같이 다양한 어노테이션이 존재한다.
Annotation 장점
xml로 설정할 시 아래와 같이 bean 태그에 작성하여 외부 설정 파일로써 내부 소스코드를 수정하지 않고도 모듈을 결합시킬 수 있었다.
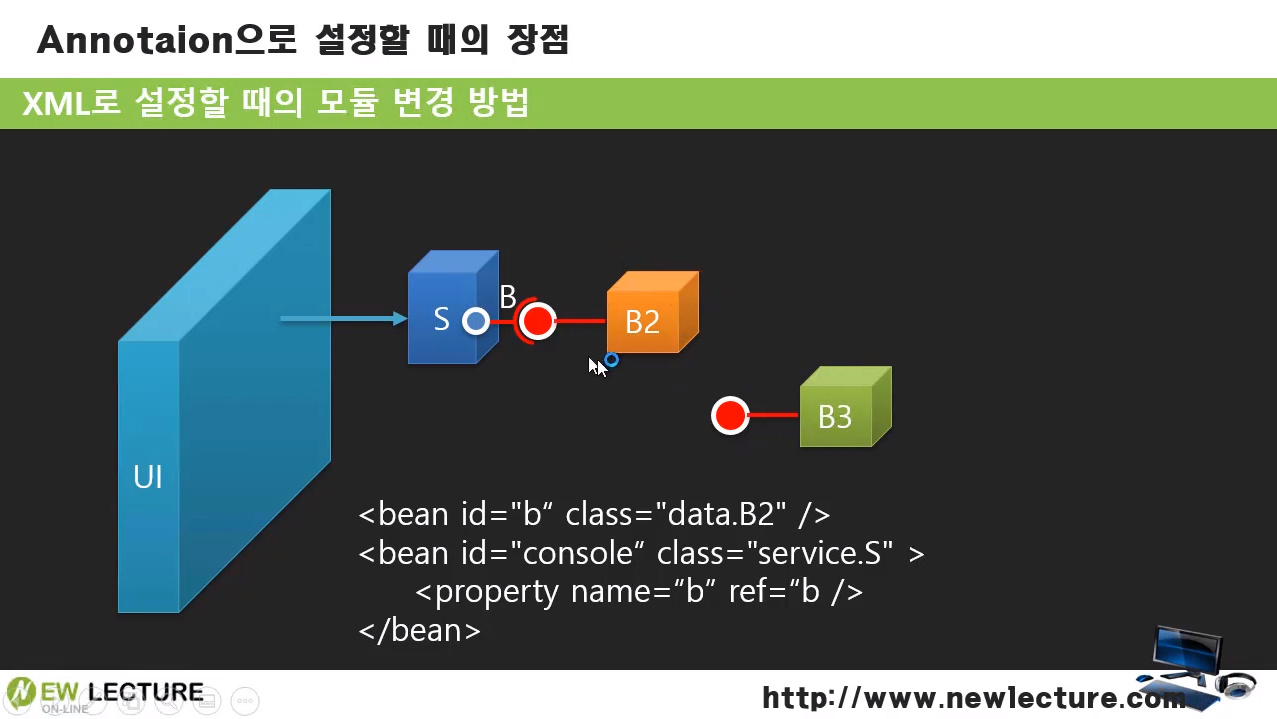
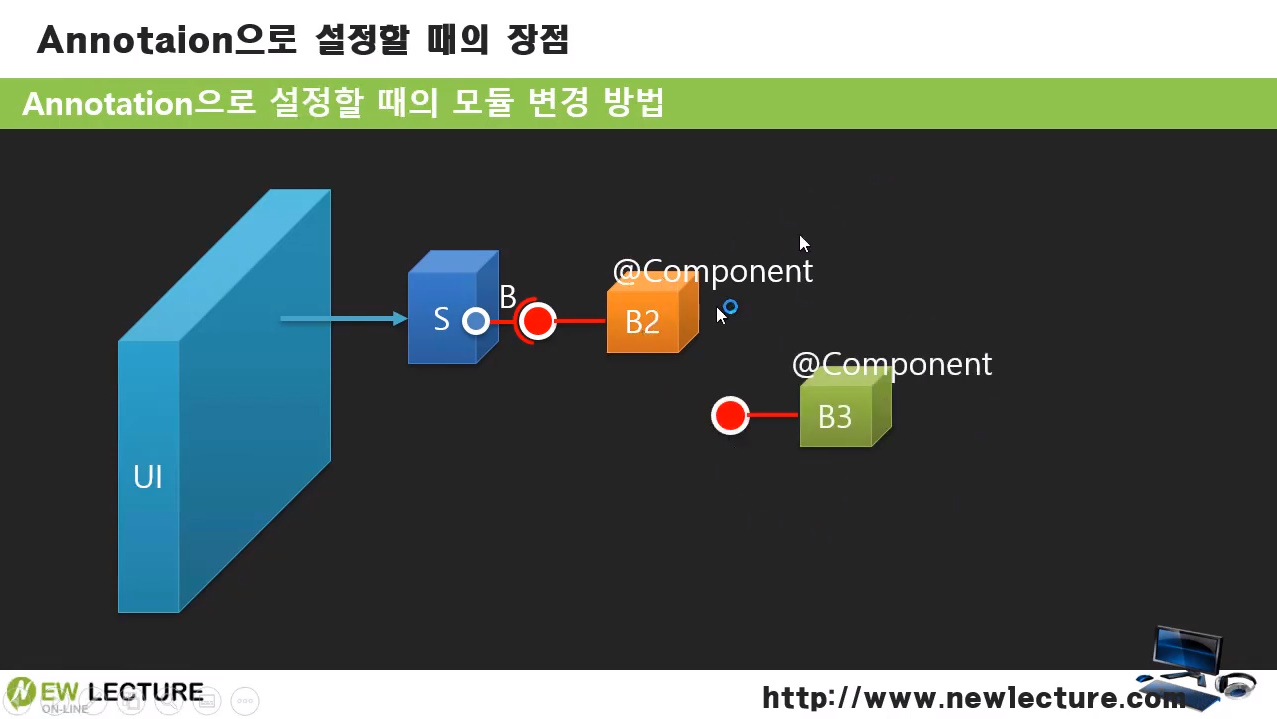
하지만 설정파일 조차 수정해야하는 불편함이 존재했고 이를 소스코드 내에 특별한 표기로써 모듈이 변경됨을 알리게 되었다.

그것이 Annotation이며 xml파일 없이 @표기와 함께 표기만 하면 간단히 대체되는 것을 알릴 수 있다.
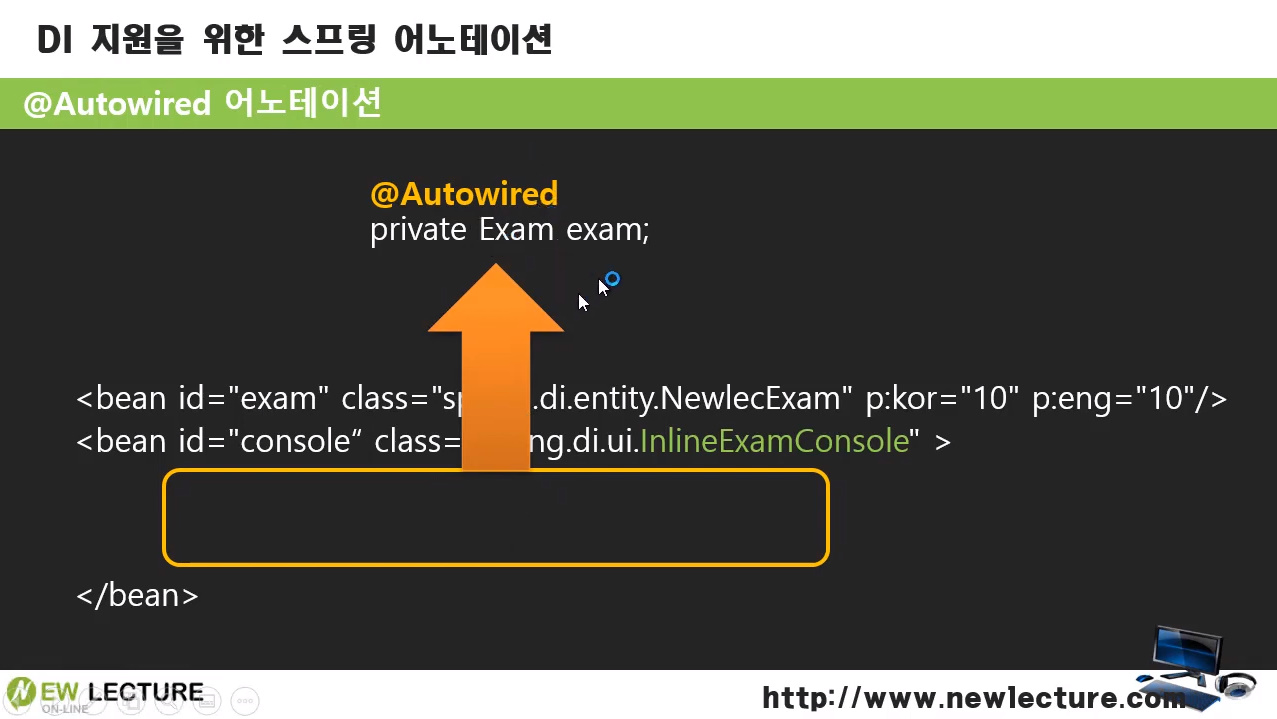
@Autowired를 이용한 DI
이번에는 setter를 통한 DI 부분을 먼저 @Autowired를 이용해 DI를 치환한다.
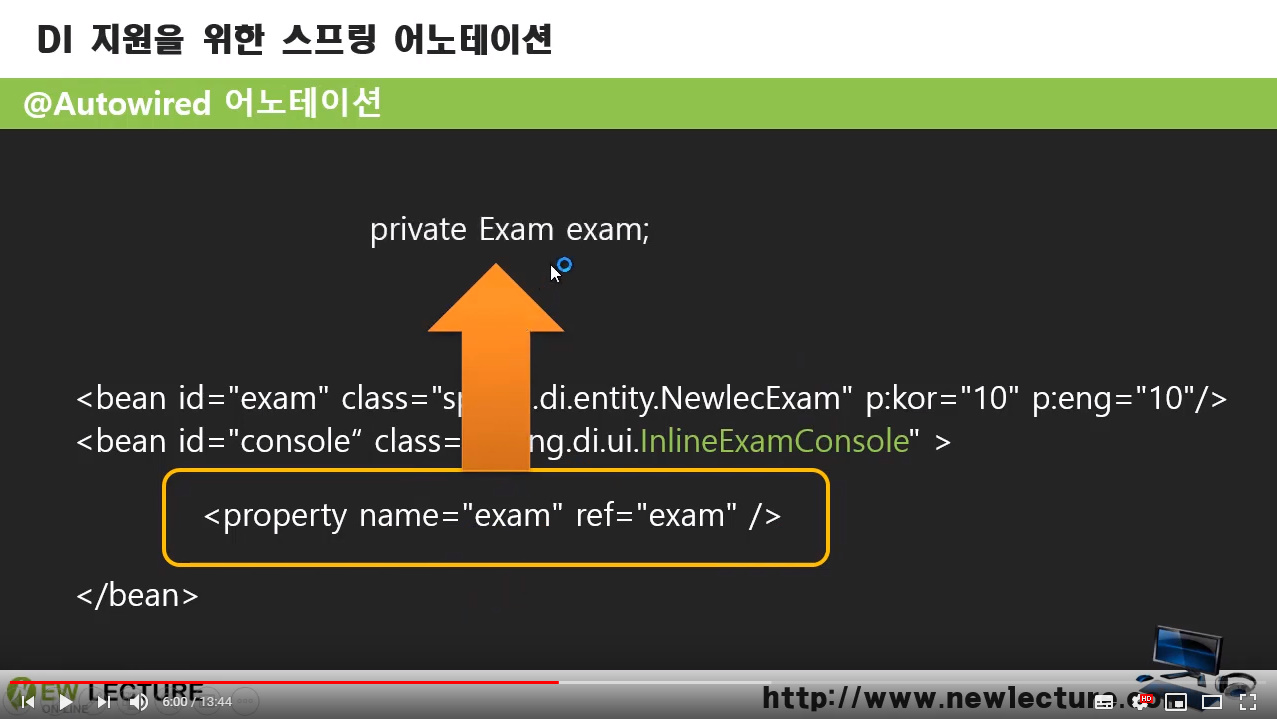
위와 같은 부분을 치환할 때 해당 소스코드위에 @Autowired만 입력하면 xml 상의 내용을 지워도 동일하게 작동한다.
지난 시간의 xml 내용 중 setter DI에 관련된 다음과 같은 내용이 있다.
<!-- ExamConsole console = new GridExamConsole(); -->
	<bean id="console" class="spring.di.ui.InlineExamConsole">
		<!-- console.setExam(exam); -->
		<property name="exam" ref="exam"></property>
	</bean>
setterdp에 관한 내용을 주석처리하고 실행해보면 당연히 NullPointerException이 발생한다.
		ApplicationContext context =
				new ClassPathXmlApplicationContext("spring/di/setting.xml");

		Exam exam = context.getBean(Exam.class);
		System.out.println(exam.toString());

		ExamConsole console = (ExamConsole) context.getBean("console");
//		ExamConsole console = context.getBean(ExamConsole.class);
		console.print();
setter에 관한 내용이 있는 InlineExamConsole에 가서 @Autowired를 작성한다.
	@Autowired
	@Override
	public void setExam(Exam exam) {
		this.exam = exam;
	}
이후 xml에서 autowired된 내용을 찾으라고 지시하는 처리기를 추가해주는데 namespace에 context를 체크하면 추가가 된다. 그리고 아래에 다음과 같은 내용을 작성한다.
<context:annotation-config/>그러면 이제 스프링은 xml에 설정된 파일에 annotation이 있는지를 찾게된다.

logos and alogos