17. Annotation Configuration
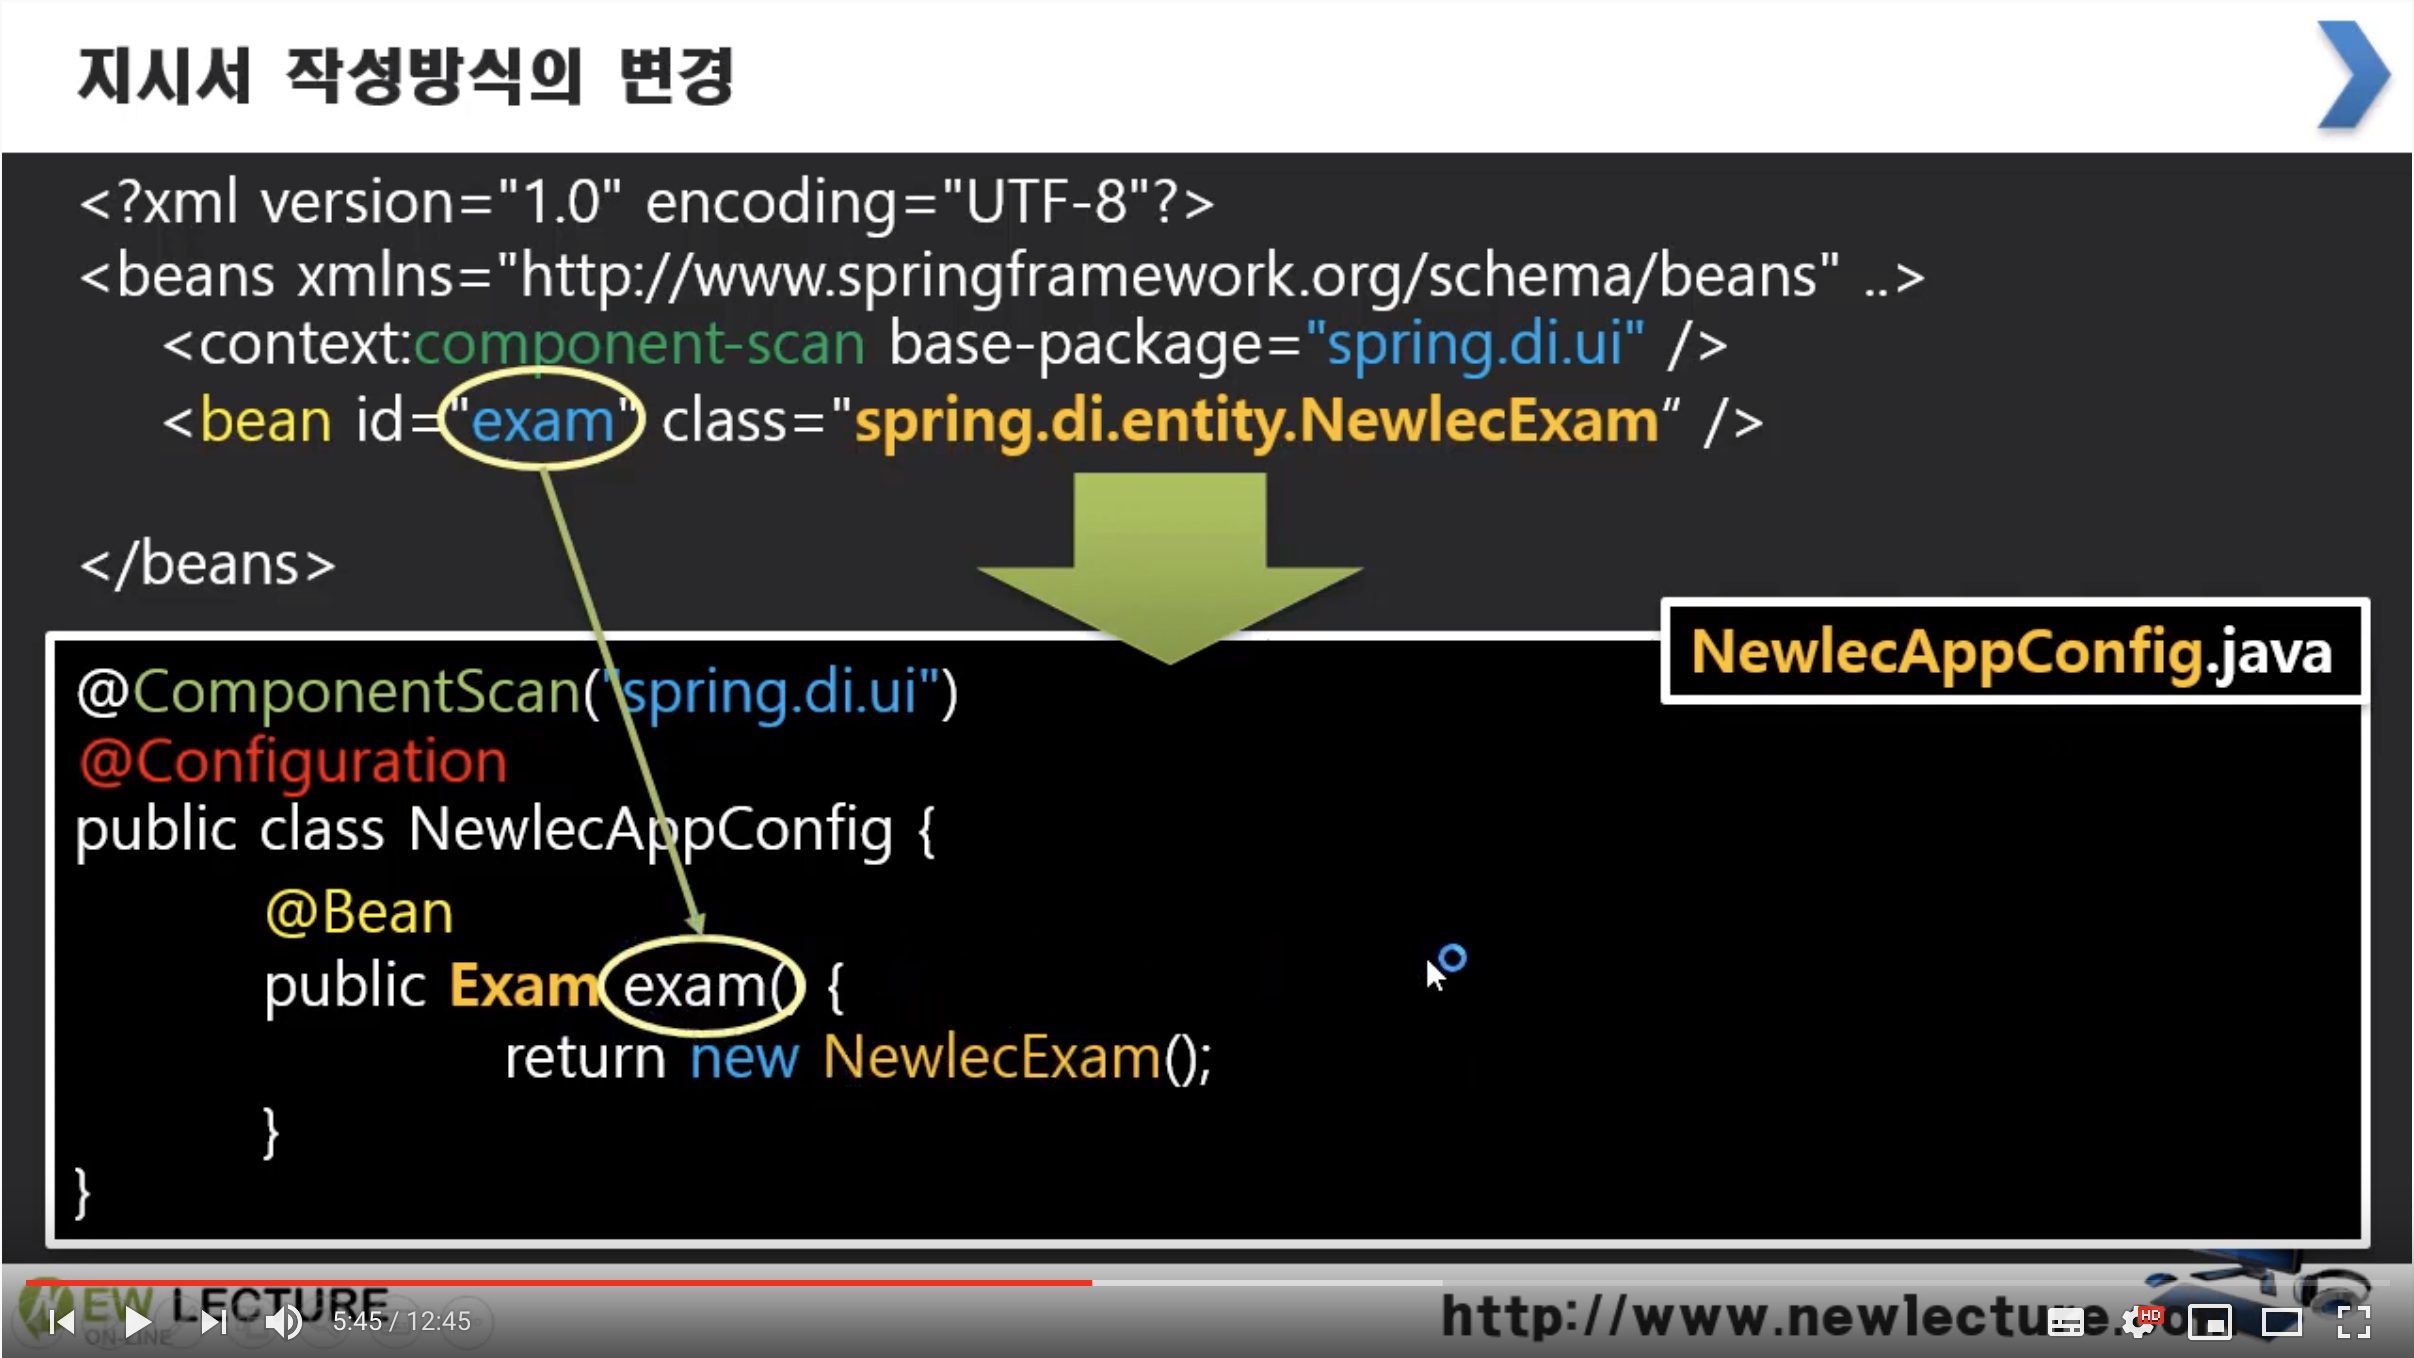
XML Config를 Annotation Config로 변경
이제 xml 설정 대신 Annotation만으로 설정하는 방법을 알아본다. xml 내용은 다음과 같이 Config 파일을 생성해 치환할 수 있겠다. 특히 객체 생성하는 @Bean의 경우 스프링이 아닌 개발자가 생성하는 모양새인데 이는 스프링이 IoC Container에 포함시키는 역할을 수행한다. (결국 생성된 객체를 스프링이 가져가서 작업에 활용)

exam()을 동사형태의 메소드로 보지말고 명사형태의 id로 보자
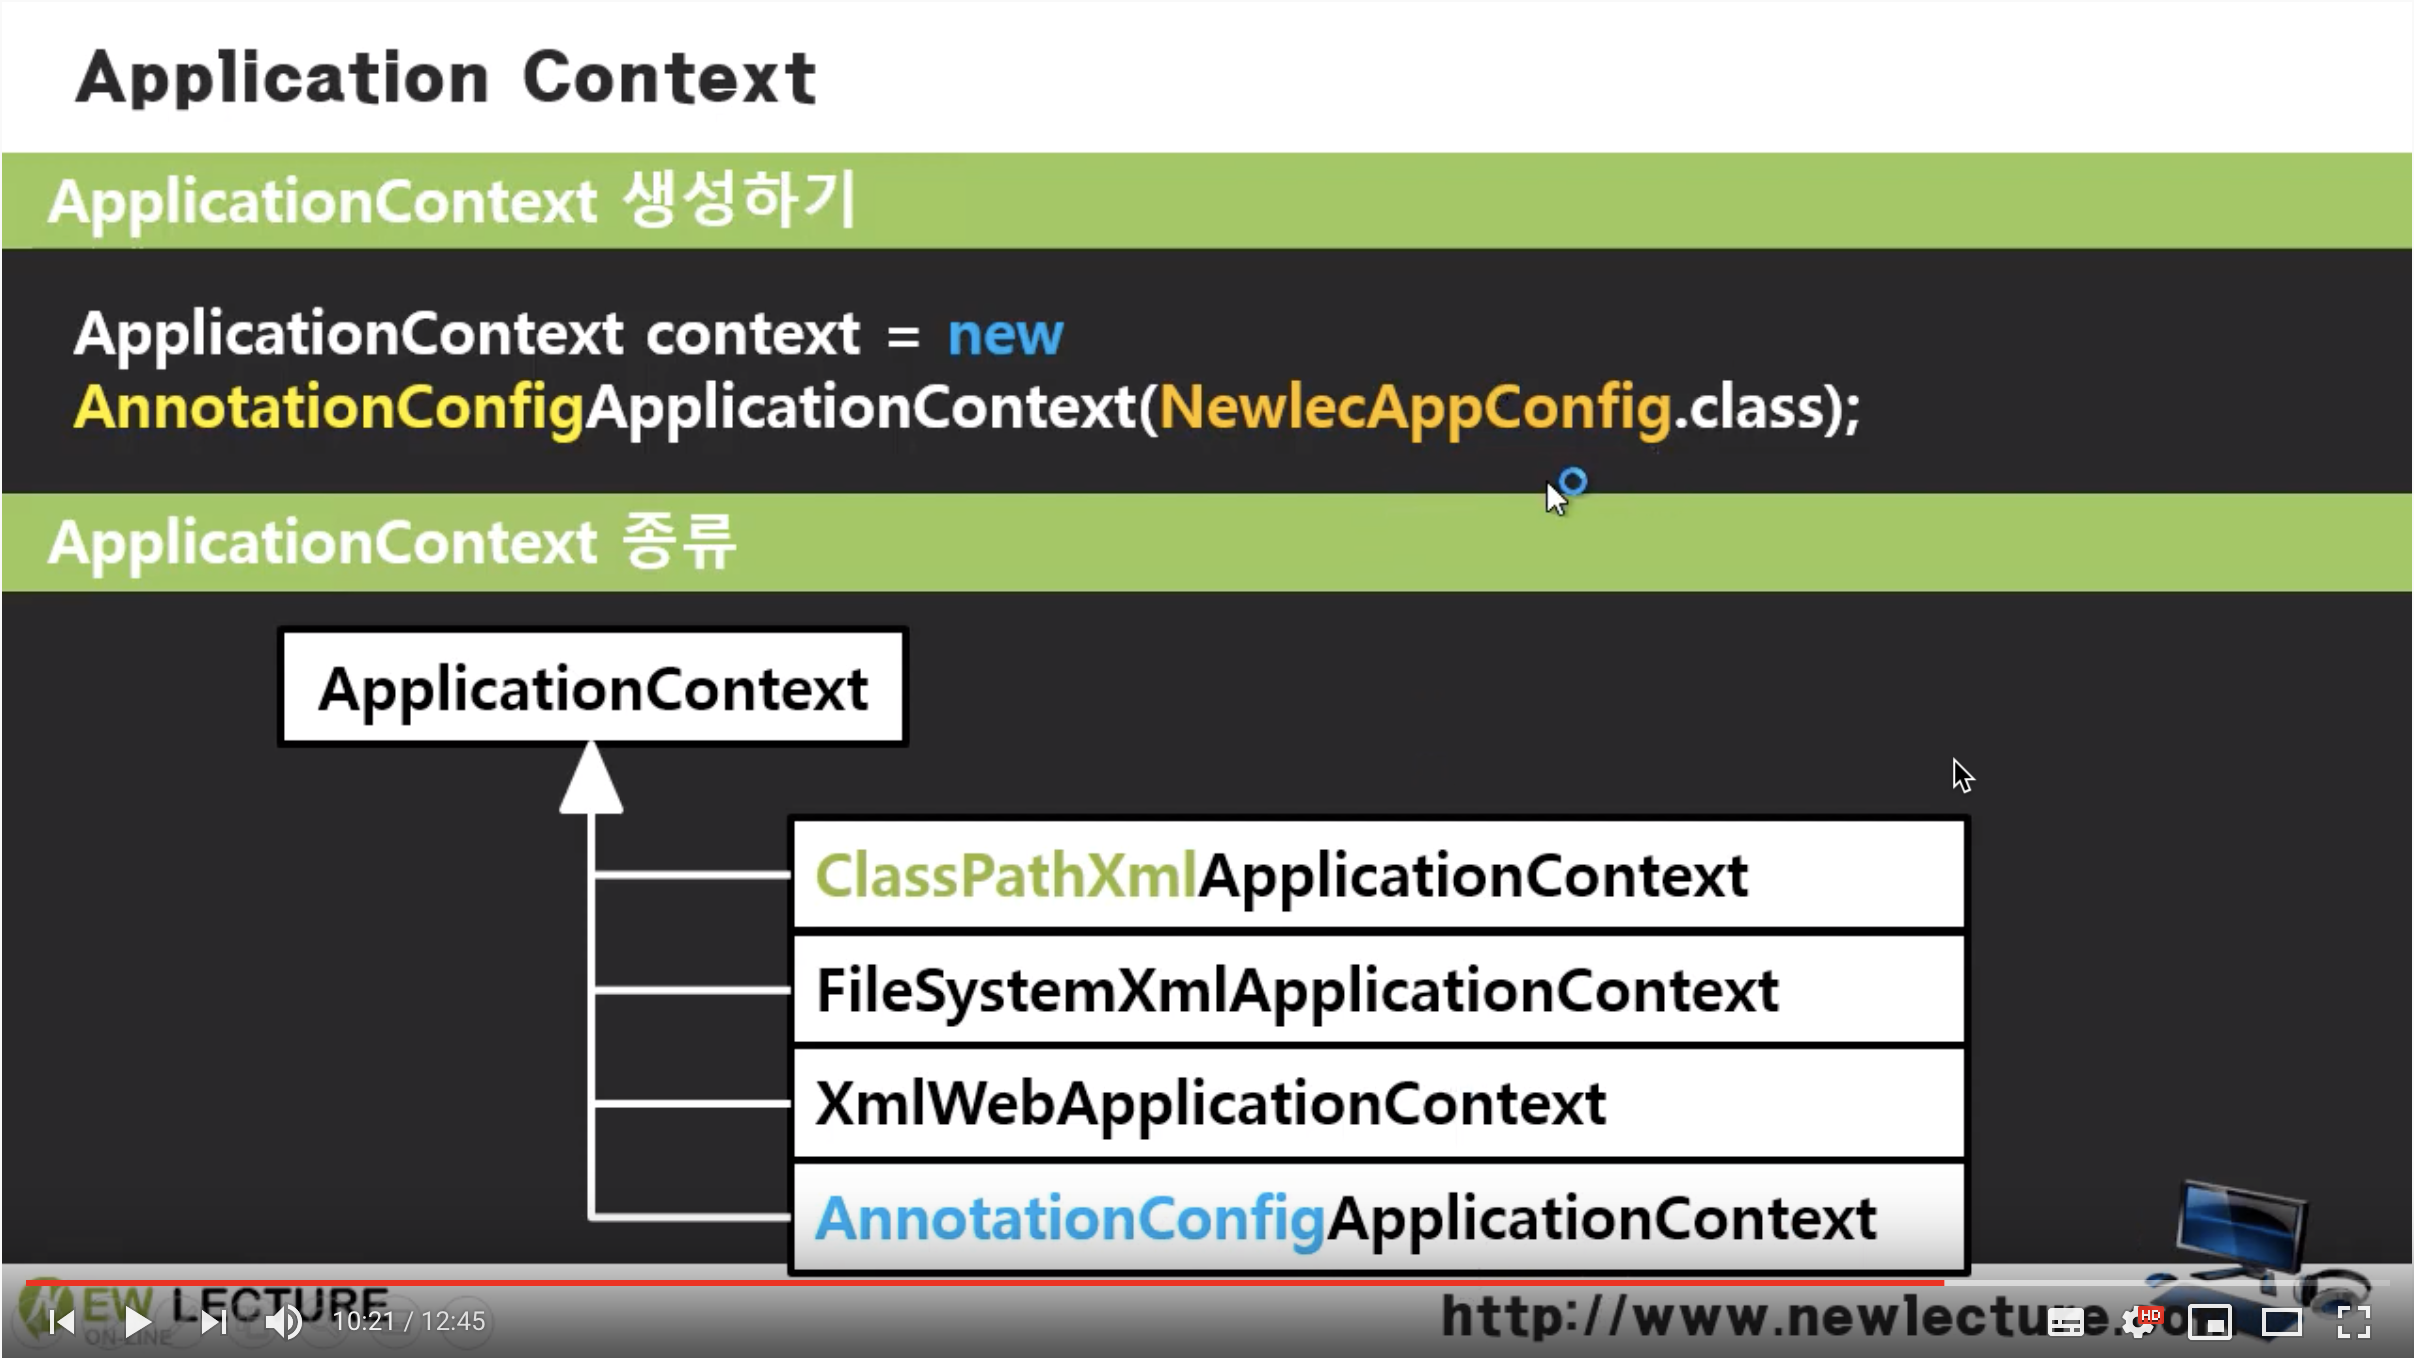
생성한 Config 파일을 사용하기위해 ClassPathXmlApplicationContext 클래스 대신 AnnotationConfigApplicationContext를 사용한다.

NewlecDIConfig.java
package spring.di;

import org.springframework.context.annotation.Bean;
import org.springframework.context.annotation.ComponentScan;
import org.springframework.context.annotation.Configuration;

import spring.di.entity.Exam;
import spring.di.entity.NewlecExam;

@Configuration
@ComponentScan("spring.di.ui")
public class NewlecDIConfig {

	@Bean
	public Exam exam() {
		return new NewlecExam();
	}
}
Program.java
package spring.di;

import org.springframework.context.ApplicationContext;
import org.springframework.context.annotation.AnnotationConfigApplicationContext;

import spring.di.ui.ExamConsole;

public class Program {

	public static void main(String[] args) {

		ApplicationContext context =
				new AnnotationConfigApplicationContext(NewlecDIConfig.class);

		ExamConsole console = (ExamConsole) context.getBean("console");
		console.print();

	}

}
추가적으로 여러 설정 파일이 있을 경우 이들을 한번에 등록하여 사용할 수도 있다. (register(, ) 메소드 사용)

