ViewModel(livedata) 이해하기
ViewModel(stateFlow)이해하기
flow를 이해하기 전에 livedata를 먼저 학습하면 이해가 쉽다.
Flow의 이해
async + reactive
flow - 기본, 베이스(상태를 가지고 있지 않다)
stateFlow - .value로 마지막 값을 알 수 있음(상태를 가지고 있다.)
sharedFlow - 연결되어 있으면서 데이터를 계속 보낼 수 있음(상태를 가지고 있지 않다)
callbackFlow - 람다 콜백 - > flow로 만들어 줌
지난번에 stateFlow를 활용하여 .value로 상태를 가지고 있었다.
sharedFlow와 callbackFlow의 활용법을 예제를 통해 알아보자.
Xml파일(동일)
<?xml version="1.0" encoding="utf-8"?>
<androidx.constraintlayout.widget.ConstraintLayout xmlns:android="http://schemas.android.com/apk/res/android"
    xmlns:app="http://schemas.android.com/apk/res-auto"
    xmlns:tools="http://schemas.android.com/tools"
    android:layout_width="match_parent"
    android:layout_height="match_parent"
    tools:context=".MainActivity"
    android:paddingHorizontal="10dp"
    >

    <TextView
        android:id="@+id/number_textview"
        android:layout_width="wrap_content"
        android:layout_height="wrap_content"
        android:text="0"
        android:textSize="30dp"
        app:layout_constraintBottom_toBottomOf="parent"
        app:layout_constraintLeft_toLeftOf="parent"
        app:layout_constraintRight_toRightOf="parent"
        app:layout_constraintTop_toTopOf="parent" />

    <EditText
        android:id="@+id/number_input_edittext"
        android:layout_width="0dp"
        android:layout_height="wrap_content"
        android:inputType="number"
        app:layout_constraintHorizontal_weight="1"
        app:layout_constraintEnd_toStartOf="@+id/plus_btn"
        app:layout_constraintStart_toStartOf="parent"
        app:layout_constraintTop_toBottomOf="@+id/number_textview"
        android:layout_marginTop="30dp"
        />

    <Button
        android:id="@+id/plus_btn"
        android:layout_width="wrap_content"
        android:layout_height="wrap_content"
        android:text="더하기"
        app:layout_constraintEnd_toStartOf="@+id/minus_btn"
        app:layout_constraintStart_toEndOf="@+id/number_input_edittext"
        app:layout_constraintTop_toTopOf="@+id/number_input_edittext"
        android:layout_marginHorizontal="10dp"
        />

    <Button
        android:id="@+id/minus_btn"
        android:layout_width="wrap_content"
        android:layout_height="wrap_content"
        android:text="빼기"
        app:layout_constraintEnd_toEndOf="parent"
        app:layout_constraintStart_toEndOf="@+id/plus_btn"
        app:layout_constraintTop_toTopOf="@+id/number_input_edittext" />


</androidx.constraintlayout.widget.ConstraintLayout>
ViewModel
enum class ActionType {
    PLUS, MINUS
}

//데이터의 변경
// 뷰모델은 데이터의 변경사항을 아렬주는 라이브 데이터를 가지고있다.

class MyNumberViewModel(
    private val coroutineScope: CoroutineScope =
    //SupervisorJob(): SupervisorJob은 부모-자식 관계의 코루틴 설정
    // 만약 자식 코루틴 중 하나가 실패시, 다른 자식 코루틴은 영향을 받지 않고 계속 실행.
        CoroutineScope((SupervisorJob() + Dispatchers.Main.immediate))
) : ViewModel() {

    //mutablelivedata - 수정 가능
    //livedata - 값 변경X

    //내부에서 설정하는 변경가능한 자료형은 Mutable로
    private val _currentValue = MutableStateFlow<Int>(0)

    //변경되지 않는 데이터를 가져올 때 이름을 _ 언더스코어 없이 설정
    // 공개적으로 가져오는 변수는 private가 아닌 퍼블릭으로 외부에서도 접근 가능하도록 설정
    // 하지만 값을 직접 라이브 데ㅣㅇ터에 접근하지 않고 뷰모델을 통해 가져올 수 있도록 설정
    val currentValue: StateFlow<Int> = _currentValue

    //사용자의 입력값
    private val _currentUserInput = MutableStateFlow<String>("")

    val currentUserData: StateFlow<String> = _currentUserInput
// 값을 계속 유지하지 않는 SharedFlow
    private val _inputErrorEvent = MutableSharedFlow<String>()
    val inputErrorEvent: SharedFlow<String> = _inputErrorEvent

    //ViewModel이 시작될 때 초기값 설정
    init {
        Log.d("ViewModel", "nyh 생성자 호출")
        _currentValue.value = 0
    }

    //Extensions에서 생성한 textChagnesToflow를 editText에 적용시킨다.
    fun bindUserInputEditText(editText: EditText) {
        viewModelScope.launch {
            editText.textChangesToFlow()
                .collect {
                    _currentUserInput.value = it.toString()
                }
        }
    }

    suspend fun updateValue(actionType: ActionType, input: Int) {

        if (input < 1) {
            _inputErrorEvent.emit("숫자는 0보다 커야 합니다.")
            return
        }


        when (actionType) {
            ActionType.PLUS -> {
                _currentValue.emit(_currentValue.value + input)
            }

            ActionType.MINUS -> {
                _currentValue.emit(_currentValue.value - input)
            }
        }
        _currentUserInput.value = ""
        Log.d("updateVal", "nyh 초기화")
    }

    override fun onCleared() {
        coroutineScope.cancel()
    }
}- _inputErrorEvent에서 SharedFlow를 이용해 선언 해 주고
- suspend fun updateValue 함수를 생성해 inputdata값을 emit하고 지켜본 후 0보다 작으면 return한다.
- 아래 작성한 Extension에서 EditText를 callbackFlow - 람다 콜백 - > flow로 만들어 준 뒤 fun bindUserInputEditText로 ViewModel에 정의 하여 Activity에서는 View를 감지하게만 한다.
Extension.kt
package com.dreamteam.viewmodel_tutorial

import android.text.Editable
import android.text.TextWatcher
import android.util.Log
import android.widget.EditText
import kotlinx.coroutines.channels.awaitClose
import kotlinx.coroutines.flow.Flow
import kotlinx.coroutines.flow.callbackFlow
import kotlinx.coroutines.flow.onStart

// EditText 텍스트 변경을 flow로 받기
fun EditText.textChangesToFlow(): Flow<CharSequence?> {

    //flow 콜백 받기
    return callbackFlow<CharSequence> {
        val listener = object : TextWatcher{
            override fun beforeTextChanged(p0: CharSequence?, p1: Int, p2: Int, p3: Int) = Unit

            override fun afterTextChanged(p0: Editable?) {
                Unit
            }

            override fun onTextChanged(p0: CharSequence?, p1: Int, p2: Int, p3: Int) {
                Log.d("TextChagned","nyh textFlow()에 텍스트")
                //값 내보내기
                trySend(text).isSuccess
            }
        }
        //위에서 설정한 리스너 달아주기
        addTextChangedListener(listener)

        //콜백이 사라질 때 실행
        awaitClose {
            Log.d("Close","textChagedToflow() / awaitClose 실행")
            removeTextChangedListener(listener)
        }
    }//onstart는 없어도됨
     .onStart {
        Log.d("onStart", "textChangesToflow() / onStart 실행")
        // Rx 에서 onNext와 동일

        //emit으로 이벤트 전달
        emit(text)
    }
}- EditText 람다 - > flow로 만들어 줌 주석으로 설명을 달아놨다.
Activity
class MainActivity : AppCompatActivity() {

    lateinit var myNumberViewModel: MyNumberViewModel
    private val binding by lazy { ActivityMainBinding.inflate(layoutInflater) }
    override fun onCreate(savedInstanceState: Bundle?) {
        super.onCreate(savedInstanceState)
        setContentView(binding.root)

        myNumberViewModel = ViewModelProvider(this).get(MyNumberViewModel::class.java)

        lifecycleScope.launch {
            binding.plusBtn.setOnClickListener { view ->
                handleButtonClick(view)
            }

            binding.minusBtn.setOnClickListener { view ->
                handleButtonClick(view)
            }
        }
        lifecycleScope.launch {
            lifecycle.repeatOnLifecycle(Lifecycle.State.STARTED) {
                launch {
                    try {
                        myNumberViewModel.currentValue.collect {
                            Log.d("lifeScope", "nyh suc $it")
                            binding.numberTextview.text = it.toString()
                        }
                    } catch (e: Throwable) {
                        Log.d("lifeScope", "nyh fail")
                    }

                }
//                launch {
//                    myNumberViewModel.currentUserData.collect {
//                        Log.d("lifeScope", "nyh currentUserData의 값은 $it")
//                        binding.numberInputEdittext.setText(it)
//                    }
//                }
                launch {
                    myNumberViewModel.inputErrorEvent.collect{
                        Log.d("error", "nyh suc $it")
                        Toast.makeText(this@MainActivity, it, Toast.LENGTH_SHORT).show()
                    }
                }

                //여기서 launch로 처리할 수 도 있다.
//                launch {
//                    binding.numberInputEdittext
//                        .textChangesToFlow()
//                        .collect{ input ->
//                        Log.d("lifeScope", "nyh text $input")
//                    }
//                }
            }
        }

        //위 주석처리된 launch부분을 Extensions와 ViewModel로 옮겨 처리한다.
        myNumberViewModel.bindUserInputEditText(binding.numberInputEdittext)
    }

    //클릭
    private fun handleButtonClick(view: View?) {
        val userInputString = binding.numberInputEdittext.text.toString()
        if (userInputString.isEmpty()) {
            // 무효한 입력 처리
            return
        }
        val userInputNumber = userInputString.toInt()

        lifecycleScope.launch {
            when (view) {
                binding.plusBtn -> {
                    myNumberViewModel.updateValue(actionType = ActionType.PLUS, userInputNumber)
                }
                binding.minusBtn -> {
                    myNumberViewModel.updateValue(actionType = ActionType.MINUS, userInputNumber)
                }
            }
        }
    }
}- lifecycleScope.launch로 길게 나열된 것을 myNumberViewModel.bindUserInputEditText(binding.numberInputEdittext) 한줄로 정리한다.
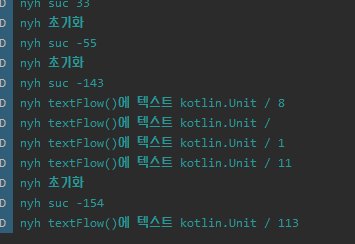
- EditText의 Flow에 emit하여 변화할 때마다 찍히는 Log를 확인할 수 있다.

안드로이드 주니어 개발자
설명 잘되어있어서 참조해서 학습하기 좋은 것 같아요😎