이때까지 우리는 데이터베이스 세팅을 위한 각 작업을 처리할 때
(1) sequelize 객체를 사용해서 코드상으로 각 작업을 처리하는 방법
(2) sequelize-cli 명령을 사용해서 migration 파일과, seed 파일들을 생성하고 그 안에 필요한 내용을 채워넣은 후, 명령어를 실행해서 각 작업을 처리하는 방법
이 2가지가 있다는 것을 알게 되었다. 그런데 이제 실제로 서버가 데이터베이스에 데이터를 삽입하고, 데이터를 조회, 수정, 삭제할 때는 코드로 작동을 해야할 것이다. 그렇다면 (2)의 방법으로 세팅된 데이터베이스에는 어떻게 접근할 수 있을까?
그냥 별다른 차이는 없다. (1)의 방법을 사용할 때는 app.js 파일을 보면
const db = require('./models/index.js');

const sequelize = db.sequelize;
const Student = db.Student;

(async () => {
  await sequelize.sync({ force: true });
})();
이렇게 sequelize 객체의 sync 메소드를 호출해줘야했다. 하지만 이미 sequelize-cli 명령어를 사용해서 세팅을 마친 데이터베이스의 경우 저 sync 메소드를 호출하면 안 된다. 그럼 (1)의 방법에서 코드로 작성했던 세팅 작업을 다시 그대로 수행하고 이때 { force: true } 옵션 때문에 기존 테이블을 삭제하고 재생성해서 seed 데이터가 날아가버린다. 따라서
그냥
const db = require('./models/index.js');

const sequelize = db.sequelize;
const Student = db.Student;

(async () => {
  // await sequelize.sync({ alter: true });
  const students = await Student.findAll();
  students.forEach((student) => {
    console.log(student.name);
  });
})();
바로 어떤 작업을 해주면 된다. 참고로 findAll은 모든 row들을 조회하는 메소드이다. 다만, 주의할 것은 현재 테이블에 있는 컬럼들을 모두 잘 인식할 수 있도록

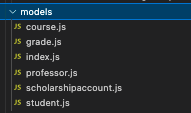
models 디렉토리 안에 있는 각 파일들이 테이블의 컬럼들을 모두 잘 선언하고 있는지(id, createdAt, updatedAt 컬럼은 예외)만 체크해주면 된다. 위의 코드를 실행하면

이렇게 각 학생들의 이름이 잘 출력되지만 models/Student.js 파일에서 만약
'use strict';
const { Model } = require('sequelize');
module.exports = (sequelize, DataTypes) => {
 class Student extends Model {
   /**
    * Helper method for defining associations.
    * This method is not a part of Sequelize lifecycle.
    * The `models/index` file will call this method automatically.
    */
   static associate(models) {
     Student.hasOne(models.ScholarshipAccount);
     Student.belongsToMany(models.Course, { through: models.Grade });
   }
 }
 Student.init(
   {
     registrationNum: DataTypes.STRING,
     // name: DataTypes.STRING, //
     age: DataTypes.INTEGER,
   },
   {
     sequelize,
     modelName: 'Student',
   }
 );
 return Student;
};
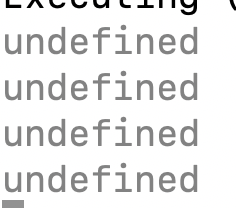
name 부분을 주석 처리하고, 다시 실행하면

이렇게 undefined들이 출력된다. 모델을 초기화할 때 속성(컬럼)을 빠뜨리지 않고 해줘야 해당 객체가 테이블의 모든 컬럼을 문제없이 인식할 수 있는 것이다.
