입력 크기에 맞춰 늘어나는 textarea만들기
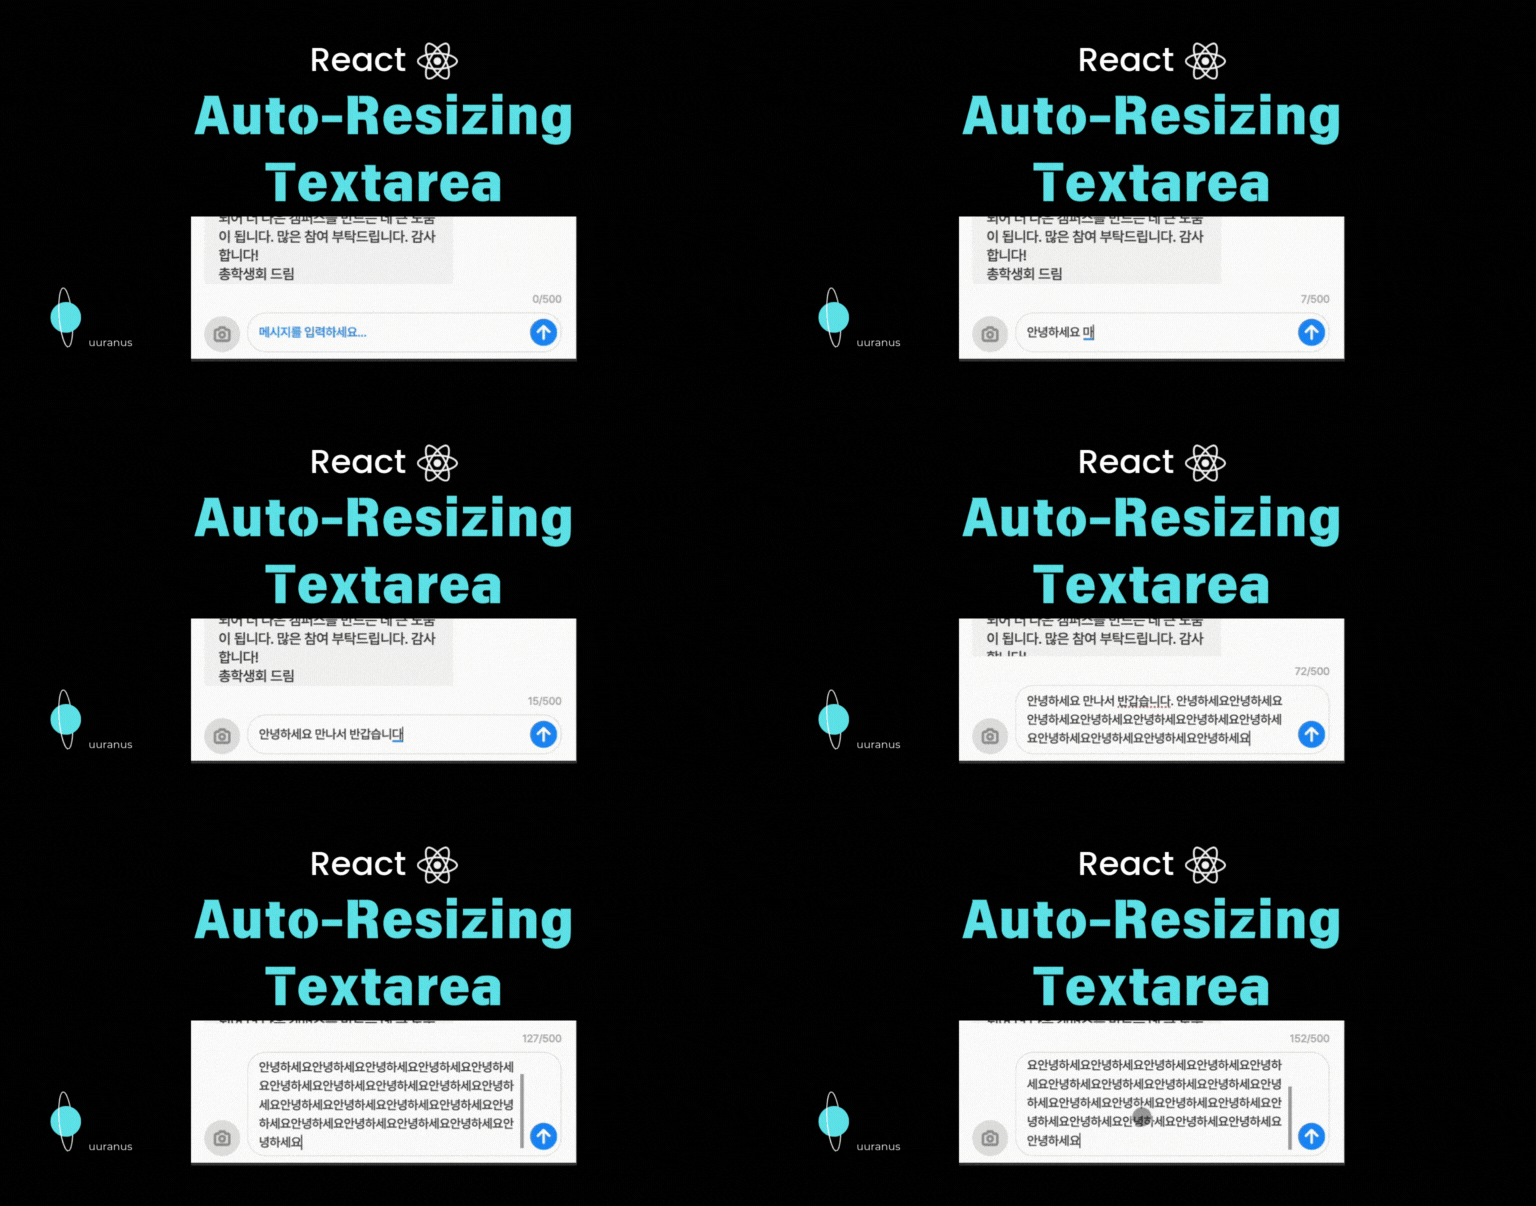
textarea 입력 사이즈에 맞추기
- textarea는 한 줄로만 입력할 수 있는 input과 달리 여러줄을 입력받을 수 있는 태그이다.
- 그러나 여러줄을 입력해도 스크롤이 생길 뿐 칸이 입력 크기에 맞춰 늘어나지 않는다.
- 입력 크기에 맞춰서 자동으로 높이를 늘리기 위해 사용자가 입력을 할 때마다 높이를 계산한다.
const handleTextInput = (newMessage: string) => {
  handleResizeHeight();
  //...
};

const handleResizeHeight = () => {
  textArea.current.style.height = 'auto';
  let scrollHeight = textArea.current.scrollHeight;

  if (scrollHeight >= maxTextInputHeight) {
    scrollHeight = maxTextInputHeight;
  }

  textArea.current.style.height = `${scrollHeight}px`;
};

<TextFieldInput
  value={textDisabled ? '' : message}
  onChange={(e) => handleTextInput(e.target.value)}
/>
- scrollHeight로 높이를 측정하고 max를 넘어가면 그 이후부터는 더 커지지 않고 스크롤이 되도록 하였다.
- scrollHeight
- 실제 내용이 차지하는 총 높이
- 스크롤이 가능한 영역까지의 높이다. (overflow: hidden 으로 가져진 부분까지 다)
- vs clientHeight
- 화면으로 가려진 부분을 제외한 높이만 제공한다.
- 즉, 현재 보이는 부분만 측정한다.
초기 사이즈 줄이기
- 이렇게 입력을 할 때마다 계산을 해도 초기에 항상 2줄 정도의 높이가 측정된다.
- 이는 textarea의 기본 줄 개수가 2개이기 때문에 그런 것이다.
- rows 속성을 1로 변경해주면 줄일 수 있는데 처음에는 이 속성이 css 속성인 줄 알고 style에 넣었다.
- 그러나
- 계속 없는 속성값이라고 나오는데 블로그나 인터넷에서는 rows가 있다고 해서 헤맸었다.
- 결론은
<TextFieldInput
  rows={1}
  ...
/>- css 속성이 아니라 html attribute이기 때문에 attribute에다 넣어줘야 한다.
DOM에 접근하기
- 렌더링이 된 이후에 측정된 scrollHeight를 얻고 height를 바꾸기 위해서 textarea에 렌더링 이후 접근을 해야 한다.
const textAreaRef = useRef<HTMLTextAreaElement>(null);

<TextFieldInput
  rows={1}
  ref={textAreaRef}
  value={message}
  onChange={(e) => handleTextInput(e.target.value)}
/>-
useRef를 이용해서 textarea를 가지고 있는다.
- useRef는 값이 업데이트 되어도 재렌더링이 되지 않는다.
-
그리고 textAreaRef의 초기값이 null이기 때문에
const handleResizeHeight = () => {
  if (textAreaRef.current) {
    textAreaRef.current.style.height = 'auto';

    let scrollHeight = textAreaRef.current.scrollHeight;
    if (scrollHeight >= maxTextInputHeight) {
      scrollHeight = maxTextInputHeight;
    }

    textAreaRef.current.style.height = `${scrollHeight}px`;
  }
};- 높이를 계산할 때 null 처리를 해줘야 한다.
보내기 버튼
- 텍스트 입력 박스에 대해서 flex로 textarea랑 보내기 버튼을 가운데 정렬을 해놨었다.
- 입력값이 길어지면서 창이 늘어나도 보내기 버튼은 항상 아래에 붙어있어야 하는데 처음에는 가운데 정렬을 그냥 flex-end로 해서 아래에 붙였다.
- 그러나 이렇게 하면 textarea가 button보다 작은 높이로 측정될 경우에 밑으로 붙는 일이 발생한다.
- 그래서 보내기 버튼만큼의 공간을 차지하는 wrapper랑 같이 textarea는 가운데 정렬을 하고 보내기 버튼은 따로 absolute로 붙여주기로 했다.
<TextFieldBox>
  <TextFieldInputWrapper>
    <TextFieldInput
      rows={1}
      value={textDisabled ? '' : message}
      onChange={(e) => handleTextInput(e.target.value)}
    />
    <SendButtonWrapper />
  </TextFieldInputWrapper>

  <SendButtonBox>
    <ArrowUpIcon />
  </SendButtonBox>
</TextFieldBox>
const TextFieldBox = styled.div<{
backgroundColor: string;
border: BorderProps;
}>`
max-height: 174px;
display: flex;
flex-direction: column;
justify-content: center;
align-items: flex-start;
position: relative;
//...
`;
const TextFieldInputWrapper = styled.div`
display: flex;
justify-content: center;
align-items: center;
//...
`;
const TextFieldInput = styled(Typography).attrs({ as: 'textarea' })<{
placeholderColor: string;
textColor: string;
}>`
flex: 1;
//....
`;
const SendButtonWrapper = styled.div`
width: 30px;
height: 30px;
`;
const SendButtonBox = styled.div<{ backgroundColor: string }>`
width: 30px;
height: 30px;
position: absolute;
right: 4px;
bottom: 6px;
//...
`;
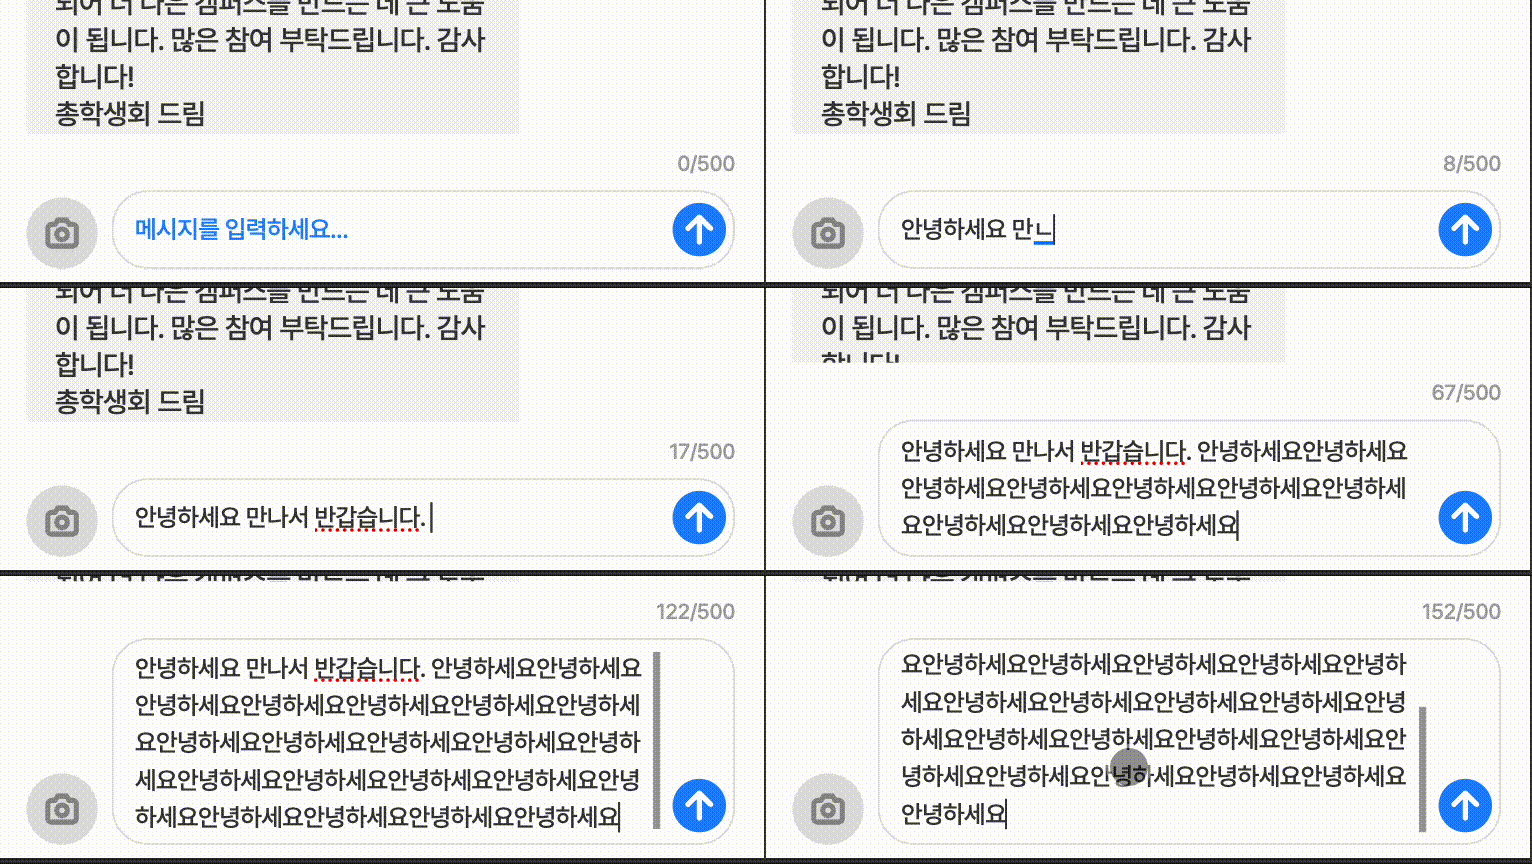
최종 결과물

Frontend Developer