
Android Project1
동물 객체를 전달하는 방법
intent에 객체를 담으려면 Parcelable을 구현한 클래스로 생성한 객체여야 한다.
-
Animal까지 모두 Parcelable 구현
사용하지 않는 Parcelable 메서드까지 모두 구현해줘야 함 -
사자, 호랑이, 기린 클래스에만 Parcelable을 구현한 경우, Animal은 Parcelable 구현하지 않음
동물 객체를 담아놓은 리스트의 제네릭이 Animal타입이기 때문에 객체를 직접 사용하기 위해서는 형변환이나 스마트캐스팅이 필요함
intent에 담으려할때도 각 동물 타입으로 형변환을 먼저 한 후에 intent에 담아서 전달하면 된다.
이 경우 intent로부터 객체를 추출할 때 어떤 타입으로 추출해야 하는건지 알 수 있어야 함
Animal 클래스에 Parcel에 프로퍼티를 담는 메서드와 Parcel로부터 프로퍼티를 추출하는 메서드 작성
open class Animal() {
    // 동물 타입
    var type = AnimalType.ANIMAL_TYPE_LION
    // 이름
    var name = ""
    // 나이
    var age = 0

    // Parcel에 프로퍼티의 값을 담아준다.
    fun addToParcel(parcel:Parcel){
        parcel.writeValue(type)
        parcel.writeString(name)
        parcel.writeInt(age)
    }

    // Parcel로부터 데이터를 추출하여 프로퍼티에 담아준다.
    fun getFromParcel(parcel: Parcel){
        type = parcel.readValue(AnimalType::class.java.classLoader) as AnimalType
        name = parcel.readString()!!
        age = parcel.readInt()
    }
}
각 동물 클래스에 Parcelable구현하면서 Animal 클래스에서 작성한 메서드도 호출
class Giraffe() : Animal(), Parcelable {

    // 목의 길이
    var neckLength = 0
    // 달리는 속도
    var runSpeed = 0

    constructor(parcel: Parcel) : this() {
        getFromParcel(parcel)
        neckLength = parcel.readInt()
        runSpeed = parcel.readInt()
    }

    override fun writeToParcel(parcel: Parcel, flags: Int) {
        addToParcel(parcel)
        parcel.writeInt(neckLength)
        parcel.writeInt(runSpeed)
    }

    override fun describeContents(): Int {
        return 0
    }

    companion object CREATOR : Parcelable.Creator<Giraffe> {
        override fun createFromParcel(parcel: Parcel): Giraffe {
            return Giraffe(parcel)
        }

        override fun newArray(size: Int): Array<Giraffe?> {
            return arrayOfNulls(size)
        }
    }

}
프로퍼티 값을 enum클래스값으로 설정한 경우에는 해당 값을 쓰고 읽는 코드를 직접 작성해줘야 한다.
사자 클래스의 경우 gender프로퍼티가 enum클래스의 값을 갖고 있기 때문에 constructor와 writeToParcel에 gender값이 자동생성되지 않는다
class Lion() : Animal(), Parcelable {

    // 털의 개수
    var hairCount = 0
    // 성별
    var gender = LION_GENDER.LION_GENDER1

    constructor(parcel: Parcel) : this() {
        getFromParcel(parcel)
        hairCount = parcel.readInt()
        gender = parcel.readValue(LION_GENDER::class.java.classLoader) as LION_GENDER
    }

    override fun writeToParcel(parcel: Parcel, flags: Int) {
        addToParcel(parcel)
        parcel.writeInt(hairCount)
        parcel.writeValue(gender)
    }

    override fun describeContents(): Int {
        return 0
    }

    companion object CREATOR : Parcelable.Creator<Lion> {
        override fun createFromParcel(parcel: Parcel): Lion {
            return Lion(parcel)
        }

        override fun newArray(size: Int): Array<Lion?> {
            return arrayOfNulls(size)
        }
    }
}
리사이클러뷰 항목을 클릭할때 intent에 객체 담아서 전달해주기
        override fun onBindViewHolder(holder: ViewHolderMain, position: Int) {
            // position번째 객체를 추출
            val animal = recyclerViewList[position]
            holder.rowMainBinding.textViewRowMainName.text = animal.name
            holder.rowMainBinding.imageViewRowMainType.setImageResource(animal.type.img)

            // 항목을 누르면 ShowActivity를 실행
            holder.rowMainBinding.root.setOnClickListener {
                val showIntent = Intent(this@MainActivity, ShowActivity::class.java)
                // showIntent.putExtra("position",position)
                // 사용자가 선택한 항목을 구성하기 위해 사용한 객체가
                // Util.animalList 리스트에 몇번째에 있는 값인지를 담아준다.
                showIntent.putExtra("position",recyclerViewIndexList[position])
                // 객체를 담아준다.
                val obj = Util.animalList[recyclerViewIndexList[position]]
                // List의 제네릭이 Animal이므로 객체를 추출하면 Animal 타입으로 변환된다.
                // Animal은 Parcelable을 구현하지 않았기 때문에 Parcelable을 구현한
                // 자식 타입으로 형변환 해서 담아 준다.
                if(obj is Lion){
                    showIntent.putExtra("obj",obj)
                } else if(obj is Tiger){
                    showIntent.putExtra("obj",obj)
                } else if(obj is Giraffe){
                    showIntent.putExtra("obj",obj)
                }

                showActivityLauncher.launch(showIntent)
            }
        }
ShowActivity에서 전달받은 intent에서 객체 추출하기
아래의 코드에서 Parcelable을 구현한 클래스를 지정해줘야하는데 Animal은 Parcelable은 구현하지 않았고, 각각의 동물 클래스를 지정해줘야 하기에는 어떤 타입의 객체를 받아왔는지 알 수 없다.
                // 포지션 번째 객체를 추출한다.
                // val animal = Util.animalList[position]
                val animal = if(Build.VERSION.SDK_INT >= Build.VERSION_CODES.TIRAMISU){
                    intent.getParcelableExtra("obj",Animal::class.java)
                }else{
                    intent.getParcelableExtra<>("obj")
                }
따라서 Animal도 Parcelable을 구현해준다.
open class Animal() : Parcelable{
    // 동물 타입
    var type = AnimalType.ANIMAL_TYPE_LION
    // 이름
    var name = ""
    // 나이
    var age = 0

    constructor(parcel: Parcel) : this() {
        name = parcel.readString()!!
        age = parcel.readInt()
    }

    // Parcel에 프로퍼티의 값을 담아준다.
    fun addToParcel(parcel:Parcel){
        parcel.writeValue(type)
        parcel.writeString(name)
        parcel.writeInt(age)
    }

    // Parcel로부터 데이터를 추출하여 프로퍼티에 담아준다.
    fun getFromParcel(parcel: Parcel){
        type = parcel.readValue(AnimalType::class.java.classLoader) as AnimalType
        name = parcel.readString()!!
        age = parcel.readInt()
    }

    override fun writeToParcel(parcel: Parcel, flags: Int) {
        parcel.writeString(name)
        parcel.writeInt(age)
    }

    override fun describeContents(): Int {
        return 0
    }

    companion object CREATOR : Parcelable.Creator<Animal> {
        override fun createFromParcel(parcel: Parcel): Animal {
            return Animal(parcel)
        }

        override fun newArray(size: Int): Array<Animal?> {
            return arrayOfNulls(size)
        }
    }
}
이제 intent에 담을 때 바로 Animal 객체를 담아줄 수 있다.
        override fun onBindViewHolder(holder: ViewHolderMain, position: Int) {
            // position번째 객체를 추출
            val animal = recyclerViewList[position]
            holder.rowMainBinding.textViewRowMainName.text = animal.name
            holder.rowMainBinding.imageViewRowMainType.setImageResource(animal.type.img)

            // 항목을 누르면 ShowActivity를 실행
            holder.rowMainBinding.root.setOnClickListener {
                val showIntent = Intent(this@MainActivity, ShowActivity::class.java)
                // showIntent.putExtra("position",position)
                // 사용자가 선택한 항목을 구성하기 위해 사용한 객체가
                // Util.animalList 리스트에 몇번째에 있는 값인지를 담아준다.
                showIntent.putExtra("position",recyclerViewIndexList[position])
                // 객체를 담아준다.
                val obj = Util.animalList[recyclerViewIndexList[position]]
                // List의 제네릭이 Animal이므로 객체를 추출하면 Animal타입이다.
                // Animal이 Parcelable을 구현했기 때문에 intent에 담을 수 있다.
                showIntent.putExtra("obj",obj)

                showActivityLauncher.launch(showIntent)
            }
        }
ShowActivity에서 전달받은 intent에서 객체 추출할때 Animal 객체를 받아올 수 있다.
    // 뷰 설정
    fun setView2() {
        activityShowBinding.apply {
            // TextView
            textViewShowInfo.apply {
                // 항목 순서값을 가져온다.
                val position = intent.getIntExtra("position",0)
                // 포지션 번째 객체를 추출한다.
                // val animal = Util.animalList[position]

                val animal = if(Build.VERSION.SDK_INT >= Build.VERSION_CODES.TIRAMISU){
                    intent.getParcelableExtra("obj",Animal::class.java)!!
                }else{
                    intent.getParcelableExtra<Animal>("obj")!!
                }


                // 공통
                text = "동물 종류 : ${animal.type.str}\n"
                append("이름 : ${animal.name}\n")
                append("나이 : ${animal.age}살\n")

                // 사자
                if(animal is Lion){
                    append("털의 개수 : ${animal.hairCount}개\n")
                    append("성별 : ${animal.gender.str}\n")
                }
                // 호랑이
                else if(animal is Tiger){
                    append("줄무늬 개수 : ${animal.lineCount}개\n")
                    append("몸무게 : ${animal.weight}kg\n")
                }
                // 기린
                else if(animal is Giraffe){
                    append("목의 길이 : ${animal.neckLength}cm\n")
                    append("달리는 속도 : 시속 ${animal.runSpeed}km\n")
                }
            }
        }
    }
위의 방법 대신
companion object로 객체를 담아서 활용하는 방식을 권장함
Git
- 첫 번째, 버전 관리를 통한 소스코드의 히스토리 관리와 팀원 간의 협업 지원 기능
마스터 브랜치는 건들이지 않고 테스트 브랜치를 만들어 잘 된 코드들만 마스터 브랜치에 병합시킬 수 있다
작업자별로 브랜치를 만들고 작업자들이 만든 코드를 나중에 마스터 브랜치에 반영시킨다 - 두 번째, 소스코드 업로드를 통한 오픈소스 공유와 포트폴리오관리
계정 비밀번호 대신 토큰을 발행하여 토큰으로 접근
토큰은 한번 발행된 후 다시 볼 수 없으므로 꼭 메모해줘야 한다.
용어 정리
Repository : 프로젝트를 보관하는 저장소.
Remote : 프로젝트를 업로드할 서버. master 브랜치로 업로드 된다.
Private : 개인용 저장소로 설정
Commit : 지금까지 작업한 것을 확정하고 작업 히스토리로 남긴다.
Push : 깃허브 서버에 프로젝트를 반영
Checkout : 브랜치를 선택
Merge : 브랜치를 다른 브랜치로 통합. 안드로이드 스튜디오에서 반영을 받을 브랜치를 체크아웃하고 머지해야 한다.
안드로이드 스튜디오 셋팅
File > Settings > Version Control > Git
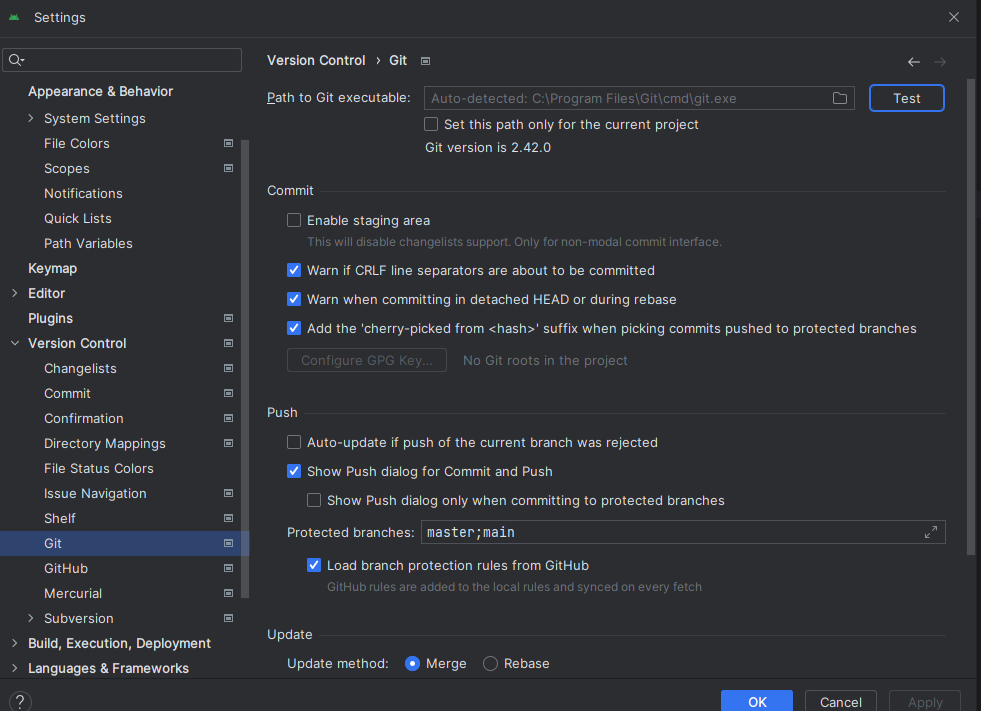
Test 버튼을 누르고 버전이 잘 뜨면 git 설치가 잘 되어있는 상태임
깃허브 토큰을 등록해준다
File > Settings > Version Control > GitHub
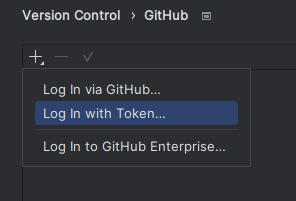
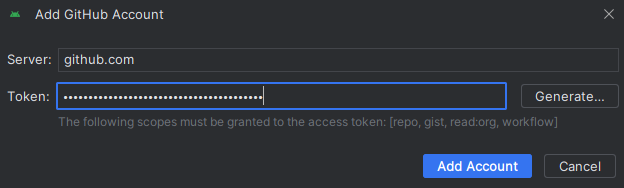
Add Account 버튼 눌러서 등록해줌
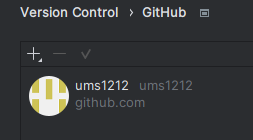
Apply 해줘야 등록이 되고 창을 끄면 처음부터 다시 등록해줘야 함
cmd 셋팅

로컬 저장소 생성
VCS > Create Git Repository... 클릭
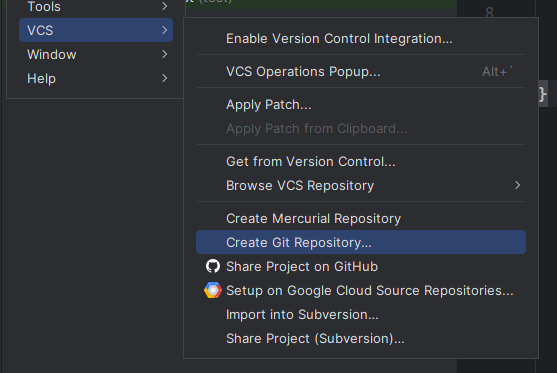
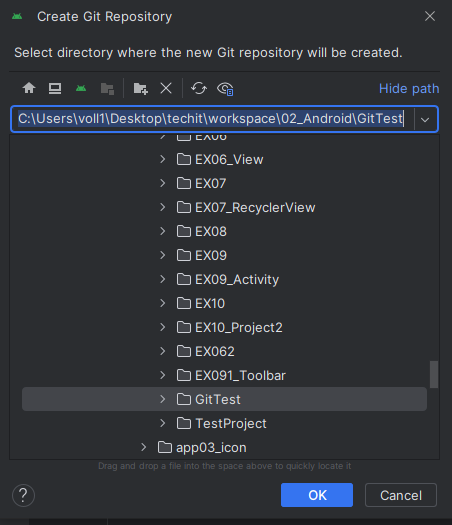
Create Git Repository : 로컬 저장소를 생성
Share Project on GitHub : 깃허브에 올림
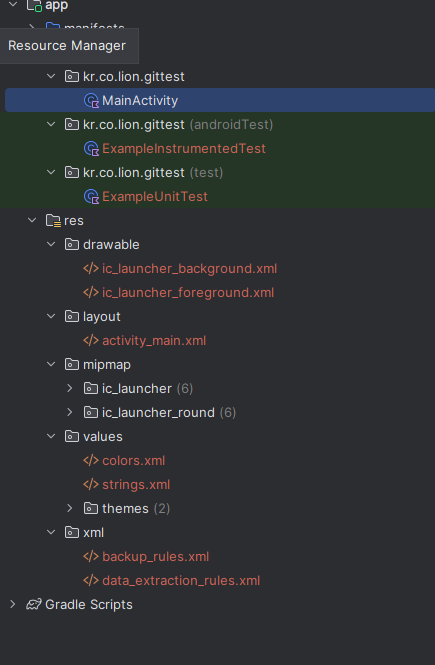
파일 디렉토리창에 파일명이 빨간색으로 표시되는 것들은 아직 깃허브에 올라가지 않은 파일임
VCS메뉴가 Git으로 바뀜
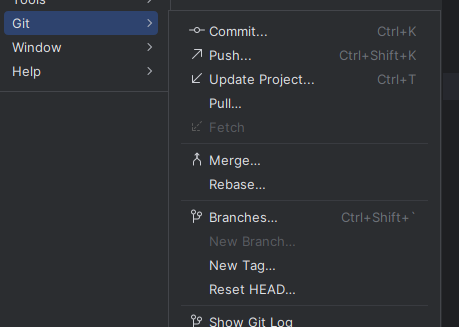
깃허브에 프로젝트 올리기
Git > GitHub > Share Project on GitHub
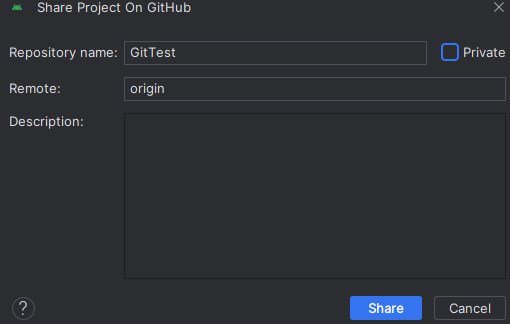
Repository name은 프로젝트 이름과 동일하게 해준다(달라도 상관은 없으나)
Private 체크 풀어주기
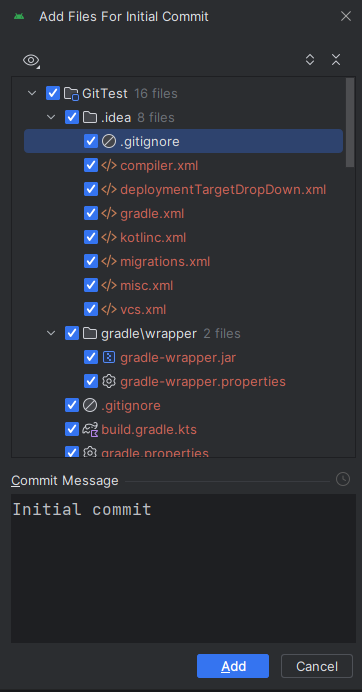
Commit Message에 메시지 작성
Add 버튼을 눌러주고 기다리면 완료 메시지가 뜬다
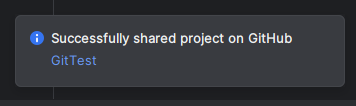

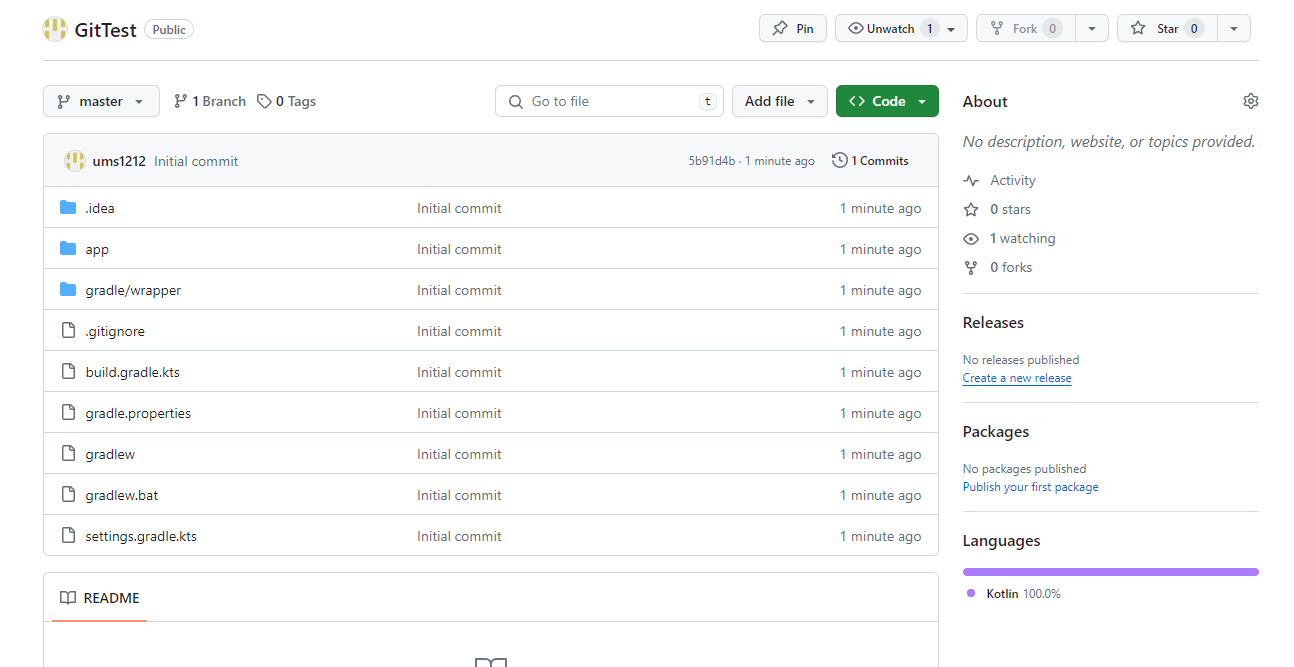
정상적으로 깃허브에 프로젝트가 올라간 것을 확인
깃 셋팅은 프로젝트를 만들고 난 후 맨 먼저 셋팅해준다.
수정 전으로 되돌리기
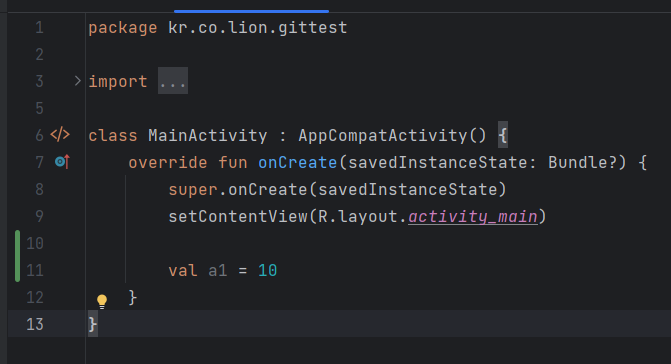
코드 작성 후
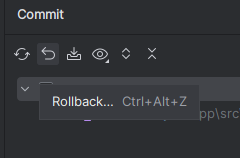

롤백 버튼을 눌러주면

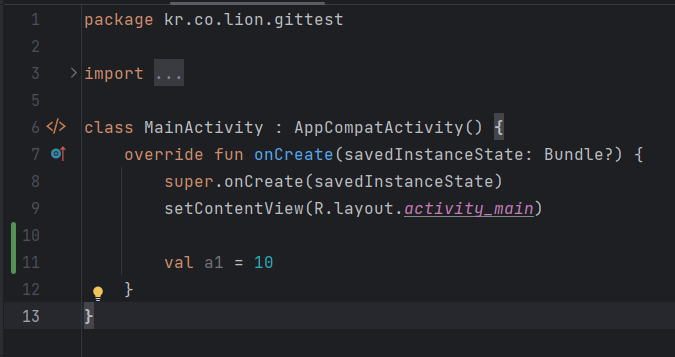
다시 마지막 커밋 시점의 코드로 돌아온다.
다시 수정을 하고
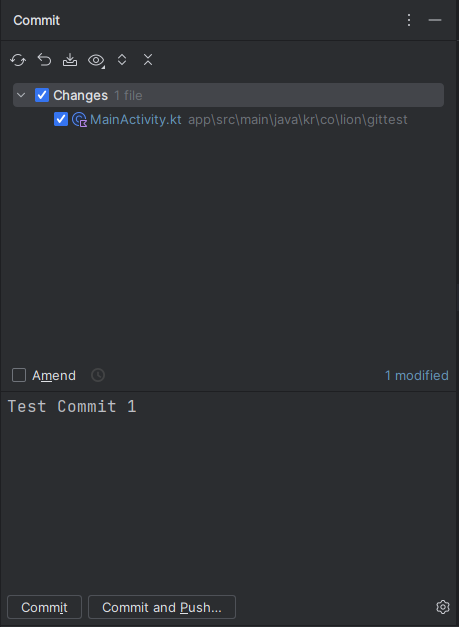
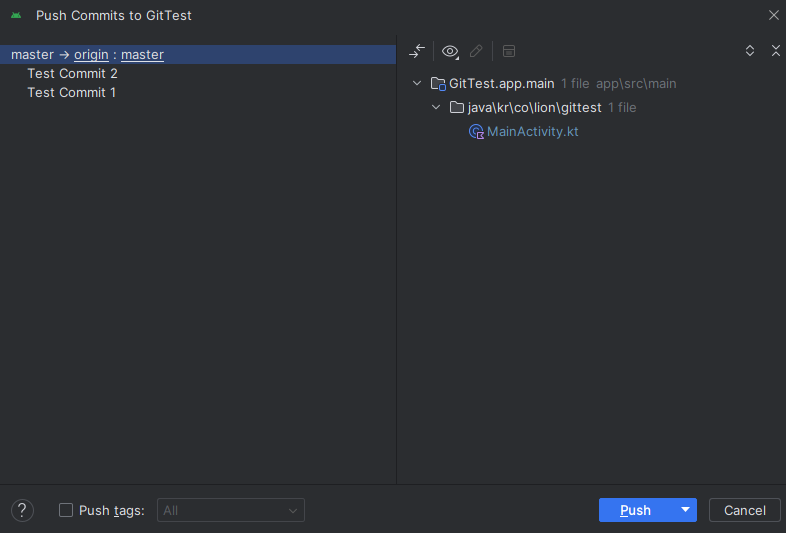
커밋을 하면 로컬저장소에만 변경된 상태이며
커밋과 푸시를 같이 하면 깃허브에도 반영된다.


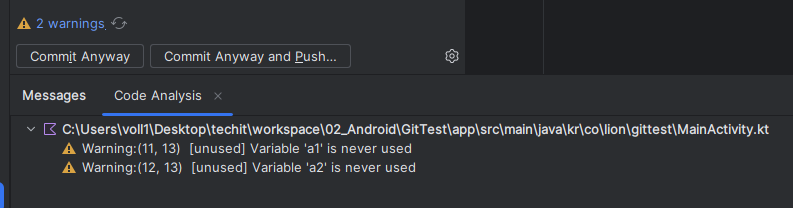
코드 상에 오류가 있으면 경고 표시가 나오지만 커밋과 푸시는 그대로 진행할 수 있다.
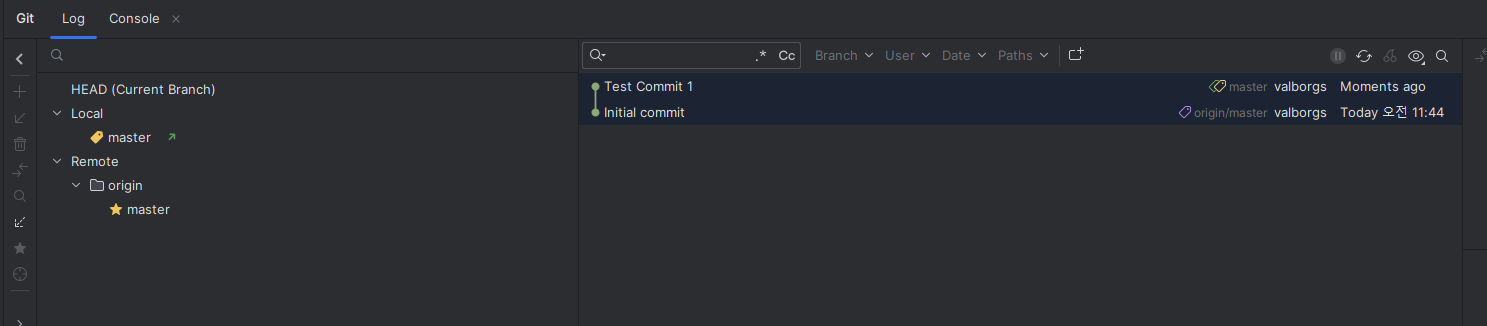
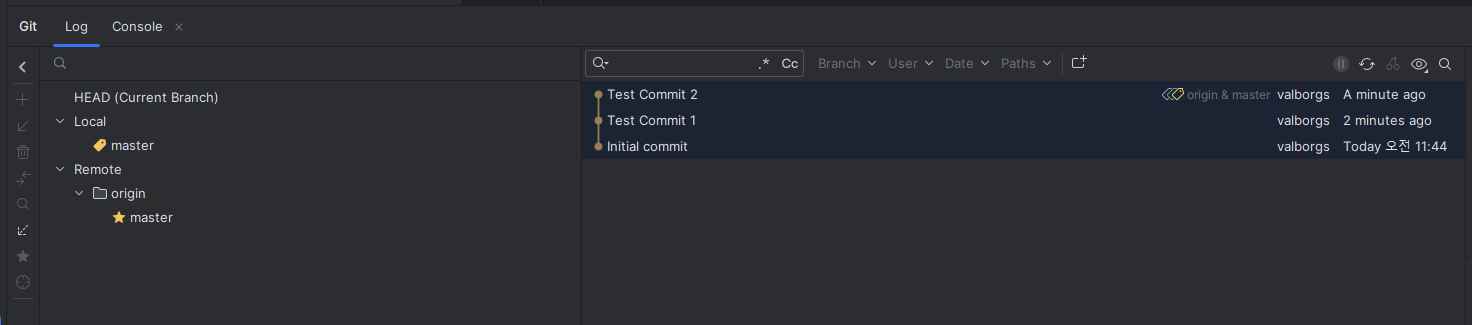
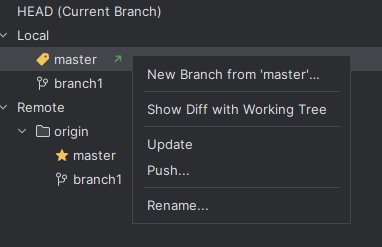
아래와 같이 로컬에만 커밋되어있는 상태와 원격 저장소에 푸시된 상태를 확인할 수 있다.

origin/master는 로컬과 원격저장소에 모두 있고
master는 로컬에만 반영되어 있는 상태임
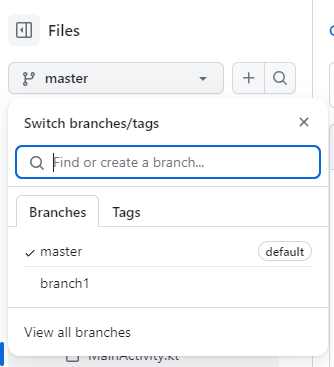
브랜치 생성
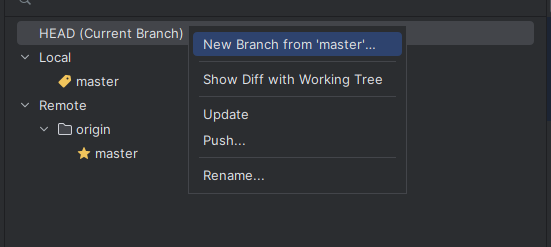
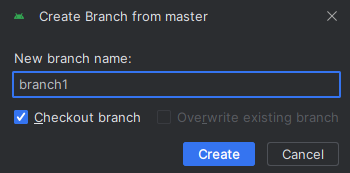
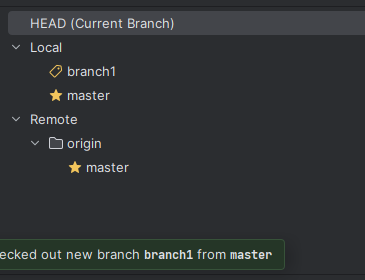
로컬상에서만 브랜치가 생성된 상태임
브랜치를 클릭해서 푸시해주면
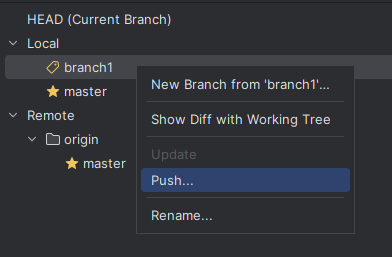
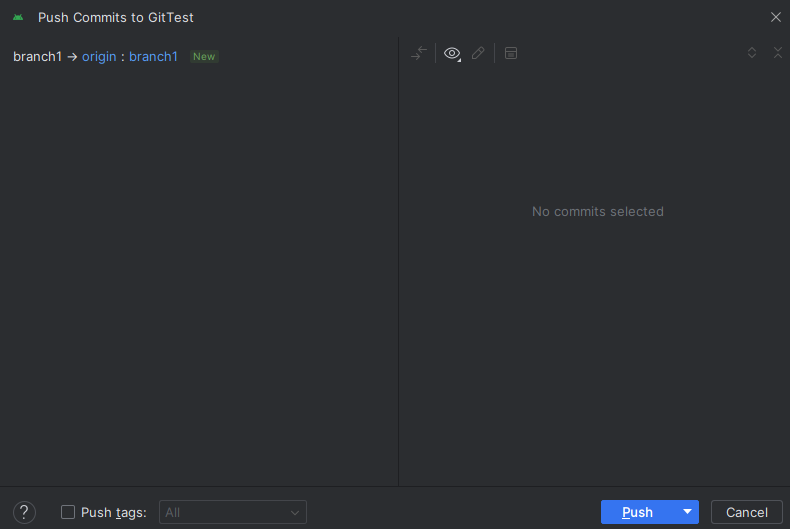
원격저장소에도 브랜치가 생김
브랜치에서 작업한 결과물은 마스터에 영향을 미치지 않음
작업한 결과물을 마스터에 반영시켜줄 수 있음
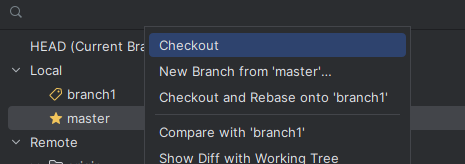
마스터 브랜치로 다시 작업을 하고싶으면 마스터 브랜치를 우클릭하여 Checkout 선택
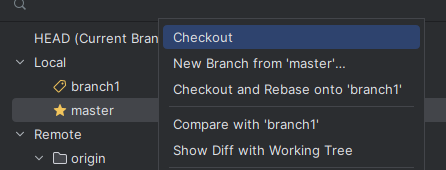

태그 아이콘이 현재 선택된 브랜치를 나타냄
branch1에서 작업 후 푸시하면
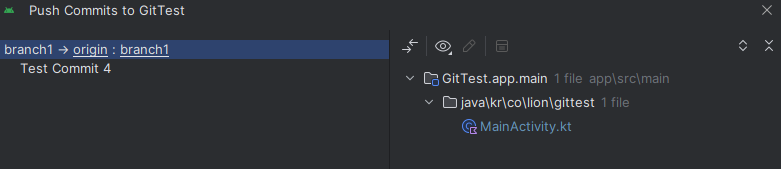

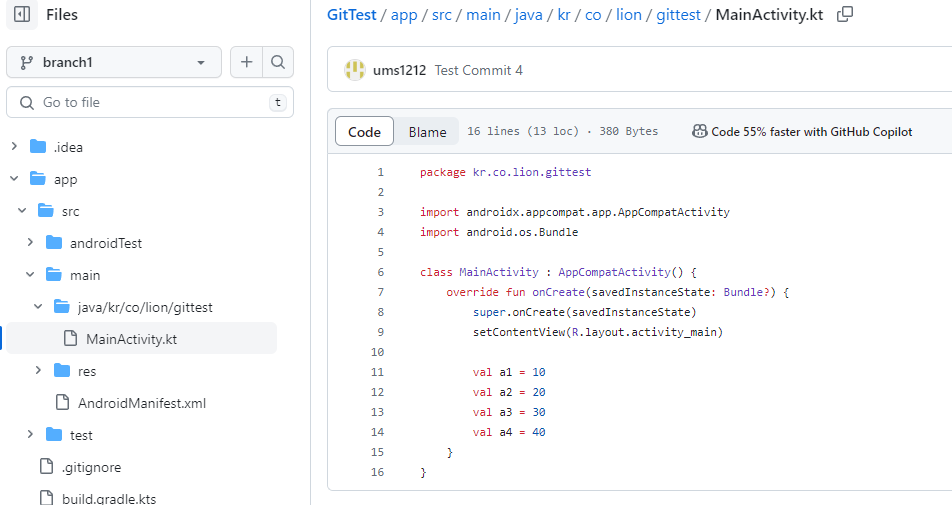
branch1에만 반영됨
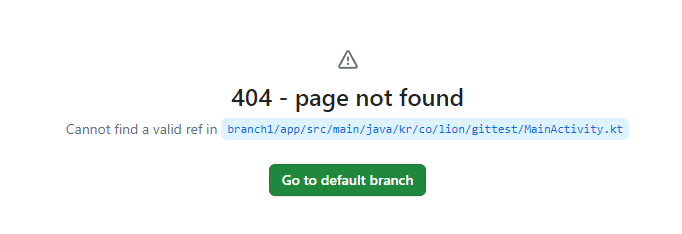
브랜치 삭제
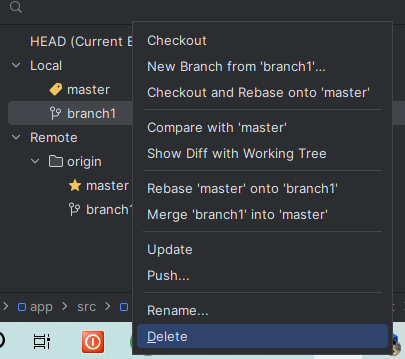
브랜치 오른쪽 클릭 후 Delete 클릭
로컬과 리모트에 모두 삭제를 하면 브랜치에서 커밋한 결과물도 모두 사라짐

마스터와 병합
Rebase : 여러 브랜치의 커밋을 하나의 타임라인으로 맞춰주는 것
A브랜치의 커밋을 마스터에 머지한 상태에서 B브랜치가 마스터와 머지하면 기존에 B브랜치에서 커밋한 내용이 사라짐 따라서 B브랜치에서 머지를 하기전에 Rebase를 해줘야 함
브랜치1을 마스터에 머지할 경우
먼저 마스터를 체크아웃 해주고

브랜치1을 선택해서 머지해주고
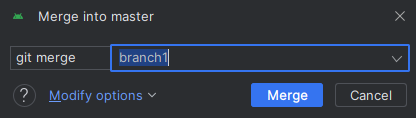
마스터를 푸시해준다.

커밋 합치기

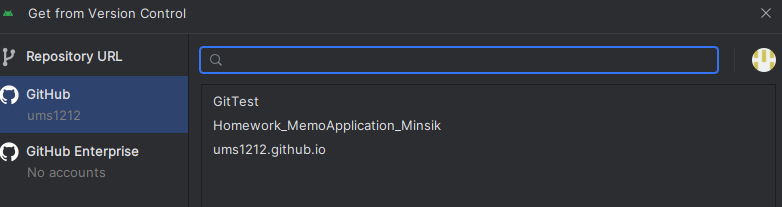
안드로이드 스튜디오에서 깃허브 프로젝트 불러오기
※ 출처 : 멋쟁이사자 앱스쿨 2기, 소프트캠퍼스 