
Android Color System
- primary : 색상은 앱의 화면과 구성요소에서 가장 자주 표시되는 색상.
- secondary : 색상은 앱을 강조하고 구분하는 데 사용.
- surface : 색상은 카드, 시트, 메뉴와 같은 구성요소의 표면에 적용.
- background : 색상은 스크롤 가능한 콘텐츠 뒤에 나타납니다.
- on : 색상 요소는 팔레트의 색상 위에 나타나며, 주로 텍스트, 아이콘, 획에 적용된다. 우리의 색상 팔레트에는 surface 색상 위에 나타나는 onSurface 색상과 primary 색상 위에 나타나는 onPrimary 색상이 있다.
출처: https://sonseungha.tistory.com/656 [Developer's Delight:티스토리]
기존의 방법으로 UI요소를 추가하면 색상값이 기본으로 설정된 색상으로 나오고 그걸 일일이 변경을 해줘야 했다.
예를 들어 버튼을 배치했을 때 별도로 background색상을 지정하지 않는다면 기본으로 설정된 색상인 보라색이 나온다. 이는 사용자가 버튼 색을 지정하지 않을 경우 보라색으로 지정해주는 방식이 아니라
특정 이름으로 지정된 색상으로 지정해주는 것으로 설정되어있는데 특정 이름으로 지정된 색상이 보라색으로 지정되어있을 뿐이다.
안드로이드 스튜디오 초기 버전에는 회색이었다가 자주색이었다가 지금은 보라색으로 바뀌어있다.
하지만 버튼에 지정된 이름은 동일하다.
따라서 버튼에 지정되는 이름을 직접 재정의하면 새로 추가되는 버튼의 배경색을 의도한 색으로 나오게 통일시켜줄 수 있다.
기존 버튼 배경색상 "Acolor" -> 보라색
재정의한 버튼 배경색상 "Acolor" -> 빨간색
재정의 이후 버튼 배경색상은 빨간색으로 설정된다.
themes.xml 파일에서 정의할 수 있다.
참조
https://pluu.github.io/blog/android/2020/08/02/global-style/
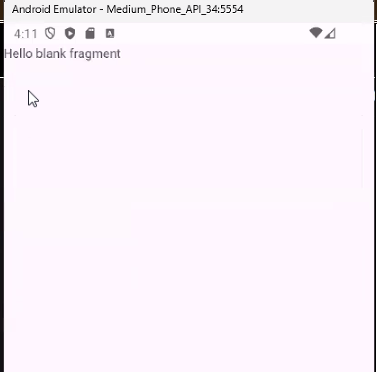
게시판 프로젝트
MainActivity
FragmentContainerView 작성
<!-- activity_main.xml -->

<?xml version="1.0" encoding="utf-8"?>
<LinearLayout xmlns:android="http://schemas.android.com/apk/res/android"
    xmlns:app="http://schemas.android.com/apk/res-auto"
    xmlns:tools="http://schemas.android.com/tools"
    android:layout_width="match_parent"
    android:layout_height="match_parent"
    android:orientation="vertical"
    tools:context=".MainActivity" >

    <androidx.fragment.app.FragmentContainerView
        android:id="@+id/containerMain"
        android:layout_width="match_parent"
        android:layout_height="wrap_content" />
</LinearLayout>
Tools
MainActivity에서 보여줄 프래그먼트들의 이름
// Tools.kt

enum class MainFragmentName(var str:String){
    A_FRAGMENT("A"),
    B_FRAGMENT("B"),
}
MainActivity
프래그먼트 교체 코드 작성
// MainActivity.kt

class MainActivity : AppCompatActivity() {

    lateinit var activityMainBinding: ActivityMainBinding

	// 프래그먼트의 주소값을 담을 프로퍼티
    var oldFragment:Fragment? = null
    var newFragment:Fragment? = null

    override fun onCreate(savedInstanceState: Bundle?) {
        super.onCreate(savedInstanceState)

        // 스플래시 스크린이 나타나게 한다.
        // 반드시  setContentView 전에 해야 한다.
        // 코틀린에서는 installSplashScreen 메서드가 구현이 되어있어 호출만 하면 된다.
        installSplashScreen()

        activityMainBinding = ActivityMainBinding.inflate(layoutInflater)
        setContentView(activityMainBinding.root)
    }

    // 지정한 Fragment를 보여주는 메서드
    // name : 프래그먼트 이름
    // addToBackStack : BackStack에 포함 시킬 것인지
    // isAnimate : 애니메이션을 보여줄 것인지
    // data : 새로운 프래그먼트에 전달할 값이 담겨져 있는 Bundle 객체
    fun replaceFragment(name:MainFragmentName, addToBackStack:Boolean, isAnimate:Boolean, data:Bundle?){

        // Fragment 전환에 딜레이를 조금 준다.
        SystemClock.sleep(200)

        // Fragment를 교체할 수 있는 객체를 추출
        val fragmentTransaction = supportFragmentManager.beginTransaction()
        // 새로운 Fragment를 담을 변수
        // var newFragment:Fragment? = null 이 코드는 지워주기

        // oldFragment에 newFragment가 가지고 있는 Fragment 객체를 담아준다.
        if(newFragment != null){
            oldFragment = newFragment
        }

        // 이름으로 분기한다.
        // Fragment의 객체를 생성하여 변수에 담아준다.
        when(name){
            MainFragmentName.LOGIN_FRAGMENT -> {
                newFragment = LoginFragment()
            }
            MainFragmentName.JOIN_FRAGMENT -> {
                newFragment = JoinFragment()
            }
            MainFragmentName.ADD_USER_INFO_FRAGMENT -> {
                newFragment = AddUserInfoFragment()
            }
        }

        // 새로운 Fragment에 전달할 Bundle 객체가 있다면 arguments 프로퍼티에 넣어준다.
        if(data != null){
            newFragment?.arguments = data
        }

        if(newFragment != null){
            // 애니메이션 설정
            if(isAnimate){
                // oldFragment -> newFragment
                // oldFragment : exit
                // newFragment : enter

                // newFragment -> oldFragment
                // oldFragment : reenter
                // newFragment : return

                // MaterialSharedAxis : 좌우, 위아래, 공중 바닥 사이로 이동하는 애니메이션 효과
                // X - 좌우
                // Y - 위아래
                // Z - 공중 바닥
                // 두 번째 매개변수 : 새로운 화면이 나타나는 것인지 여부를 설정
                // true : 새로운 화면이 나타나는 애니메이션이 동작한다.
                // false : 이전으로 되돌아가는 애니메이션이 동작한다.
                if(oldFragment != null){
                    // old에서 new가 새롭게 보여질 때 old의 애니메이션
                    oldFragment?.enterTransition = MaterialSharedAxis(MaterialSharedAxis.X, true)
                    // new에서 old로 되돌아갈 때 old의 애니메이션
                    oldFragment?.enterTransition = MaterialSharedAxis(MaterialSharedAxis.X, false)

                    oldFragment?.enterTransition = null
                    oldFragment?.returnTransition = null
                }

                // old에서 new가 새롭게 보여질 때 new의 애니메이션
                newFragment?.enterTransition = MaterialSharedAxis(MaterialSharedAxis.X, true)
                // new에서 old로 되돌아갈 때의 애니메이션
                newFragment?.enterTransition = MaterialSharedAxis(MaterialSharedAxis.X, false)

                newFragment?.exitTransition = null
                newFragment?.reenterTransition = null
            }

            // Fragment를 교체한다.(이전 Fragment가 없으면 새롭게 추가하는 역할을 수행한다)
            // 첫 번째 매개 변수 : Fragment를 배치할 FragmentContainer의 ID
            // 두 번째 매개 변수 : 보여주고자 하는 Fragment 객체
            fragmentTransaction.replace(R.id.containerMain, newFragment!!)

            // addToBackStack 변수의 값이 true면 새롭게 보여질 Fragment를 BackStack에 포함시켜 준다.
            if(addToBackStack == true){
                // BackStack에 포함시킬 때 이름을 지정해주면 원하는 Fragment를 BackStack에서 제거할 수 있다.
                fragmentTransaction.addToBackStack(name.str)
            }

            // Fragment 교체를 확정한다.
            fragmentTransaction.commit()
        }
    }

    // BackStack에서 Fragment를 제거한다.
    fun removeFragment(name:MainFragmentName){
        // BackStack에 가장 위에 있는 Fragment를 BackStack에서 제거한다
        // supportFragmentManager.popBackStack()

        // Fragment 전환에 딜레이를 조금 준다.
        SystemClock.sleep(200)

        // 지정한 이름으로 있는 Fragment를 BackStack에서 제거한다.
        supportFragmentManager.popBackStack(name.str, FragmentManager.POP_BACK_STACK_INCLUSIVE)
    }


}
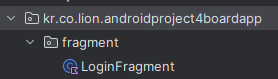
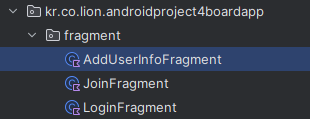
프래그먼트 별로 패키지 구성하여 관리

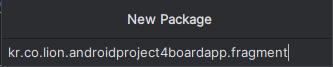
LoginFragment
LoginFragment 생성
MainFragmentName 수정
// Tools.kt


// MainActivity에서 보여줄 프래그먼트들의 이름
enum class MainFragmentName(var str:String){
    LOGIN_FRAGMENT("LoginFragment"),
    B_FRAGMENT("B"),
}
프래그먼트 교체 코드의 when절 수정
// MainActivity.kt


        // 이름으로 분기한다.
        // Fragment의 객체를 생성하여 변수에 담아준다.
        when(name){
            // 로그인 화면
            MainFragmentName.LOGIN_FRAGMENT -> {
                newFragment = LoginFragment()
            }
            MainFragmentName.B_FRAGMENT -> {

            }
        }
MainActivity에서 LoginFragment를 띄워준다.
// MainActivity.kt


    override fun onCreate(savedInstanceState: Bundle?) {
        super.onCreate(savedInstanceState)

        // 스플래시 스크린이 나타나게 한다.
        // 반드시  setContentView 전에 해야 한다.
        // 코틀린에서는 installSplashScreen 메서드가 구현이 되어있어 호출만 하면 된다.
        installSplashScreen()

        activityMainBinding = ActivityMainBinding.inflate(layoutInflater)
        setContentView(activityMainBinding.root)

        replaceFragment(MainFragmentName.LOGIN_FRAGMENT, false, false, null)
    }
fragment_login.xml 작성
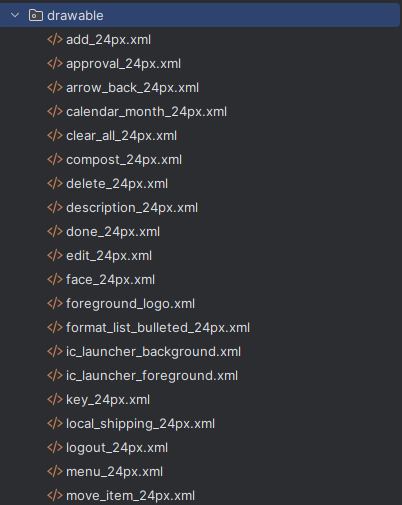
준비한 아이콘파일 전부 drawable에 넣기
<?xml version="1.0" encoding="utf-8"?>
<LinearLayout xmlns:android="http://schemas.android.com/apk/res/android"
    xmlns:app="http://schemas.android.com/apk/res-auto"
    xmlns:tools="http://schemas.android.com/tools"
    android:layout_width="match_parent"
    android:layout_height="match_parent"
    android:orientation="vertical"
    android:transitionGroup="true"
    tools:context=".fragment.LoginFragment">

    <com.google.android.material.appbar.MaterialToolbar
        android:id="@+id/toolbarLogin"
        android:layout_width="match_parent"
        android:layout_height="wrap_content"
        android:background="?attr/colorPrimary"
        android:minHeight="?attr/actionBarSize"
        android:theme="?attr/actionBarTheme" />

    <ScrollView
        android:layout_width="match_parent"
        android:layout_height="match_parent" >

        <LinearLayout
            android:layout_width="match_parent"
            android:layout_height="wrap_content"
            android:orientation="vertical"
            android:padding="10dp">

            <com.google.android.material.textfield.TextInputLayout
                android:layout_width="match_parent"
                android:layout_height="wrap_content"
                android:hint="아이디"
                app:endIconMode="clear_text"
                app:startIconDrawable="@drawable/person_24px">

                <com.google.android.material.textfield.TextInputEditText
                    android:id="@+id/textFieldLoginUserId"
                    android:layout_width="match_parent"
                    android:layout_height="wrap_content"
                    android:inputType="text"
                    android:textAppearance="@style/TextAppearance.AppCompat.Large" />
            </com.google.android.material.textfield.TextInputLayout>

            <com.google.android.material.textfield.TextInputLayout
                android:layout_width="match_parent"
                android:layout_height="wrap_content"
                android:layout_marginTop="10dp"
                android:hint="비밀번호"
                app:endIconMode="password_toggle"
                app:startIconDrawable="@drawable/key_24px">

                <com.google.android.material.textfield.TextInputEditText
                    android:id="@+id/textFieldLoginUserPw"
                    android:layout_width="match_parent"
                    android:layout_height="wrap_content"
                    android:inputType="text|textPassword"
                    android:textAppearance="@style/TextAppearance.AppCompat.Large" />
            </com.google.android.material.textfield.TextInputLayout>

            <com.google.android.material.checkbox.MaterialCheckBox
                android:id="@+id/checkBoxLoginAuto"
                android:layout_width="match_parent"
                android:layout_height="wrap_content"
                android:layout_marginTop="10dp"
                android:text="자동로그인"
                android:textAppearance="@style/TextAppearance.AppCompat.Large" />

            <Button
                android:id="@+id/buttonLoginSubmit"
                style="@style/Widget.Material3.Button.OutlinedButton"
                android:layout_width="match_parent"
                android:layout_height="wrap_content"
                android:layout_marginTop="10dp"
                android:text="로그인"
                android:textAppearance="@style/TextAppearance.AppCompat.Large" />

            <com.google.android.material.divider.MaterialDivider
                android:layout_width="match_parent"
                android:layout_height="2dp"
                android:layout_marginTop="10dp"
                android:background="@color/black"/>

            <Button
                android:id="@+id/buttonLoginJoin"
                style="@style/Widget.Material3.Button.OutlinedButton"
                android:layout_width="match_parent"
                android:layout_height="wrap_content"
                android:layout_marginTop="10dp"
                android:text="회원가입"
                android:textAppearance="@style/TextAppearance.AppCompat.Large" />
        </LinearLayout>
    </ScrollView>

</LinearLayout>
로그인버튼과 회원가입버튼 사이에는 MaterialDivder를 넣어준다.

체크박스는 추후 매터리얼체크박스로 형변환이 필요하기 때문에 체크박스에서 매터리얼체크박스로 미리 바꿔놓는다.
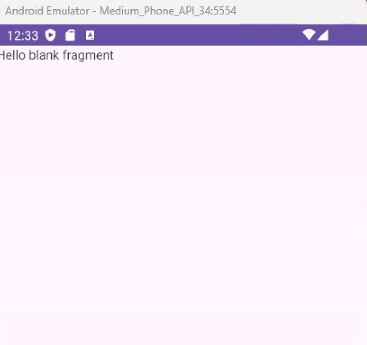
디자인탭에서는 아이콘이 텍스트와 겹쳐보이지만
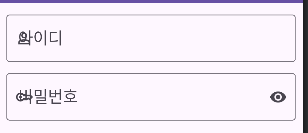
실제 화면에서는 겹치지 않게 제대로 보인다.

themes.xml
<resources xmlns:tools="http://schemas.android.com/tools">
<!-- Base application theme. -->
<style name="Base.Theme.AndroidProject4BoardApp" parent="Theme.Material3.DayNight.NoActionBar">
<!-- Customize your light theme here. -->
<!-- <item name="colorPrimary">@color/my_light_primary</item> -->
<!-- 모든 UI 요소의 기본 색상 -->
<item name="colorPrimary">@color/material_dynamic_primary40</item>
</style>
<style name="Theme.AndroidProject4BoardApp" parent="Base.Theme.AndroidProject4BoardApp" />
<!-- Splash Screen Theme -->
<style name="AppTheme.Starting" parent="Theme.SplashScreen">
<item name="windowSplashScreenBackground">@color/ic_logo_background</item>
<item name="windowSplashScreenAnimatedIcon">@mipmap/ic_logo</item>
<item name="windowSplashScreenAnimationDuration">1000</item>
<item name="postSplashScreenTheme">@style/Theme.AndroidProject4BoardApp</item>
</style>
<!-- Toolbar용 테마. Toolbar마다 지정해준다. -->
<style name="Theme.AndroidProject4BoardApp.Toolbar" parent="ThemeOverlay.Material3.Toolbar.Surface">
<item name="colorPrimary">@color/material_dynamic_tertiary99</item>
</style>
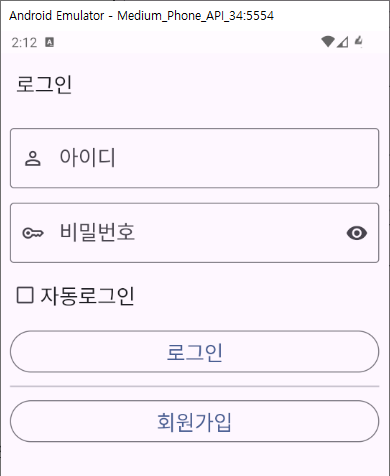
</resources>색상이 바뀌어 있는 것을 확인할 수 있음
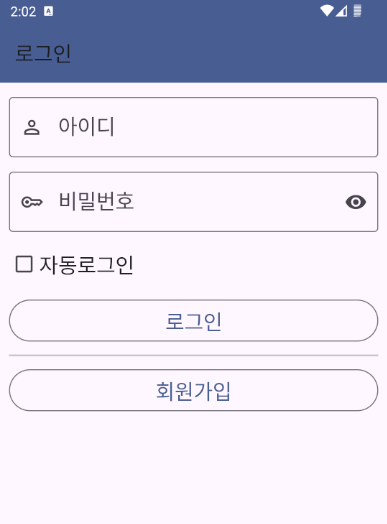
툴바 색상 변경


    <com.google.android.material.appbar.MaterialToolbar
        android:id="@+id/toolbarLogin"
        style="@style/Theme.AndroidProject4BoardApp.Toolbar"
        android:layout_width="match_parent"
        android:layout_height="wrap_content"
        android:minHeight="?attr/actionBarSize"
        android:theme="?attr/actionBarTheme" />
기존에 설정해놓은 background속성은 지워주면 만들어놓은 테마가 적용이된다.
상단 상태바 색상 변경
상단 상태바도 어플리케이션의 기본 테마와 동일하게 맞춰주는 것을 권장한다.
<resources xmlns:tools="http://schemas.android.com/tools">
    <!-- Base application theme. -->
    <style name="Base.Theme.AndroidProject4BoardApp" parent="Theme.Material3.DayNight.NoActionBar">
        <!-- Customize your light theme here. -->
        <!-- <item name="colorPrimary">@color/my_light_primary</item> -->

        <!-- 모든 UI 요소의 기본 색상 -->
        <item name="colorPrimary">@color/material_dynamic_primary40</item>
      	<!-- 상단 상태바 색상 -->
        <item name="colorPrimaryDark">@color/material_dynamic_tertiary99</item>
    </style>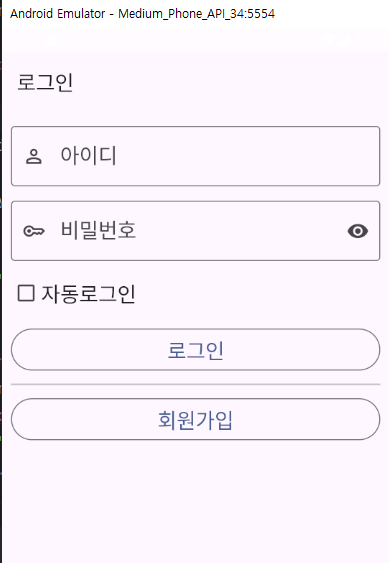
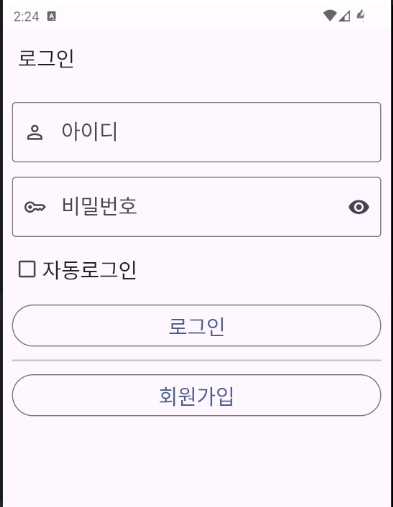
하지만 상태바의 정보도 하얗게 안보인다.
상태바의 정보도 보여줄 수 있게 설정해줘야 한다.
<resources xmlns:tools="http://schemas.android.com/tools">
<!-- Base application theme. -->
<style name="Base.Theme.AndroidProject4BoardApp" parent="Theme.Material3.DayNight.NoActionBar">
<!-- Customize your light theme here. -->
<!-- <item name="colorPrimary">@color/my_light_primary</item> -->
<!-- 모든 UI 요소의 기본 색상 -->
<item name="colorPrimary">@color/material_dynamic_primary40</item>
<!-- 상단 상태바 색상 -->
<item name="colorPrimaryDark">@color/material_dynamic_tertiary99</item>
<!-- 상단 상태바에 나타나는 정보를 보여주도록 설정한다. 상단 상태바의 색상이 밝은 색인지 여부를 설정한다 -->
<item name="android:windowLightStatusBar">true</item>
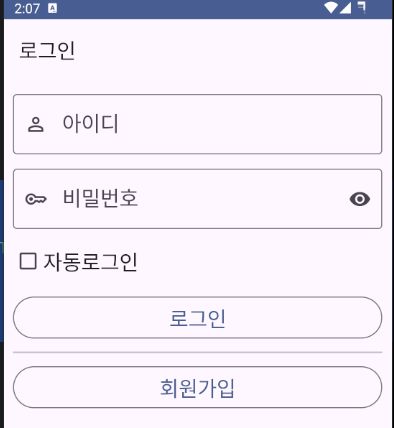
</style>상태바 색상이 밝은 경우 true를 해주면 상태바 정보가 밝은 화면에서도 보여질 수 있게 처리해주고,
상태바 색상이 어두운 경우 false를 해주면 상태바 정보가 어두운 화면에서도 보여질 수 있게 처리해준다.
뷰바인딩 및 툴바 세팅
// LoginFragment.kt


class LoginFragment : Fragment() {

    lateinit var fragmentLoginBinding: FragmentLoginBinding
    lateinit var mainActivity: MainActivity

    override fun onCreateView(
        inflater: LayoutInflater, container: ViewGroup?,
        savedInstanceState: Bundle?
    ): View? {
        // Inflate the layout for this fragment

        fragmentLoginBinding = FragmentLoginBinding.inflate(inflater)
        mainActivity = activity as MainActivity

		settingToolbar()

        return fragmentLoginBinding.root
    }

    // 툴바 설정
    fun settingToolbar(){
        fragmentLoginBinding.apply {
            toolbarLogin.apply {
                // 타이틀
                title = "로그인"
            }
        }
    }
}
JoinFragment
JoinFragment 생성
MainFragmentName 수정
// Tools.kt


// MainActivity에서 보여줄 프래그먼트들의 이름
enum class MainFragmentName(var str:String){
    LOGIN_FRAGMENT("LoginFragment"),
    JOIN_FRAGMENT("joinFragment"),
}
프래그먼트 교체 코드의 when절 수정
// MainActivity.kt


        // 이름으로 분기한다.
        // Fragment의 객체를 생성하여 변수에 담아준다.
        when(name){
            // 로그인 화면
            MainFragmentName.LOGIN_FRAGMENT -> {
                newFragment = LoginFragment()
            }
            // 회원가입 화면1
            MainFragmentName.JOIN_FRAGMENT -> {
                newFragment = JoinFragment()
            }
        }
LoginFragment에 회원가입 버튼 동작 메서드 작성
// LoginFragment.kt
override fun onCreateView(
inflater: LayoutInflater, container: ViewGroup?,
savedInstanceState: Bundle?
): View? {
// Inflate the layout for this fragment
fragmentLoginBinding = FragmentLoginBinding.inflate(inflater)
mainActivity = activity as MainActivity
settingToolbar()
settingButtonLoginJoin()
return fragmentLoginBinding.root
}
// 회원가입 버튼
fun settingButtonLoginJoin(){
fragmentLoginBinding.apply {
buttonLoginJoin.apply {
// 버튼을 눌렀을 때
setOnClickListener {
// JoinFragment가 보여지게 한다.
mainActivity.replaceFragment(MainFragmentName.JOIN_FRAGMENT, true, true, null)
}
}
}
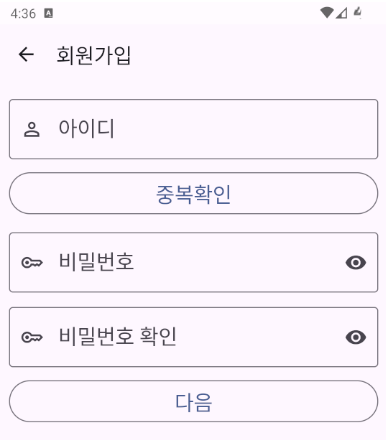
}회원가입 버튼을 누르면 JoinFragment로 이동하는지 확인
fragment_join.xml 작성
<?xml version="1.0" encoding="utf-8"?>
<LinearLayout xmlns:android="http://schemas.android.com/apk/res/android"
    xmlns:app="http://schemas.android.com/apk/res-auto"
    xmlns:tools="http://schemas.android.com/tools"
    android:layout_width="match_parent"
    android:layout_height="match_parent"
    android:orientation="vertical"
    android:transitionGroup="true"
    tools:context=".fragment.JoinFragment">


    <com.google.android.material.appbar.MaterialToolbar
        android:id="@+id/toolbarJoin"
        android:layout_width="match_parent"
        android:layout_height="wrap_content"
        android:minHeight="?attr/actionBarSize"
        android:theme="?attr/actionBarTheme" />

    <ScrollView
        android:layout_width="match_parent"
        android:layout_height="match_parent" >

        <LinearLayout
            android:layout_width="match_parent"
            android:layout_height="wrap_content"
            android:orientation="vertical"
            android:padding="10dp">

            <com.google.android.material.textfield.TextInputLayout
                android:layout_width="match_parent"
                android:layout_height="wrap_content"
                android:hint="아이디"
                app:endIconMode="clear_text"
                app:startIconDrawable="@drawable/person_24px">

                <com.google.android.material.textfield.TextInputEditText
                    android:id="@+id/textFieldJoinUserId"
                    android:layout_width="match_parent"
                    android:layout_height="wrap_content"
                    android:inputType="text"
                    android:textAppearance="@style/TextAppearance.AppCompat.Large" />

            </com.google.android.material.textfield.TextInputLayout>

            <Button
                android:id="@+id/buttonJoinCheckId"
                style="@style/Widget.Material3.Button.OutlinedButton"
                android:layout_width="match_parent"
                android:layout_height="wrap_content"
                android:layout_marginTop="10dp"
                android:text="중복확인"
                android:textAppearance="@style/TextAppearance.AppCompat.Large" />

            <com.google.android.material.textfield.TextInputLayout
                android:layout_width="match_parent"
                android:layout_height="wrap_content"
                android:layout_marginTop="10dp"
                android:hint="비밀번호"
                app:endIconMode="password_toggle"
                app:startIconDrawable="@drawable/key_24px">

                <com.google.android.material.textfield.TextInputEditText
                    android:id="@+id/textFieldJoinUserPw"
                    android:layout_width="match_parent"
                    android:layout_height="wrap_content"
                    android:inputType="text|textPassword"
                    android:textAppearance="@style/TextAppearance.AppCompat.Large" />
            </com.google.android.material.textfield.TextInputLayout>

            <com.google.android.material.textfield.TextInputLayout
                android:layout_width="match_parent"
                android:layout_height="wrap_content"
                android:layout_marginTop="10dp"
                android:hint="비밀번호 확인"
                app:endIconMode="password_toggle"
                app:startIconDrawable="@drawable/key_24px">

                <com.google.android.material.textfield.TextInputEditText
                    android:id="@+id/textFieldJoinUserPw2"
                    android:layout_width="match_parent"
                    android:layout_height="wrap_content"
                    android:inputType="text|textPassword"
                    android:textAppearance="@style/TextAppearance.AppCompat.Large" />
            </com.google.android.material.textfield.TextInputLayout>

            <Button
                android:id="@+id/buttonJoinNext"
                style="@style/Widget.Material3.Button.OutlinedButton"
                android:layout_width="match_parent"
                android:layout_height="wrap_content"
                android:layout_marginTop="10dp"
                android:text="다음"
                android:textAppearance="@style/TextAppearance.AppCompat.Large" />
        </LinearLayout>
    </ScrollView>

</LinearLayout>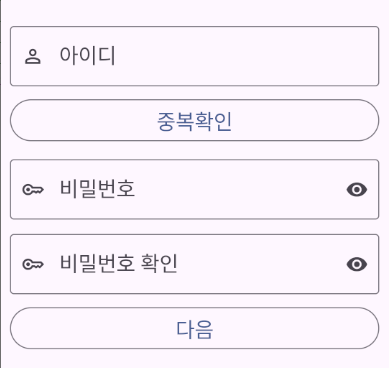
뷰바인딩 및 툴바 세팅
// JoinFragment.kt

class JoinFragment : Fragment() {

    lateinit var fragmentJoinBinding: FragmentJoinBinding
    lateinit var mainActivity: MainActivity

    override fun onCreateView(
        inflater: LayoutInflater, container: ViewGroup?,
        savedInstanceState: Bundle?
    ): View? {
        // Inflate the layout for this fragment

        fragmentJoinBinding = FragmentJoinBinding.inflate(inflater)
        mainActivity = activity as MainActivity

        settingToolbar()

        return fragmentJoinBinding.root
    }

    // 툴바 설정
    fun settingToolbar(){
        fragmentJoinBinding.apply {
            toolbarJoin.apply {
                // 타이틀
                title = "회원가입"
                // Back
                setNavigationIcon(R.drawable.arrow_back_24px)
                setNavigationOnClickListener {
                    // 이전 화면으로 간다.
                    mainActivity.removeFragment(MainFragmentName.JOIN_FRAGMENT)
                }
            }
        }
    }

}
AddUserInfoFragment
AddUserInfoFragment 생성
MainFragmentName 수정
// Tools.kt


// MainActivity에서 보여줄 프래그먼트들의 이름
enum class MainFragmentName(var str:String){
    LOGIN_FRAGMENT("loginFragment"),
    JOIN_FRAGMENT("joinFragment"),
    ADD_USER_INFO_FRAGMENT("addUserInfoFragment"),
}
프래그먼트 교체 코드의 when절 수정
// MainActivity.kt


        // 이름으로 분기한다.
        // Fragment의 객체를 생성하여 변수에 담아준다.
        when(name){
            // 로그인 화면
            MainFragmentName.LOGIN_FRAGMENT -> {
                newFragment = LoginFragment()
            }
            // 회원가입 화면1
            MainFragmentName.JOIN_FRAGMENT -> {
                newFragment = JoinFragment()
            }
            // 회원가입 화면2
            MainFragmentName.ADD_USER_INFO_FRAGMENT -> {
                newFragment = AddUserInfoFragment()
            }
        }
JoinFragment에 다음 버튼 동작 메서드 작성
// JoinFragment.kt


    override fun onCreateView(
        inflater: LayoutInflater, container: ViewGroup?,
        savedInstanceState: Bundle?
    ): View? {
        // Inflate the layout for this fragment

        fragmentJoinBinding = FragmentJoinBinding.inflate(inflater)
        mainActivity = activity as MainActivity

        settingToolbar()
        settingButtonJoinNext()

        return fragmentJoinBinding.root
    }

    // 다음 버튼
    fun settingButtonJoinNext(){
        fragmentJoinBinding.apply {
            buttonJoinNext.apply {
                // 버튼을 눌렀을 때
                setOnClickListener {
                    // AddUserInfoFragment를 보여준다.
                    mainActivity.replaceFragment(MainFragmentName.ADD_USER_INFO_FRAGMENT, true, true, null)
                }
            }
        }
    }
다음 버튼을 누르면 AddUserInfoFragment로 이동하는지 확인
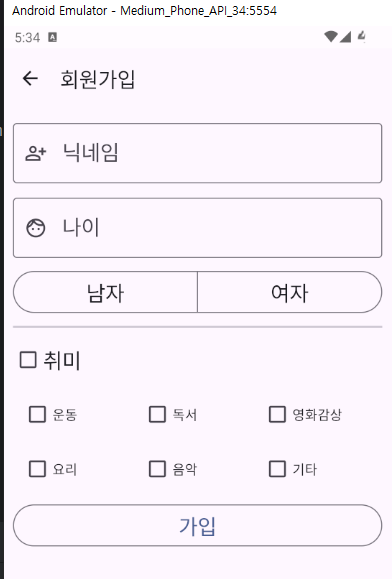
fragment_add_user_info.xml 작성
<?xml version="1.0" encoding="utf-8"?>
<LinearLayout xmlns:android="http://schemas.android.com/apk/res/android"
    xmlns:app="http://schemas.android.com/apk/res-auto"
    xmlns:tools="http://schemas.android.com/tools"
    android:layout_width="match_parent"
    android:layout_height="match_parent"
    android:orientation="vertical"
    android:transitionGroup="true"
    tools:context=".fragment.AddUserInfoFragment">


    <com.google.android.material.appbar.MaterialToolbar
        android:id="@+id/toolbarAddUserInfo"
        android:layout_width="match_parent"
        android:layout_height="wrap_content"
        android:minHeight="?attr/actionBarSize"
        android:theme="?attr/actionBarTheme" />

    <ScrollView
        android:layout_width="match_parent"
        android:layout_height="match_parent">

        <LinearLayout
            android:layout_width="match_parent"
            android:layout_height="wrap_content"
            android:orientation="vertical"
            android:padding="10dp">

            <com.google.android.material.textfield.TextInputLayout
                android:id="@+id/textInputLayoutAddNickname"
                android:layout_width="match_parent"
                android:layout_height="wrap_content"
                android:hint="닉네임"
                app:endIconMode="clear_text"
                app:startIconDrawable="@drawable/person_add_24px">

                <com.google.android.material.textfield.TextInputEditText
                    android:id="@+id/textFieldAddUserInfoNickName"
                    android:layout_width="match_parent"
                    android:layout_height="wrap_content"
                    android:inputType="text"
                    android:textAppearance="@style/TextAppearance.AppCompat.Large" />
            </com.google.android.material.textfield.TextInputLayout>

            <com.google.android.material.textfield.TextInputLayout
                android:id="@+id/textInputLayoutAddAge"
                android:layout_width="match_parent"
                android:layout_height="wrap_content"
                android:layout_marginTop="10dp"
                android:hint="나이"
                app:endIconMode="clear_text"
                app:startIconDrawable="@drawable/face_24px">

                <com.google.android.material.textfield.TextInputEditText
                    android:id="@+id/textFieldAddUserInfoAge"
                    android:layout_width="match_parent"
                    android:layout_height="wrap_content"
                    android:inputType="number|numberDecimal"
                    android:textAppearance="@style/TextAppearance.AppCompat.Large" />
            </com.google.android.material.textfield.TextInputLayout>

            <com.google.android.material.button.MaterialButtonToggleGroup
                android:id="@+id/toggleAddUserInfoGender"
                android:layout_width="match_parent"
                android:layout_height="wrap_content"
                android:layout_marginTop="10dp"
                app:selectionRequired="true"
                app:singleSelection="true">

                <com.google.android.material.button.MaterialButton
                    android:id="@+id/buttonAddUserInfoMale"
                    style="@style/Widget.Material3.Button.OutlinedButton"
                    android:layout_width="wrap_content"
                    android:layout_height="wrap_content"
                    android:layout_weight="1"
                    android:text="남자"
                    android:textAppearance="@style/TextAppearance.AppCompat.Large" />

                <com.google.android.material.button.MaterialButton
                    android:id="@+id/buttonAddUserInfoFemale"
                    style="@style/Widget.Material3.Button.OutlinedButton"
                    android:layout_width="wrap_content"
                    android:layout_height="wrap_content"
                    android:layout_weight="1"
                    android:text="여자"
                    android:textAppearance="@style/TextAppearance.AppCompat.Large" />

            </com.google.android.material.button.MaterialButtonToggleGroup>

            <com.google.android.material.divider.MaterialDivider
                android:layout_width="match_parent"
                android:layout_height="2dp"
                android:layout_marginTop="10dp"
                android:background="@color/black" />

            <com.google.android.material.checkbox.MaterialCheckBox
                android:id="@+id/checkBoxAddUserInfoAll"
                android:layout_width="match_parent"
                android:layout_height="wrap_content"
                android:layout_marginTop="10dp"
                android:text="취미"
                android:textAppearance="@style/TextAppearance.AppCompat.Large" />

            <LinearLayout
                android:id="@+id/checkBoxGroupAddUserInfo1"
                android:layout_width="match_parent"
                android:layout_height="wrap_content"
                android:layout_marginStart="10dp"
                android:layout_marginTop="10dp"
                android:orientation="horizontal">

                <com.google.android.material.checkbox.MaterialCheckBox
                    android:id="@+id/checkBoxAddUserInfoHobby1"
                    android:layout_width="match_parent"
                    android:layout_height="match_parent"
                    android:layout_weight="1"
                    android:text="운동" />

                <com.google.android.material.checkbox.MaterialCheckBox
                    android:id="@+id/checkBoxAddUserInfoHobby2"
                    android:layout_width="match_parent"
                    android:layout_height="match_parent"
                    android:layout_weight="1"
                    android:text="독서" />

                <com.google.android.material.checkbox.MaterialCheckBox
                    android:id="@+id/checkBoxAddUserInfoHobby3"
                    android:layout_width="match_parent"
                    android:layout_height="match_parent"
                    android:layout_weight="1"
                    android:text="영화감상" />
            </LinearLayout>

            <LinearLayout
                android:id="@+id/checkBoxGroupAddUserInfo2"
                android:layout_width="match_parent"
                android:layout_height="wrap_content"
                android:layout_marginStart="10dp"
                android:layout_marginTop="10dp"
                android:orientation="horizontal">

                <com.google.android.material.checkbox.MaterialCheckBox
                    android:id="@+id/checkBoxAddUserInfoHobby4"
                    android:layout_width="match_parent"
                    android:layout_height="match_parent"
                    android:layout_weight="1"
                    android:text="요리" />

                <com.google.android.material.checkbox.MaterialCheckBox
                    android:id="@+id/checkBoxAddUserInfoHobby5"
                    android:layout_width="match_parent"
                    android:layout_height="match_parent"
                    android:layout_weight="1"
                    android:text="음악" />

                <com.google.android.material.checkbox.MaterialCheckBox
                    android:id="@+id/checkBoxAddUserInfoHobby6"
                    android:layout_width="match_parent"
                    android:layout_height="match_parent"
                    android:layout_weight="1"
                    android:text="기타" />
            </LinearLayout>

            <Button
                android:id="@+id/buttonAddUserInfoSubmit"
                style="@style/Widget.Material3.Button.OutlinedButton"
                android:layout_width="match_parent"
                android:layout_height="wrap_content"
                android:layout_marginTop="10dp"
                android:text="가입"
                android:textAppearance="@style/TextAppearance.AppCompat.Large" />
        </LinearLayout>
    </ScrollView>

</LinearLayout>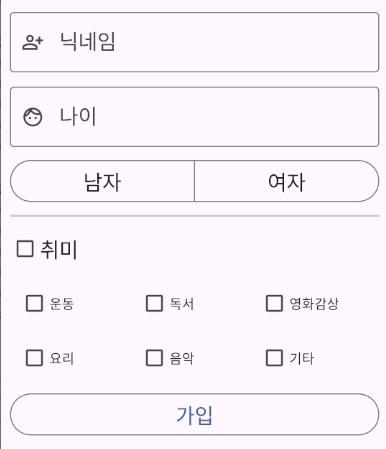
뷰바인딩 및 툴바 세팅
// AddUserInfoFragment.kt


class AddUserInfoFragment : Fragment() {

    lateinit var fragmentAddUserInfoBinding: FragmentAddUserInfoBinding
    lateinit var mainActivity: MainActivity

    override fun onCreateView(
        inflater: LayoutInflater, container: ViewGroup?,
        savedInstanceState: Bundle?
    ): View? {
        // Inflate the layout for this fragment

        fragmentAddUserInfoBinding = FragmentAddUserInfoBinding.inflate(inflater)
        mainActivity = activity as MainActivity

        settingToolbar()

        return fragmentAddUserInfoBinding.root
    }

    fun settingToolbar(){
        fragmentAddUserInfoBinding.apply {
            toolbarAddUserInfo.apply {
                // 타이틀
                title = "회원가입"
                // Back
                setNavigationIcon(R.drawable.arrow_back_24px)
                setNavigationOnClickListener {
                    mainActivity.removeFragment(MainFragmentName.ADD_USER_INFO_FRAGMENT)
                }
            }
        }
    }


}
가입 버튼 동작 메서드 작성
// AddUserInfoFragment.kt


    override fun onCreateView(
        inflater: LayoutInflater, container: ViewGroup?,
        savedInstanceState: Bundle?
    ): View? {
        // Inflate the layout for this fragment

        fragmentAddUserInfoBinding = FragmentAddUserInfoBinding.inflate(inflater)
        mainActivity = activity as MainActivity

        settingToolbar()
        settingButtonAddUserInfoSubmit()

        return fragmentAddUserInfoBinding.root
    }


    // 가입 버튼
    fun settingButtonAddUserInfoSubmit(){
        fragmentAddUserInfoBinding.buttonAddUserInfoSubmit.apply {
            // 눌렀을 때
            setOnClickListener {
                mainActivity.removeFragment(MainFragmentName.ADD_USER_INFO_FRAGMENT)
                mainActivity.removeFragment(MainFragmentName.JOIN_FRAGMENT)
            }
        }
    }
가입 버튼을 눌렀을때 로그인화면으로 잘 돌아가는지 확인한다.
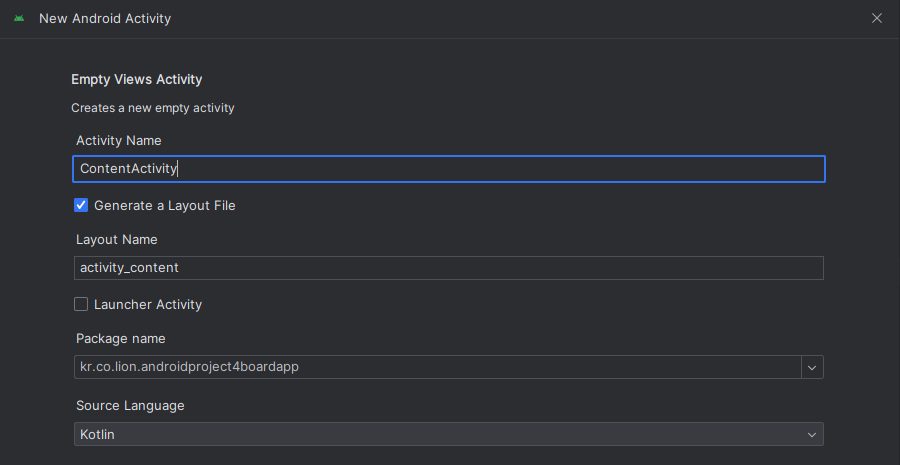
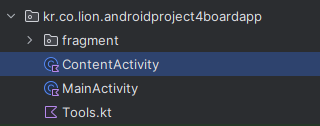
ContentActivity
ContentActivity 생성
LoginFragment의 로그인 버튼 동작 메서드 작성
// LoginFragment.kt

    override fun onCreateView(
        inflater: LayoutInflater, container: ViewGroup?,
        savedInstanceState: Bundle?
    ): View? {
        // Inflate the layout for this fragment

        fragmentLoginBinding = FragmentLoginBinding.inflate(inflater)
        mainActivity = activity as MainActivity

        settingToolbar()
        settingButtonLoginJoin()
        settingButtonLoginSubmit()

        return fragmentLoginBinding.root
    }


    // 로그인 버튼
    fun settingButtonLoginSubmit(){
        fragmentLoginBinding.apply {
            buttonLoginSubmit.apply {
                // 버튼을 눌렀을 때
                setOnClickListener {
                    // ContentActivity를 실행한다.
                    val contentIntent = Intent(mainActivity, ContentActivity::class.java)
                    startActivity(contentIntent)
                    // MainActivity를 종료한다.
                    mainActivity.finish()
                }
            }
        }
    }
여기서 로그인 버튼을 눌러 ContentActivity로 이동하려 할 때 오류가 난다.

FATAL EXCEPTION: mainProcess: kr.co.lion.androidproject4boardapp, PID: 29324java.lang.RuntimeException: Unable to start activity ComponentInfo{kr.co.lion.androidproject4boardapp/kr.co.lion.androidproject4boardapp.ContentActivity}: java.lang.IllegalStateException: You need to use a Theme.AppCompat theme (or descendant) with this activity.AndroidManifest.xml을 보면
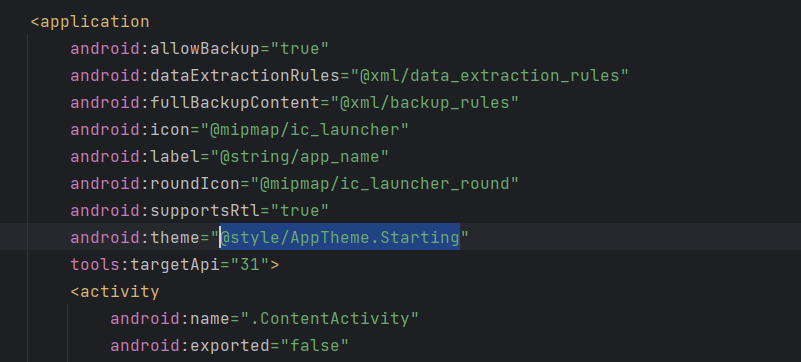
스플래시스크린의 테마가 ContentActivity의 테마로 사용되고 있어서 에러가 나기 때문에 테마를 지정해줘야 한다.
        <activity
            android:name=".ContentActivity"
            android:exported="false"
            android:theme="@style/Base.Theme.AndroidProject4BoardApp"/>
NavigationDrawer
전체를 DrawerLayout으로 묶고 CoordinatorLayout은 본문UI, NavigationView에는 네비게이션에 배치할 UI가 들어간다..
menu.xml파일 생성이 필요하다
menu_content_drawer.xml 생성
일단 만들어놓기만 하기
activity_content.xml 작성
CoordinatorLayout은 디자인탭에서 제공하지않으므로 직접 코드로 작성해줘야 한다.
또는 기존 레이아웃을 ConvertView해서 검색하면 찾을 수 있다

NavigationView는 Containers에 있다.

NavigationView의 layout_gravity속성은 무조건 start로 설정해준다.

<?xml version="1.0" encoding="utf-8"?>
<androidx.drawerlayout.widget.DrawerLayout xmlns:android="http://schemas.android.com/apk/res/android"
xmlns:app="http://schemas.android.com/apk/res-auto"
xmlns:tools="http://schemas.android.com/tools"
android:id="@+id/drawerLayoutContent"
android:layout_width="match_parent"
android:layout_height="match_parent"
tools:context=".ContentActivity">
<androidx.coordinatorlayout.widget.CoordinatorLayout
android:layout_width="match_parent"
android:layout_height="match_parent">
<LinearLayout
android:layout_width="match_parent"
android:layout_height="match_parent"
android:orientation="vertical">
<Button
android:id="@+id/buttonTest"
android:layout_width="match_parent"
android:layout_height="wrap_content"
android:text="Button" />
</LinearLayout>
</androidx.coordinatorlayout.widget.CoordinatorLayout>
<com.google.android.material.navigation.NavigationView
android:id="@+id/navigationViewContent"
android:layout_width="match_parent"
android:layout_height="match_parent"
android:layout_gravity="start"
app:menu="@menu/menu_content_drawer" />
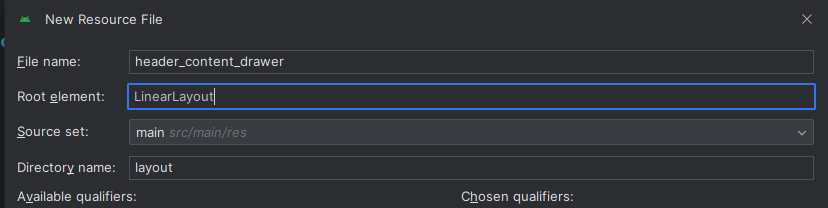
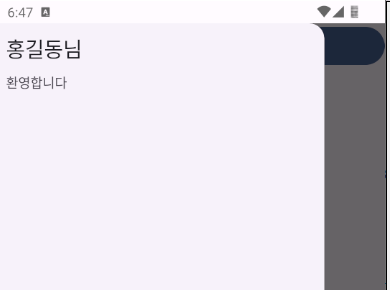
</androidx.drawerlayout.widget.DrawerLayout>header_content_drawer 작성
네비게이션뷰의 헤더로 사용한다.
<?xml version="1.0" encoding="utf-8"?>
<LinearLayout xmlns:android="http://schemas.android.com/apk/res/android"
    android:layout_width="match_parent"
    android:layout_height="match_parent"
    android:orientation="vertical"
    android:padding="10dp">

    <TextView
        android:id="@+id/headerContentDrawerNickName"
        android:layout_width="match_parent"
        android:layout_height="wrap_content"
        android:text="TextView"
        android:textAppearance="@style/TextAppearance.AppCompat.Large" />

    <TextView
        android:id="@+id/textView2"
        android:layout_width="match_parent"
        android:layout_height="wrap_content"
        android:layout_marginTop="10dp"
        android:text="환영합니다" />
</LinearLayout>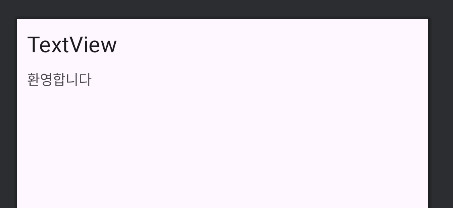
뷰바인딩 및 네비게이션 뷰 설정
class ContentActivity : AppCompatActivity() {

    lateinit var activityContentBinding: ActivityContentBinding

    override fun onCreate(savedInstanceState: Bundle?) {
        super.onCreate(savedInstanceState)

        activityContentBinding = ActivityContentBinding.inflate(layoutInflater)
        setContentView(activityContentBinding.root)

        settingNavigationView()

        activityContentBinding.buttonTest.setOnClickListener {
            activityContentBinding.drawerLayoutContent.open()
        }
    }

    // 네비게이션 뷰 설정
    fun settingNavigationView(){
        activityContentBinding.apply {
            navigationViewContent.apply {
                // 헤더로 보여줄 view를 생성한다.
                val headerContentDrawerBinding = HeaderContentDrawerBinding.inflate(layoutInflater)
                // 헤더로 보여줄 View를 설정한다.
                addHeaderView(headerContentDrawerBinding.root)

                // 사용자 닉네임을 설정한다.
                headerContentDrawerBinding.headerContentDrawerNickName.text = "홍길동님"
            }
        }
    }
}
menu_content_drawer.xml 작성
<?xml version="1.0" encoding="utf-8"?>
<menu xmlns:app="http://schemas.android.com/apk/res-auto"
    xmlns:android="http://schemas.android.com/apk/res/android">

    <item
        android:title="게시판" >
        <menu>
            <item
                android:id="@+id/menuItemContentNavigationAll"
                android:checkable="true"
                android:icon="@drawable/local_shipping_24px"
                android:title="전체게시판"
                app:showAsAction="ifRoom" />
            <item
                android:id="@+id/menuItemContentNavigation1"
                android:checkable="true"
                android:icon="@drawable/post_add_24px"
                android:title="자유게시판"
                app:showAsAction="ifRoom" />
            <item
                android:id="@+id/menuItemContentNavigation2"
                android:checkable="true"
                android:icon="@drawable/compost_24px"
                android:title="유머게시판"
                app:showAsAction="ifRoom" />
            <item
                android:id="@+id/menuItemContentNavigation3"
                android:checkable="true"
                android:icon="@drawable/package_24px"
                android:title="시사게시판"
                app:showAsAction="ifRoom" />
            <item
                android:id="@+id/menuItemContentNavigation4"
                android:checkable="true"
                android:icon="@drawable/approval_24px"
                android:title="스포츠게시판"
                app:showAsAction="ifRoom" />
        </menu>

    </item>
    <item
        android:id="@+id/menuItemContentNavigationModifyUserInfo"
        android:icon="@drawable/person_24px"
        android:title="사용자 정보 수정"
        app:showAsAction="ifRoom" />
    <item
        android:id="@+id/menuItemContentNavigationLogout"
        android:icon="@drawable/logout_24px"
        android:title="로그아웃"
        app:showAsAction="ifRoom" />
    <item
        android:id="@+id/menuItemContentNavigationSignOut"
        android:icon="@drawable/move_item_24px"
        android:title="회원탈퇴"
        app:showAsAction="ifRoom" />
</menu>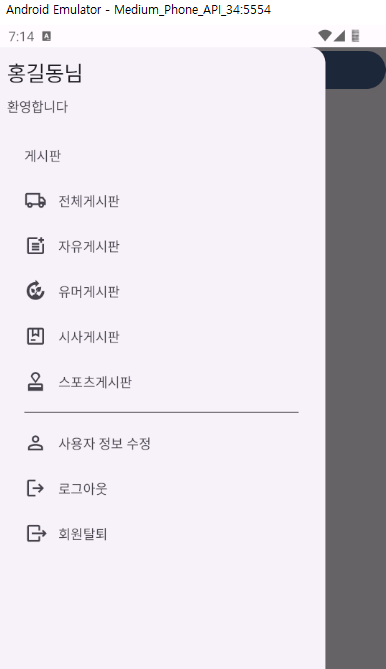
메뉴 구분선은 최상단의 MenuItem마다 구분될 수 있도록 자동으로 셋팅된다.
네비게이션 메뉴를 눌렀을 때 동작하는 리스너
// ContentActivity.kt
// 네비게이션 뷰 설정
fun settingNavigationView(){
activityContentBinding.apply {
navigationViewContent.apply {
// 헤더로 보여줄 view를 생성한다.
val headerContentDrawerBinding = HeaderContentDrawerBinding.inflate(layoutInflater)
// 헤더로 보여줄 View를 설정한다.
addHeaderView(headerContentDrawerBinding.root)
// 사용자 닉네임을 설정한다.
headerContentDrawerBinding.headerContentDrawerNickName.text = "홍길동님"
// 메뉴를 눌렀을 때 동작하는 리스너
setNavigationItemSelectedListener {
// 딜레이를 조금 준다.
SystemClock.sleep(200)
// 메뉴의 id로 분기한다.
when(it.itemId){
// 전체 게시판
R.id.menuItemContentNavigationAll -> {
// NavigationView를 닫아준다.
drawerLayoutContent.close()
}
// 자유 게시판
R.id.menuItemContentNavigation1 -> {
// NavigationView를 닫아준다.
drawerLayoutContent.close()
}
}
true
}
}
}
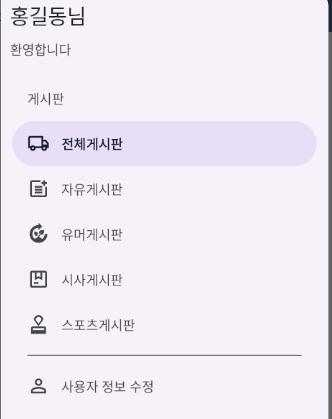
}항목을 클릭할때 열고닫히는 애니메이션이 가끔 빠르게 동작하는 경우가 있어 클릭시 잠깐의 딜레이를 같이 준다.
5개 게시판 항목에 checkable 속성을 true로 준 경우에는 항목 클릭시 체크한 효과를 보여준다.
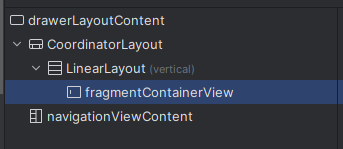
FragmentContainerView 추가
activity_content.xml에서 버튼을 지우고 fragmentContainerView를 추가해준다.
<?xml version="1.0" encoding="utf-8"?>
<androidx.drawerlayout.widget.DrawerLayout xmlns:android="http://schemas.android.com/apk/res/android"
    xmlns:app="http://schemas.android.com/apk/res-auto"
    xmlns:tools="http://schemas.android.com/tools"
    android:id="@+id/drawerLayoutContent"
    android:layout_width="match_parent"
    android:layout_height="match_parent"
    tools:context=".ContentActivity">

    <androidx.coordinatorlayout.widget.CoordinatorLayout
        android:layout_width="match_parent"
        android:layout_height="match_parent">

        <LinearLayout
            android:layout_width="match_parent"
            android:layout_height="match_parent"
            android:orientation="vertical">

            <androidx.fragment.app.FragmentContainerView
                android:id="@+id/fragmentContainerView"
                android:layout_width="match_parent"
                android:layout_height="wrap_content" />
        </LinearLayout>
    </androidx.coordinatorlayout.widget.CoordinatorLayout>

    <com.google.android.material.navigation.NavigationView
        android:id="@+id/navigationViewContent"
        android:layout_width="match_parent"
        android:layout_height="match_parent"
        android:layout_gravity="start"
        app:menu="@menu/menu_content_drawer" />
</androidx.drawerlayout.widget.DrawerLayout>
기존의 버튼 관련 코드 부분은 지워준다.
