모델의 레이블링 툴인 label studio를 설치하고, 모델과 데이터를 연결하여 레이블링 할 수 있도록 설정한 내용을 다룬다.
설치
label-studio 설치
pip install label-studiolabel-studio-ml-backend 설치(label-studio-ml)
- https://github.com/HumanSignal/label-studio-ml-backend?tab=readme-ov-file#1-installation 공식 문서에서 아래와 같이 설치하면된다고 했지만 계속
label-studio-ml: command not found에러가 발생하였음git clone https://github.com/HumanSignal/label-studio-ml-backend.git cd label-studio-ml-backend/ pip install -e . label-studio-ml --help - 이것 저것 다해봤는데 아래 명령어를 하니 됨..ㅎ 그래도 https://github.com/HumanSignal/label-studio-ml-backend/tree/master/label_studio_ml/examples/huggingface_llm와 같은 예시 코드들을 보고 해보면서 해결할 수 있었음.
pip install git+https://github.com/HumanSignal/label-studio-ml-backend.git
Quick Start
label-studio (참고자료)
-
Install Label Studio:
pip install label-studio -
Start Label Studio
label-studio start -
Open Label Studio at
http://localhost:8080. -
Sign up with an email address and password that you create.
-
Click Create to create a project and start labeling data.
-
Name the project and optionally enter a description and select a color.
-
Click Data Import and upload the data files that you want to use. If you want to use data from a local directory, cloud storage bucket, or database, skip this step for now.
-
Click Labeling Setup and choose a template and customize the label names for your use case.
-
Click Save to save your project.
label-studio-ml-backend
예시 모델 중 huggingface_llm을 통한 실행(참고자료)
-
이미 정의된 huggingface llm 모델을 실행하여 모델 api를 띄움
git clone https://github.com/HumanSignal/label-studio-ml-backend.git cd label-studio-ml-backend/label_studio_ml/exmaples label-studio-ml start huggingface_llm/ -d -
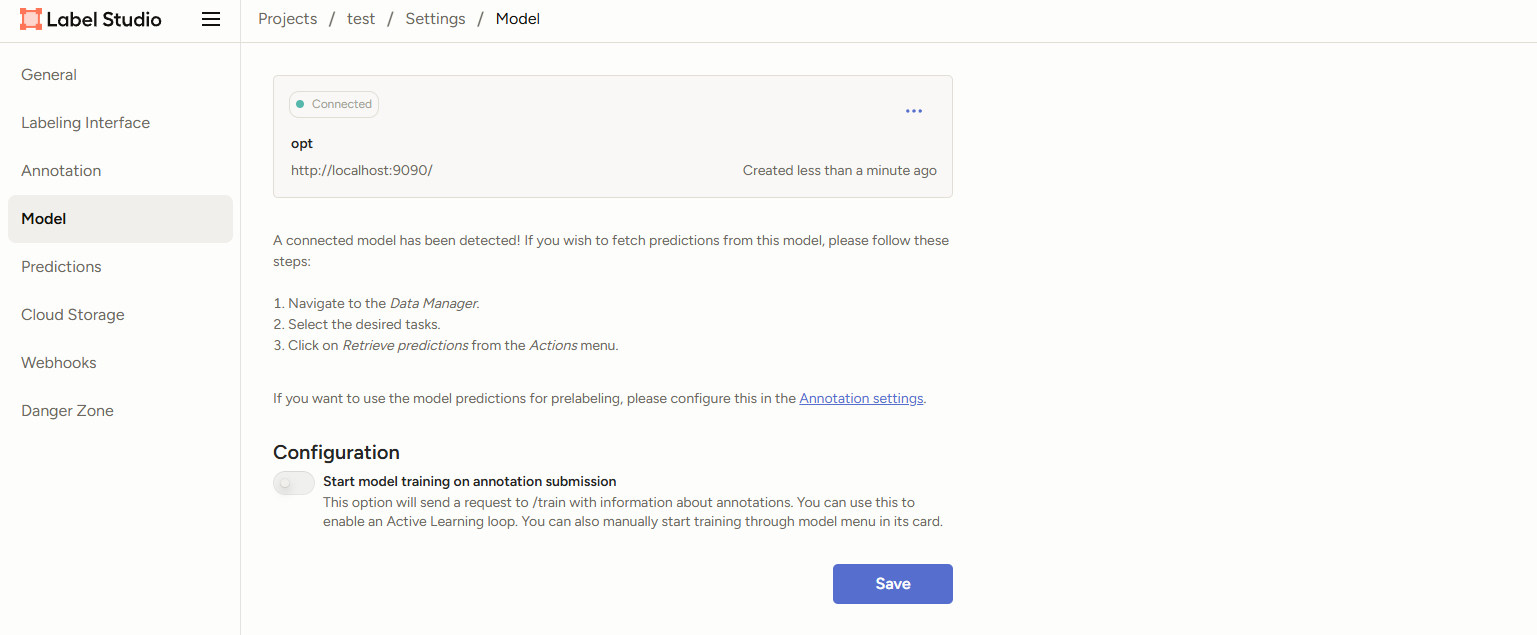
프로젝트 안에 모델 등록.
project>settings>Model>Connect Model을 선택한 후 등록하고 싶은 모델 이름과 Backend URL을 설정하고 저장한다.http://localhost:9090/health와 같이 해당 url이 유효한지 확인하고 저장이 완료된다. 아래 사진은 연결이 완료된 후 화면이다.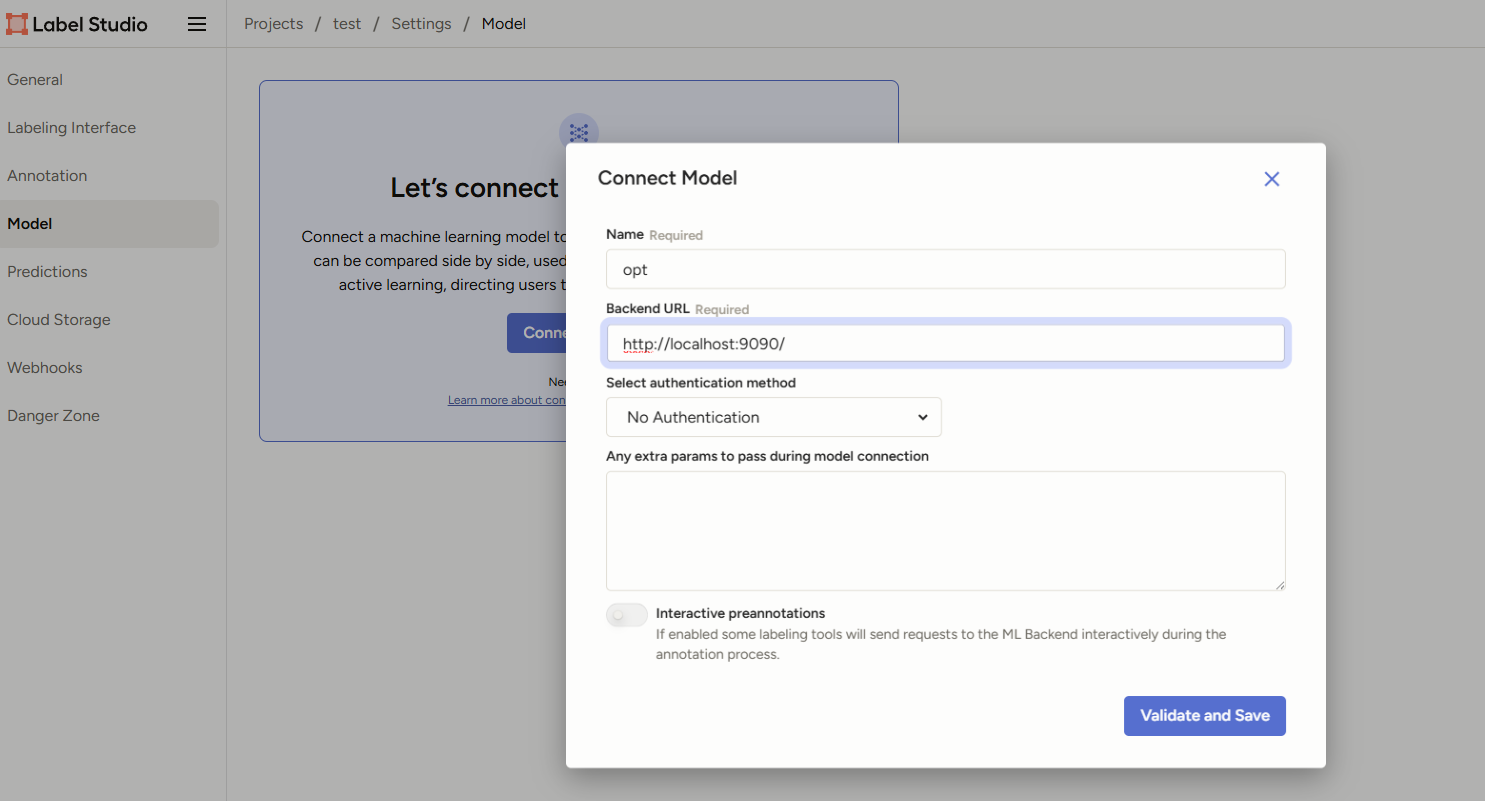
개인 모델을 실행을 위한 ml_backend 템플릿 활용 (참고자료)
-
아래 코드를 통해 ml_backend 템플릿 directory가 생성됨
label-studio-ml create my_ml_backend -
생성된 모델 레포에
model.py를 수정. api 예측 결과를 수정하기 위해서는predict()함수 수정def predict(self, tasks, context, **kwargs): """Make predictions for the tasks.""" return predictionspredict() 함수는 레이블링 진행할 데이터인 tasks를 예측하기 위해 사용된다.
tasks: Label Studio tasks in JSON formatcontext: Label Studio context in JSON format - for interactive labeling scenariopredictions: Predictions array in JSON format
-
(옵션) training 로직을 작성하기 위해서는
fit()함수를 수정하면 된다. -
model 실행
label-studio-ml start my_ml_backend -d -
프로젝트 안에 모델 등록.
project>settings>Model>Connect Model을 선택한후, 등록하고 싶은 모델 이름과 Backend URL을 설정하고 저장한다.http://localhost:9090/health와 같이 해당 url이 유효한지 확인하고 저장이 완료된다.
라벨링 적용하기
프로젝트 생성하기
-
프로젝트
Create버튼 클릭 -
프로젝트 이름을 설정하고,
Labeling Setup을 클릭한 후 아래 코드를 복붙. 그러면 UI Preview를 확인할 수 있다.<View> <Text name="input_text" value="$text"/> <TextArea name="generated_text" toName="input_text"/> </View>여기서 Tag는 2가지 개념의 Tag가 존재한다.
- 하나는 라벨링의 대상이 되는
Object Tag이고, - 다른 하나는 라벨링 데이터를 작성하는 공간인
Control Tag이다. - 각 태그의 자세한 설명은 https://labelstud.io/tags/ 을 참고.
Object Tag와Control Tag를 연결하기 위해서는Control Tag에toName으로 연결되는Object Tag의 name을 넣는다.
- 하나는 라벨링의 대상이 되는
레이블링할 데이터 넣기
Go to import 버튼 클릭 후 데이터를 넣는다.
레이블링 하기
- 아래와 같이 텍스트를 입력하여 라벨링을 할 수 있다.
submit버튼을 눌러야 저장이 된다.
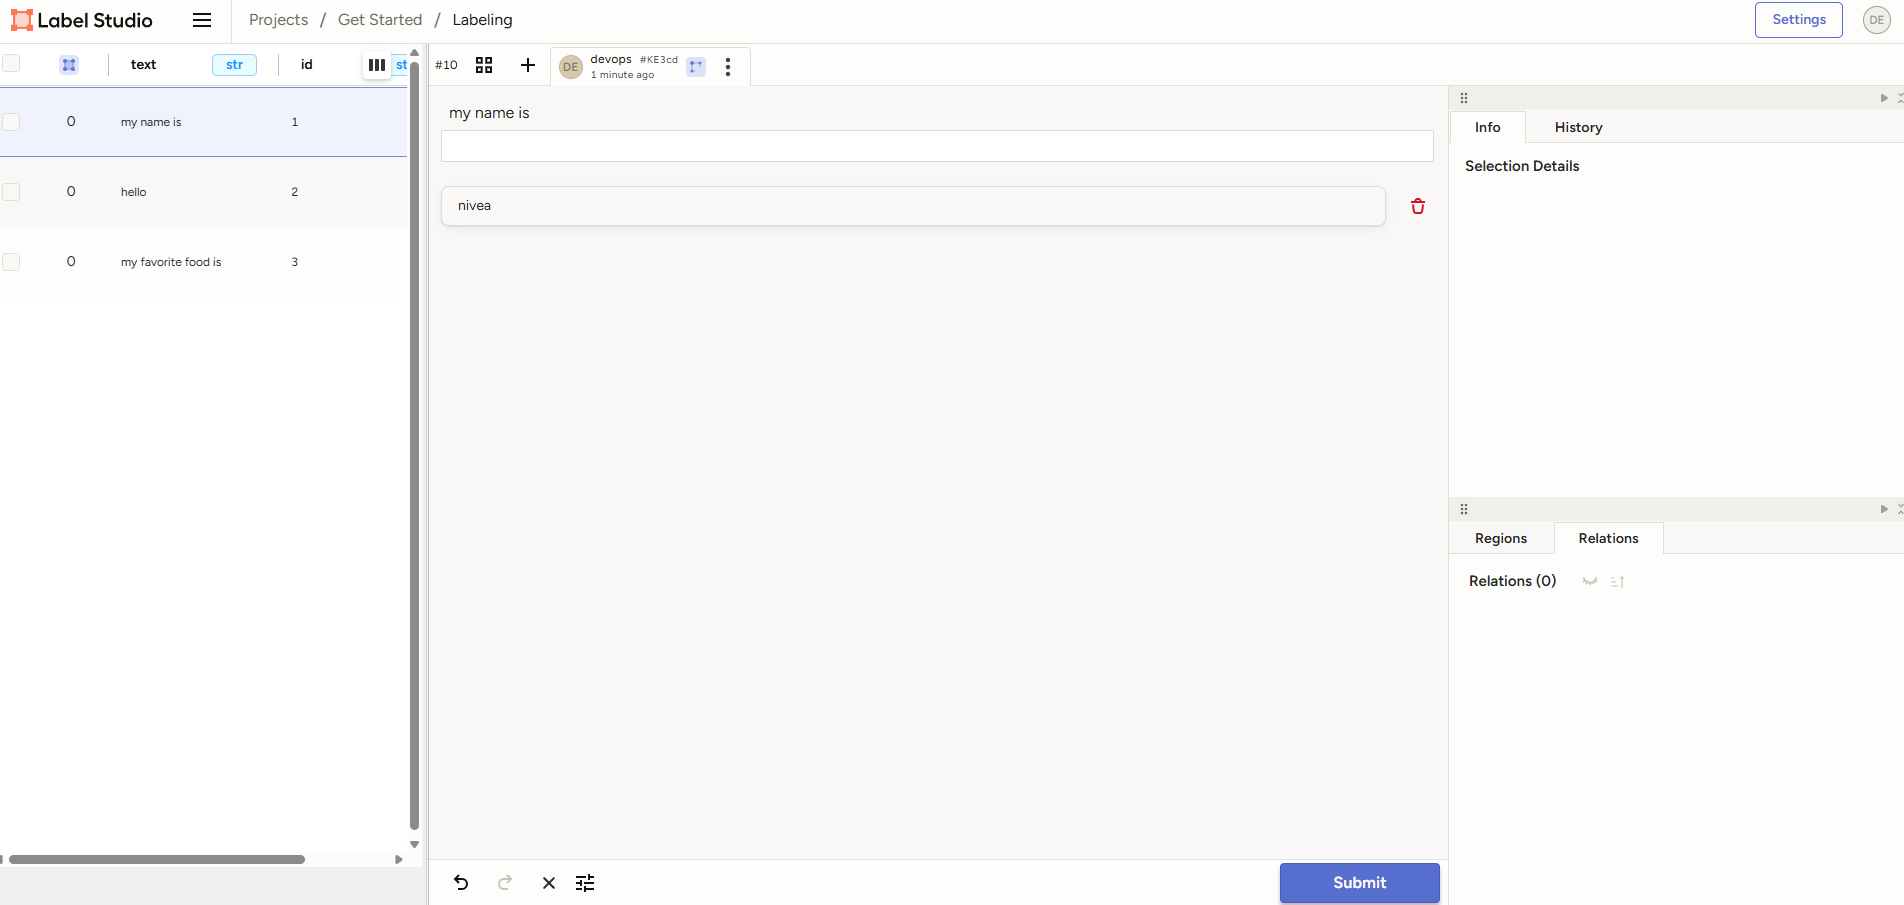
- 데이터를 여러개 입력하면 여러개가 라벨링된다. 하나의 응답만을 할 수 있도록 고정되지는 않는 듯 하다.
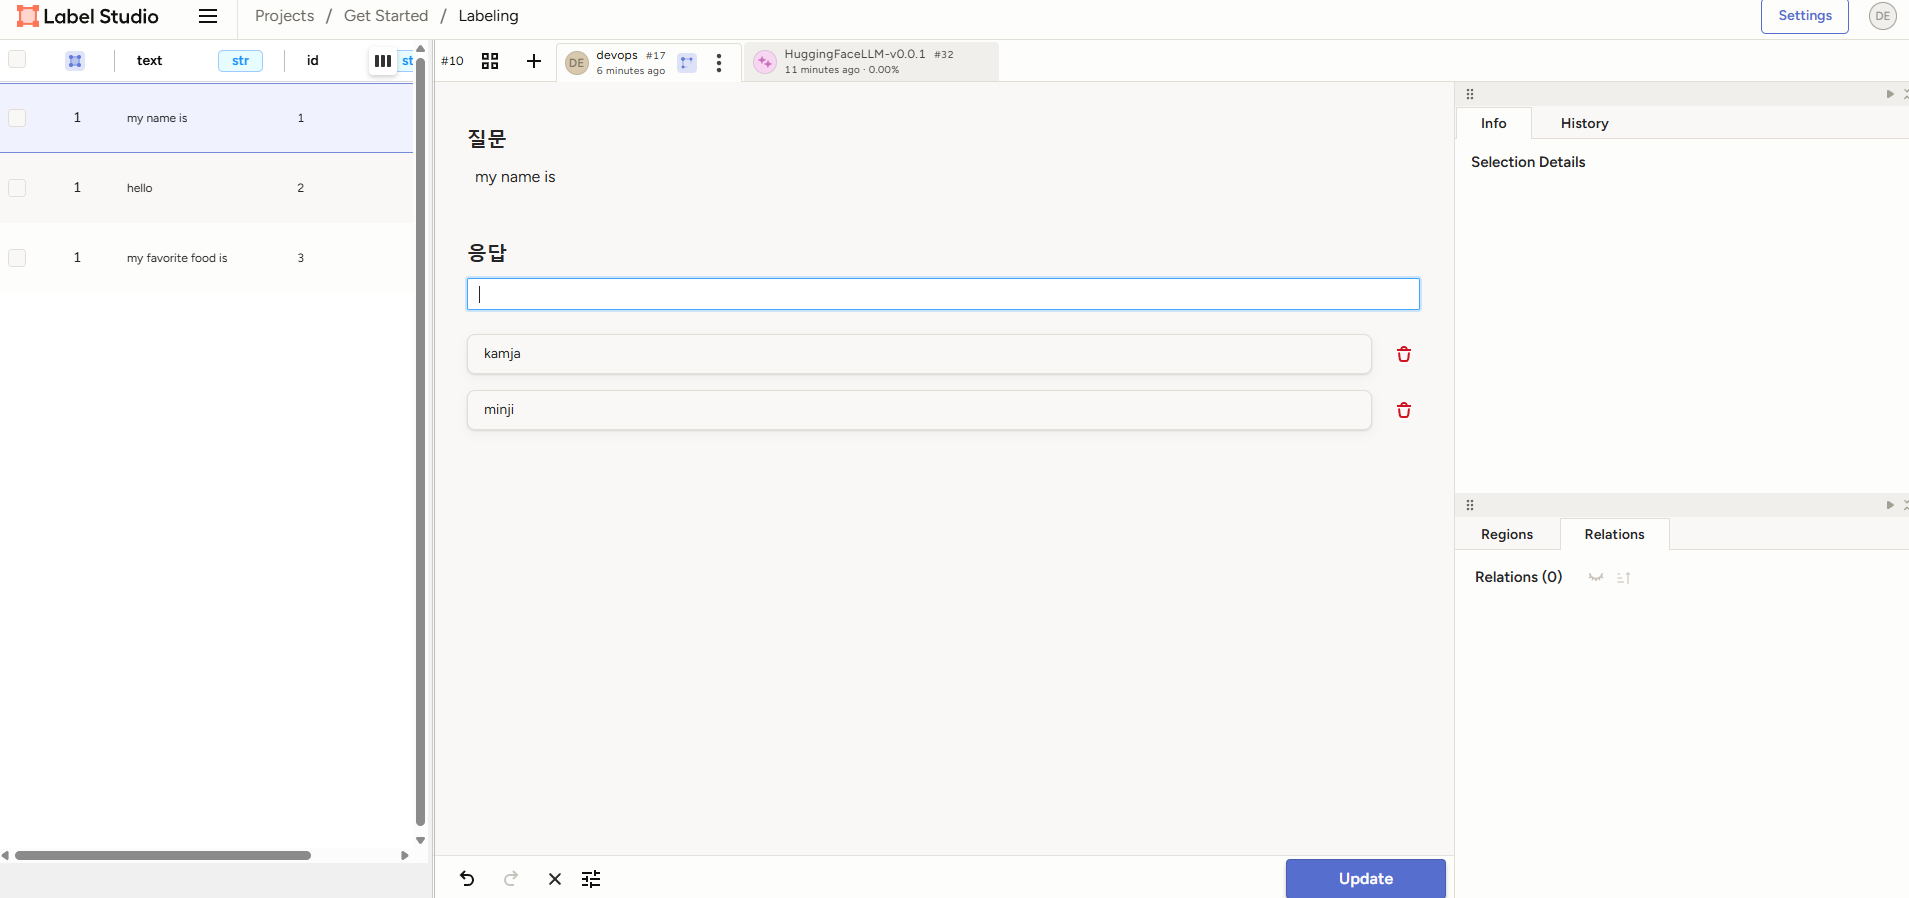
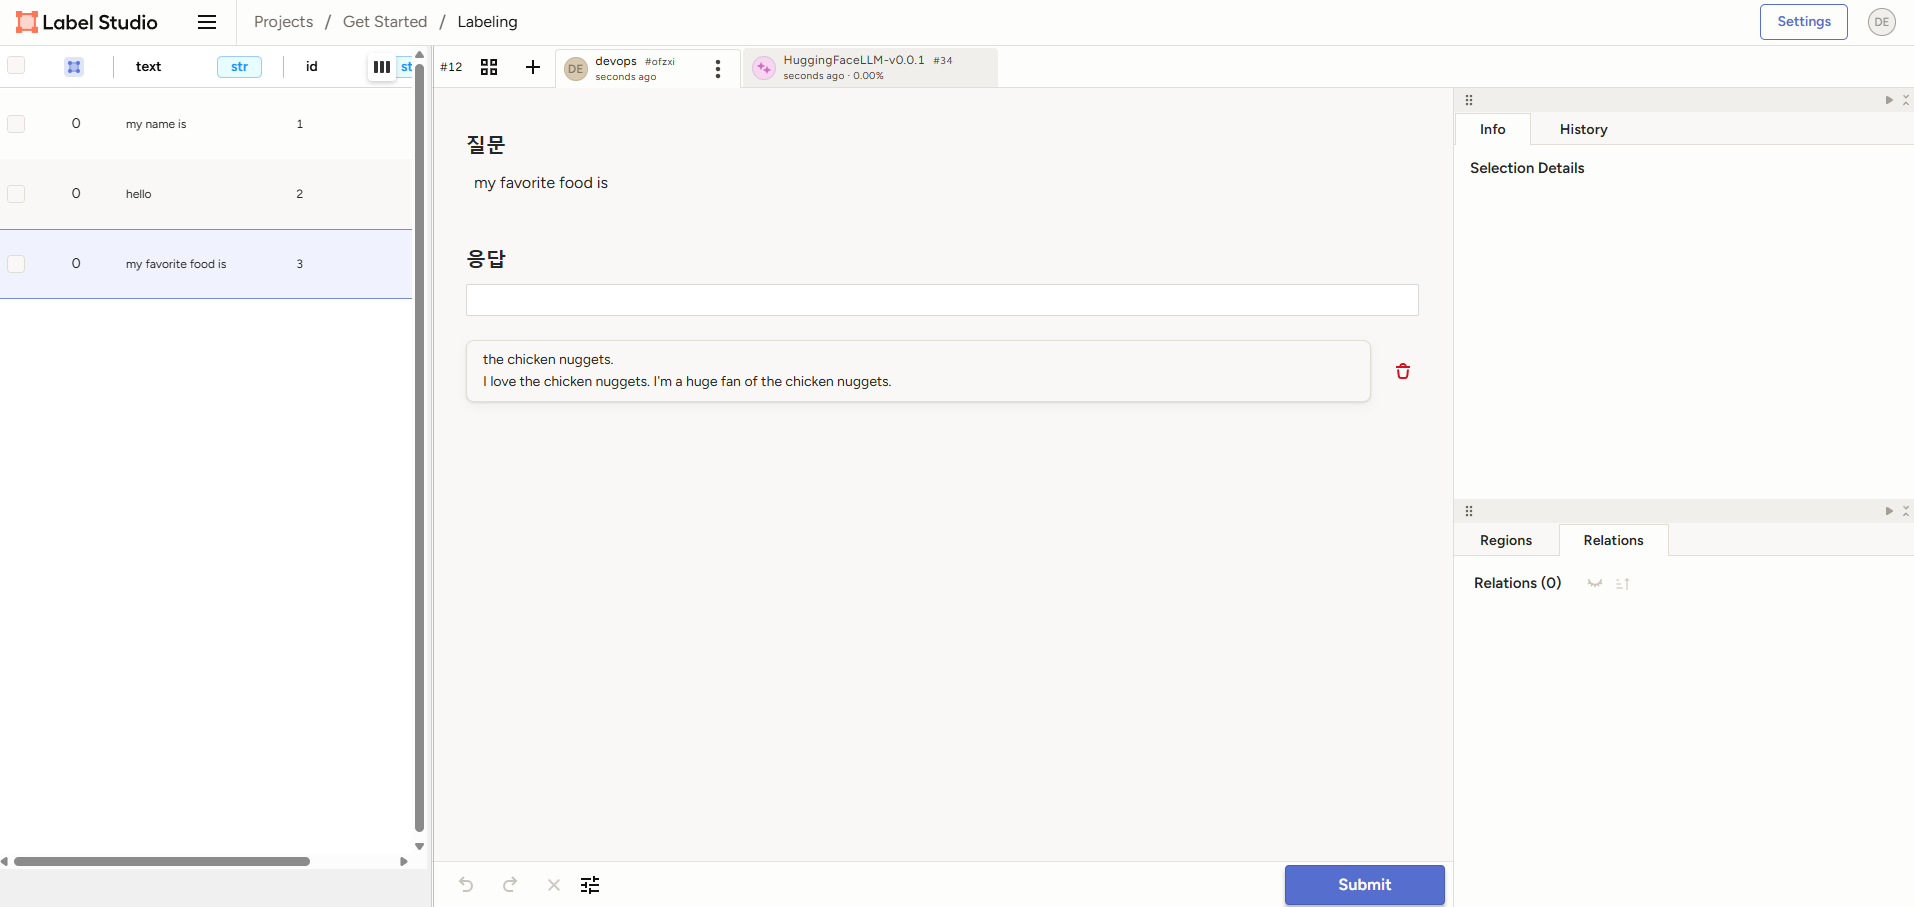
모델 예측 결과를 레이블링 데이터로 활용하기
- 지정된 필드(여기서는
text) 데이터를 설정된 모델의 입력으로 넣어, 모델의 예측 결과를 반환받을 수 있다. 우선 label-studio-ml-backend을 통해 모델 api 배포 및 모델 연결을 미리 해야한다. - 데이터 레이블링을 시작하면 아래와 같이 모델을 통해 생성된 텍스트를 확인할 수 있다. 모델이 생성한 텍스트가 마음에 들면 바로
submit을 누르면 저장이 된다. 이때 예측 모델의 이름은HuggingFaceLLM-v0.0.1가 된 이유는 model.py를 통해model_version을 이와 같이 정의하였기 때문이다.
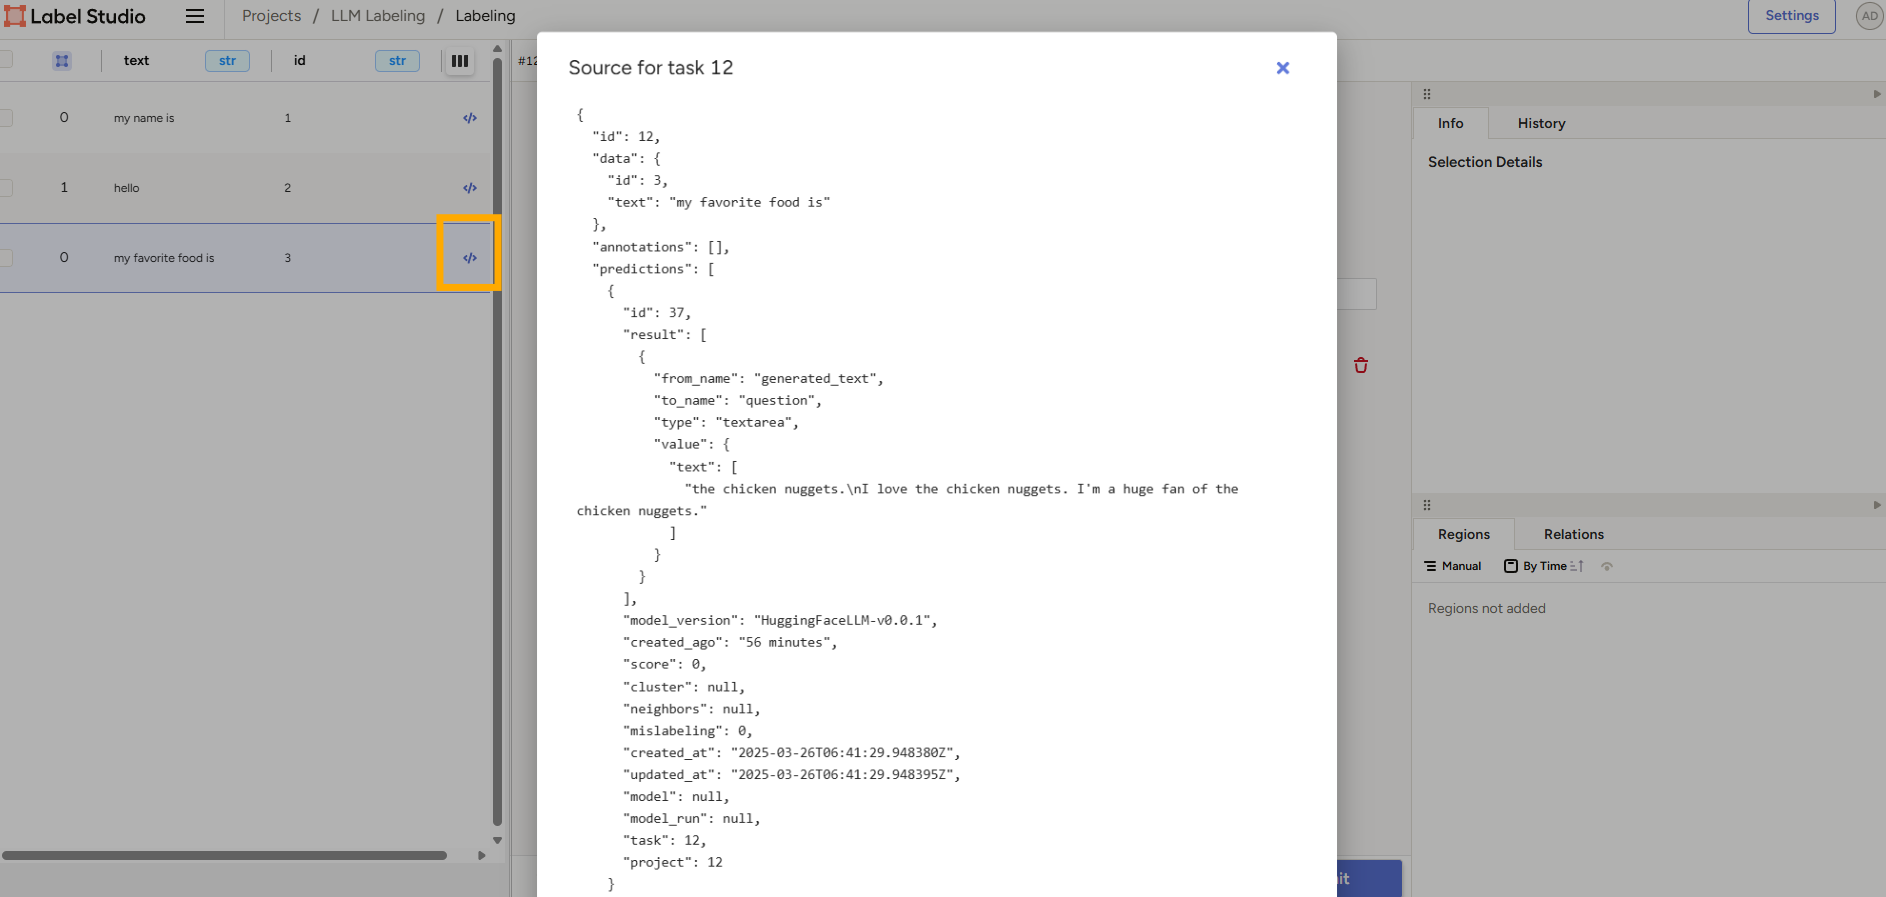
해당 데이터 정보 조회
show task source를 통해 각 데이터의 아이디(id), 입력(data), 모델 예측 결과(predictions), 레이블링된 데이터(annotatioins)를 확인할 수 있다.
레이블링된 결과 저장하기
- 레이블링을 모두 완료하면
export버튼을 누른 후 저장하면 된다.
후기
- ui의 사용자가 코드를 변경할 수 있고, 좀 더 자유롭게 사용할 수 있는 툴이라고 생각하였다.
- 자율성이 큰만큼 모델의 응답과 UI를 연결해주기위한 설정 등이 까다로웠다. 하지만 한번 익숙해지면 유용하게 잘 쓸 수 있는 툴이 될 거 같다.
- 매번 submit을 선택하는게 귀찮을거 같긴한데 그게 확실히 확인했다는 사인이긴 하지
- 하나의 응답만 labeling은 안되는 듯
참조 문서
label studio
- https://labelstud.io/guide
- Getting Started With Label Studio: A Step-By-Step Guide : https://labelstud.io/learn/getting-started-with-label-studio/
- api docs : https://labelstud.io/api/
- Tag : https://labelstud.io/tags/
- 튜토리얼 - Evaluate LLM responses : https://api.labelstud.io/tutorials/tutorials/evaluate-llm-responses
label studio ml backend
- https://github.com/HumanSignal/label-studio-ml-backend/tree/master
- example for hugging face large language model backend : https://github.com/HumanSignal/label-studio-ml-backend/tree/master/label_studio_ml/examples/huggingface_llm
- template에서 태그를 조회하는 함수(예시 :
get_first_tag_occurence())들을 확인할 수 있는 코드 : https://github.com/HumanSignal/label-studio-sdk/blob/master/src/label_studio_sdk/label_interface/interface.py