1)
prac커서올린 후 > New > Directoty > 'static'폴더 , 'templates'폴더 하나씩 만들기
2)
'templates'커서 올린 후 > New > HTML File > 'index.html'파일 만들기
서버를 만들었기 때문에 localhost:5000으로 접속해서볼 것!! html의 단순 브라우저로 보는 것은 X
3) app.py파일에 GET요청 API코드붙이기
@app.route('/test', methods=['GET'])
def test_get():
   title_receive = request.args.get('title_give')
   //'title_give로 가져온 값 가져오란의미
   print(title_receive)
   return jsonify({'result':'success', 'msg': '이 요청은 GET!'})
//request 와 jsonify 붙이기
from flask import Flask, render_template, request, jsonify
app = Flask(__name__)
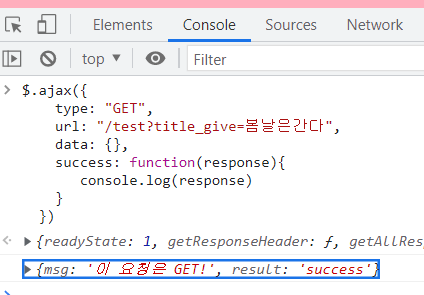
4) GET요청 확인Ajaxz코드를 console창에 입력
$.ajax({
    type: "GET",
    //GET요청은'?'이용!
    url: "/test?title_give=봄날은간다",
    data: {},
    success: function(response){ //서버에서 내려주는 값
       console.log(response)
    }
  })
console.log(response)했기 때문에 하단의 네모안의 결과값이 나오는 것을 확인 할 수 있다!!
5) app.py파일에 POST요청 API코드붙이기
@app.route('/test', methods=['POST'])
def test_post():
//title_give의 값을 가져오란 의미
title_receive = request.form['title_give']
print(title_receive)
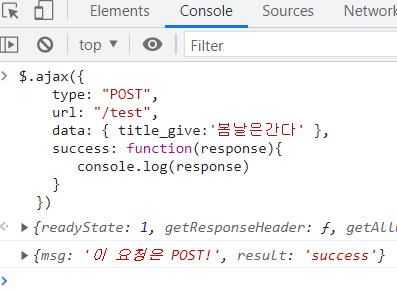
return jsonify({'result':'success', 'msg': '이 요청은 POST!'})6) POST요청 확인Ajaxz코드를 console창에 입력
$.ajax({
    type: "POST",
    url: "/test",
    data: { title_give:'봄날은간다' },
    success: function(response){
       console.log(response)
    }
  })

귀엽고 상큼하다?