
진도표 7일차와 연결됩니다.
우리는 JPA라는 개념을 배우고 유저 테이블에 JPA를 적용해 보았습니다. 몇 가지 문제를 통해 JPA를 연습해 봅시다!🔥
문제 1.
과제 #6 에서 만들었던 Fruit 기능들을 JPA를 이용하도록 변경해보세요! 😊
해결 과정
💡 먼저 application.yml부터 설정했습니다.
application.yml
spring:
  config:
    activate:
      on-profile: local
  datasource:
    url: "jdbc:mysql://localhost:3306/inflearn"
    username: "username"
    password: "userpassword"
    driver-class-name: com.mysql.cj.jdbc.Driver

  jpa:
    hibernate:
      ddl-auto: none #

    properties:
      hibernate:
        show_sql: true
        format_sql: true
        dialect: org.hibernate.dialect.MySQL8Dialect
💡 다음으로
domain디렉토리에 JpaRepository를 상속받는FruitRepository를 새롭게 생성하였습니다.
FruitRepository
public interface FruitRepository extends JpaRepository<FruitInfoEntity, Long> {
    Optional<FruitInfoEntity> findByIdAndSoldOutFalse(long id);
    List<FruitInfoEntity> findAllByName(String name);
    long countBySoldOutTrueAndName(String name);
    List<FruitInfoEntity> findAllByPriceGreaterThanEqual(long price);
    List<FruitInfoEntity> findAllByPriceLessThanEqual(long price);
}
// JpaRepository를 상속받고 있으므로, 따로 @Repository를 선언할 필요가 없다!!
💡 기존의
JdbcRepository를 유지시키기 위해, 새롭게 APIServiceV2 를 생성하였습니다.
APIServiceV2
@Service
@RequiredArgsConstructor
public class APIServiceV2 {
    private final FruitRepository repository;

    @Transactional
    public void saveFruitInfo(FruitInfoRequest request){
        repository.save(request.toEntity());
    }

    @Transactional
    public void soldFruitInfo(SoldFruitInfoRequest request){
        FruitInfoEntity fruitInfo = repository.findByIdAndSoldOutFalse(request.getId())
                .orElseThrow(IllegalArgumentException::new);
        fruitInfo.update_Sold_out();
    }

    @Transactional
    public SalesAmountResponse salesAmount(String name){
        List<FruitInfoEntity> fruitInfoEntityList = repository.findAllByName(name);
        if(fruitInfoEntityList.isEmpty()) throw new IllegalArgumentException("해당이름의 과일은 존재하지 않습니다.");
        long salesAmount = 0;
        long notSalesAmount = 0;
        for(FruitInfoEntity fruitInfo : fruitInfoEntityList) {
            if (fruitInfo.isSoldOut()) salesAmount += fruitInfo.getPrice();
            else notSalesAmount += fruitInfo.getPrice();
        }
        return new SalesAmountResponse(salesAmount, notSalesAmount);
    }
}
soldFruitInfo= 해당 Id를 조회하고, 팔리지 않았으면 sold_out 처리를 해줬습니다.salsesAmount= 해당 이름을 가진 FruitInfoEntity List를 가져오고,
해당 List를 조회해서 sold_out == true이면 salseAmount의 값에 price를 더하고,
그렇지 않으면 notSalesAmount 에 price를 더합니다.
Controller
@RequiredArgsConstructor
@RestController
public class APIController {
	private final APIServiceV2 apiService;
}
💡 JpaRepository를 사용하기 위해 APIService를 V2로 바꿔줬습니다.
결과
-
saveFruitInfo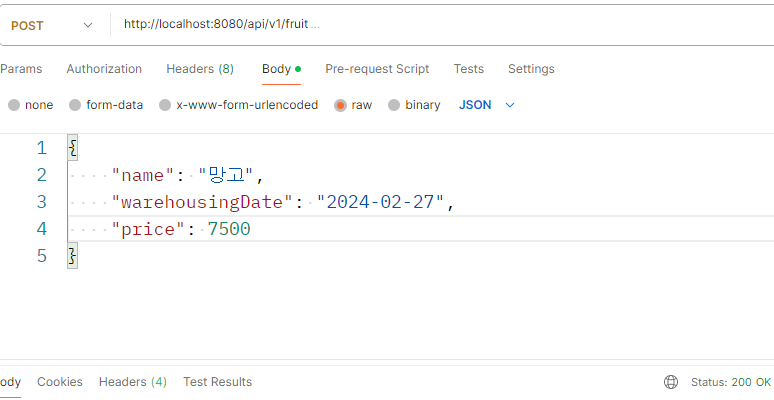

-
soldFruitInfo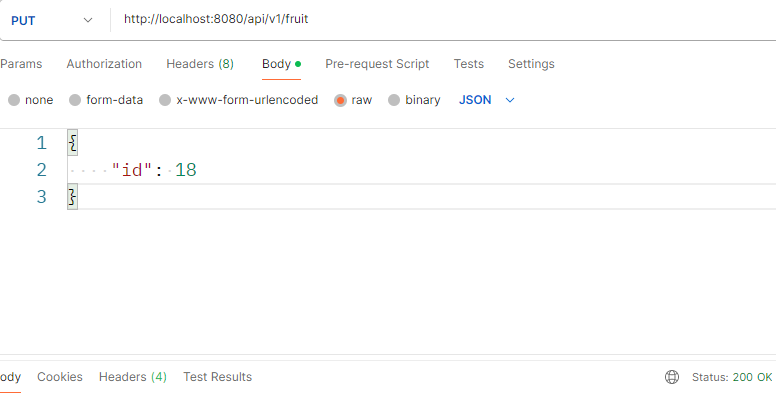

-
salesAmount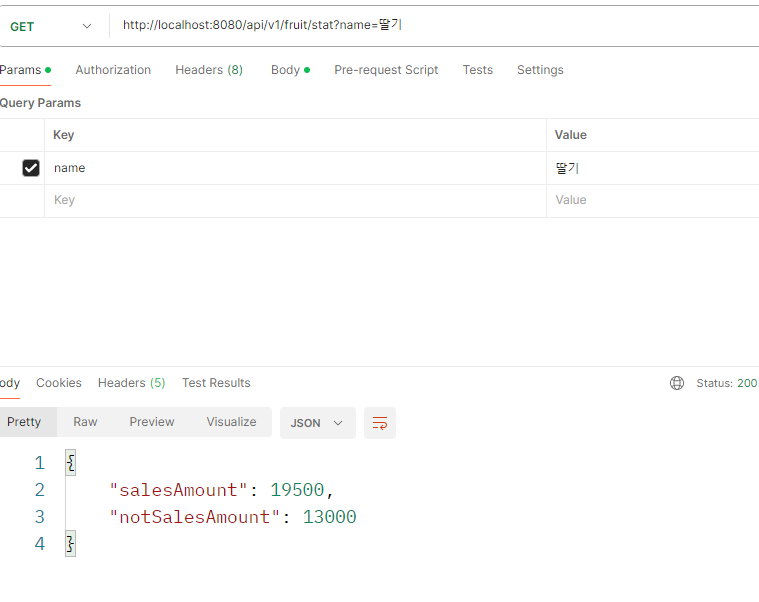
문제 2.
우리는 특정 과일을 기준으로 지금까지 우리 가게를 거쳐갔던 과일 개수를 세고 싶습니다.
<문제 1>에서 만들었던 과일 Entity Class를 이용해 기능을 만들어 보세요! 👍
예를 들어,
1. (1, 사과, 3000원, 판매 O)
2. (2, 바나나, 4000원, 판매 X)
3. (3, 사과, 3000원, 판매 O)
와 같은 세 데이터가 있고, 사과를 기준으로 과일 개수를 센다면, 우리의 API는 2를 반환할 것입니다.
구체적인 스펙은 다음과 같습니다.
- HTTP method :
GET - HTTP path :
/api/v1/fruit/count - HTTP query
- name : 과일 이름
- 예시
GET /api/v1/fruit/count?name=사과 - HTTP 응답 Body
 {
	"count": long
}- HTTP 응답 Body 예시
 {
	"count": 2
 }
해결 과정
Controller
@GetMapping("/api/v1/fruit/count")
    public ResponseEntity<GetSoldFruitCountResponse> getSoldFruitCount (@RequestParam String name){
        GetSoldFruitCountResponse getSoldFruitCountResponse = apiService.getSoldFruitCount(name);
        return ResponseEntity.ok()
                .body(getSoldFruitCountResponse);
    }
Service
@Transactional
public GetSoldFruitCountResponse getSoldFruitCount(String name){
  return new GetSoldFruitCountResponse(repository.countBySoldOutTrueAndName(name));
}
💡
countBySoldOutTrueAndName
해당 name으로 조회한 후, sold_out이 true인 값의 수를 반환하게 만들었습니다. (팔린 과일)
해당 name이 없다면, 0이 반환됩니다.
DTO(Response)
public record GetSoldFruitCountResponse(long count) {
}
결과
getSoldFruitCount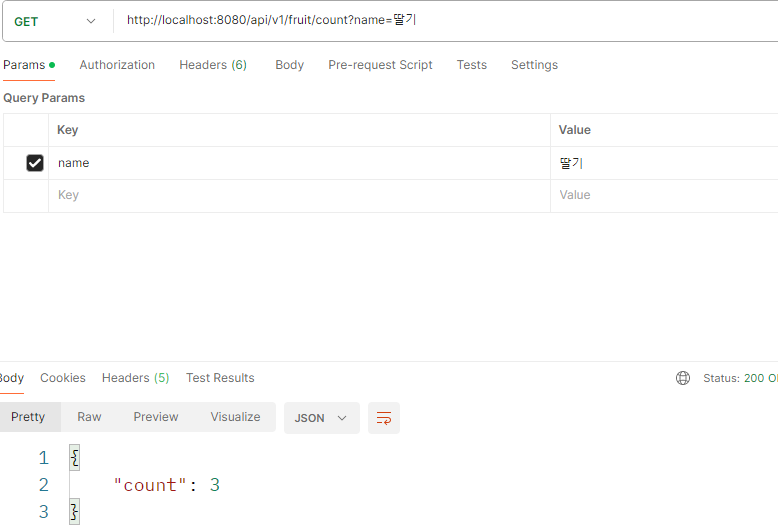
문제 3.
우리는 아직 판매되지 않은 특정 금액 이상 혹은 특정 금액 이하의 과일 목록을 받아보고 싶습니다.
구체적인 스펙은 다음과 같습니다.
- HTTP method :
GET - HTTP path :
/api/v1/fruit/list - HTTP query
- option : "GET"혹은 "LTE"라는 문자열이 들어온다.
- GTE : greater than equal 의 의미
- LTE : less than equal의 의미
- price : 기준이 되는 금액이 들어온다.
- option : "GET"혹은 "LTE"라는 문자열이 들어온다.
- 예시 1 -
GET /api/v1/fruit/list?option=GTE&price=3000- 판매되지 않은 3000원 이상의 과일 목록을 반환해야 한다.
- 예시 2 -
GET /api/v1/fruit/list/option=LTE&price=5000- 판매되지 않은 5000원 이하의 과일 목록을 반환해야 한다.
- HTTP 응답 Body
 [{
	"name": String,
    "price": long,
    "warehousingDate": LocalDate,
}, ...]- HTTP 응답 Body 예시
 [{
	"name": "사과",
    "price": 4000,
    "warehousingDate": 2024-01-05,
 },
 {
	"name": "바나나",
    "price": 6000,
    "warehousingDate": "2024-01-08",
 }
 ]
해결 과정
Controller
@GetMapping("/api/v1/fruit/list")
    public ResponseEntity<List<GetFruitInfoListResponse>> getFruitInfoList(@RequestParam String option, @RequestParam long price){
        List<GetFruitInfoListResponse> getFruitInfoListResponseList = apiService.getFruitInfoList(option, price);
        return ResponseEntity.ok()
                .body(getFruitInfoListResponseList);
    }
Service
@Transactional
    public List<GetFruitInfoListResponse> getFruitInfoList(String option, long price){
        if(!option.equals("GTE") && !option.equals("LTE")) throw new IllegalArgumentException();
        if(option.equals("GTE")) return repository.findAllByPriceGreaterThanEqual(price).stream().map(GetFruitInfoListResponse::new).toList();
        return repository.findAllByPriceLessThanEqual(price).stream().map(GetFruitInfoListResponse::new).toList();
    }
💡
option이GTE나LTE가 아니면 바로 예외를 던지도록 하였습니다. 그 뒤,
option이GTE면 해당price보다 높은price를 가진FruitInfoEntityList를
stream.map으로 조회하며FruitInfoEntity를GetFruitInfoListResponse로 전환해서 저장합니다.
만약,option이LTE면, 해당price보다 낮은price를 가진
FruitInfoEntityList를 조회하면서GetFruitInfoListResponse로 변환해서 저장합니다.
DTO(Response)
@Getter
public class GetFruitInfoListResponse {
    private final String name;
    private final long price;
    private final LocalDate warehousingDate;

    public GetFruitInfoListResponse(FruitInfoEntity fruitInfoEntity) {
        this.name = fruitInfoEntity.getName();
        this.price = fruitInfoEntity.getPrice();
        this.warehousingDate = fruitInfoEntity.getStockedDate();
    }
}
결과
-
getFruitInfoList(GTE)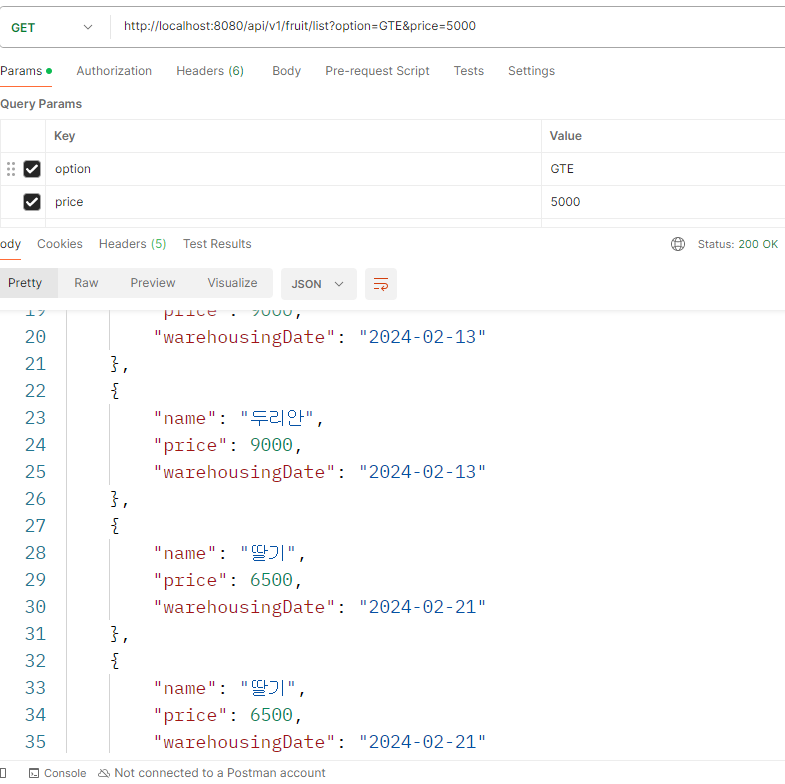
💡 5000원보다 비싼 과일들이 출력되는 모습.
-
getFruitInfoList(LTE)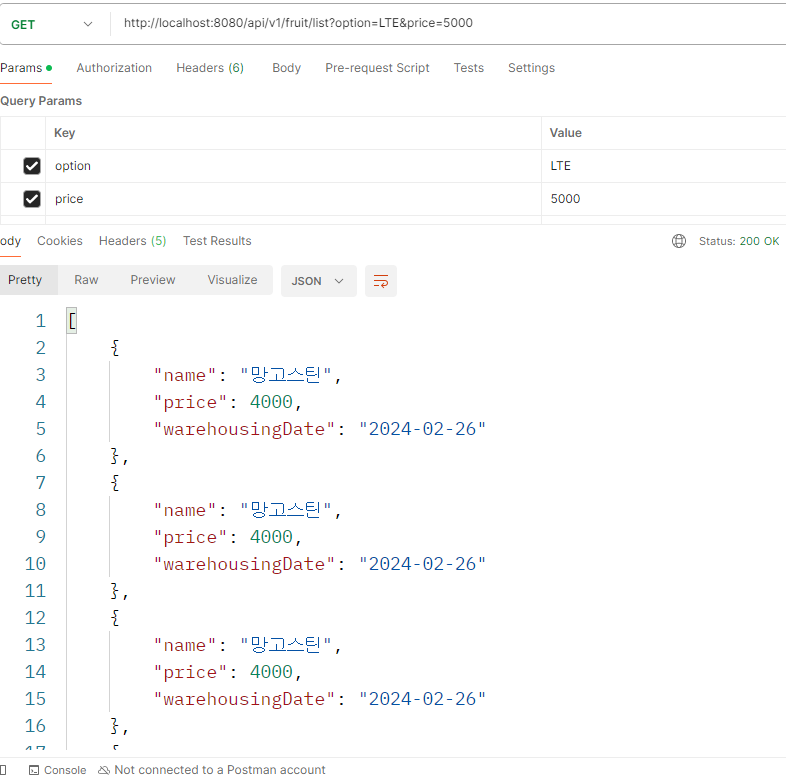
💡 5000원보다 저렴한 과일들이 출력되는 모습.
후기
강의를 들을 땐 이해했다고 생각했는데, 막상 구현해보니 생각보다 어려웠습니다.
아직 JPA에 대한 숙련도가 충분하지 않다는걸 느꼈습니다.
또한, 자꾸 DataBase의column명이 일치하지 않아서 오류가 발생했는데,
Jpa를 통해 데이터 베이스에 접근할 때, 예를 들어 soldOut이면
매핑은 sold_out 으로 된다는사실도 처음 알게 되었습니다.
좀 더 JPA에 대한 깊이 있는 공부가 필요하다고 느꼈습니다.
