mackerel 스터디에서 Git Actions를 공부해보자는 얘기가 나와서 갱신 해보고자 하는 요약글 입니다.
1. 빠른 준비
- .github/workflows를 생성하고, ***-yml 파일을 생성합니다.
- 아래의 내용을 복사 붙여넣기 하도록 합시다.
name: GitHub Actions Demo
run-name: ${{ github.actor }} is testing out GitHub Actions 🚀
on: [push]
jobs:
  Explore-GitHub-Actions:
    runs-on: ubuntu-latest
    steps:
      - run: echo "🎉 The job was automatically triggered by a ${{ github.event_name }} event."
      - run: echo "🐧 This job is now running on a ${{ runner.os }} server hosted by GitHub!"
      - run: echo "🔎 The name of your branch is ${{ github.ref }} and your repository is ${{ github.repository }}."
      - name: Check out repository code
        uses: actions/checkout@v3
      - run: echo "💡 The ${{ github.repository }} repository has been cloned to the runner."
      - run: echo "🖥️ The workflow is now ready to test your code on the runner."
      - name: List files in the repository
        run: |
          ls ${{ github.workspace }}
      - run: echo "🍏 This job's status is ${{ job.status }}."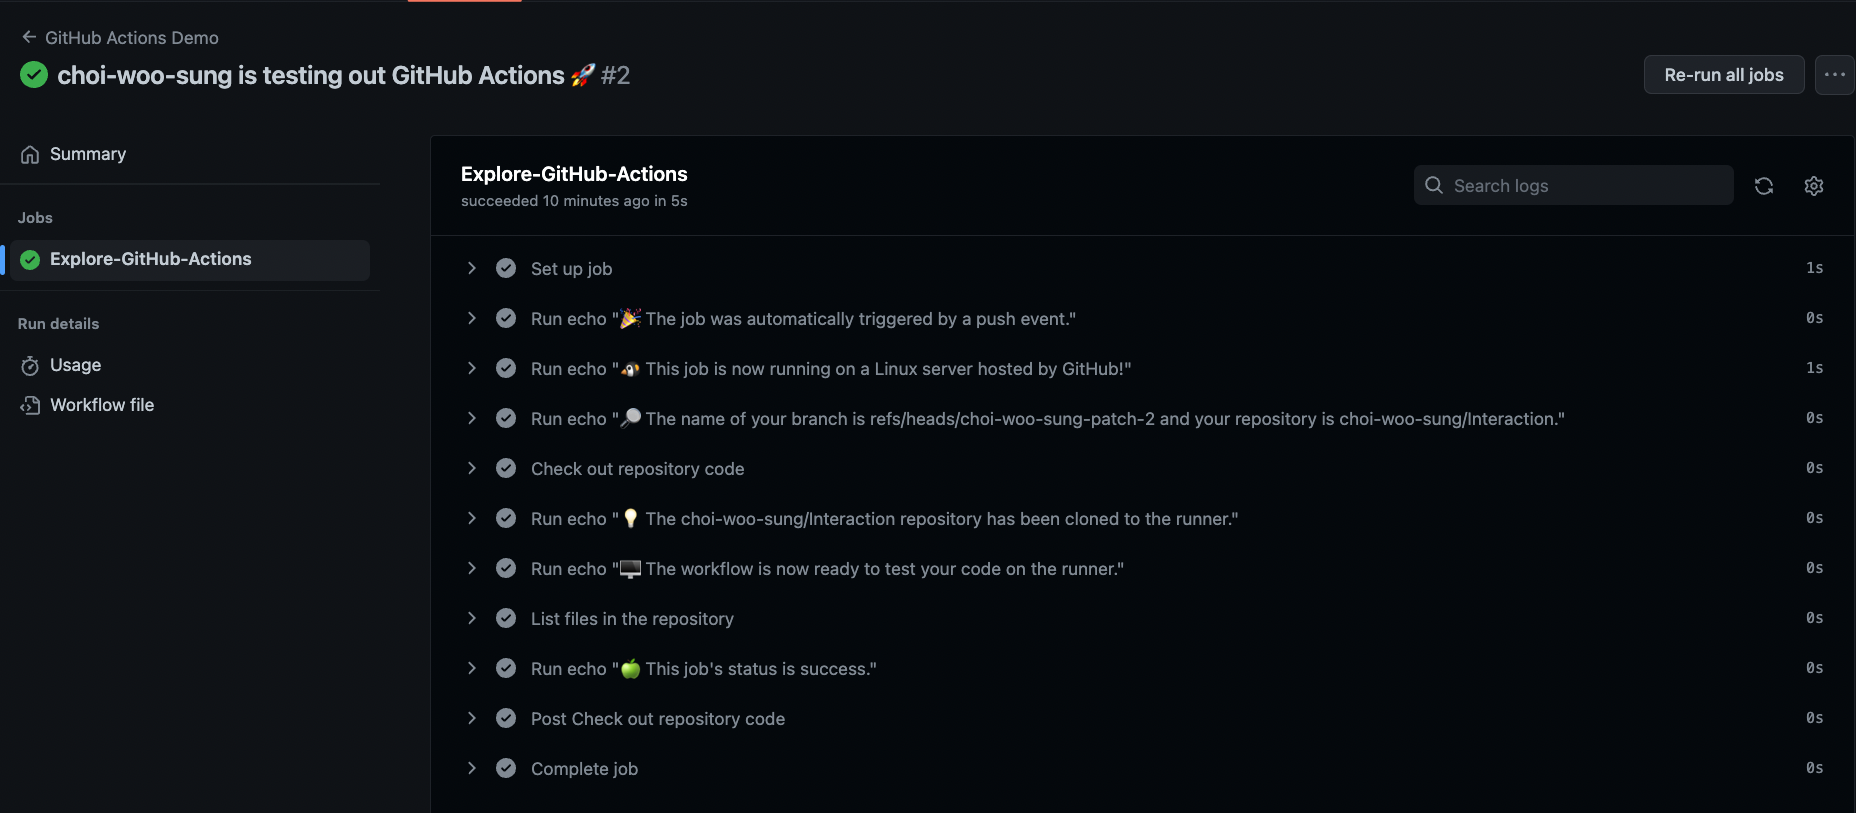
git Actions 카테고리에 아래같은 게시글이 있다면 git Actions가 적용이 된것입니다.
2. gitActions 구성
-
워크 플로우(workflows)
저장소에 추가하는 자동화 프로세스이다.
하나 이상의job으로 이루어져 있고,event에 의해 실행된다. -
이벤트(event)
워크플로우를 실행하는 특정 활동 혹은 규칙이다.
push(빠른준비에서는 push로 되어있다), pull request 뿐만아니라 저장소 dispatch를 이용하여 github 외부에서 발생하는 활동으로도 이벤트를 발생할 수 있다.
이곳을통해 어떤것이 있는지 알아보자.
-
작업(jobs)
워크플로우의 기본단위이며, 더 작은 스텝(step)으로 이루어져 있다.
기본적으로 워크플로우는 병렬로 실행을 하는데, 순차적으로 실행하도록 만들 수 있다. -
스텝(steps)
작업에서 커맨드를 실행하는 독립적인 단위이다. 각 스텝들은 동일한 러너에서 실행되므로, 해당 작업의 액션들은 서로 데이터를 공유한다. -
액션(actions)
워크플로의 가장 작은 요소이며, 마켓에 등록된걸 사용하거나, 직접 만들어 사용이 가능하다.
3. Push될때 안드로이드 빌드가 되게 해보자.
name: Android Build Test
on:
  pull_request:
    branches: [ develop ]

jobs:
  build:
    runs-on: ubuntu-latest
    steps:
      - uses: actions/checkout@v3
        with:
          fetch-depth: 0

      - name: Setup JDK 11
        uses: actions/setup-java@v3
        with:
          distribution: "zulu"
          java-version: 11

      - name: Setup Android SDK
        uses: android-actions/setup-android@v2

      - name: Cache Gradle packages
        uses: actions/cache@v2
        with:
          path: |
            ~/.gradle/caches
            ~/.gradle/wrapper
          key: ${{ runner.os }}-gradle-${{ hashFiles('**/*.gradle*', '**/gradle-wrapper.properties', '**/buildSrc/**/*.kt') }}
          restore-keys: |
            ${{ runner.os }}-gradle-
      - name: Grant execute permission for gradlew
        run: chmod +x gradlew

      - name: Decrypt secrets.tar.gpg
        run: gpg --quiet --batch --yes --always-trust --decrypt --passphrase="$SECRET_GPG_PASSWORD" --output secrets.tar secrets.tar.gpg
        env:
          SECRET_GPG_PASSWORD: ${{ secrets.SECRET_GPG_PASSWORD }}

      - name: Unzip secrets.tar
        run: tar xvf secrets.tar

      - name: Run ktlint
        run: ./gradlew ktlintCheck

      - name: Run detekt
        run: ./gradlew detekt

      - name: Run unit tests
        run: ./gradlew testDebugUnitTest

      - name: Build assemble release apk
        run: ./gradlew assembleRelease

      - name: Create android test report
        uses: asadmansr/android-test-report-action@v1.2.0
        if: ${{ always() }}

      - name: Build assemble release apk
        run: ./gradlew assembleRelease
전체 명령어는 이렇고 하나씩 알아보도록 합시다.
3. 1 checkout@v3
여기까지 찾아왔다는것은 on의 개념이나, job의 개념은 대충 알고있을꺼라 생각합니다.
바로 처음시작하는 checkout@v3는 CI의 원격서버가 코드를 다운받기위해 필요한 코드입니다.
기본적으로 github에서 호스팅을 해주고있는 CI서버는 코드를 가지고있진 않습니다.
그렇기에 CI서버에 자료들을 pull할때 필요한 작업입니다.
GitHub Actions의 체크아웃(Checkout) 액션으로 코드 내려받기
3. 2 Setup JDK 11
Setup Java : Github
안드로이드를 빌드하려면 JDK가 필요합니다.
4. Tag를 달때 빌드버전을 수정해보자.
5. ChatGpt를 집어넣어보자.
6. Compose Metrics를 작동시켜 보자.
7. module dependency graph를 시작해보자.
참고
GitHub Actions로 안드로이드 CI환경 구축하기 (Goodbye Jenkins)
GitHub Actions를 사용하여 Android 앱 개발을 자동화하는 방법
Android CI/CD pipeline with Github Actions: Demystifying Github Actions