고도 엔진 베이스 크랙미
1. main
func _connect_signals() -> void :
    _submit_button.pressed.connect(_on_submit_pressed)
    ...

func _on_submit_pressed() -> void :
    print_debug("Submit pressed. Current key: ", _current_key)
    if _current_key.strip_edges().is_empty():
        _status_label.text = "please enter a key..."
        _status_label.add_theme_color_override("font_color", COLORS["red"])
        return

    var is_valid = _validate_key(_current_key)
    print_debug("Validation result: ", is_valid)
    key_validated.emit(is_valid)
submit 버튼의 handler인 _on_submit_pressed를 보면 _validate_key로 얻은 결과를 key_validated로 전달한다.
signal key_validated(is_valid: bool)

func _connect_signals() -> void :
    _submit_button.pressed.connect(_on_submit_pressed)
    _key_input.text_changed.connect(_on_key_input_changed)
    key_validated.connect(_on_key_validated)

func _on_key_validated(is_valid: bool) -> void :
    if is_valid:
        _status_label.text = "✧・゚ success! key is valid! ・゚✧"
        _status_label.add_theme_color_override("font_color", COLORS["green"])
        _is_completed = true
        challenge_completed.emit()
    else:
        _status_label.text = "invalid key. try again..."
_status_label.add_theme_color_override("font_color", COLORS["red"])key_validated는 signal로 _validate_key 결과에 따라 success 또는 invalid key를 출력한다.
var _key_validator: KeyValidator

func _ready() -> void :
    _key_validator = KeyValidator.new()
    ...

func _validate_key(key: String) -> bool:
    return _key_validator.validate_key(key)
그리고 _validate_key 함수는 KeyValidator 클래스의 validate_key 함수를 호출한다.
크랙미를 풀기 위해선 KeyValidator 클래스를 분석해야 한다.
2. KeyValidator
func validate_key(key: String) -> bool:
    print_debug("\nValidating key...")
    _debug_key_components(key)


    if not _check_key_format(key):
        print_debug("Failed format check")
        return false

    var components = key.split(SEPARATOR) # const SEPARATOR = "-"
    if components.size() != 3:
        print_debug("Failed component count check")
        return false

    var time_component = components[0]
    var hardware_component = components[1]
    var validation_component = components[2]


    if hardware_component != _hardware_id.to_lower():
        print_debug("Failed hardware match")
        return false


    var key_time_block = _decode_time_block(time_component)
    var current_time_block = _get_time_block()
    print_debug("Time blocks - Key: ", key_time_block, " Current: ", current_time_block)

    if key_time_block < current_time_block - 1 or key_time_block > current_time_block:
        print_debug("Failed time check")
        return false


    var validation_base = "%s%s" % [time_component, hardware_component]
    var expected_validation = _generate_validation_component(validation_base)

    if validation_component != expected_validation:
        print_debug("Failed validation check")
        print_debug("Expected: ", expected_validation)
        print_debug("Got: ", validation_component)
        return false

return truevalidate_key에서 true를 리턴해야 하기 때문에 중간에 있는 모든 return false를 피해야 한다.
각 조건을 확인해 보면:
1. _check_key_format 에서 true를 받아야 하고,
2. "-"를 기준으로 나눴을 때 3개로 나눠져야 하고,
3. 자른 데이터를 data[0], data[1], data[2] 라고 했을때 data[1]이 hwid 여야 하고,
4. data[0]과 현재 시간 데이터의 차가 적어야 하고, (시간에 따라 key가 바뀜)
5. data[2]는 data[0]과 data[1]로 만들어 낸 데이터와 같아야 한다.
하나씩 해보자.
1. _check_key_format 조건 분석>
func _check_key_format(key: String) -> bool:

    var regex = RegEx.new()
    regex.compile("^[0-9A-Z]{6}-[0-9a-f]{8}-[0-9A-F]{8}$")
    if not regex.search(key):
        print_debug("Format check failed for key: ", key)
        return false
    return true
data[0] 부분은 숫자나 대문자 알파벳으로 이루어진 6글자여야 하고,
data[1] 부분은 숫자나 a부터 f로 소문자 16진수가 8자리 들어가야 한다.
data[2] 부분은 대문자 16진수가 8자리 들어간다.
위 조건에 맞춰 입력은 123456-01234567-89ABCDEF가 될 수 있다.
2. components.size() == 3
첫번째 조건을 맞추면 두번째 조건도 맞춰진다.
3. hwid check (validate data[1])
var _hardware_id: String
func _init() -> void :
    _generate_hardware_id()
_hardware_id는 class의 _init에서 생성된다.
const HARDWARE_SALT_LENGTH = 8

func _generate_hardware_id() -> void :
    var system_info = []


    system_info.append(OS.get_name())
    system_info.append(OS.get_model_name())
    system_info.append(str(OS.get_processor_count()))
    system_info.append(OS.get_unique_id())


    var hasher = HashingContext.new()
    hasher.start(HashingContext.HASH_SHA256)

    for info in system_info:
        hasher.update(info.to_ascii_buffer())

    var system_hash = hasher.finish()
    _hardware_id = system_hash.hex_encode().substr(0, HARDWARE_SALT_LENGTH)
이 부분은 바뀌지 않기 때문에 비교하는 데이터를 그대로 가져오면 된다.
print_debug에 들어가는 내용을 가져왔다.
print_debug("  Time component: ", time_component)
print_debug("  Hardware ID: ", hardware_component)
print_debug("  Validation: ", validation_component)
print_debug("  Stored hardware ID: ", _hardware_id.to_lower())
4. time check (validate data[0])
const TIME_BLOCK_LENGTH = 30

func _get_time_block() -> int:
    return int(Time.get_unix_time_from_system()) / TIME_BLOCK_LENGTH

func _decode_time_block(encoded: String) -> int:
    var value = 0

    for c in encoded:
        value *= 36
        if c.is_valid_int():
            value += int(c)
        else:

            value += c.unicode_at(0) - "A".unicode_at(0) + 10

    return value
시간에 따라 다른 입력이 정답이 되기 때문에 keygenme의 point가 되는 부분이다.
현재 시간을 구해서 encode_time_block(get_time_block())을 하면 된다.
5. validation check (validate data[2])
func _generate_validation_component(base: String) -> String:
    var hasher = HashingContext.new()
    hasher.start(HashingContext.HASH_SHA256)
    hasher.update(base.to_ascii_buffer())
    var hash = hasher.finish()


return hash.hex_encode().substr(0, 8).to_upper()"{data[0]}{data[1]}"의 sha256 hash를 구하고 hex로 인코딩한 다음 첫 8글자를 대문자로 변환한 것이 data[2]가 된다.
그대로 해주면 된다.
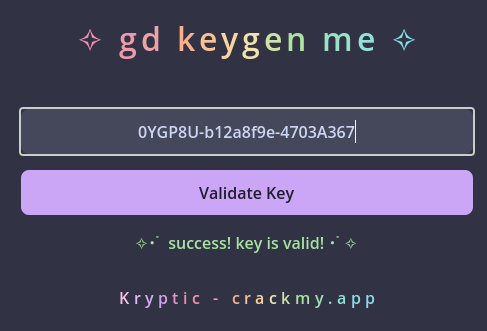
3. 키 입력
keygen을 만든 뒤 얻은 키를 입력하면 풀린다.