
Organization의 레포지토리를 Vercel에 배포하려면 기본적으로 Pro 버전이 필요합니다. 하지만 개인 레포지토리는 무료로 배포할 수 있다는 점을 이용하면, fork를 통해 조직 레포도 무료로 배포할 수 있습니다.
또한 PR을 올렸을 때 Preview 배포 설정까지 함께 구성할 수 있어 팀 프로젝트에서 유용하게 활용할 수 있습니다.
Vercel Organization 우회 배포
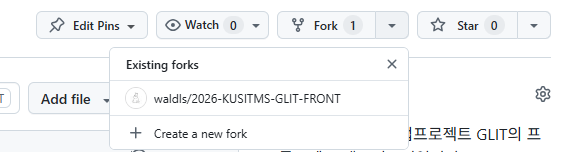
1. Organization 레포지토리 fork하기
먼저 조직의 레포지토리를 본인의 개인 계정으로 fork합니다.
2. fork된 레포지토리 Vercel 배포
fork한 개인 레포지토리를 Vercel에 연결하여 배포합니다. Vercel 대시보드에서 새 프로젝트를 추가할 때 fork된 레포를 선택하면 됩니다.
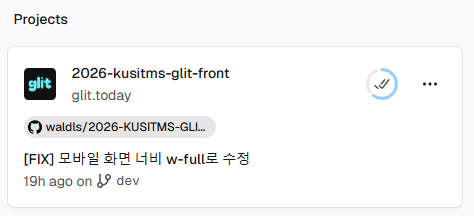
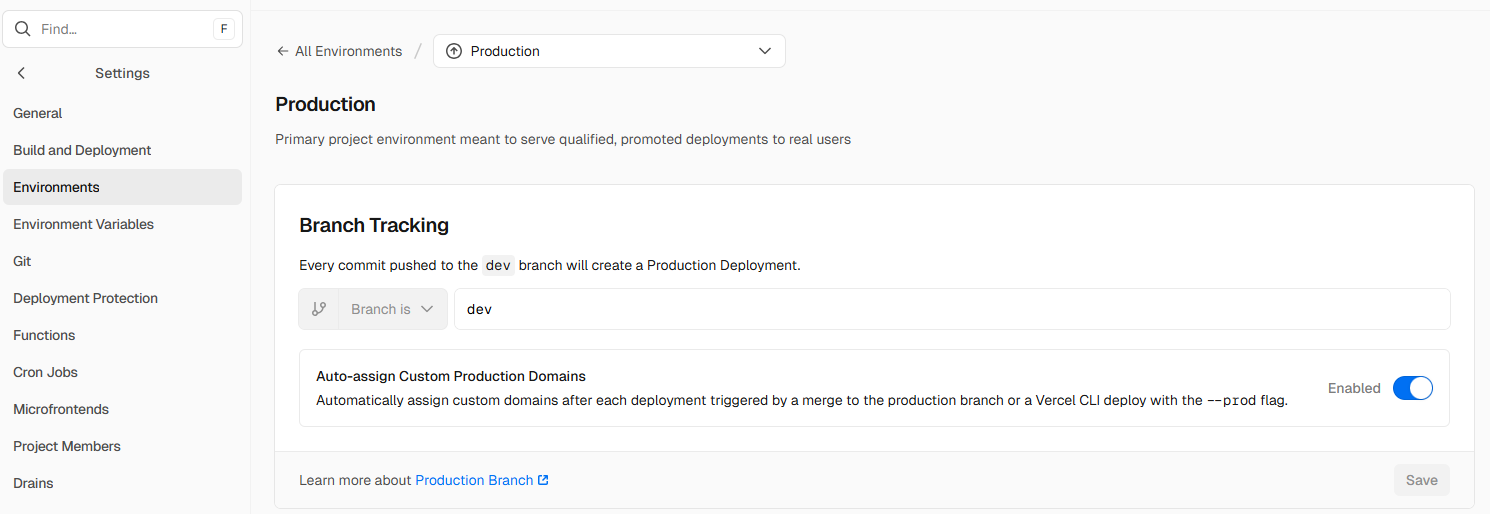
이때 배포할 브랜치를 원하는 브랜치로 변경해줍니다. 저는 dev 브랜치를 기준으로 배포할 예정이라 dev로 설정했습니다.
3. GitHub Secrets 토큰 발급
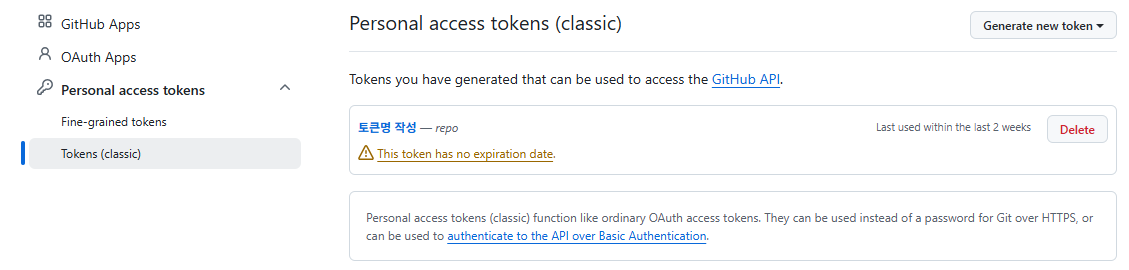
https://github.com/settings/tokens에서 ghp로 시작하는 Personal Access Token을 발급받습니다. 권한은 repo만 체크하면 됩니다.
이 토큰은 이후 Github Actions에서 원본 조직 레포에 접근할 때 사용됩니다.
4. build.sh
프로젝트 루트 경로에 build.sh 파일을 생성하고 다음과 같은 코드를 작성합니다.
#!/bin/sh
cd ../
mkdir output
cp -R ./[팀 레포명]/* ./output
cp -R ./output ./[팀 레포명]/
이 스크립트는 배포할 파일을 자동으로 정리해주는 빌드 스크립트입니다. 실행하면 상위 디렉토리에 output 폴더를 생성하고, 팀 레포의 파일들을 복사해 모아둔 뒤, 다시 레포 안으로 가져옵니다.
쉽게 말해 Vercel이 배포할 파일들을 한 곳에 정리해주는 역할을 합니다.
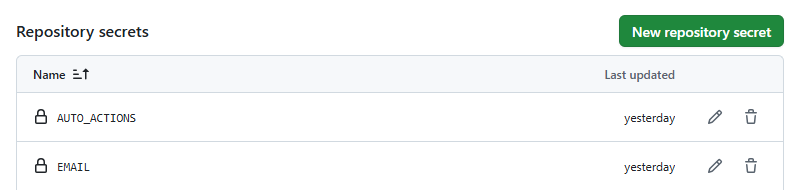
5. Organization 레포지토리에 시크릿 변수 등록
조직 레포의 Settings > Secret and variables > Actions 에 들어가서 시크릿 변수를 등록합니다.
AUTO_ACTIONS: 위에서 발급받은 Personal Access TokenEMAIL: 본인의 GitHub 이메일
6. Github Actions 워크플로우 작성
.github/workflows/deploy.yml 파일을 생성하고, 아래 코드를 작성합니다.
name: Deploy

on:
  push:
    branches: ["dev"]

jobs:
  build:
    runs-on: ubuntu-latest

    container: pandoc/latex

    steps:
      - uses: actions/checkout@v2
      - name: Install mustache (to update the date)
        run: apk add ruby && gem install mustache
      - name: creates output
        run: sh ./build.sh
      - name: Pushes to another repository
        id: push_directory
        uses: cpina/github-action-push-to-another-repository@main
        env:
          API_TOKEN_GITHUB: ${{ secrets.AUTO_ACTIONS }}
        with:
          source-directory: "output"
          destination-github-username: [본인 계정명]
          destination-repository-name: [팀 레포명]
          user-email: ${{ secrets.EMAIL }}
          commit-message: ${{ github.event.commits[0].message }}
          target-branch: dev
      - name: Test get variable exported by push-to-another-repository
        run: echo $DESTINATION_CLONED_DIRECTORY
저는 dev 브랜치를 기준으로 배포했기 때문에 branches: ["dev"]와 target-branch: dev로 설정했습니다. 배포 브랜치가 다르다면 해당 부분을 본인의 브랜치명으로 변경해주세요.
이후 push를 하면 조직 레포의 Actions 탭에서 워크플로우가 실행되는 것을 확인할 수 있습니다.

PR Preview 설정
이번에는 PR을 올렸을 때 자동으로 미리보기 URL이 생성되도록 설정해봅시다.
1. preview.yml 파일 생성
.github/workflows/preview.yml 파일을 생성하고, 아래 코드를 작성합니다.
name: Preview

on:
  pull_request:
    branches: ["dev"]

jobs:
  vercel-preview:
    runs-on: ubuntu-latest

    env:
      VERCEL_ORG_ID: ${{ secrets.VERCEL_ORG_ID }}
      VERCEL_PROJECT_ID: ${{ secrets.VERCEL_PROJECT_ID }}

    steps:
      - uses: actions/checkout@v4
      - name: Install Vercel CLI
        run: npm install --global vercel@latest && npm install --global pnpm
      - name: Get Vercel Environment Variables
        run: vercel pull --yes --environment=preview --token=${{ secrets.VERCEL_TOKEN }}
      - name: Build Project Artifacts
        run: vercel build --token=${{ secrets.VERCEL_TOKEN }}
      - name: Deploy Project Artifacts to Vercel
        id: deploy

        run: |

          vercel deploy --prebuilt --token=${{ secrets.VERCEL_TOKEN }} > vercel-output.txt
          echo "preview_url=$(cat vercel-output.txt)" >> $GITHUB_OUTPUT

      - name: Comment PR with Preview URL
        uses: thollander/actions-comment-pull-request@v2
        with:
          message: |
            ✅ PREVIEW ${{ steps.deploy.outputs.preview_url }}

permissions:
  contents: read
  pages: write
  deployments: write
  id-token: write
  issues: write
  pull-requests: write
이 워크플로우는 dev 브랜치로 PR이 올라올 때 자동으로 실행됩니다. Vercel CLI를 설치하고 프로젝트를 빌드한 뒤 Preview 배포를 진행하고, 배포가 완료되면 해당 PR에 미리보기 URL을 댓글로 자동으로 달아줍니다.
2. Vercel 개인 토큰 발급
https://vercel.com/account/settings/tokens 링크에 접속해서 Vercel 개인 토큰을 발급받습니다.

3. Vercel 프로젝트 연결
터미널에 아래 명령어를 입력해 Vercel CLI를 설치하고 로그인합니다.
pnpm add -g vercel@latest
vercel login
로그인이 완료되면 아래 명령어를 입력해 배포할 레포지토리를 Vercel 프로젝트와 연결합니다.
vercel연결이 완료되면 프로젝트 루트에 .vercel 폴더가 생성됩니다.
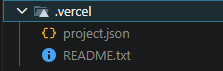
.vercel/project.json 파일을 열어보면 아래와 같은 값을 확인할 수 있습니다.
{"projectId": "프로젝트 id", "orgId": "조직 id", "projectName": "프로젝트명"}여기서 projectId와 orgId를 복사해둡니다.
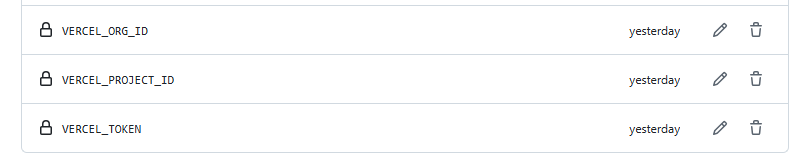
4. Secret 변수 등록
앞서 했던 것과 동일하게, 조직 레포의 Settings > Secret and variables > Actions 에서 아래 시크릿 변수를 등록합니다.
VERCEL_ORG_ID:project.json의orgId값VERCEL_PROJECT_ID:project.json의projectId값VERCEL_TOKEN: 위에서 발급받은 Vercel 개인 토큰
등록이 완료되면 push합니다.
5. Pull Request 확인
dev 브랜치로 PR을 올리면, 아래와 같이 PR에 미리보기 URL이 댓글로 자동 생성되는 것을 확인할 수 있습니다.

마무리
조직 레포도 이 설정 하나로 무료 배포가 가능하고, PR을 올릴 때마다 머지 전에 실제 화면으로 미리 확인할 수 있으니 팀 프로젝트가 한결 안정적으로 느껴졌습니다. 같은 고민을 하고 계셨던 분들께 도움이 되길 바랍니다.