버킷리스트 만들기
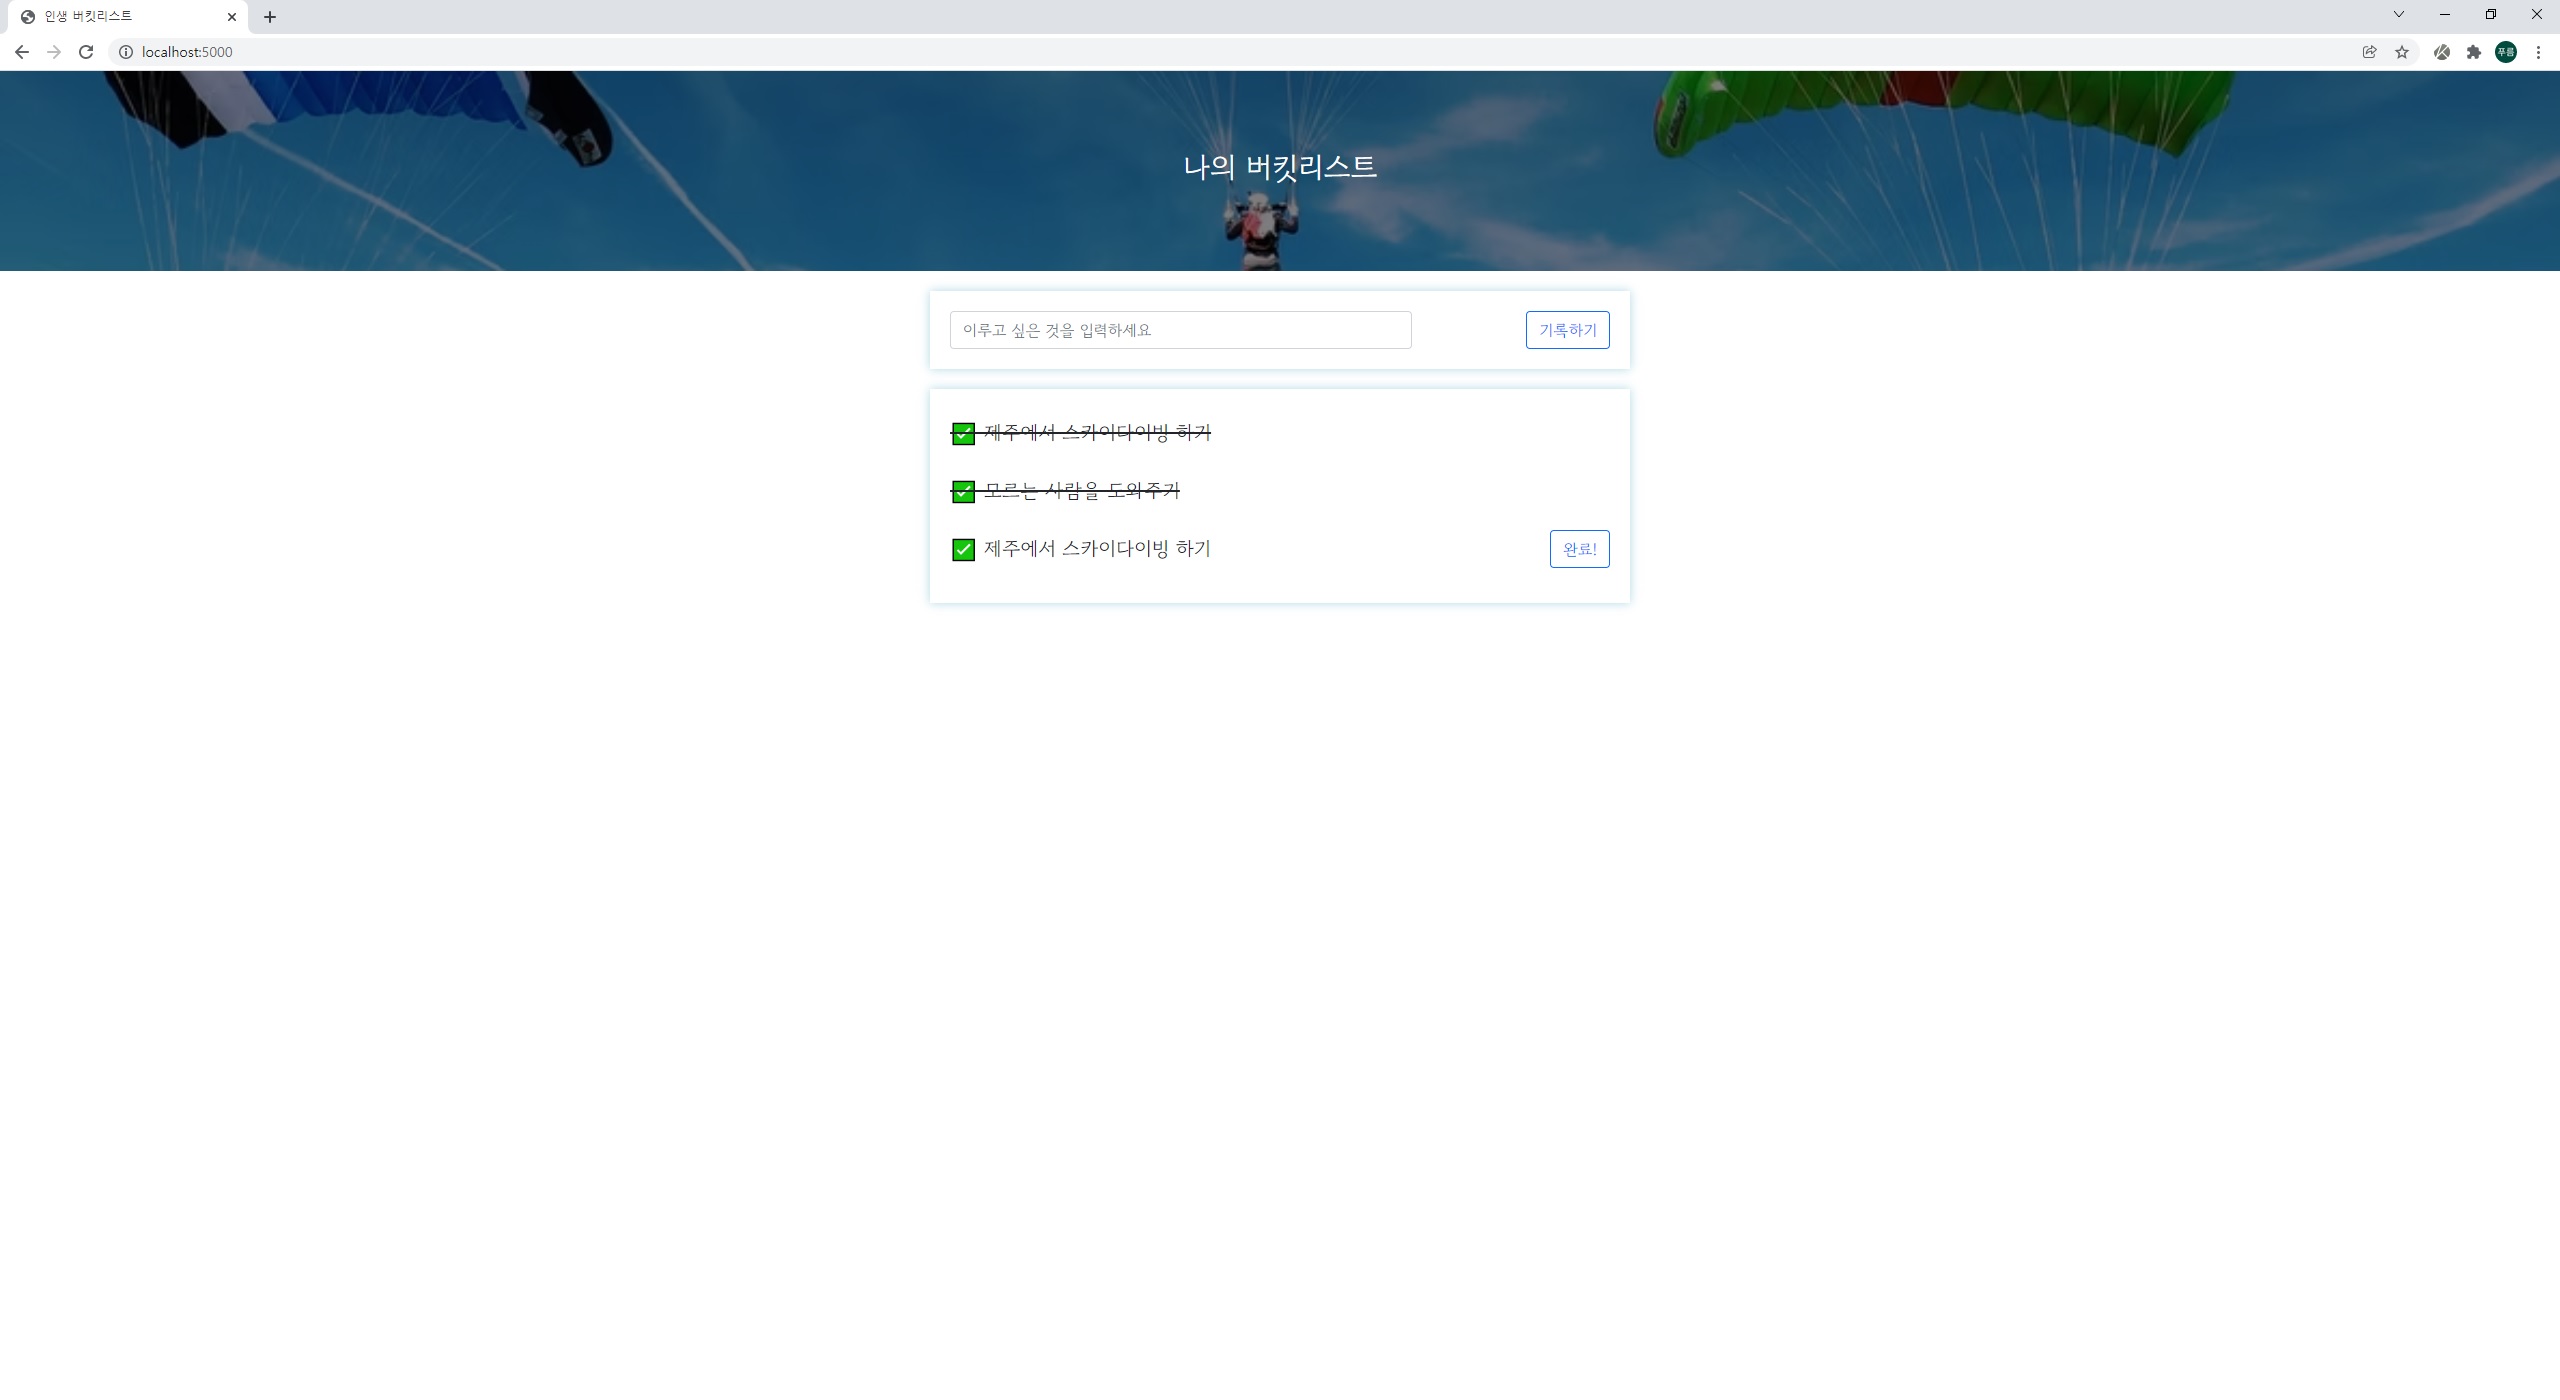
지난 4주차에 이어서 api연습을 했는데 데이터를 클라이언트에서 서버 다시 서버에서 클라이언트로 가져와 보여주는 것까지는 똑같은데 완료버튼을 누르면 줄이 그어지는 기능이 추가 됐다.
app.py
@app.route('/')
def home():
    return render_template('index.html')

@app.route("/bucket", methods=["POST"])
def bucket_post():
    bucket_receive = request.form['bucket_give']

    bucket_list = list(db.bucket02.find({}, {'_id': False}))
    count = len(bucket_list) + 1

    doc = {
        'num' : count,
        'bucket': bucket_receive,
        'done' : 0
    }
    db.bucket02.insert_one(doc)

    return jsonify({'msg': '등록 완료!'})

@app.route("/bucket/done", methods=["POST"])
def bucket_done():
    num_receive = request.form['num_give']
    db.bucket02.update_one({'num': int(num_receive)}, {'$set': {'done': 1}})

    return jsonify({'msg': '버킷완료!'})

@app.route("/bucket", methods=["GET"])
def bucket_get():
    bucket_list = list(db.bucket02.find({}, {'_id': False}))

    return jsonify({'buckets': bucket_list})
mongoDB에 저장할때 데이터들에게 번호를 부여해서 구분하여 완료버튼이 작동하게 했다.
HTML
<script>
        $(document).ready(function () {
            show_bucket();
        });

        function show_bucket() {
            $.ajax({
                type: "GET",
                url: "/bucket",
                data: {},
                success: function (response) {
                    let rows = response['buckets']
                    for (let i = 0; i <rows.length; i++) {
                        let bucket = rows[i]['bucket']
                        let num = rows[i]['num']
                        let done = rows[i]['done']

                        let temp_html = ``
                        if (done == 0) {
                            temp_html = `<li>
                                            <h2>✅ ${bucket}</h2>
                                            <buttontoken interpolation">${num})" type="button" class="btn btn-outline-primary">완료!</button>
                                        </li>`
                        }else {
                            temp_html = `<li>
                                            <h2 class="done">✅ ${bucket}</h2>
                                        </li>`
                        }
                        $('#bucket-list').append(temp_html)
                    }

                    console.log(response['buckets'])
                }
            });
        }

        function save_bucket() {
            let bucket = $('#bucket').val()

            $.ajax({
                type: "POST",
                url: "/bucket",
                data: {bucket_give: bucket},
                success: function (response) {
                    alert(response["msg"])
                    window.location.reload()
                }
            });
        }

        function done_bucket(num) {
            $.ajax({
                type: "POST",
                url: "/bucket/done",
                data: {num_give: num},
                success: function (response) {
                    alert(response["msg"])
                    window.location.reload()
                }
            });
        }
    </script>
HTML파일에서도 버튼마다 번호를 부여해주었다.
내 프로젝트 서버에 올리기
컴퓨터를 항상 켜 놓기가 곤란해서 AWS라는 클라우드 서비스에서 EC2사용권을 구입해서 서버로 사용한다.
ASW 서버 구매하기
https://ap-northeast-2.console.aws.amazon.com/ec2/v2/home?region=ap-northeast-2에 접속해서
인스턴스 시작을 눌러서 Ubuntu Server 20.04를 선택하고 실행해주면 된다.
새 키페어 생성을 해주고 바탕화면에 저장해준다.
EC2에 접속하기
gitbash를 실행하고
ssh -i 받은키페어를끌어다놓기 ubuntu@AWS에적힌내아이피이렇게 하면 Key fingerprint 관련 메세지가 나오는데 yes를 입력해준다
서버 세팅하기
# python3 -> python
sudo update-alternatives --install /usr/bin/python python /usr/bin/python3 10

# pip3 -> pip
sudo apt-get update
sudo apt-get install -y python3-pip
sudo update-alternatives --install /usr/bin/pip pip /usr/bin/pip3 1

# port forwarding
sudo iptables -t nat -A PREROUTING -i eth0 -p tcp --dport 80 -j REDIRECT --to-port 5000
sudo로 시작하는 명령어들을 한줄씩 넣어준다.
파일질라를 키고
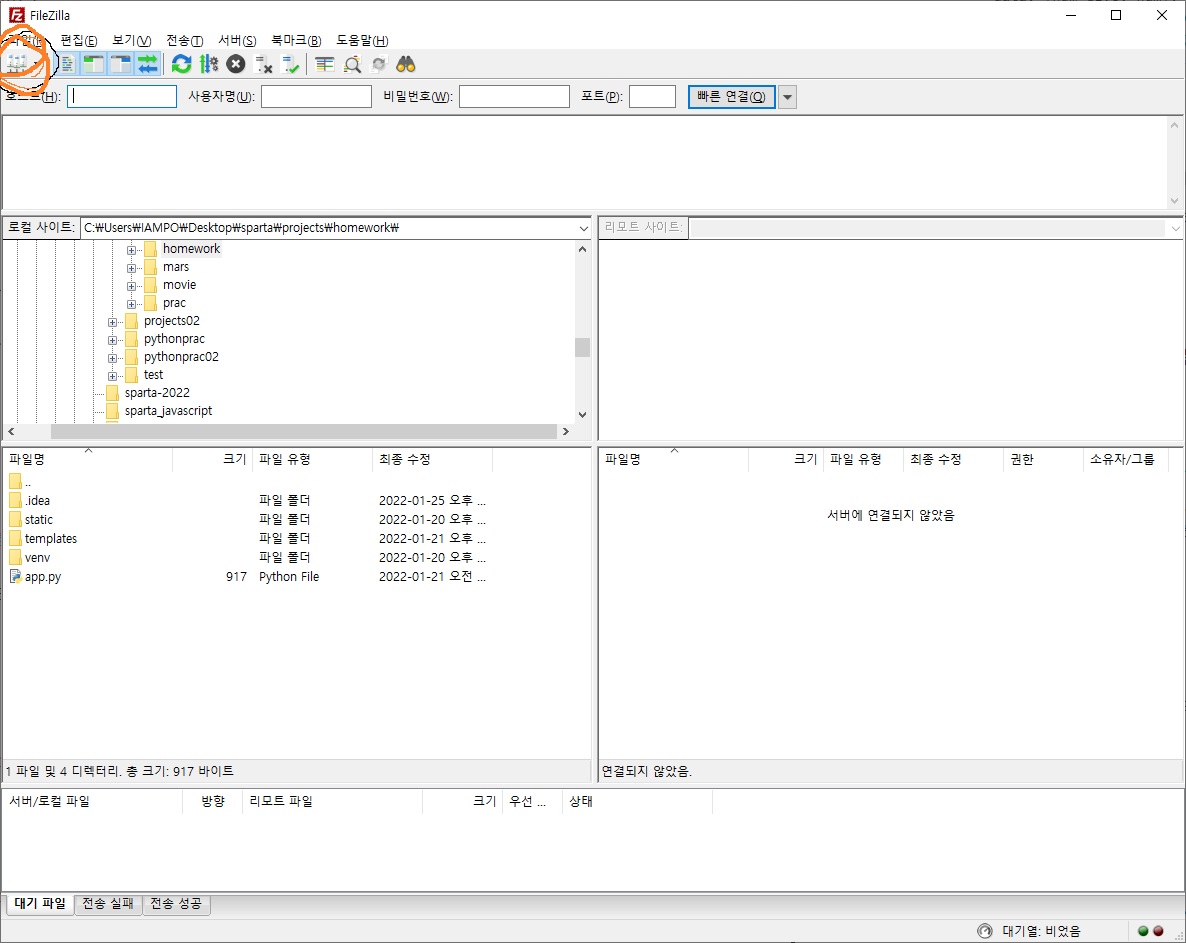
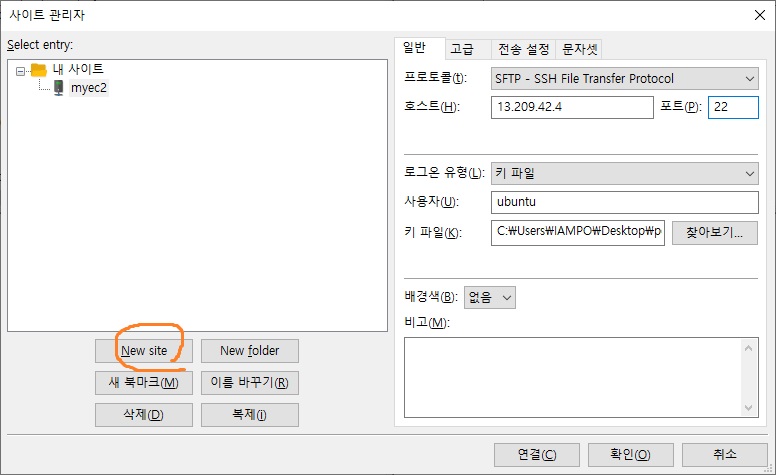
사진처럼 세팅하고 호스트에는
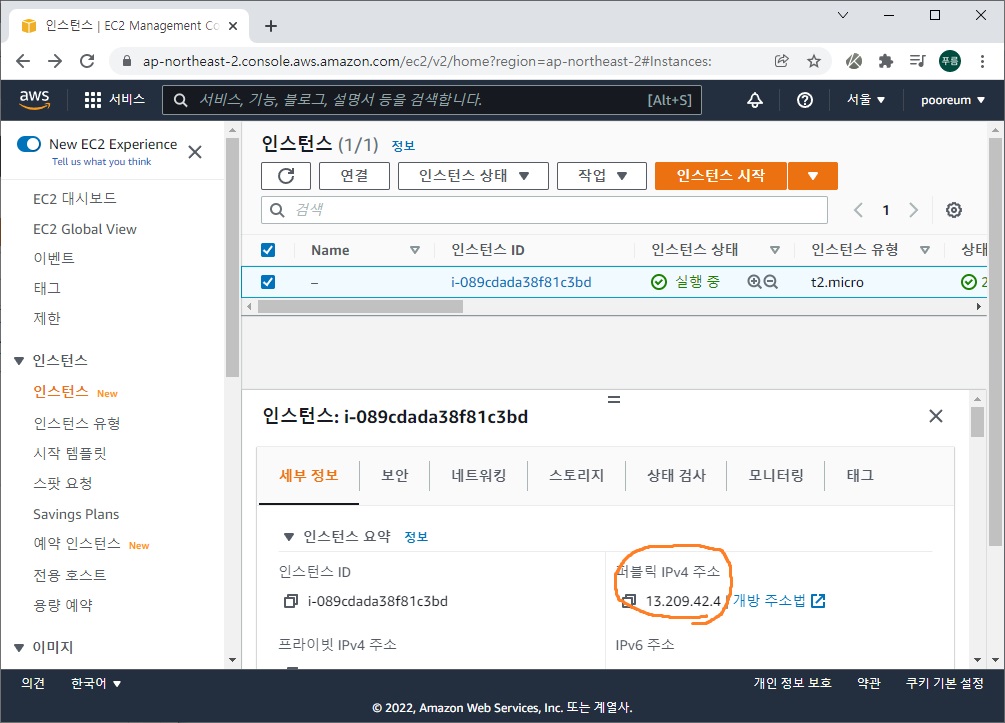
퍼블릭 IPv4주소를 복사해서 넣어준다.
Flask 서버 실행하기
static, templates, app.py만 드래그앤 드롭으로 오른쪽으로 옮겨준다.
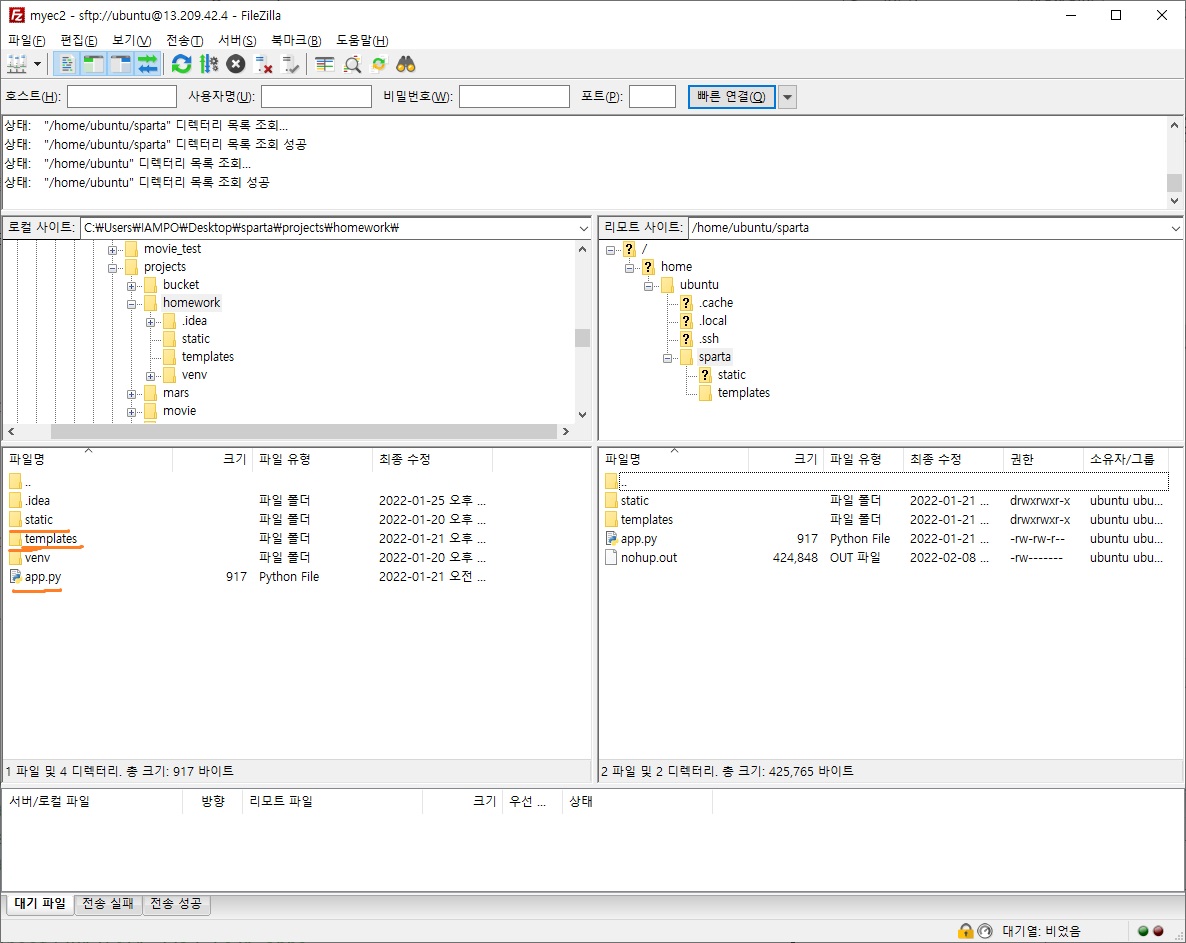
gitbash에서 ubuntu/sparta 폴더에 패키지들을 설치해준다
pip install flask
pip install pymongo
pip install dnspython
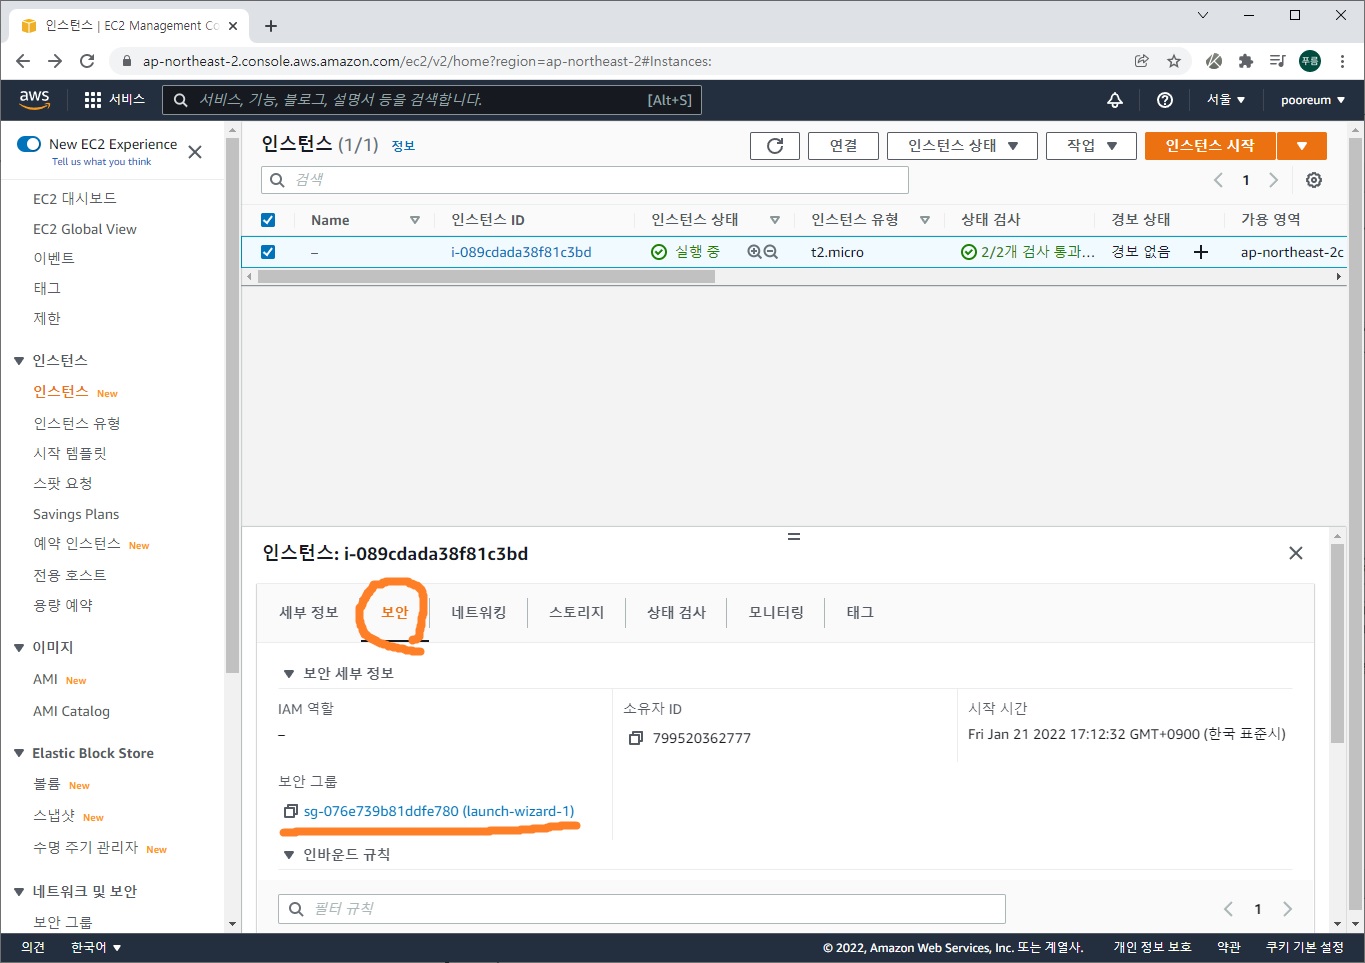
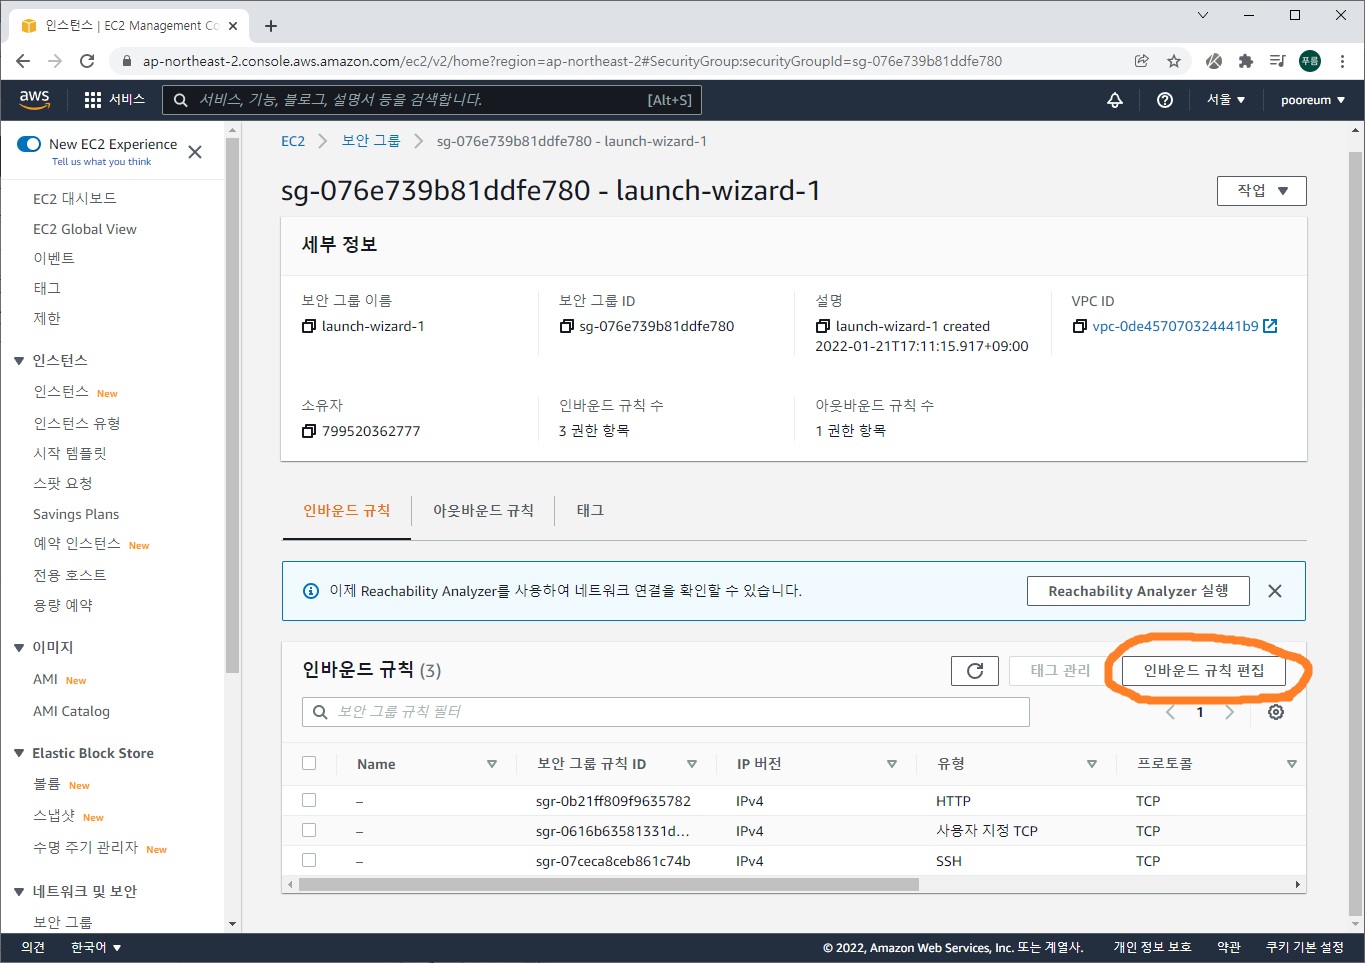
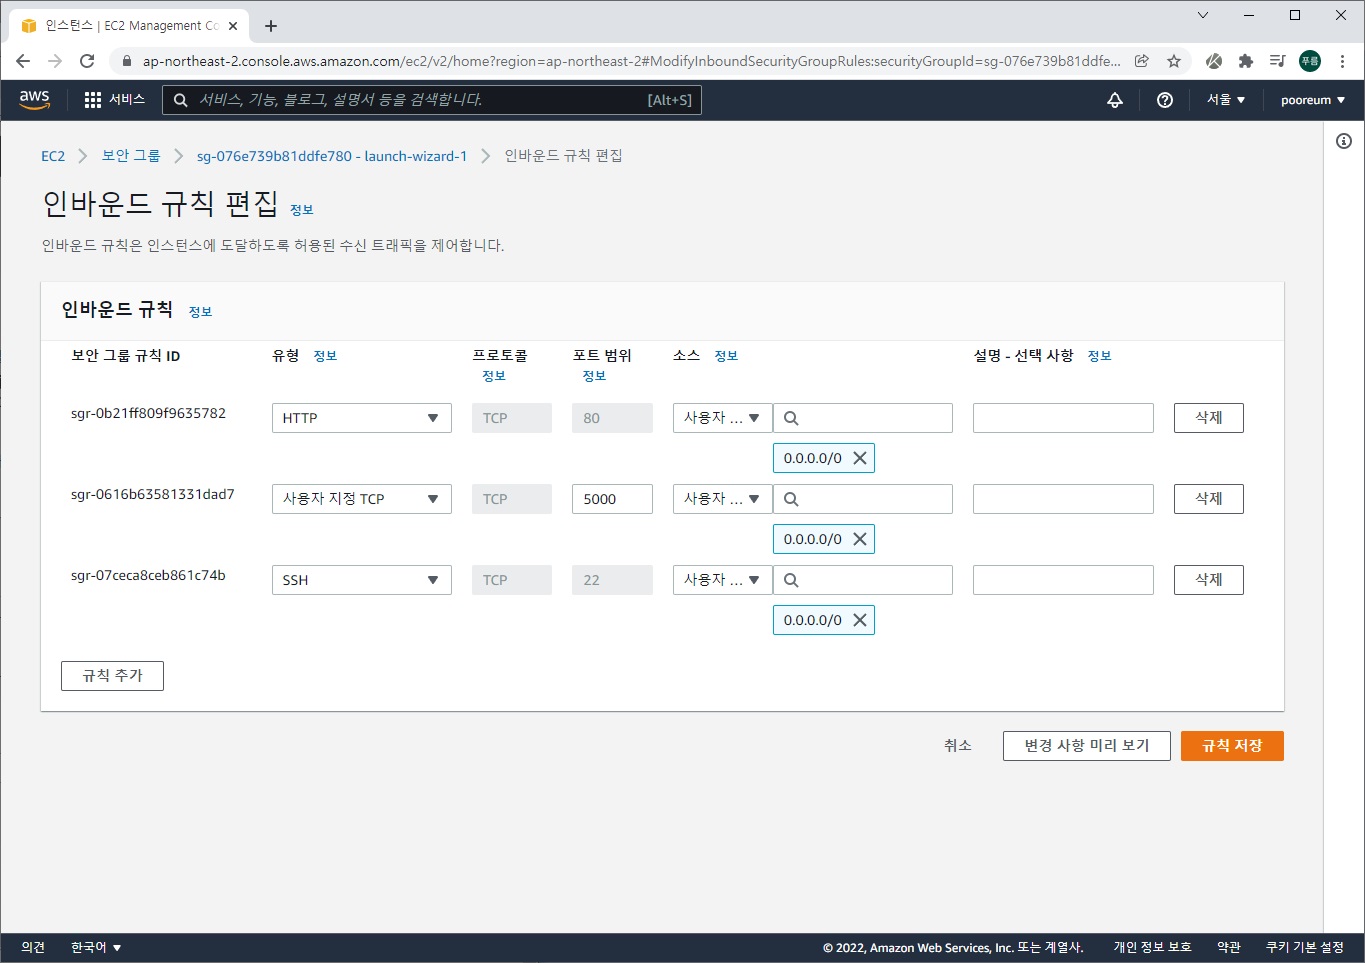
인바운드 규칙 편집을 통해서 포트를 열어준다.
nohup 설정하기
gitbash에서 아래 명령어를 입력해서 원격 접속을 종료하더라도 서버가 계속 돌아가게 할 수 있다.
nohup python app.py &gitbash에서 아래 명령어를 입력해서 원격 접속을 종료할 수 있다.
ps -ef | grep 'python app.py' | awk '{print $2}' | xargs kill도메인 연결하기
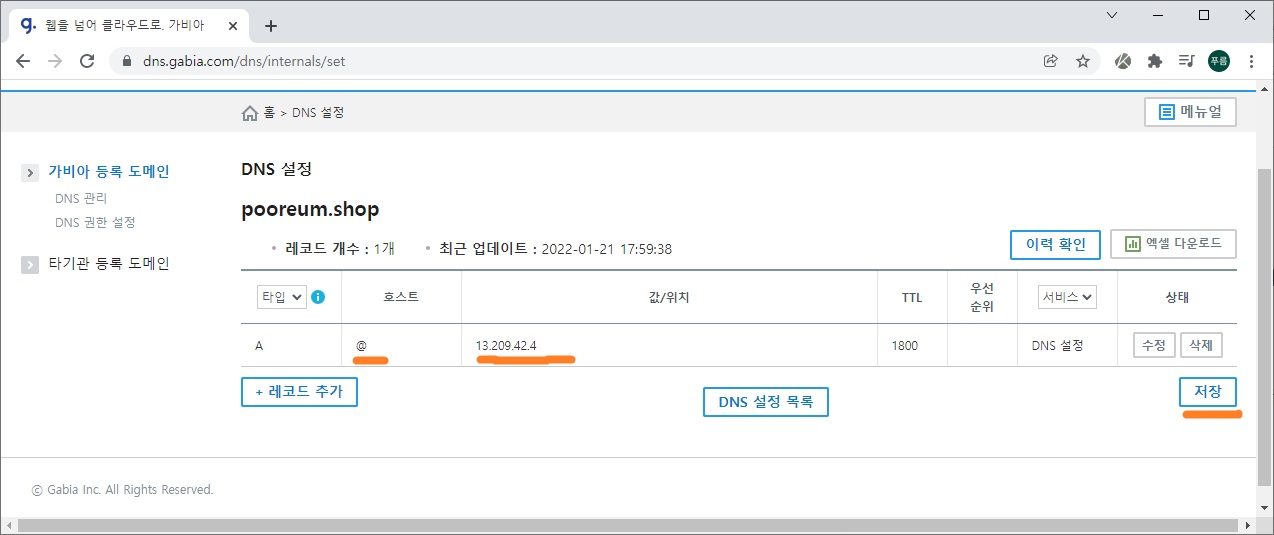
가비아에 로그인해서 DNS관리에 들어가서
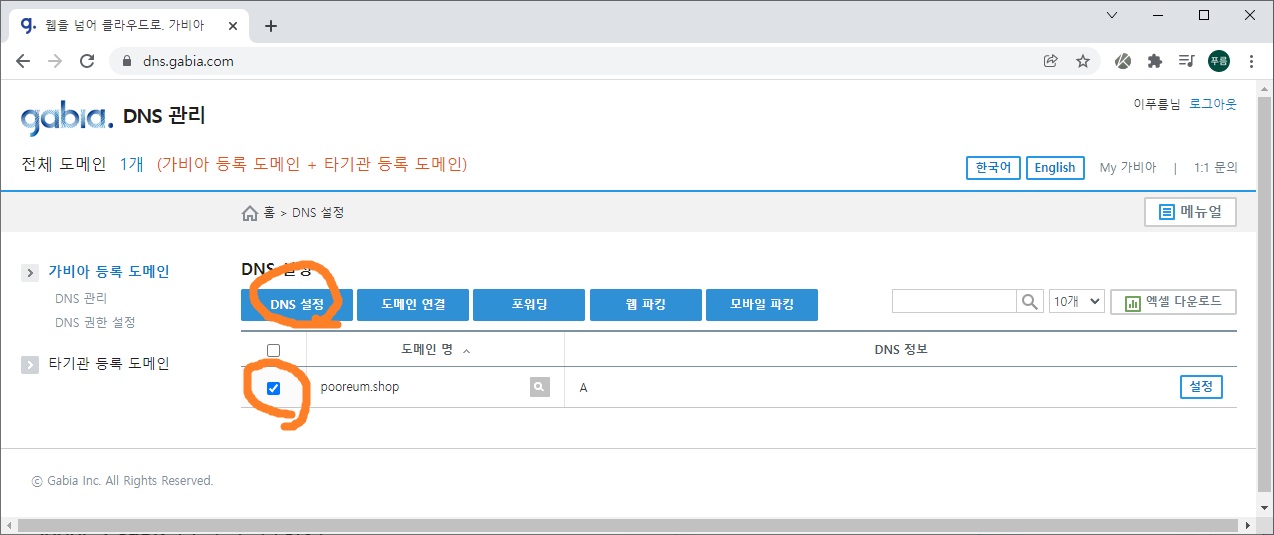
DNS설정에 들어가 설정을 해준다 값/위치에 인스턴스 ip주소를 넣어주면 된다
