Spring 프로젝트에 mysql 연동 & DB 데이터 출력하기
0. DB확인
1. DB 연결 설정 (gradle)
1-1. build.gradle
1-2. application.properties
2. MVC 모델에 맞게 파일 생성
2-1. Controller
2-2. domain
2-3. repository
2-4. service
2-5. SpringConfig
3. DB 데이터 출력하기
3-1. html
0. DB 확인
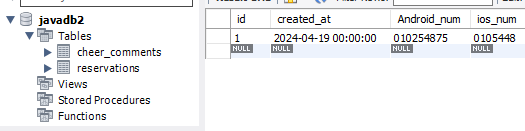
mysql에서 DB를 생성하고 임시 데이터를 하나 넣어봤습니다.
이때 스키마명, 테이블 명, 컬럼명을 잘 확인해 두세요.
1. DB 연결 설정 (gradle)
1-1. build.gradle
dependencies 부분에서 DB 연동을 위한 코드 2줄을 추가해주면 된다.
//생략
dependencies {
	//Spring boot에서 추가한 라이브러리
	implementation 'org.springframework.boot:spring-boot-starter-thymeleaf'
	implementation 'org.springframework.boot:spring-boot-starter-web'
	compileOnly 'org.projectlombok:lombok'
	annotationProcessor 'org.projectlombok:lombok'
	testImplementation 'org.springframework.boot:spring-boot-starter-test'
	//DB 연동을 위한 의존성 mysql과 jpa 추가
	//runtimeOnly 'mysql:mysql-connector-java'는 우리가 쓰는 mysql 버전에서 오류가 나서 아래코드로 변경
	runtimeOnly 'com.mysql:mysql-connector-j'
	implementation 'org.springframework.boot:spring-boot-starter-data-jpa'
}

//생략
추가해 준뒤는 프로젝트 업데이트를 해주어 라이브러리를 다운받을 수 있게한다.

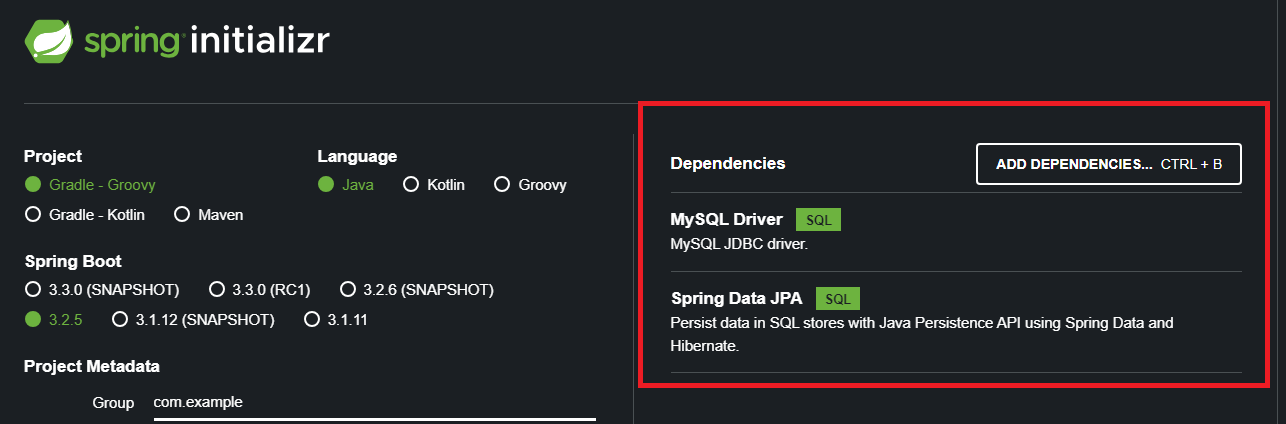
+) springboot.io 프로젝트 생성할 때, 아래 처럼 의존성을 추가했다면 안해도 된다.
1-2. application.properties
application.properties 에 다음 코드를 작성해 주도록 한다.
{}에 개인 세팅에 맞는 값을 입력하도록
spring.application.name=프로젝트명
spring.datasource.url=jdbc:mysql://{DB 서버 IP주소}:{포트 번호}/{스키마명}?useUnicode=true&characterEncoding=utf8&autoReconnect=true&serverTimezone=Asia/Seoul
spring.datasource.driverClassName=com.mysql.cj.jdbc.Driver
spring.datasource.username={DB ID}
spring.datasource.password={DB password}
spring.jpa.show-sql=true
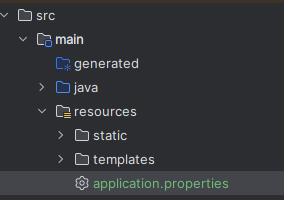
spring.jpa.hibernate.ddl-auto=none2. MVC 모델에 맞게 파일 생성
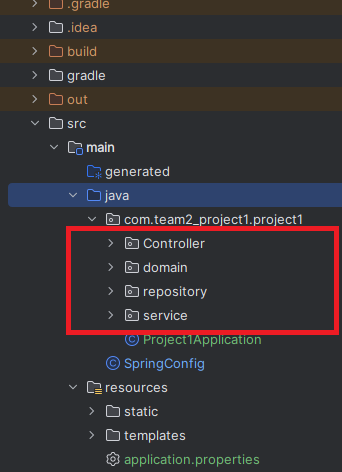
다음과 같이 디렉토리를 생성해준다.
2-1. Controller
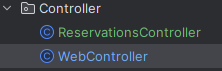
컨트롤러에는 두 개의 클래스 파일을 생성할 것이다.
WebController
: 홈화면을 매핑해주는 컨트롤러
package com.team2_project1.project1.Controller;

import org.springframework.stereotype.Controller;
import org.springframework.web.bind.annotation.RequestMapping;

@Controller
public class WebController {

    @RequestMapping("/")
    public String home(){ return "helloworld"; }

}
ReservationsController
: DB 에서 예약자 정보를 불러와 html에 가져다주는 컨트롤러
package com.team2_project1.project1.Controller;

import com.team2_project1.project1.domain.Reservations;
import com.team2_project1.project1.service.ReservationsService;
import org.springframework.beans.factory.annotation.Autowired;
import org.springframework.stereotype.Controller;
import org.springframework.ui.Model;
import org.springframework.web.bind.annotation.GetMapping;

import java.util.List;
@Controller
public class ReservationsController {
    private final ReservationsService reservationsService;

    @Autowired
    public ReservationsController(ReservationsService reservationsService) {
        this.reservationsService = reservationsService;
    }

    @GetMapping("/reservations")
    public String List(Model model){
        List<Reservations> reservations = reservationsService.findReservations();
        model.addAttribute("reservations", reservations);
        return "reservations/List";}
}
2-2. domain
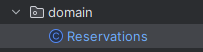
예약자 객체를 만들어줌
Reservations
: 되도록 DB의 컬럼명과 통일하여 헷갈리지 않게 하자
package com.team2_project1.project1.domain;

import jakarta.persistence.*;
public class Reservations {
    @Id
    @GeneratedValue(strategy = GenerationType.IDENTITY)
    private Long id;
    private String Android_num;
    private String ios_num;

    public Long getId() {
        return id;
    }

    public void setId(Long id) {
        this.id = id;
    }

    public String getAndroid_num() {
        return Android_num;
    }

    public void setAndroid_num(String android_num) {
        Android_num = android_num;
    }

    public String getIos_num() {
        return ios_num;
    }

    public void setIos_num(String ios_num) {
        this.ios_num = ios_num;
    }

}
2-3. repository
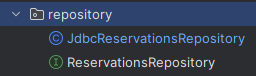
우선 예약자 목록만 보기위해서 findAll() 매서드만 구현할 것이다.
ReservationsRepository
: 이는 인터페이스로 생성해 준다. 여기서 메서드를 선언하여 계층간 접근을 도와주는 인터페이스 역할을 하는 파일이다.
package com.team2_project1.project1.repository;

import com.team2_project1.project1.domain.Reservations;

import java.util.List;

public interface ReservationsRepository {
    List<Reservations> findAll();
}
JdbcReservationsRepository
: Jdbc templete를 사용하여 작성한 파일이다. 나도 자세히 이해는 못했지만, 데이터 소스와의 연결, 클로즈, sql문 사용 등을 도와준다.
package com.team2_project1.project1.repository;
import com.team2_project1.project1.domain.Reservations;
import org.springframework.jdbc.datasource.DataSourceUtils;
import org.springframework.stereotype.Repository;

import javax.sql.DataSource;
import java.sql.*;
import java.util.ArrayList;
import java.util.List;
import java.util.Optional;

@Repository
public class JdbcReservationsRepository implements ReservationsRepository {
    private final DataSource dataSource;
    public JdbcReservationsRepository(DataSource dataSource) {
        this.dataSource = dataSource;
    }

    @Override
    public List<Reservations> findAll() {
        String sql = "select * from reservations";
        Connection conn = null;
        PreparedStatement pstmt = null;
        ResultSet rs = null;
        try {
            conn = getConnection();
            pstmt = conn.prepareStatement(sql);
            rs = pstmt.executeQuery();
            List<Reservations> Reservations = new ArrayList<>();
            while(rs.next()) {
                Reservations Reservation = new Reservations();
                Reservation.setId(rs.getLong("id"));
                Reservation.setAndroid_num(rs.getString("Android_num"));
                Reservations.add(Reservation);
            }
            return Reservations;
        } catch (Exception e) {
            throw new IllegalStateException(e);
        } finally {
            close(conn, pstmt, rs);
        }
    }
    private Connection getConnection() {
        return DataSourceUtils.getConnection(dataSource);
    }
    private void close(Connection conn, PreparedStatement pstmt, ResultSet rs) {
        try {
            if (rs != null) {
                rs.close();
            }
        } catch (SQLException e) {
            e.printStackTrace();
        }
        try {
            if (pstmt != null) {
                pstmt.close();
            }
        } catch (SQLException e) {
            e.printStackTrace();
        }
        try {
            if (conn != null) {
                close(conn);
            }
        } catch (SQLException e) {
            e.printStackTrace();
        }
    }
    private void close(Connection conn) throws SQLException {
        DataSourceUtils.releaseConnection(conn, dataSource);
    }
}
2-4. service
ReservationsService
: 그동안 작성한 파일을 이용해 동작하는 서비스를 구현하는 파일이다.
package com.team2_project1.project1.service;

import com.team2_project1.project1.domain.Reservations;
import com.team2_project1.project1.repository.ReservationsRepository;
import org.springframework.beans.factory.annotation.Autowired;
import org.springframework.stereotype.Service;

import java.util.List;

@Service
public class ReservationsService {
    private final ReservationsRepository reservationsRepository;

    @Autowired
    public ReservationsService(ReservationsRepository reservationsRepository) { this.reservationsRepository = reservationsRepository;}

    //전체 예약 조회
    public List<Reservations> findReservations() {
        return reservationsRepository.findAll();
    }

}
2-5. SpringConfig

SpringConfig
: 서비스와 리포지토리에 데이터 소스 빈을 등록하는 파일
import com.team2_project1.project1.repository.JdbcReservationsRepository;
import com.team2_project1.project1.repository.ReservationsRepository;

import com.team2_project1.project1.service.ReservationsService;
import org.springframework.context.annotation.Bean;
import org.springframework.context.annotation.Configuration;

import javax.sql.DataSource;

@Configuration
public class SpringConfig {
    private final DataSource dataSource;
    public SpringConfig(DataSource dataSource) {
        this.dataSource = dataSource;
    }
    @Bean
    public ReservationsService reservationService() {
        return new ReservationsService(reservationsRepository());
    }
    @Bean
    public ReservationsRepository reservationsRepository() {
        return new JdbcReservationsRepository(dataSource);
    }
}
3. DB 데이터 출력하기
3-1. html

hellowlorld.html
: 홈화면으로 매핑된 html
<!DOCTYPE html>
<html xmlns:th="http://www.thymeleaf.org">
<head>
    <meta charset="UTF-8">
    <meta name="viewport"
          content="width=device-width, user-scalable=no, initial-scale=1.0, maximum-scale=1.0, minimum-scale=1.0">
    <meta http-equiv="X-UA-Compatible" content="ie=edge">
    <title>Title</title>
</head>
<body>
<div class="container">
    <div>
        <h1>Hello Spring</h1>
        <p>
            <a href="/reservations">예약자 목록</a>
        </p>
    </div>
</div>

</body>

</html>
List.html
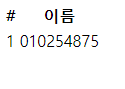
: DB에 있는 데이터가 출력되는 화면. 테스트라서 id와 안드로이드 번호만 출력되게 했다.
<!DOCTYPE html>
<html xmlns:th="http://www.thymeleaf.org">
<head>
    <meta charset="UTF-8">
    <meta name="viewport"
          content="width=device-width, user-scalable=no, initial-scale=1.0, maximum-scale=1.0, minimum-scale=1.0">
    <meta http-equiv="X-UA-Compatible" content="ie=edge">
    <title>Title</title>
</head>
<body>
<div>
    <table>
        <thead>
        <tr>
            <th>#</th>
            <th>이름</th>
        </tr>
        </thead>
        <tbody>
        <tr th:each="reservations : ${reservations}">
            <td th:text="${reservations.id}">id</td>
            <td th:text="${reservations.Android_num}">num</td>
        </tr>
        </tbody>
    </table>
</div>

</body>

</html>
결과
DB 화면
출력 화면