질문 목록과 질문 상세 기능
질문 목록 조회
최근 등록된 질문을 가장 먼저 출력
-
데이터가 등록된 날짜 역순으로 조회
- pybo/views.py
from .models import Question def index(request): # pybo 목록 출력 question_list = Question.objects.order_by('-create_date') context = {'question_list' : question_list}- 등록된 질문은 최신순으로 조회하기 위해 등록된 날짜의 역순으로 조회
- order_by(’-create_date’)
- 조회한 데이터는 context 변수에 저장
- 등록된 질문은 최신순으로 조회하기 위해 등록된 날짜의 역순으로 조회
- pybo/views.py
-
render로 화면 출력
render 함수는 모델 데이터를 HTML 코드로 변환하여 템플릿에 적용한다. 템플릿은 장고의 태그를 사용할 수 있는 HTML 파일이다.
- pybo/views.py
from django.shortcuts import render
from .models import Question

def index(request):
    # pybo 목록 출력
    question_list = Question.objects.order_by('-create_date')
    context = {'question_list' : question_list}
    return render(request, 'pybo/question_list.html', context)
- pybo/views.py
-
템플릿 디렉토리 생성
- 템플릿은 템플릿을 관리할 디렉토리에서 관리하는 것이 유용하다. setting.py에 템플릿을 관리할 경로를 지정하면 django는 템플릿 디렉토리의 템플릿을 사용 가능하다.
- setting.py
TEMPLATES = [ { ... 'DIRS': [BASE_DIR / 'templates'], ... } ] - settings.py에 설정한 템플릿 디렉토리 외에 앱 디렉토리 하위에 templates 디렉토리를 생성하면 django가 자동으로 템플릿 디렉토리를 인식가능
-
템플릿 생성
- 템플릿을 생성할 때는 반드시 템플릿 디렉토리로 설정한 디렉토리에 저장한다.
- templates/pybo/question_list.html
{% if question_list %} <ul> {% for question in question_list %} <li><a href="/pybo/{{ question.id }}/">{{ question.subject }}</a></li> {% endfor %} </ul> {% eles %} <p>질문이 있습니다.</p> {% endif %}- {% %}는 템플릿 태그이며 이 태그 안에 python 문법과 크게 다르지 않은 조건문이나 반복문 등을 사용 가능
- 탬플릿 보통 분기, 반복, 객체 출력의 유형으로 자주 사용
-
화면 출력 확인

질문 상세 기능
질문 목록에서 각 질문은 링크가 있다. 이 링크를 따라가면 아직 URL 매핑이 되어있지 않아 페이지를 찾을 수 없다는 오류 페이지가 출력된다.
따라서 각 질문 id에 대한 URL 매핑과 화면을 추가해야한다.
-
URL 매핑 추가
- pybo/urls.py
from django.urls import path from . import views urlpatterns = [ path('', views.index), path('<int:question_id>/', view.detail), ] - pybo/ 뒤에 질문 id가 따라오면 view.detail 함수를 실행
- pybo/urls.py
-
view.detail 함수 추가
- pybo/view.py
... def detail(request, question_id): # pybo 질문 내용 출력 question = Question.objects.get(id=question_id) context = {'question': question} return render(request, 'pybo/question_detail.html', context)- 특정 질문의 id를 입력받아야 하므로 매개변수에 question_id를 포함
- pybo/view.py
-
질문 상세를 표시할 템플릿 생성
- templates/pybo/question_detail.html
<h1>{{ question.subject }}</h1> <div> {{ question.content }} </div>- 질문의 제목과 내용을 표시하는 템플릿
- question 객체는 detail 함수에서 render 함수로 전달한 context에 저장된 데이터
- templates/pybo/question_detail.html
-
화면 확인

- DB에서 가져온 question의 상세 정보를 확인 가능
오류 화면
사용자가 잘못된 URL로 접속하면 django의 개발 서버는 아래와 같은 페이지를 표시한다.
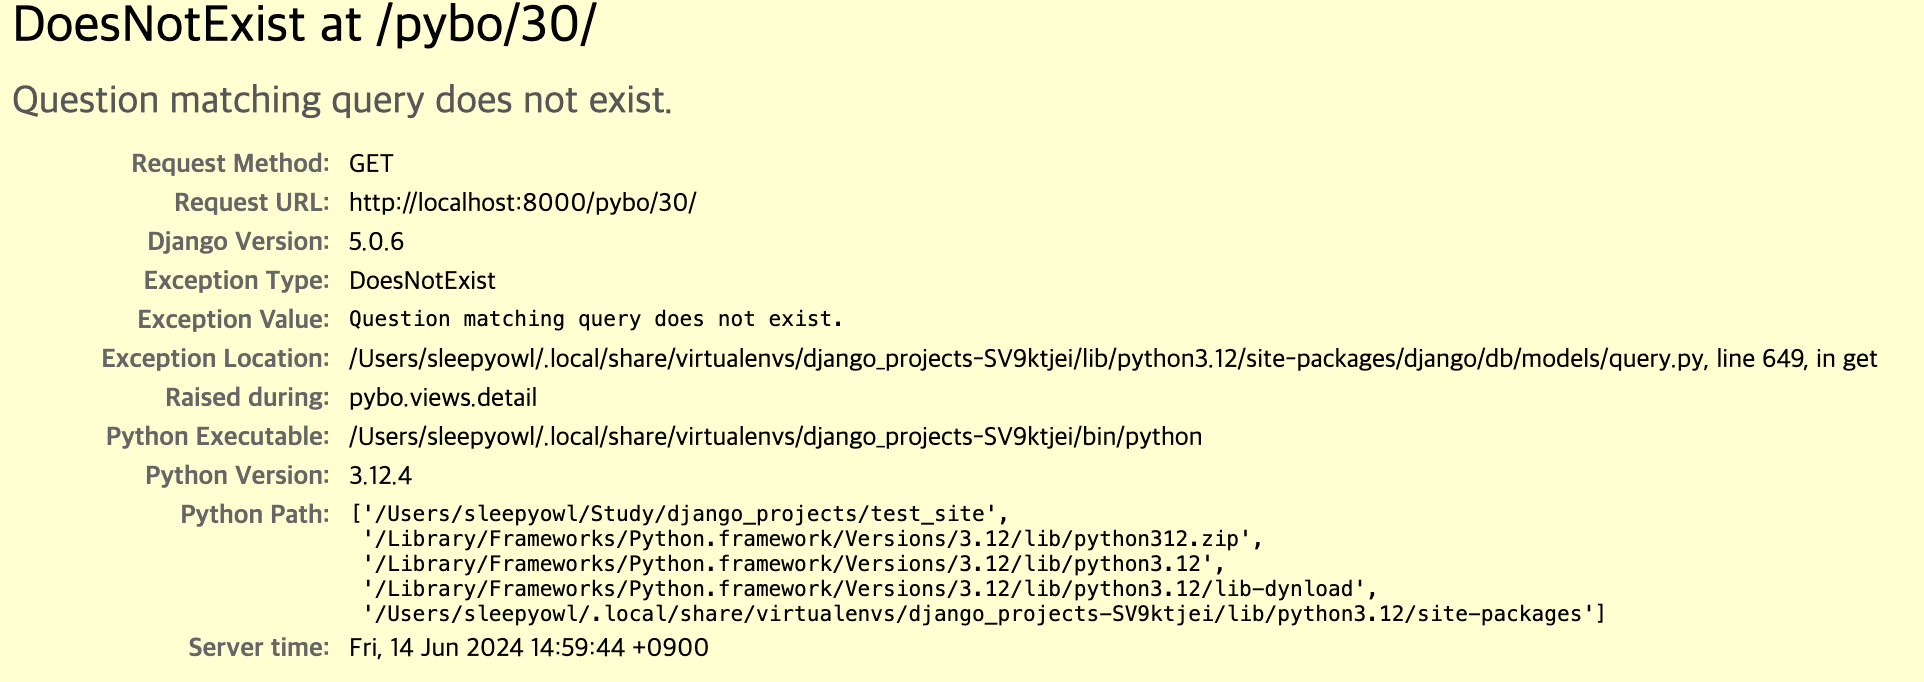
하지만 DB 쿼리 결과가 없다는 오류 페이지보다는 페이지가 없다고 표시하는 것이 좀더 직관적이기 때문에 쿼리 오류 대신 404 페이지를 대신 출력하도록 변경
404 페이지로 쿼리 오류 페이지 변경
-
detail 함수를 수정
- pybo/views.py
def detail(request, question_id): # pybo 질문 내용 출력 question = get_object_or_404(Question, pk=question_id) context = {'question': question} return render(request, 'pybo/question_detail.html', context)- question 데이터를 조회할 때 객체에서 직접 가져오는 대신 get_object_or_404 함수를 사용해 쿼리 결과가 없다면 404 페이지를 표시하도록 변경
- pybo/views.py
-
404 페이지 출력 확인

- 쿼리 결과가 없는 경우 404 페이지가 출력됨을 확인
URL 개선
URL 하드 코딩은 URL이 변경될 경우 이전에 작성한 URL을 일일히 수정해줘야 하는 불편함이 있다. 예를 들어 질문 상세 페이지의 URL이 pybo/2이지만 이 URL이 언제든 pybo/question/2나 pybo/2/question으로 바뀔 수 있고 이 때마다 href를 수정해야 할 수 있다. 이를 해결하기 위해 URL에 실제 주소를 사용하는 대신 별칭을 사용해야 한다.
URL 별칭
URL 별칭은 urls.py에서 name 속성을 사용하면 된다.
- pybo/urls.py
from django.urls import path from . import views urlpatterns = [ path('', views.index, name='index'), path('<int:question_id>/', views.detail, name='detail'), ]- 실제 경로까지 입력 후에 뒤에 name 속성으로 별칭 부여
- pybo/question_list.html 템플릿에서 URL 실제 주소 대신 별칭으로 수정
{% if question_list %} <ul> {% for question in question_list %} <li><a href="{% url 'detail' question.id %}">{{ question.subject }}</a></li> {% endfor %} </ul> {% else %} <p>질문이 있습니다.</p> {% endif %}- 원래 href에 /pybo/{{ question.id }}를 별칭을 사용한 것으로 변경
URL Namespace
프로젝트에 여러 앱이 있을 때 별칭이 중복 가능성이 있다. 따라서 네임스페이스를 사용하면 앱이 관리하는 독립적인 공간에서 별칭을 관리할 수 있다.
-
Namespace 추가
Namespace는 urls.py에 app_name 변수를 사용하는 것만으로 간단히 생성가능
- pyno/urls.py
from django.urls import path from . import views app_name = 'pybo' urlpatterns = [ path('', views.index, name='index'), path('<int:question_id>/', views.detail, name='detail'), ]- app_name을 추가해 namespace 생성
- pyno/urls.py
-
Namespace 적용후 테스트
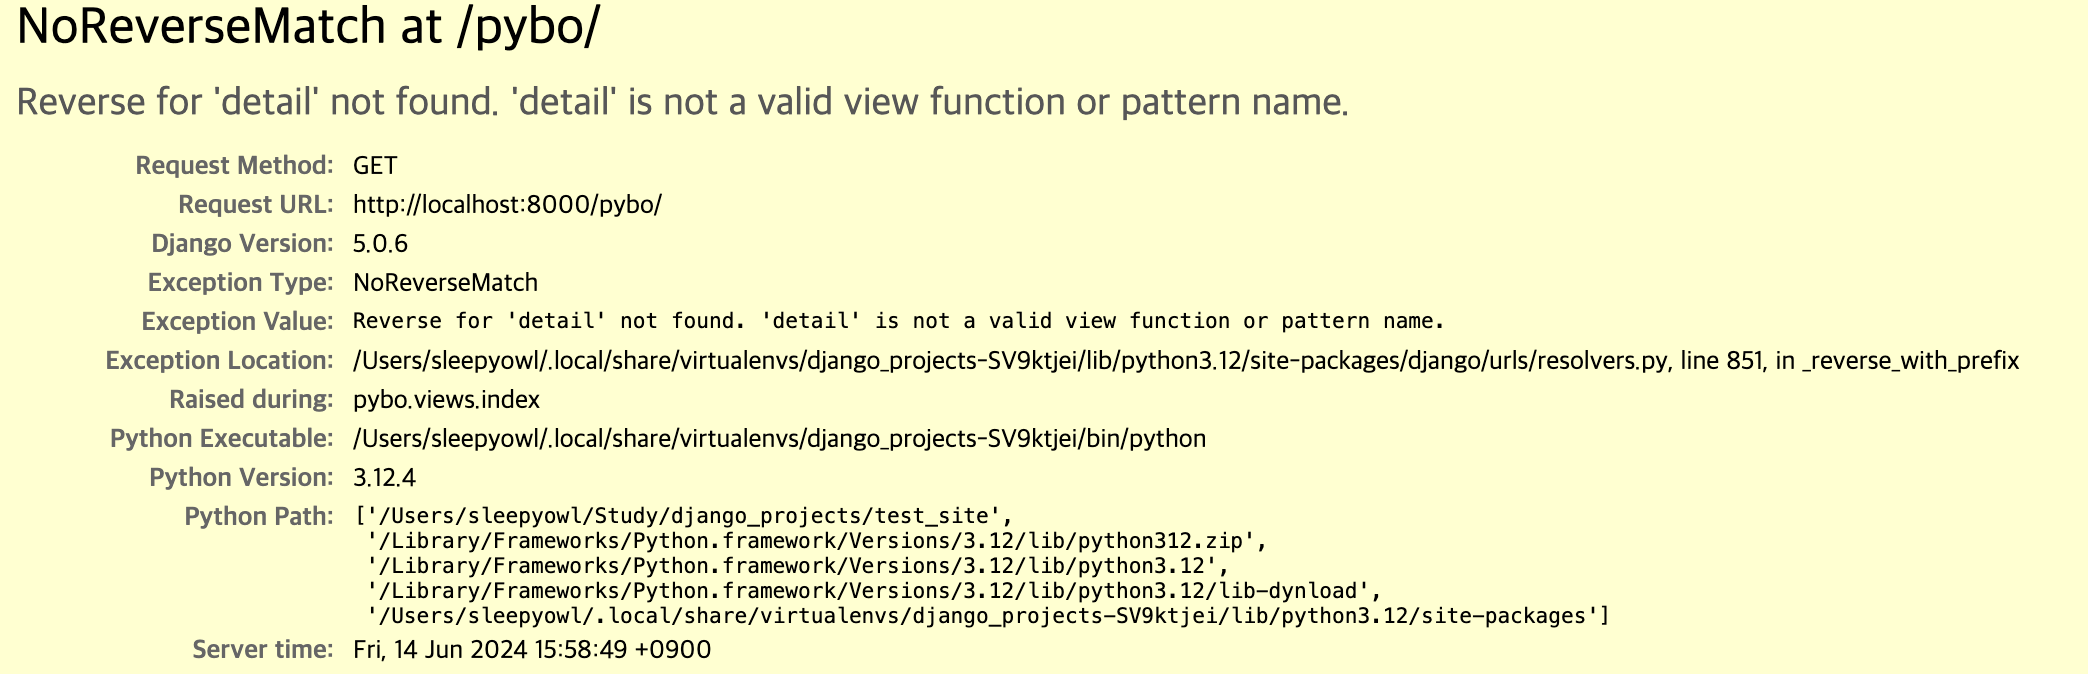
- 네임스페이스 적용 후 페이지에 접근하면 별칭을 찾을 수 없다는 오류 페이지가 발생한다.
- 템플릿에 namespace를 사용하고 있지 않아 발생한 오류
-
템플릿에 namespace 적용
- templates/pybo/question_list.html
{% if question_list %} <ul> {% for question in question_list %} <li><a href="{% url 'pybo:detail' question.id %}">{{ question.subject }}</a></li> {% endfor %} </ul> {% else %} <p>질문이 있습니다.</p> {% endif %}- 별칭 앞에 “namespace 이름:”을 붙인다.
- templates/pybo/question_list.html
답변 등록 기능
답변 저장 및 표시
-
질문 상세 페이지에 답변을 등록하도록 답변 등록 버튼 추가
- template/pybo/question_detail.html
<h1>{{ question.subject }}</h1> <div> {{ question.content }} </div> <form action="{% url 'pybo:answer_create' question.id %}" method="post"> {% csrf_token %} <textarea name="content" id="content" rows="15"></textarea> <input type="submit" value="답변 등록"> </form>- 답변 등록 버튼을 누르면 answer_create url을 호출
- csrf_token은 CSRF 공격을 대비하기 위한 코드
- form 엘리먼트를 통해 전송된 데이터가 실제로 웹 브라우저에서 작성된 데이터인지 판단하는 검사기 역할을 수행
- csrf_token은 장고의 기본 기능이므로 개발자가 별도로 미들웨어를 추가하지 않아도 된다.
- template/pybo/question_detail.html
-
URL 매핑
- pybo/urls.py
... urlpatterns = [ path('', views.index, name='index'), path('<int:question_id>/', views.detail, name='detail'), path('answer/create/<int:quetion_id>/', views.answer_create, name="answer_create"), ]- answer_create url 매핑
- pybo/urls.py
-
answer_create 함수 추가
- pybo/views.py
... from django.utils import timezone ... def answer_create(request, question_id): # pybo 답변 등록 question = get_object_or_404(Question, pk=question_id) question.answer_set.create(content=request.POST.get('content'), create_date=timezone.now())- request 매개변수에 textarea에 입력된 데이터가 넘어오는데 이때 내용을 추출하기 위해 request.POST.get() 함수를 사용
- answer 모델 데이터 생성하기 위해 question.answer_set.create() 함수를 사용
- 이 부분은 Answer 모델을 사용해 처리할 수도 있다.
- pybo/views.py
-
답변 등록 후 질문 상세 페이지로 이동하도록 수정
- pybo/views.py
from django.shortcuts import render, get_object_or_404, redirect ... def answer_create(request, question_id): # pybo 답변 등록 question = get_object_or_404(Question, pk=question_id) question.answer_set.create(content=request.POST.get('content'), create_date=timezone.now()) return redirect('pybo:detail', question_id=question.id)- redirect 함수를 활용해 답변 등록 후 질문 상세 페이지로 이동
- pybo/views.py
-
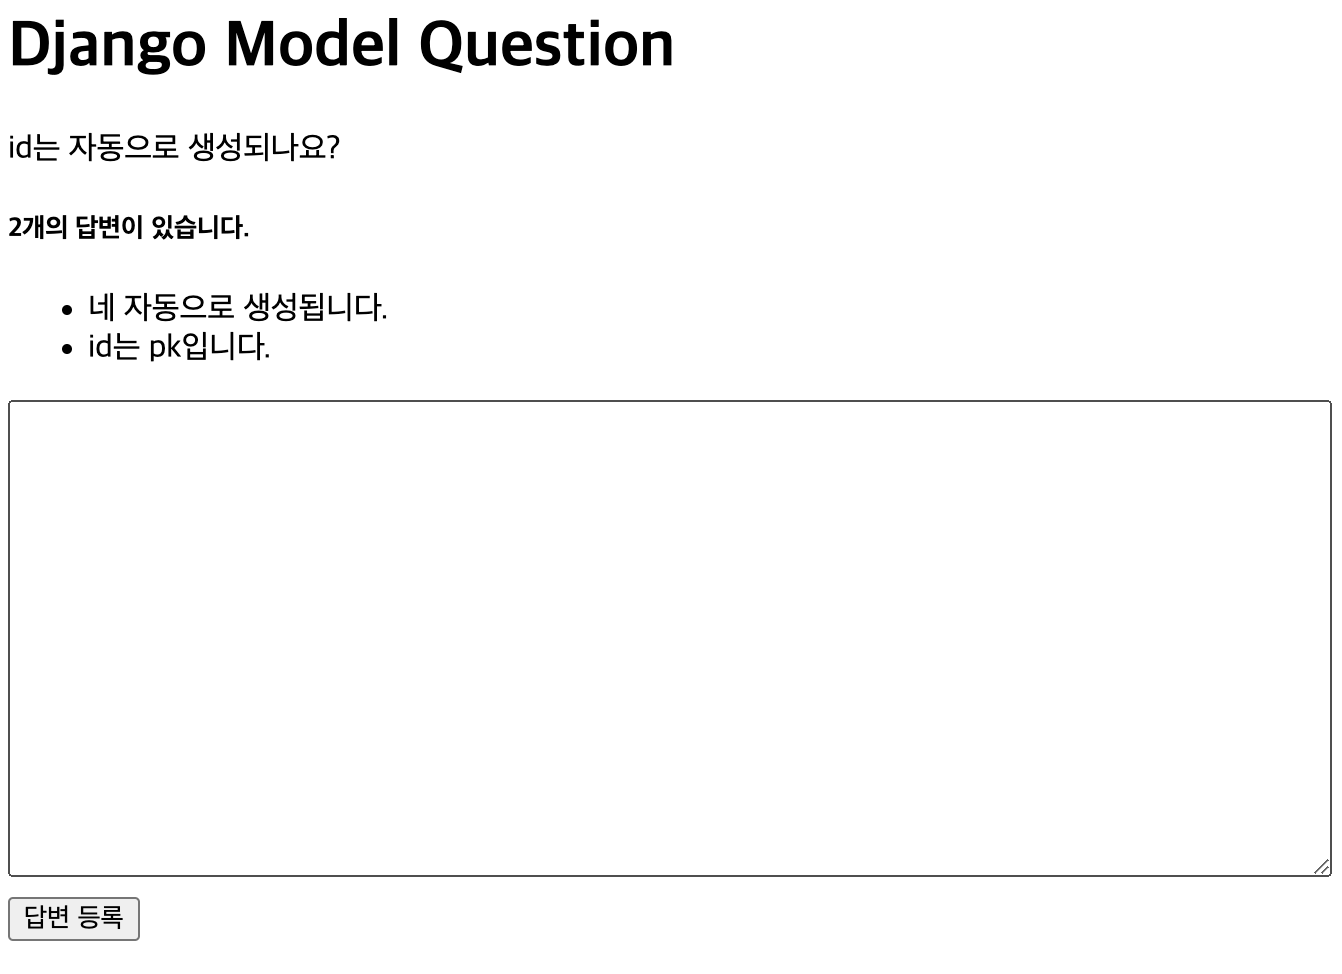
등록된 답변 표시
- template/pybo/question_detail.html
<h5>{{ question.answer_set.count }}개의 답변이 있습니다.</h5> <div> <ul> {% for answer in question.answer_set.all %} <li>{{ answer.content }}</li> {% endfor %} </ul> </div>- 답변의 개수와 답변 내용을 표시
- template/pybo/question_detail.html
-
답변 확인
CSS 적용
Django 앱에 CSS를 적용하기 위해서 프로젝트 디렉토리에 static 디렉토리를 생성하고 그곳에 CSS 파일을 저장해야한다. 그리고 settings.py에 STATICFILES_DIRS에 static 디렉토리 경로를 추가해야 한다.
static 디렉토리는 앱 디렉토리 하위에 만들면 django가 자동으로 인식한다. 하지만 프로젝트 관리가 불편해질 수 있다.
-
static 디렉토리 생성
(django_projects) sleepyowl ~/Study/django_projects/test_site mkdir static -
config/settings.py
... STATIC_URL = 'static/' STATICFILES_DIRS = [ BASE_DIR / 'static', ] ...- STATICFILES_DIRS 항목은 settings.py에 없으므로 STAIC_URL 아래에 추가
-
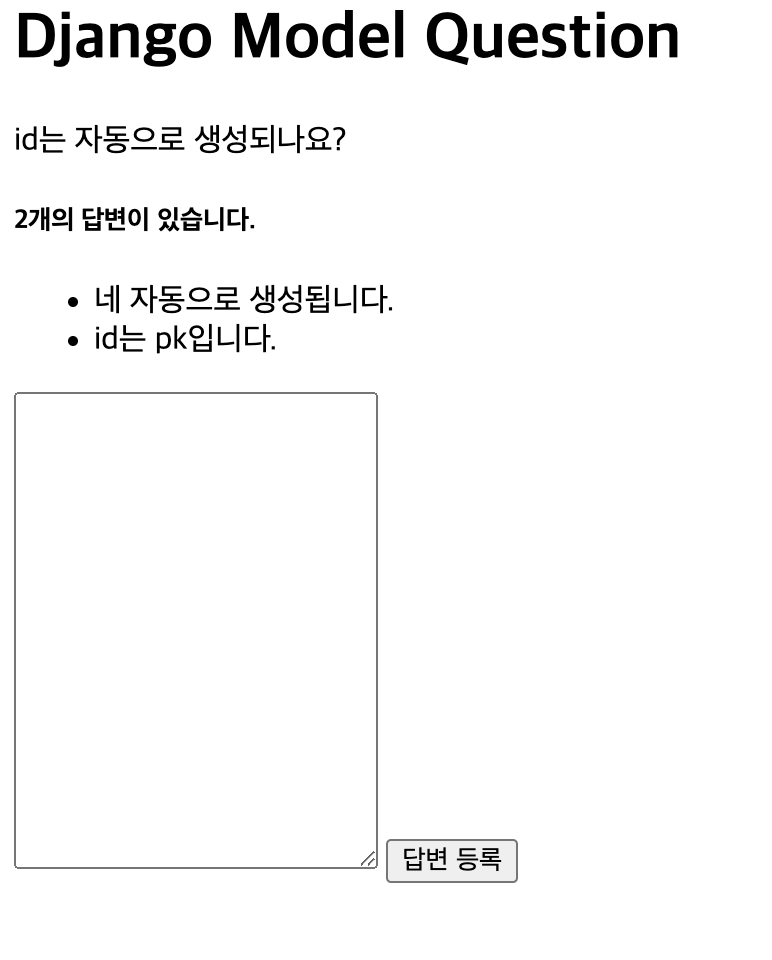
style.css
textarea { width:100%; } input[type=submit] { margin-top:10px; }- 답변을 입력하는 textarea를 창 크기의 100%로 설정
- 답변 등록 버튼 위로 마진을 두어 여유 공간이 생기도록 설정
-
template/pybo/question_detail.html
<!--css load--> {% load static %} <link rel="stylesheet" type="text/css" href="{% static 'style.css' %}">- css를 적용할 템플릿에 css 파일을 로드
-
CSS 적용된 페이지 확인