KREAM | 한정판 거래의 FLEX

KREAM
사이트명 : 현대카드
사용언어 : HTML, SCSS, Jquery
POINT
- JSON 사용하여 데이터 처리
- SCSS 사용
- BEM 사용
SCSS 구조
이때 SCSS 사용 할 때 정식적인 구조를 모른체 사용을 해서 조금 이상한 부분이 있을 수 있다.
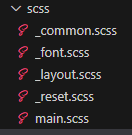
이런 식으로 구조를 만든 뒤 main에서 모든 Scss를 import 해서 사용했다.
scss 컴파일 할 때 VS코드에서 확장프로그램을 이용하여 컴파일 하였고 JSON의 옵션 값에서
"liveSassCompile.settings.autoprefix": ["> 1%", "last 2 versions"],이런 코드를 넣어주면 각 브라우저의 2 버전 까지 호환 되는 css코드를 자동으로 넣어줘서 편리하다 ex : -webkit, -ms
BEM 방식 사용
BEM은 Block, Element, Modifier를 뜻하며 각각 __ , -- 구분한다. 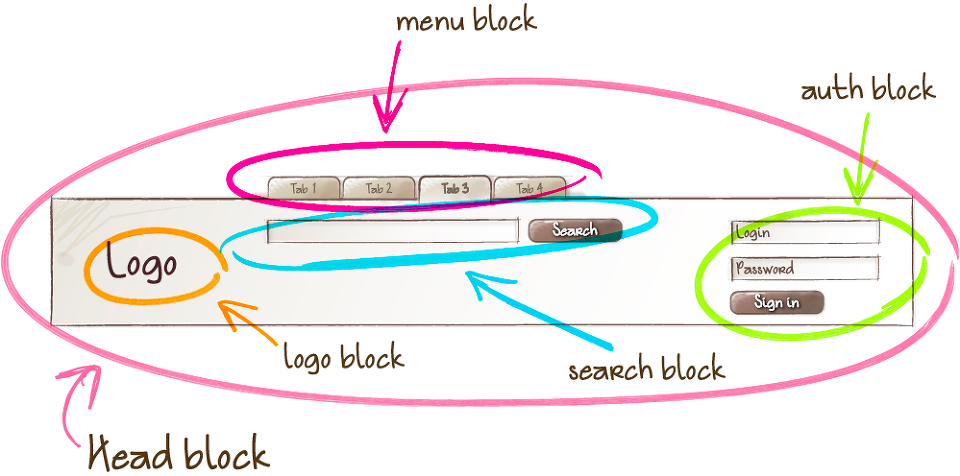
SCSS를 스타일링 할때 작성 방식이 되게 간편해진다
<div class="header">
  <div class="header__inner">
    <div class="tabzilla">
      <a href="#" class="tabzilla__link">
        <span>mozilla</span>
      </a>
    </div>

    <div class="header__logo">
      <div class="logo">
        <a href="#" class="logo__link">
          <h1>MDN</h1>
        </a>
      </div>
    </div>
  </div>
</div>
.header {
.
.
.
&__inner {
.
.
.
}
&__logo {
.
.
.
}
}이런 식으로 부모참조자를 사용해서 쓰기가 편해지며 클래스 네임만으로도 마크업 구조를 알 수 있다.
JSON 데이터
fetch : JSON 파일 가져오기then((res) => res.json()) : 첫 번째 then 응답('ras') JSON 객체로 변환then((json) => {}) : 두 번째 then JOSN 데이터를 처리data = json.~ : JSON의 데이터를 변수에 할당
{
  "items": [
    {
      "url": "",
      "thumb": "../assets/images/main-banner.jpg",
      "desc": "지금 핫한 두 브랜드 Hoka & On Running",
      "theme": "khaki"
    },
    {
      "url": "",
      "thumb": "../assets/images/main-banner2.jpg",
      "desc": "ANOETIC 감각적이고 웨어러블한 실루엣",
      "theme": "purple"
    },
    {
      "url": "",
      "thumb": "../assets/images/main-banner3.jpg",
      "desc": "카카오페이 결제시 최대 4만원 즉시 할인",
      "theme": "white"
    }
  ]
}
이런식으로 JSON에 데이터를 넣어주었고 fatch문을 사용해서 html에 넣어주었다.
fetch('../assets/data/bannerData.json')
  .then((res) => res.json())
  .then((json) => {
    data = json.items;
    let html = ``;
    data.forEach((el) => {
      html += `<div class="swiper-slide swiper-slide--${el.theme}">
                <div class="banner">
                  <picture>
                    <img src="${el.thumb}" alt="${el.desc}" />
                  </picture>
                </div>
            </div>`;
    });

    $('#bannerList').html(html);

        const banner = new Swiper('.sc-banner .swiper-container', {
      	loop: true,

      autoplay: {
        delay: 5000,
      },

      navigation: {
        nextEl: '.sc-banner .btn--next',
        prevEl: '.sc-banner .btn--prev',
      },

      pagination: {
        el: '.sc-banner .swiper-pagination',
        type: 'bullets',
        clickable: true,
      },
      touchEventsTarget: 'container',
      allowTouchMove: true,
    });
스와이퍼를 사용 할 때에도 문제 없이 사용이 가능하다
그리고 슬라이드도 같이 반복문을 해야 할 때에도
fetch('../assets/data/shortcutData.json')
  .then((res) => res.json())
  .then((json) => {
    let html = '';
    data = json.slides;

    data.forEach((slide) => {
      let slideHtml = '<div class="swiper-slide">';
      slide.items.forEach((el) => {
        slideHtml += `
          <div class="menu__item">
            <a href="#">
              <figure>
                <img src="${el.thumb}" alt="${el.name}" />
                <figcaption>${el.name}</figcaption>
              </figure>
            </a>
            <a href="#">
              <figure>
                <img src="${el.thumb2}" alt="${el.name2}" />
                <figcaption>${el.name2}</figcaption>
              </figure>
            </a>
          </div>
        `;
      });
      slideHtml += '</div>';
      html += slideHtml;
    });
    $('#shortCut').html(html);
  });
먼저 data 배열의 각 슬라이드 항목에 대해 반복하고 슬라이드 아이템의 데이터를 반복처리 해줬다.
각각 슬라이드의 반복이 끝나면 </div> 추가 하여 슬라이드를 종료하고 슬라이드의 html을 html변수에 합친 뒤 html 삽입 해주었다.
"slides": [
    {
      "items": [
        {
          .
          .
          .

        },
      ]
    },

    {
      "items": [
        {
          .
          .
          .
        },
      ]
    }
  ],
상품 데이터
  "PopularList": [
    {
      "id": "",
      "brand": {
        "name": "Gonak",
        "auth": false
      },
      "thumb": "../assets/images/product.webp",
      "title": "Thisisneverthat x New Era x MLB New York Yankees Short Sleeve T-Shirt Navy",
      "price": {
        "directCheck": false,
        "directPrice": null,
        "normalPrice": 100520,
        "salePercent": 30,
        "salePrice": 200520
      },
      "Mileage": true,
      "coupon": true,
      "delivery": {
        "fast": false,
        "free": true
      },
      "order": {
        "check": true,
        "value": 3
      }
    },
  ]
data.forEach((el) => {
html += `
<div class="product__item">
<div class="product__thumb">
<img src="${el.thumb}" alt="" />
<span class="product--number">${el.order.check ? `거래 ${el.order.value}` : ''}</span>
<span class="product--wish">
<svg xmlns="http://www.w3.org/2000/svg">
<use href="#i-ico-wish-off" xlink:href="#i-ico-wish-off"></use>
</svg>
</span>
</div>
<div class="product__info">
<div class="info__desc">
<em>
<span>${el.brand.name}</span>
${el.brand.auth ? `<svg xmlns="http://www.w3.org/2000/svg"><use href="#i-ico-brand-official" xlink:href="#i-ico-brand-official"></use></svg>` : ''}
</em>
<p>${el.title}</p>
<div class="tags">
${el.coupon ? `<span>적립</span>` : ''}
${el.delivery.free ? `<span>무료배송</span>` : ''}
</div>
${el.delivery.fast ? `<div class="tags tags--rocket"><span><i class="ico--rocket"></i>빠른배송</span></div>` : ''}
</div>
<div class="info__price">
<span>
${el.price.salePercent ? `<span class="point--red">${el.price.salePercent}%</span>` : ''}
${el.price.directlPrice ? el.price.directlPrice.toLocaleString() : ''}
${el.price.salePrice ? el.price.salePrice.toLocaleString() + '원' : el.price.normalPrice ? el.price.normalPrice.toLocaleString() + '원' : ''}
</span>
<p>${el.price.directCheck ? '즉시 구매가' : '구매가'}</p>
</div>
</div>
<a href="#" class="link"></a>
</div>
`;
});
$('#dropped').html(html);
});
삼항 연산자를 사용해서 필요한 부분들을 처리했다
스크롤 처리
PC에선 스와이퍼로 처리를 했으며 태블릿 화면 부터는 overflow-x 사용해서 스크롤이 되게 만든 뒤 scrollbar-width : none 스크롤이 안보이게 처리했다.
SCSS에서의 미디어 쿼리 활용
mixin을 활용해서 미디어 쿼리를 쓸 수 있다
@mixin tablets() {
  @media (max-width: 980px) {
    @content;
  }
}

@mixin mobile() {
  @media (max-width: 750px) {
    @content;
  }
}
.swiper-pagination {
@include mobile {
display: flex;
padding: 0 16px;
bottom: 18px;
}
}믹스인을 만들어 둔 뒤에 미디어 쿼리를 사용 할 요소에 인클루드로 사용해주면 된다
