1. 들어가기
이번 글에서는 Kops로 Kubernetes 클러스터를 생성한 후 Envoy Gateway를 install 한 뒤 a.yaml 파일 2048 Game을 배포해보겠습니다.
Terraform VS kOps
kOps는 클러스터 생성에 특화된 도구로, 쉽고 빠르게 리소스 설정을 할 수 있게 합니다.
terraform은 인프라 전체를 코드로 관리, 설정하는 도구입니다.
본격적인 실습에 앞서 이 실습의 기본적인 리소스를 생성해야 합니다.
제가 사용한 기본 설정입니다.
kOps는 Linux 환경에서 실행해야 합니다. Windows에서 직접 실행이 되지 않기 때문에 EC2를 생성한 후 SSH로 접속하여 실습을 진행했습니다.
- 필기본 VPC를 사용하여, EC2 인스턴스를 생성했습니다.
- EC2 인스턴스는 Ubuntu AMI, PemKey, Admin IAM 역할을 가져야 합니다.
- VScode 터미널에서 ssh로 접속하기 위해 Remote-ssh 확장 프로그램을 사용했습니다.
- 보안 그룹의 모든 트래픽은 Anywhere로 개방해야 합니다.
- 스토리지는 20GB로 설정했습니다.

kOps는 클러스터를 만들 때 AWS 내부에서 EC2들이 서로 통신해야 하기 때문에 Anywhere로 개방했습니다.
아래 링크에서 Remote-ssh를 다운로드할 수 있습니다.
https://marketplace.visualstudio.com/items?itemName=ms-vscode-remote.remote-ssh
VSCode Remote-SSH로 접속
~/.ssh/config 파일에 아래 내용을 추가해야 합니다.
Host kops
	Hostname {ip}
    IdentityFile {PemKey 경로}
	User ubuntu
이후 VSCode에서 Ctrl + Shift + P를 입력 한 후 Remote-SSH: Connect to Host 선택, 아까 생성한 kops를 선택하면 됩니다.
이번 실습에서 기초적으로 사용되는 기본 명령어를 정리해보았습니다.
kubectl get       # 리소스 목록 조회
kubectl describe  # 리소스 상세 정보 조회
kubectl logs      # 컨테이너 로그 조회
kubectl apply     # 리소스 생성 또는 수정
kubectl delete    # 리소스 삭제
실습 진행할 때 참조한 공식 docs 입니다.
- https://kops.sigs.k8s.io/getting_started/aws/
- https://kubernetes.io/ko/docs/reference/kubectl/
- https://docs.aws.amazon.com/
kubectl create VS kubectl apply
kubectl create는 리소스를 새로 생성하는 명령어로 이미 존재하면 에러가 발생하지만, kubectl apply는 선언적 방식으로 리소스를 생성하거나 변경 내용을 반영(Update)하여 더 유연하다. 일회성 생성은 create, 지속적 관리 및 수정은 apply가 적합하다.
apply는 yaml 파일에 정의된 원하는 삳태와 현재 상태를 비교해서 필요한 변경사항만 적용한다.
2. hands On
1-1. AWS CLI, Kubectl, kOps 설치
터미널에서 다음 명령어를 입력하여 AWS CLI를 설치합니다.
sudo apt update && sudo apt install unzip -y
curl "https://awscli.amazonaws.com/awscli-exe-linux-x86_64.zip" -o "awscliv2.zip"
unzip awscliv2.zip
sudo ./aws/install
aws --version # 최신 버전인지 확인합니다.
이후 kubectl을 설치합니다.
curl -LO "https://dl.k8s.io/release/$(curl -L -s https://dl.k8s.io/release/stable.txt)/bin/linux/amd64/kubectl"
chmod +x kubectl
sudo mv kubectl /usr/local/bin/kubectl
kubectl version --client # 최신 버전인지 확인합니다.
아래 명령어를 입력하여 실행 권한을 부여하고, kubectl을 전역에서 사용할 수 있게 설정합니다.
chmod +x kubectl
sudo mv kubectl /usr/local/bin/kubectl
마지막으로 kOps를 설치합니다.
curl -LO https://github.com/kubernetes/kops/releases/download/$(curl -s https://api.github.com/repos/kubernetes/kops/releases/latest | grep tag_name | cut -d '"' -f 4)/kops-linux-amd64
chmod +x kops-linux-amd64
sudo mv kops-linux-amd64 /usr/local/bin/kops
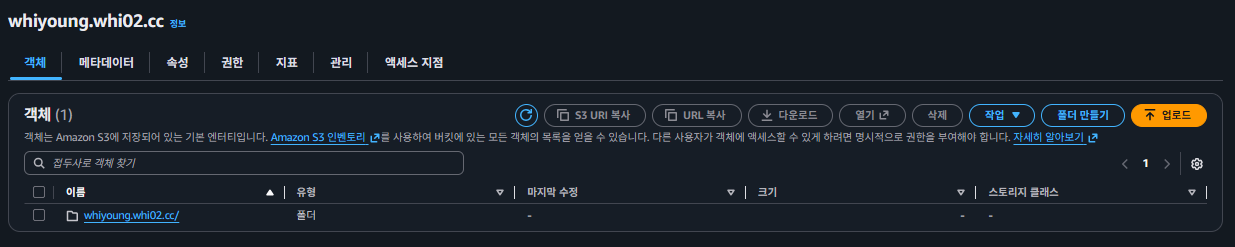
kops version1-2. S3 Bucket 생성 (kOps state store)
- kOps는 클러스터 상태 정보를 S3에 저장합니다. 따라서 클러스터를 만들기 전 S3 버팃을 먼저 생성해야 합니다.
- S3가 없다면 kOps가 클러스터 정보를 저장할 수 없어 동작하지 않게 됩니다.
- mb = make bucket (버킷 생성)
- rb = remove bucket (버킷 삭제)
- 버킷 이름은 {name}.{name}.cc 형식을 사용합니다. (kOps가 Route53 도메인 형식을 장려함)
aws s3api create-bucket \
  --bucket <버킷 이름> \
  --region ap-northeast-2 \
--create-bucket-configuration LocationConstraint=ap-northeast-2- export로 설정한 변수는 현재 터미널 세션에만 유지된다. 따라서 터미널을 닫으면 날아가기 때문에 영구 저장하려면, ~/.bashrc에 추가해야 합니다.
1-3. kOps 환경변수 설정
export KOPS_STATE_STORE="s3://{name}.{name}.cc"
export CONTROL_PLANE_SIZE="t3.medium"
export NODE_SIZE="t3.medium"
export ZONES="{regionA},{regionB},{regionC}"
1-4. kOps 클러스터 생성 및 적용
kops create cluster {name}.{name}.cc \
  --node-count 2 \
  --zones $ZONES \
  --node-size $NODE_SIZE \
  --control-plane-size $CONTROL_PLANE_SIZE \
  --control-plane-zones $ZONES \
  --networking calico \
  --topology public \
--yes- 클러스터 생성까지 10분 정도 소요됩니다.
kops validate cluster --wait 10m-
클러스터가 완전히 배포될 때까지 최대 10분 동안 기다리며, 주기적으로 클러스터 상태를 체크하는 옵션입니다.
-
클러스터 생성이 완료되면 확인합니다.
# kubeconfig 가져오기
kops export kubeconfig {name}.{name}.cc --admin

# 클러스터 확인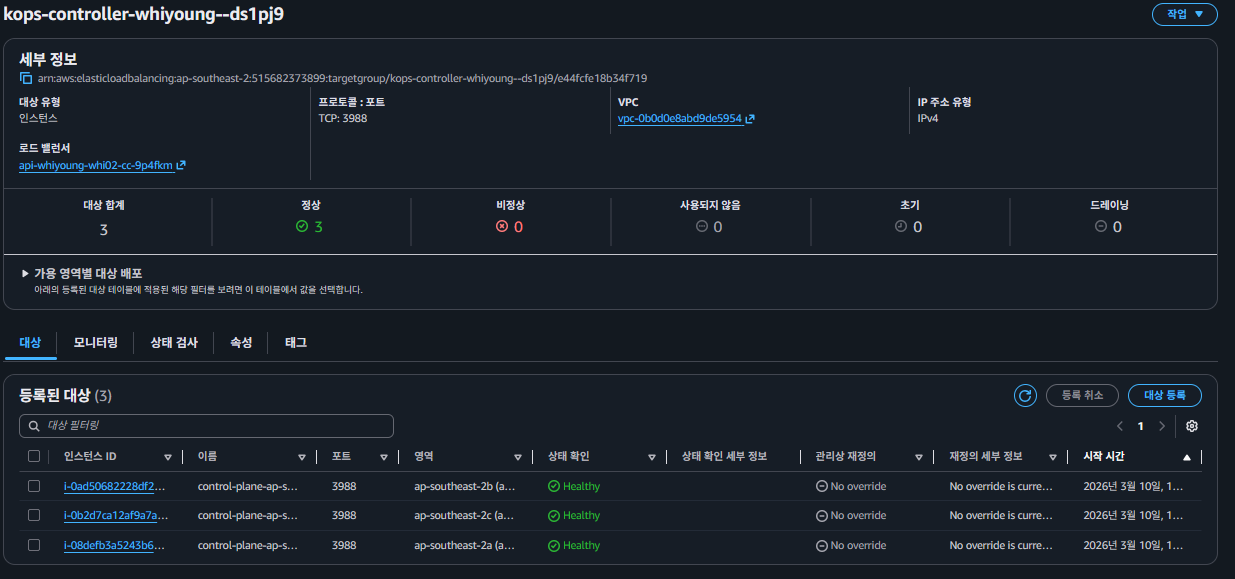
kubectl get nodes- 예시 실행 결과
NAME                  STATUS   ROLES           AGE   VERSION
i-0736bfe25b6fe41cf   Ready    node            9m    v1.34.5
i-08defb3a5243b632b   Ready    control-plane   11m   v1.34.5
i-0a203ae63d064e06a   Ready    node            9m    v1.34.5
i-0ad50682228df2830   Ready    control-plane   12m   v1.34.5
i-0b2d7ca12af9a7a94   Ready    control-plane   12m   v1.34.5
Control Plane이 3개로 생성된 이유
export ZONES="{regionA},{regionB},{regionC}"위 명령어로 3개의 가용 영역을 지정했기 때문에 kOps가 각 zone에 Control Plan을 1개씩 자동으로 배치되었습니다.
고가용성 구성을 위해 일반적으로 Control Plane을 홀수 개로 구성합니다.
2-1. Envoy Gateway install
- Kubernetes 클러스터가 준비되면 Envoy Gateway를 설치합니다.
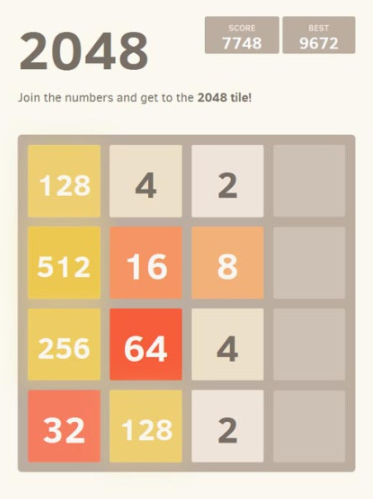
kubectl apply -f https://github.com/envoyproxy/gateway/releases/download/latest/install.yaml3-1. 2048 game 배포
2048 game yaml 배포 file은 여기에 있습니다.
kubectl apply -f a.yamlnamespace/game-2048 created
deployment.apps/deployment-2048 created
service/service-2048 created
gatewayclass.gateway.networking.k8s.io/eg created
gateway.gateway.networking.k8s.io/gateway-2048 created
httproute.gateway.networking.k8s.io/route-2048 created접속 확인
kubectl get gateway -n game-2048NAME CLASS ADDRESS PROGRAMMED AGE
gateway-2048 eg a83f79b37419c4cd583db6517002e789-xxx.elb.amazonaws.com True 87sADDRESS에 ELB 주소가 뜨면, 브라우저에 붙혀넣고 접속을 확인합니다.
4-1. kubectl 실습
2048 실습을 진행한 리소스에서 kubectl을 실습하겠습니다.
get | 리소스 목록 조회
kubectl get pods -n game-2048         # 특정 Namespace Pod 조회
kubectl get pods -A                   # 전체 Namespace Pod 조회
kubectl get gateway -n game-2048      # Gateway 조회 (ELB 주소 확인)
describe | 리소스 상세 정보 조회
kubectl describe pod <pod이름> -n game-2048출력에서 중요한 부분
- Node: 이 Pod가 어느 Worker Node에 배치됐는지
- Status: Running 상태이면 정상입니다.
- Restart Count: 재시작 횟수를 나타내고, Restart Count 수가 많다면, 문제가 생겼다는 것을 의미합니다.
- Events: 트러블슈팅 핵심. Pod에 문제가 생기면 이 부분에서 에러 내용이 출력됩니다.
logs — 컨테이너 로그 조회
kubectl logs <pod이름> -n game-2048        # 로그 조회
kubectl logs -f <pod이름> -n game-2048     # 실시간 로그 스트리밍 (-f = follow)
배포 진행 후 접속하지 않았다면, nginx가 요청을 받지 않았기 때문에 Log가 없을 수 있습니다.
exec — Pod 내부 접속
kubectl exec -it <pod이름> -n game-2048 -- bash   # bash로 접속
kubectl exec -it <pod이름> -n game-2048 -- sh     # sh로 접속
3. 마무리
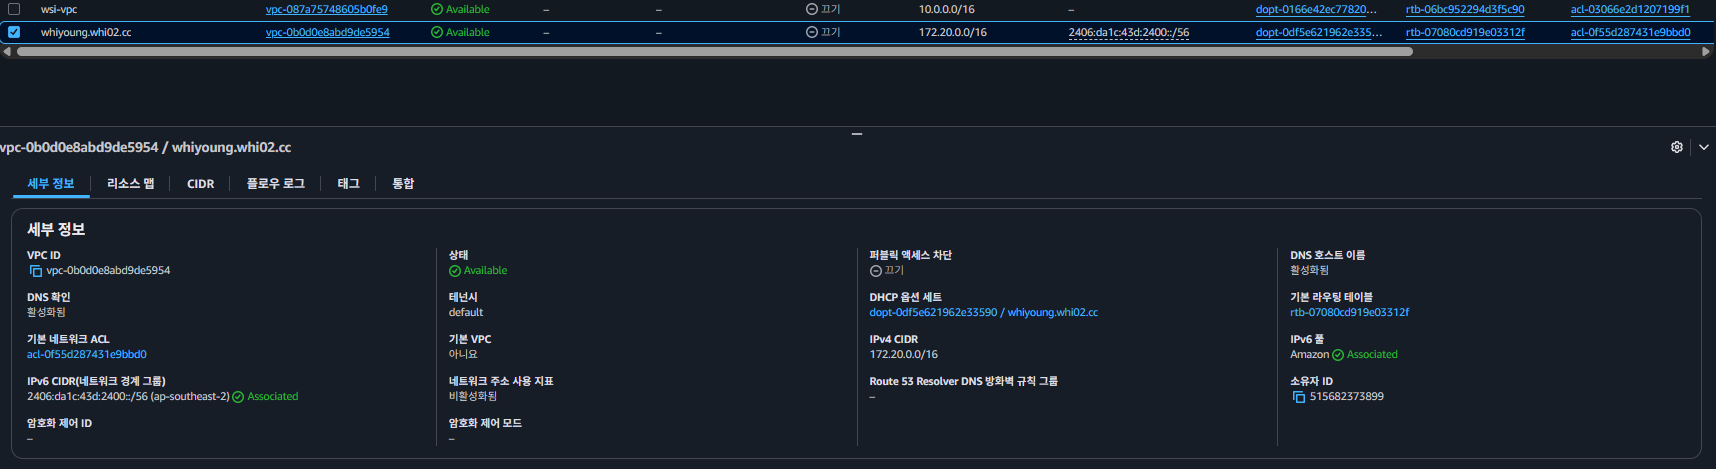
배포를 진행하고, 우리가 지정한 리전에 리소스가 생성된 것을 알 수 있습니다.


이번 실습을 통해 배운 내용을 정리해보겠습니다.
- kOps는 S3에 클러스터 상태를 저장한다 - S3 없으면 kOps 동작을 하지 않는다.
- Control Plane은 홀수로 구성 - 고가용성을 위해 이렇게 자동으로 생성된다.
- kubectl -n 옵션으로 Namespace 지정 - 없으면 default Namespace에서 찾는다.
- 경량 컨테이너에는 bash 없을 수 있다 - sh로 대체한다.
- 트러블슈팅 순서: kubectl describe → Events 확인 → kubectl logs 확인
추후에 이 실습을 Terraform을 사용하여 EKS로 진행해보려고 합니다.
감사합니다.