지난글
- Three.js란
- Three.js의 구조
- Three.js 설치 / 렌더링
이어서
지난 포스트에서는 Three.js를 시작하는 방법에 대해서 알아보았습니다. 이번에는 Three.js에 기본 도형들에 대해서 알아볼께요. 총 도형이 18가지라 도형 6개씩 글 3개로 쪼개겠습니다. 텍스처는 MeshBasicMaterial 기본 텍스처를 쓰고 나머지는 나중에 더 알아보도록 합시다.
index.html
<!DOCTYPE html>
<html lang="en">
  <head>
    <meta charset="UTF-8" />
    <meta name="viewport" content="width=device-width, initial-scale=1.0" />
    <title>Document</title>
  </head>
  <body>
    <div class="controls">
      <label>
        Width:
        <input type="range" id="width" min="0.1" max="5" step="0.1" value="1" />
      </label>
      <label>
        Height:
        <input
          type="range"
          id="height"
          min="0.1"
          max="5"
          step="0.1"
          value="1"
        />
      </label>
      <label>
        Depth:
        <input type="range" id="depth" min="0.1" max="5" step="0.1" value="1" />
      </label>
      <label>
        Color:
        <input type="color" id="color" value="#44aa88" />
      </label>
    </div>
    <canvas id="c"></canvas>
    <script type="module" src="./index.js"></script>
  </body>
</html>
index.js
import * as THREE from './node_modules/three/build/three.module.js';

const canvas = document.querySelector('#c');
const renderer = new THREE.WebGLRenderer({ antialias: true, canvas });
renderer.setSize(window.innerWidth, window.innerHeight);
const fov = 70;
const aspect = window.innerWidth / window.innerHeight;
const near = 0.1;
const far = 5;
const camera = new THREE.PerspectiveCamera(fov, aspect, near, far);
camera.position.z = 2;

const scene = new THREE.Scene();

let boxWidth = 1;
let boxHeight = 1;
let boxDepth = 1;
const geometry = new THREE.BoxGeometry(boxWidth, boxHeight, boxDepth); // 여기에서 변경가능
const material = new THREE.MeshBasicMaterial({ color: 0x44aa88 });
const mesh = new THREE.Mesh(geometry, material);
scene.add(mesh);

function animate() {
  // 애니메이션
  mesh.rotation.x += 0.01;
  mesh.rotation.y += 0.01;
  renderer.render(scene, camera);
  requestAnimationFrame(animate);
}
animate();

const widthControl = document.getElementById('width');
const heightControl = document.getElementById('height');
const depthControl = document.getElementById('depth');
const colorControl = document.getElementById('color');

function updateGeometry() {
  // 다시 만드는 함수
  const newWidth = parseFloat(widthControl.value);
  const newHeight = parseFloat(heightControl.value);
  const newDepth = parseFloat(depthControl.value);
  mesh.geometry.dispose(); // 삭제
  mesh.geometry = new THREE.BoxGeometry(newWidth, newHeight, newDepth); // 생성
}
function updateColor() {
  // 색바꾸는 함수
  const newColor = colorControl.value;
  mesh.material.color.set(newColor);
}
widthControl.addEventListener('input', updateGeometry);
heightControl.addEventListener('input', updateGeometry);
depthControl.addEventListener('input', updateGeometry);
colorControl.addEventListener('input', updateColor);
위 코드는 canvas밖의 요소를 받아 canvas안의 도형에 width나 height같은 요소를 변경할수 있는 예제입니다. 이렇게 활용도 할 수 있는 것을 보여주고 싶었습니다. 나머지 도형들은 예제 코드에서 조금 변경만 해서 보여드리겠습니다.
1.BoxGeometry
저희가 예제에서 써보기도했는데 말그대로 box같은 사각형의 형태를 띄고있습니다. 들어갈수 있는 인자로는 width, height, depth, widthSegments, heightSegments, depthSegments가 있습니다. 예제에서 봤기 때문에 패스하도록 할게요.
2.CircleGeometry
이 도형은 납작한 쟁반같이 2차원 원을 표현할 수 있는 도형입니다. 들어갈수 있는 인자는 radius, segments, thetaStart, thetaLength가 있어요.예제코드에서 geometry코드를
let radius = 1;
let segments = 50;
let thetaStart = 2;
let thetaLength = Math.PI * 1.6;
const geometry = new THREE.CircleGeometry(
  radius,
  segments,
  thetaStart,
  thetaLength,
);
const material = new THREE.MeshBasicMaterial({ color: 0xffff00 });
const mesh = new THREE.Mesh(geometry, material);
scene.add(mesh);
이런식으로 바꿔주시면 귀여운 픽맨이 됩니다
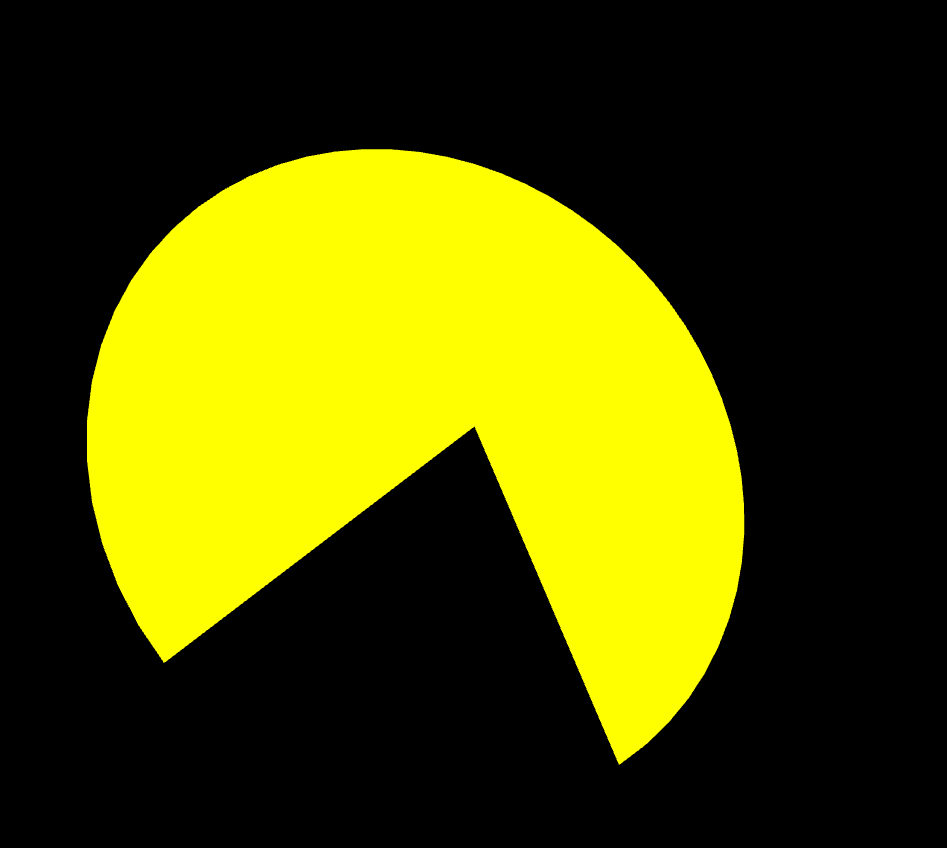
조절해보기 ㅣ https://threejs.org/docs/#api/en/geometries/CircleGeometry
3.ConeGeometry
이름 그대로 콘모양의 도형입니다. 들어갈 수 있는 인자는 radius, height,radialSegments, heightSegments, openEnded, thetaStart, thetaLength 가 있습니다.
let radius = 1;
let height = 2;
let radialSegments = 20;
const geometry = new THREE.ConeGeometry(radius, height, radialSegments);
const material = new THREE.MeshBasicMaterial({ color: 0xffff });
const mesh = new THREE.Mesh(geometry, material);
scene.add(mesh);
평범한 콘을 만들수 있습니다.
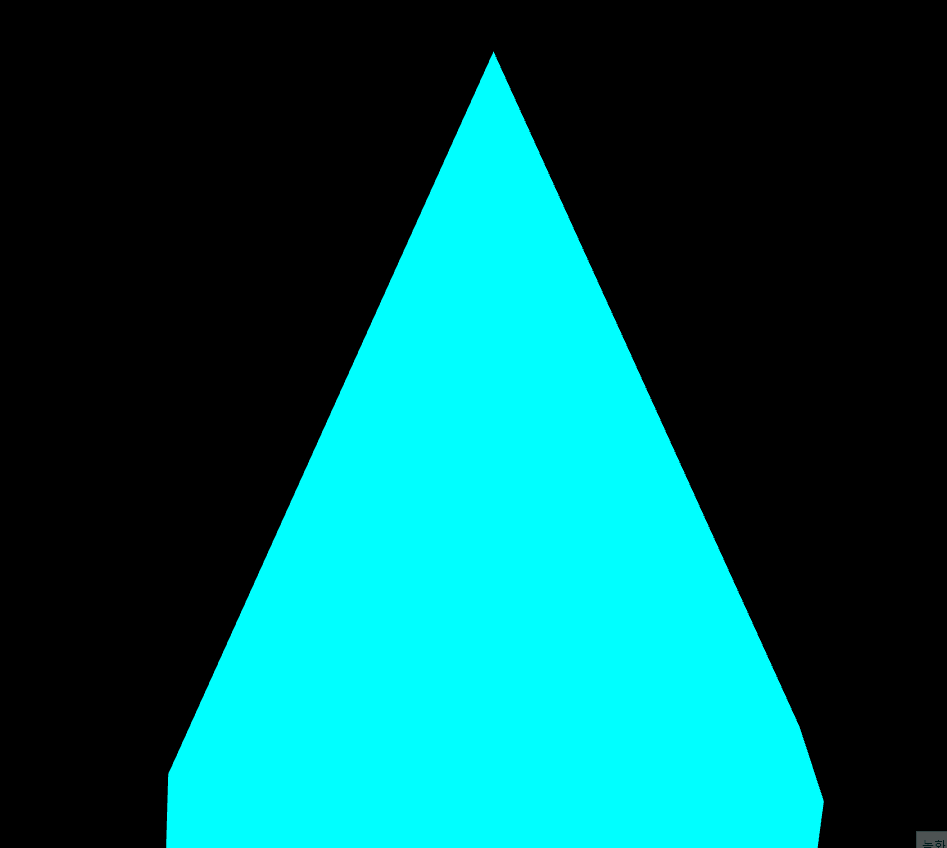
조절해보기 ㅣ https://threejs.org/docs/#api/en/geometries/ConeGeometry
4.CylinderGeometry
원통모양의 도형입니다. 들어갈 수 있는 인자로는 radiusTop, radiusBottom, height, radialSegments,heightSegments, openEnded, thetaStart, thetaLength 가 있어요
let radiusTop = 1.5;
let radiusBottom = 1.5;
let height = 4;
let radialSegments = 10;
const geometry = new THREE.CylinderGeometry(
  radiusTop,
  radiusBottom,
  height,
  radialSegments,
);
const material = new THREE.MeshBasicMaterial({ color: 0x44aa88 });
const mesh = new THREE.Mesh(geometry, material);
scene.add(mesh);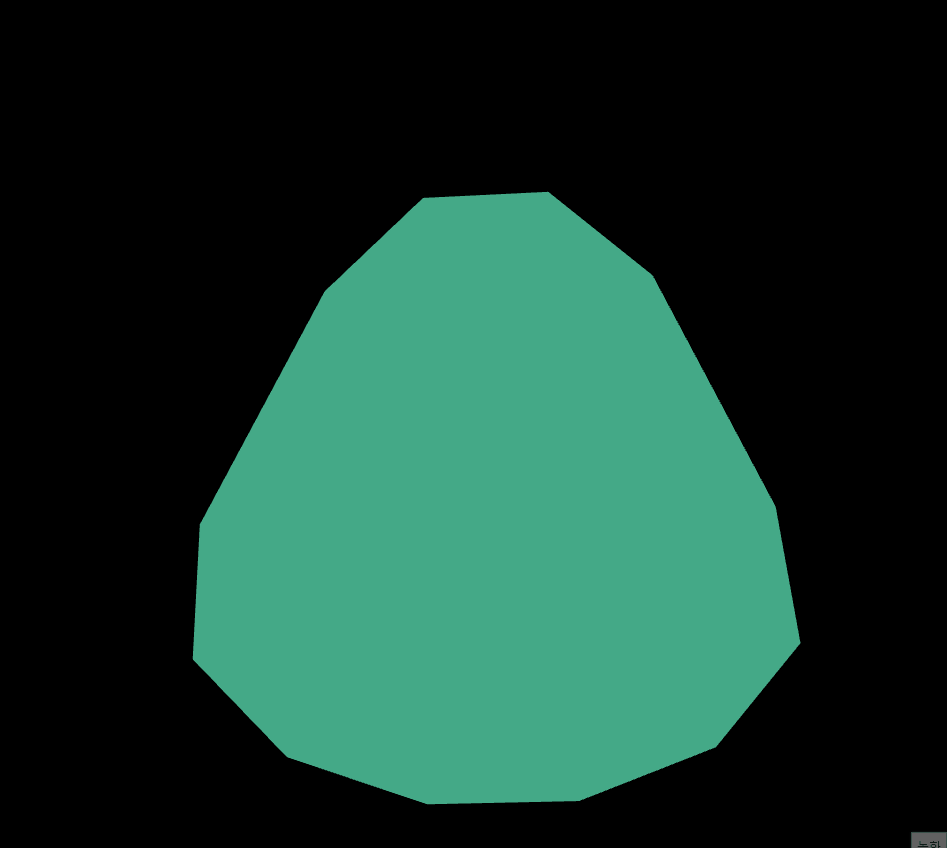
조절해보기 ㅣ https://threejs.org/docs/#api/en/geometries/CylinderGeometry
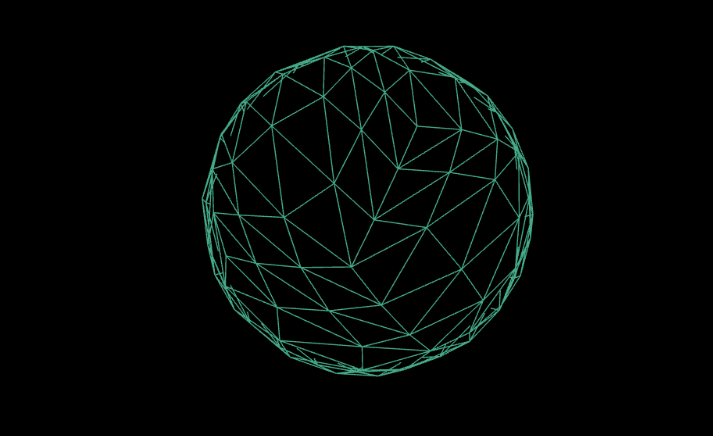
5.DodecahedronGeometry
12면체이고 들어갈수 있는 인자는 radius, detail 가 있습니다.원이라서 잘 안보여서 wireframe: true이라는 옵션을 추가해 주겠습니다. 이 옵션을 추가하면 모든 모서리가 표시됩니다.
let radius = 1.5;
let detail = 2;
const geometry = new THREE.DodecahedronGeometry(radius, detail);
const material = new THREE.MeshBasicMaterial({
  color: 0x44aa88,
  wireframe: true,
});
const mesh = new THREE.Mesh(geometry, material);
scene.add(mesh);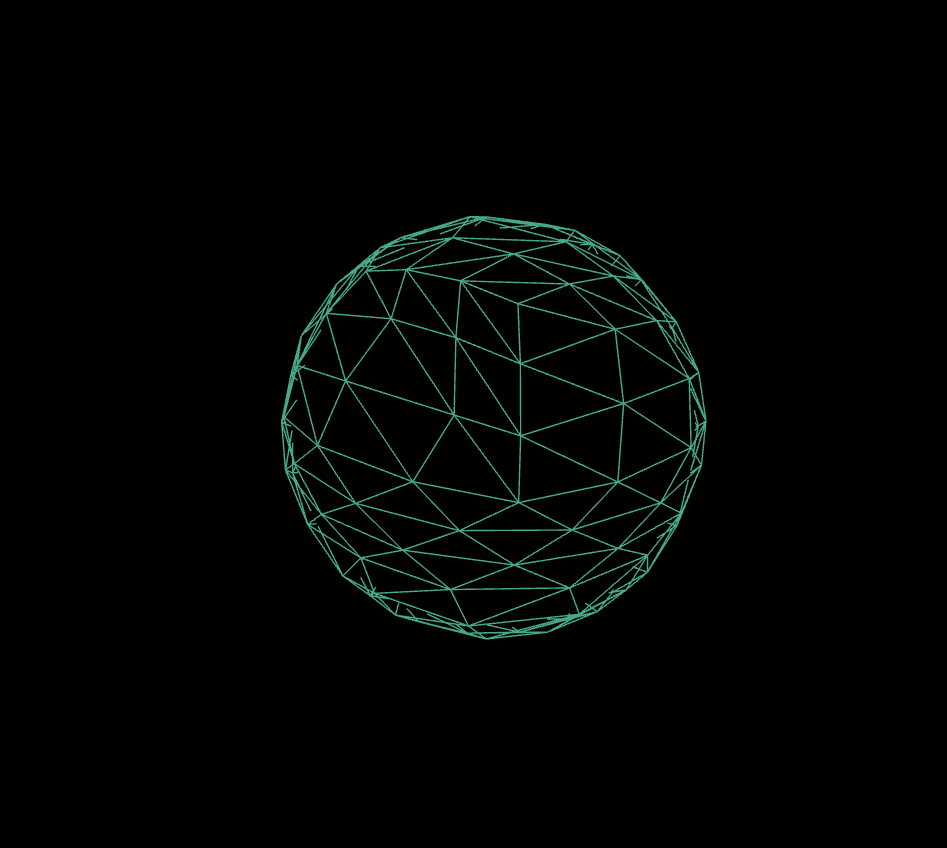
조절해보기 ㅣ https://threejs.org/docs/#api/en/geometries/DodecahedronGeometry
6.ExtrudeGeometry
도형을 깍아서 만들 수 있는 도형입니다. 저희는 공식문서에 있는 하트로 깍는 예제를 한번 해보도록 할게요.
const shape = new THREE.Shape();
const x = -2.5;
const y = -5;
shape.moveTo(x + 2.5, y + 2.5);
shape.bezierCurveTo(x + 2.5, y + 2.5, x + 2, y, x, y);
shape.bezierCurveTo(x - 3, y, x - 3, y + 3.5, x - 3, y + 3.5);
shape.bezierCurveTo(x - 3, y + 5.5, x - 1.5, y + 7.7, x + 2.5, y + 9.5);
shape.bezierCurveTo(x + 6, y + 7.7, x + 8, y + 4.5, x + 8, y + 3.5);
shape.bezierCurveTo(x + 8, y + 3.5, x + 8, y, x + 5, y);
shape.bezierCurveTo(x + 3.5, y, x + 2.5, y + 2.5, x + 2.5, y + 2.5);

const extrudeSettings = {
  steps: 1,
  depth: 2,
  bevelEnabled: true,
  bevelThickness: 1,
  bevelSize: 1,
  bevelSegments: 2,
};

const geometry = new THREE.ExtrudeGeometry(shape, extrudeSettings);
const material = new THREE.MeshBasicMaterial({
  color: '#FF0000',
});
const mesh = new THREE.Mesh(geometry, material);
scene.add(mesh);
빨간색을 넣어서 하트처럼 만들어보겠습니다.
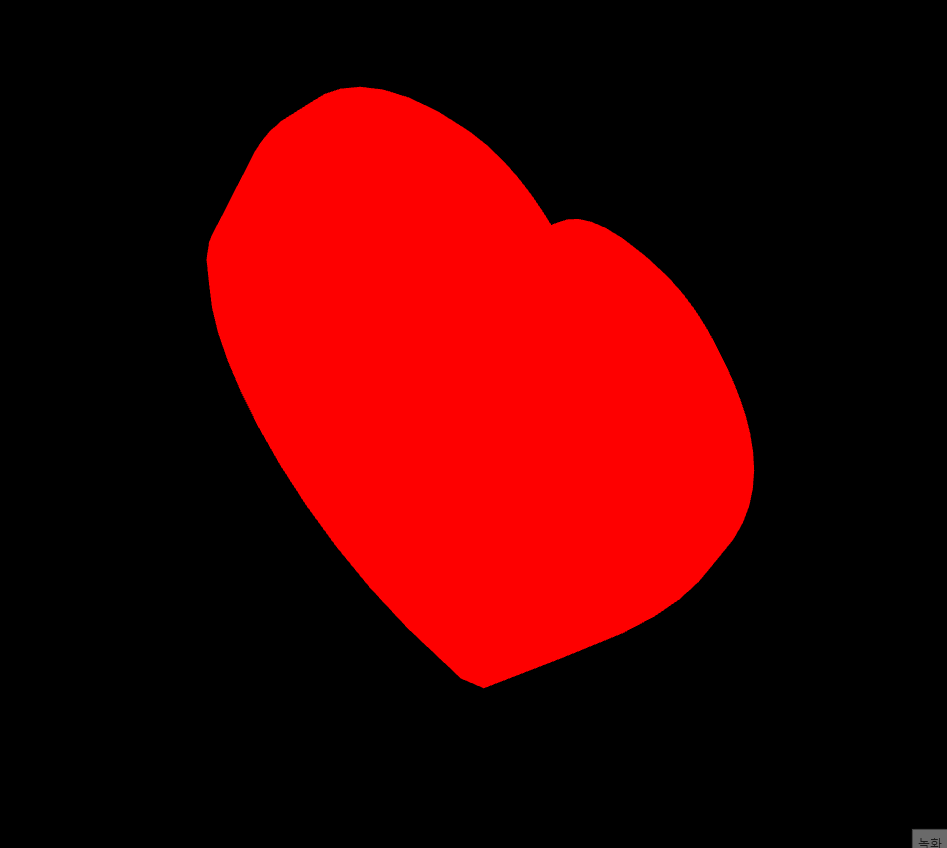
조절해보기 ㅣ https://threejs.org/docs/#api/en/geometries/ExtrudeGeometry
끝으로
오늘은 이렇게 6가지의 도형들을 알아봤습니다. 다음 글에서도 6개의 도형들과 예제들을 가져오도록 하겠습니다. 고생하셨어요.