지난 게시물에서 작성한 페이지와 Prisma를 기반으로 화면에 동적으로 데이터를 뿌려보도록 하자.
DB 스키마 만들기
아주 기본적인 데이터베이스 스키마를 만들자.
api/db/schema.prisma
datasource db {
  provider = "sqlite"
  url      = env("DATABASE_URL")
}

generator client {
  provider      = "prisma-client-js"
  binaryTargets = "native"
}

model Post {
  id        Int      @id @default(autoincrement())
  title     String
  body      String
  createdAt DateTime @default(now())
}
yarn rw prisma migrate dev
명령어 실행 후 migration name을 적절하게 입력하면 prisma를 통해 데이터베이스 스키마를 테이블화한다.
yarn rw prisma studio
prisma에서 제공하는 UI인 prisma Studio를 실행한다. (http://localhost:5555/)
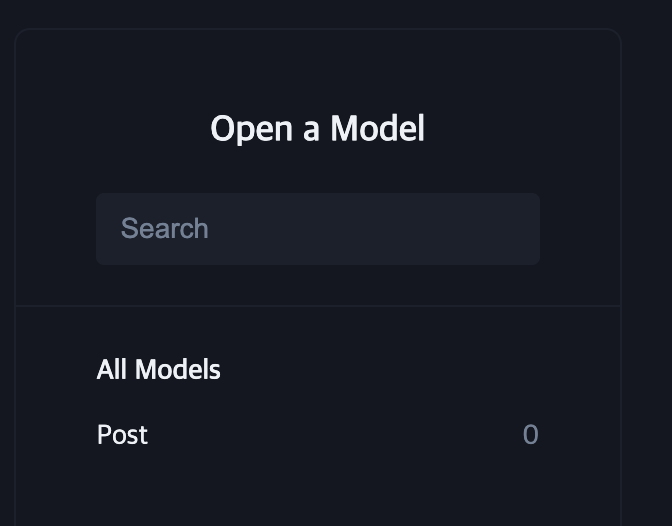
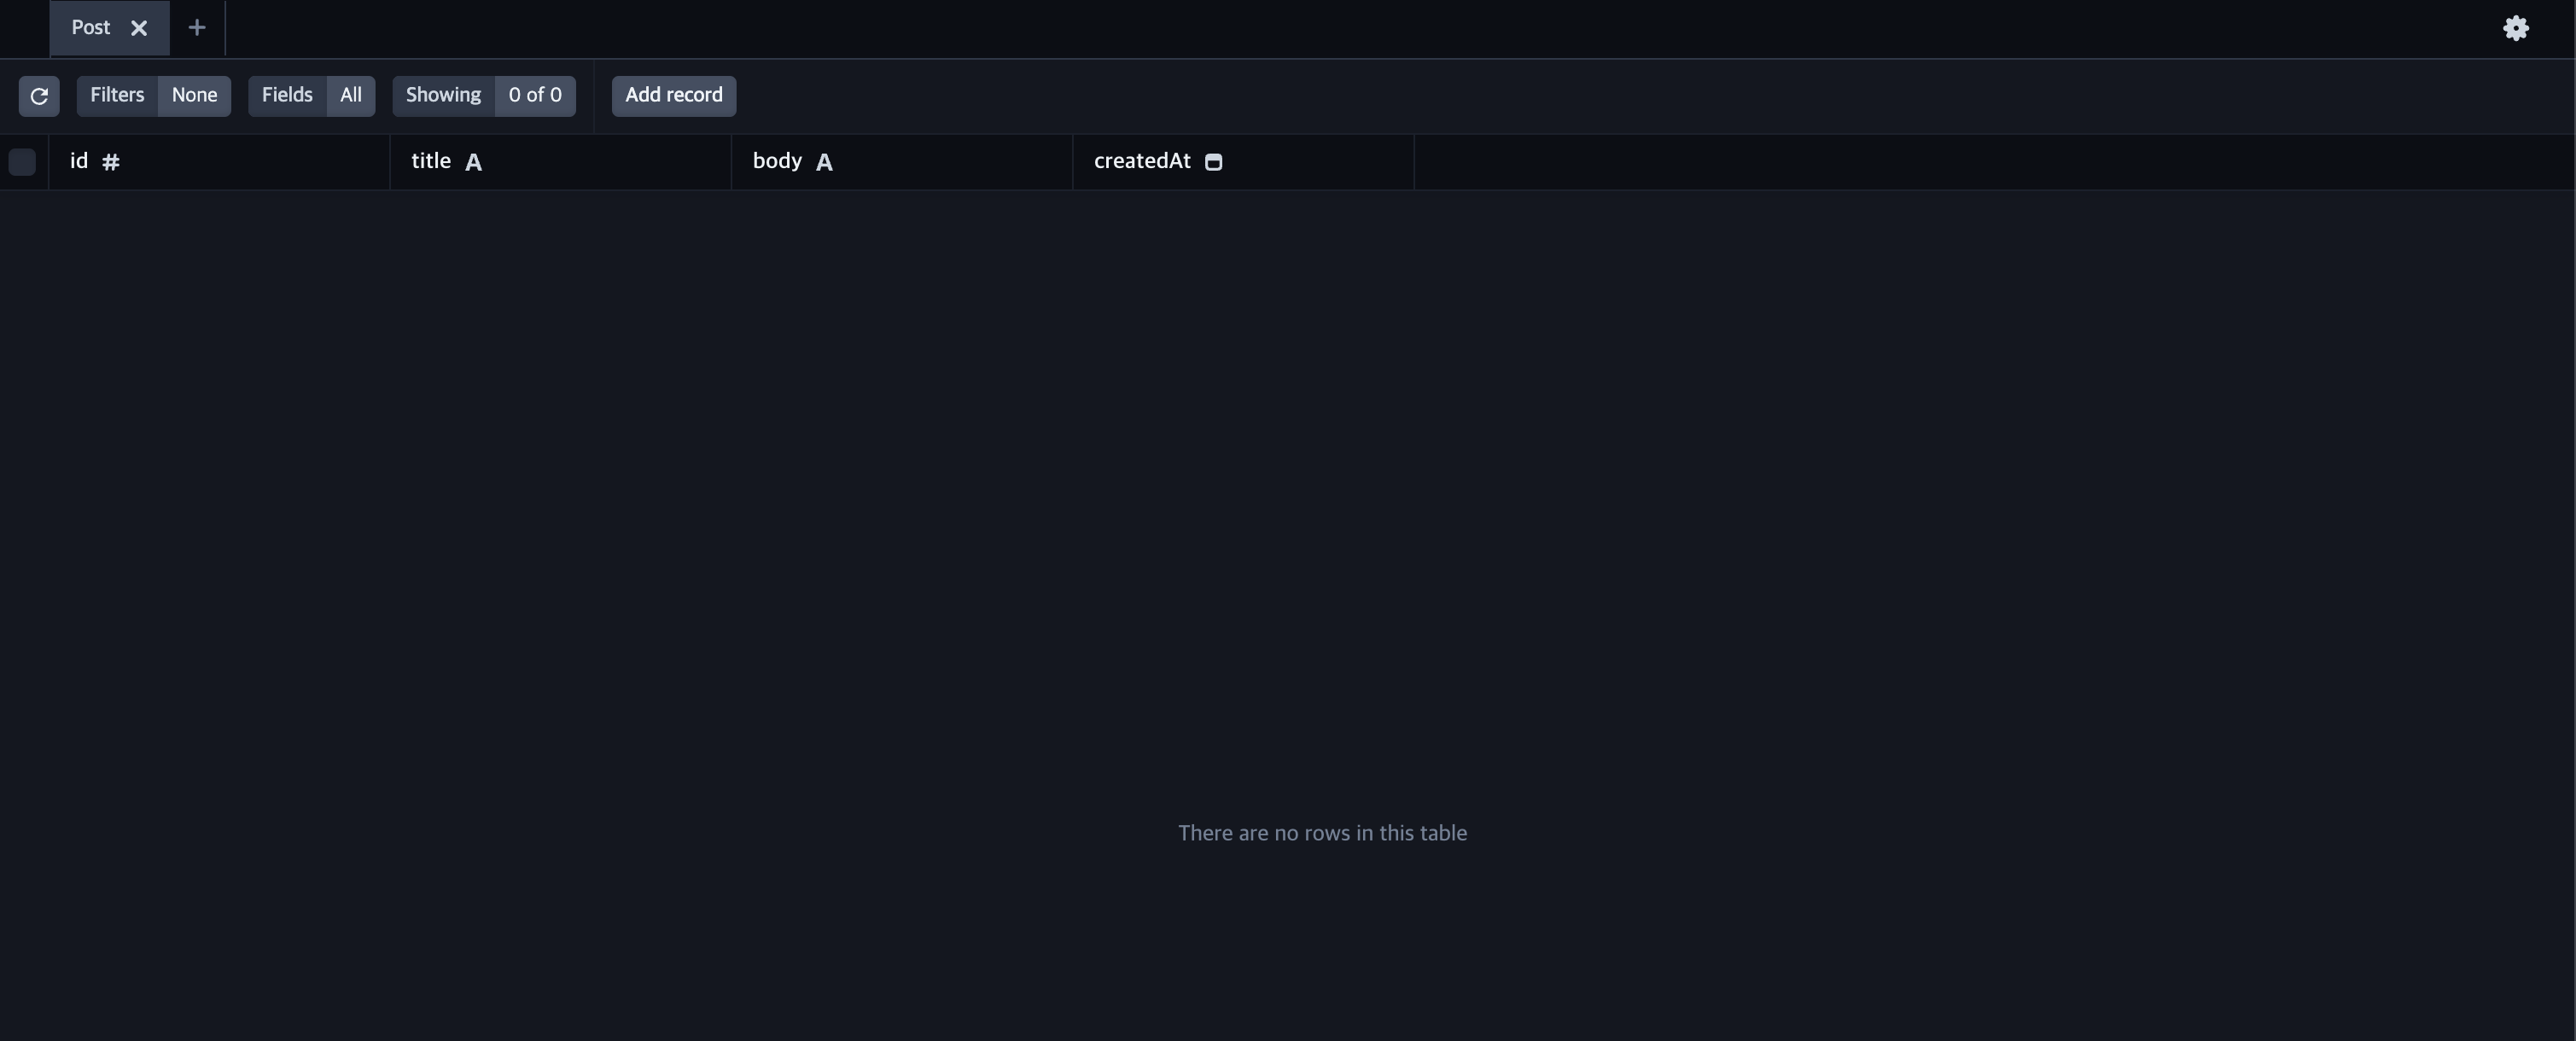
Post를 선택하면 아래와 같은 화면을 마주한다.
yarn rw g scaffold post
CRUD 작업의 의도된 대로 잘 이루어지고 있는지 테스트를 위해 때때로 우린 sample post를 생성해야 한다. RedwoodJS는 위 명령어로 샘플 데이터를 추가 및 편집할 수 있는 일종의 생성기를 제공한다.
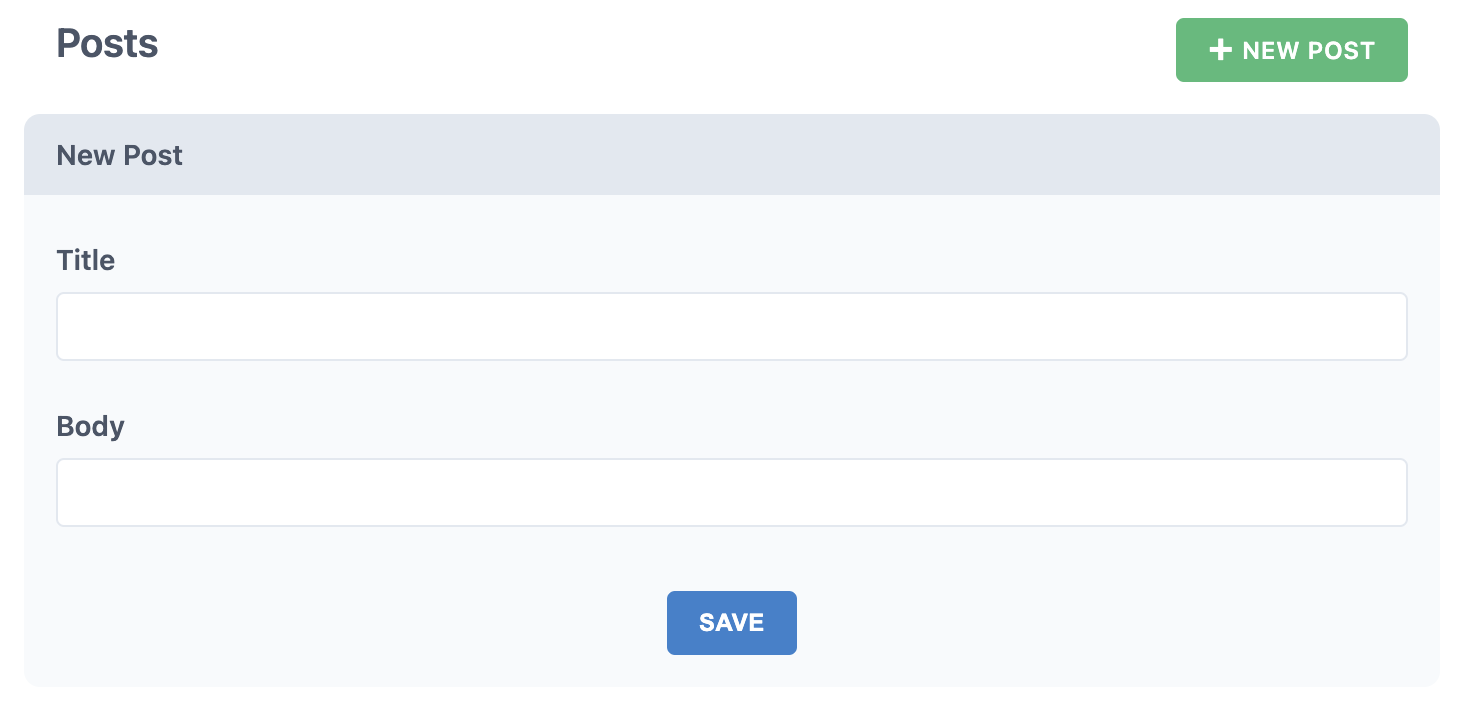
NEW POST 버튼을 눌러 샘플 Post 데이터를 직접 생성해보자!
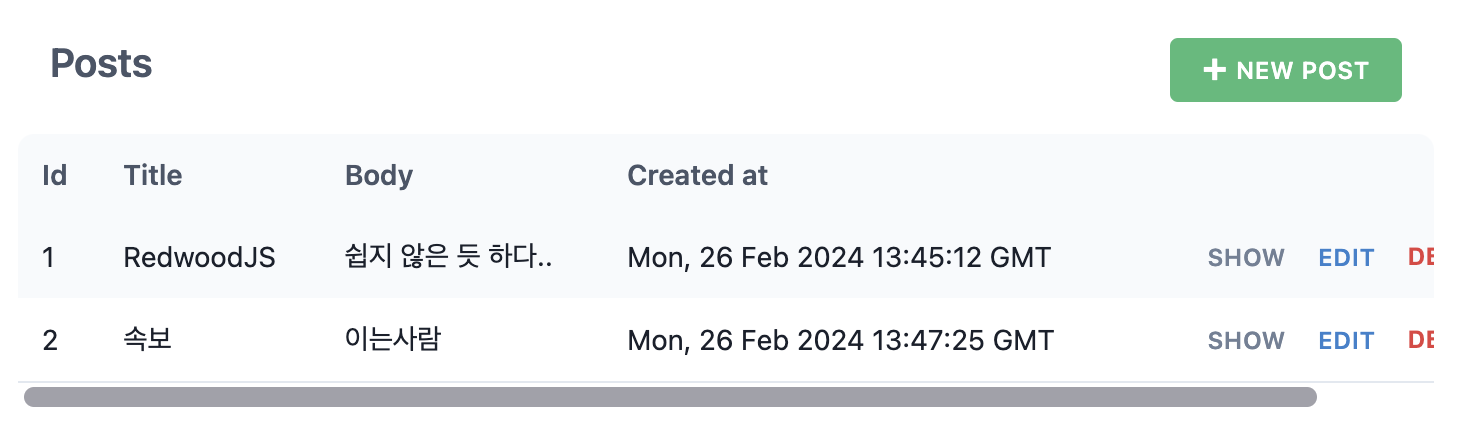
Redwood를 껐다 켜도 여전히 데이터는 남아 있으며, 편집 및 삭제 역시 가능하다.
이제 이전에 구현한 정적 화면에 동적으로 데이터를 뿌리려고 한다.
일반 유저의 입장에서,
게시물이 없다면 게시판이 비어 있음을 표현하는 빈 슬레이트 텍스트 등이 필요하고,
특정 게시물을클릭하면 그 게시물에 대한 상세 조회 기능이 제공되어야 하며,
게시물이 DB에서 클라이언트로 넘어오는 동안 프로그래스바 등의 로딩 아이콘 등이 존재해야 할 것이다.
RedwoodJS에서는 로딩 상태, 오류 메시지, 데이터 없을 때 텍스트 등 대부분의 웹앱에서 제공하는 기능 구현을 위한 Cell이라는 간단한 접근법을 제공한다.
Cell이란?
개발자가 일정량의 데이터를 필요로 하는 UI (리스트뷰 등)를 더 쉽게 구성할 수 있도록 도와주는 RedwoodJS만의 기본적인 패턴이며,
GraphQL 쿼리 + 이를 사용하는 컴포넌트의 조합으로 구성된다.
Loading: 데이터가 로딩 중일 때 보여줄 UI 컴포넌트이며, 데이터 요청이 진행 중임을 사용자에게 알린다.
Success: 요청이 성공적으로 완료되었을 때 해당 데이터와 함께 렌더링할 UI 컴포넌트이며, GraphQL 쿼리를 통해 성공적으로 수신한 데이터를 이 컴포넌트에 담아 화면에 표시한다.
Failure: 요청 중 오류가 발생했을 때 보여줄 UI 컴포넌트이며, 유저에게 오류 발생을 알리는 역할을 맡는다.
Empty: 요청은 성공했으나 쿼리 결과가 비어있을 경우 보여줄 UI 컴포넌트이며, 이 컴포넌트를 통해 결과가 비어있음을 유저에게 알린다.
GraphQL 쿼리를 바탕으로 한 요청 후 그 상태에 따라 자동으로 적절한 컴포넌트를 렌더링하므로 개발자는 주로 데이터를 어떻게 표시할지에 더욱 집중할 수 있다는 강점을 갖는다.
CLI로 Cell를 생성할 경우 cell에 대한 story 파일, 테스트 파일, mock 파일이 자동으로 추가되며, story 및 테스트 파일은 mock 파일에서 만들어둔 더미 데이터를 활용해 그들의 역할을 수행할 수 있다.
yarn rw g cell Articles
yarn rw g types
ArticlesCell.tsx
import type { ArticlesQuery } from 'types/graphql'
import type { CellSuccessProps, CellFailureProps } from '@redwoodjs/web'

// 게시물을 가져오기 위한 쿼리, posts에 articles라는 별칭을 부여
export const QUERY = gql`
  query ArticlesQuery {
    articles: posts {
      id
      title
      body
      createdAt
    }
  }
`

export const Loading = () => <div>Loading...</div> // 아직 데이터가 넘어오지 않는 동안 빈 화면을 보여주지 않고 "로딩중"

export const Empty = () => <div>Empty</div> // 빈 화면을 보여주는 대신 "Empty"

export const Failure = ({ error }: CellFailureProps) => ( // 에러가 발생하면 에러 메시지를 보여줌
  <div style={{ color: 'red' }}>Error: {error.message}</div>
)

export const Success = ({ articles }: CellSuccessProps<ArticlesQuery>) => { // 데이터가 넘어오면 데이터를 보여줌
  return (
    <ul>
      {articles.map((item) => {
        return <li key={item.id}>{JSON.stringify(item)}</li>
      })}
    </ul>
  )
}
AritclesCell.tsx 파일을 통해 예시 Cell을 생성해였다.
참고로 첫번째 명령어만 실행 시 "The type ArticlesQuery does not exist"라는 에러가 발생한다.
HomePage.tsx
import { Metadata } from '@redwoodjs/web'

import ArticlesCell from 'src/components/ArticlesCell'

const HomePage = () => {
  return (
    <>
      <Metadata title="Home" description="Home page" />
      <ArticlesCell />
    </>
  )
}

export default HomePage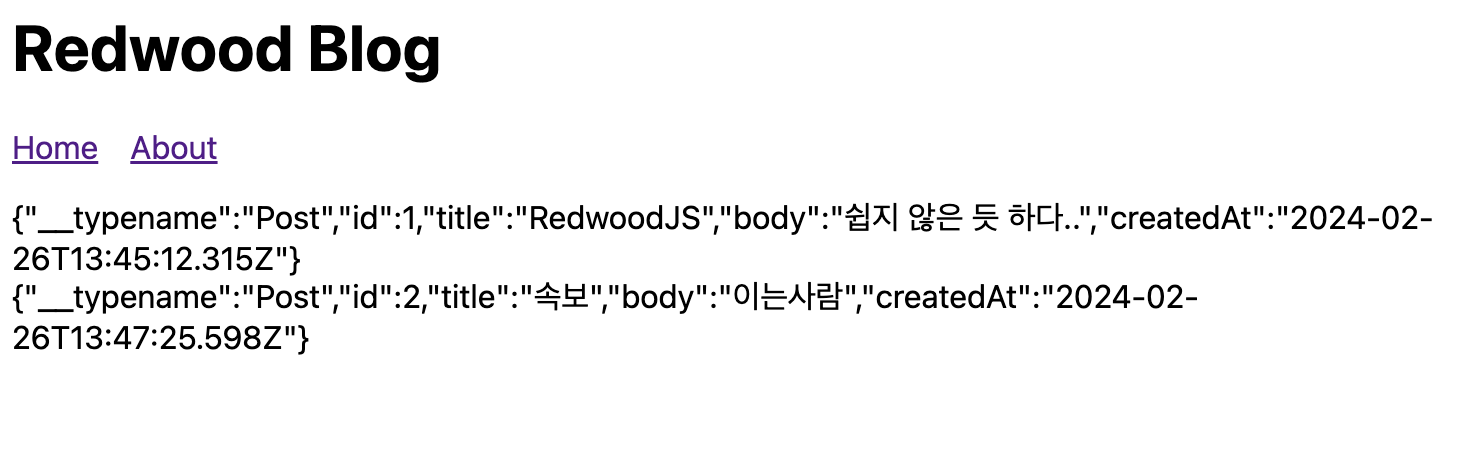
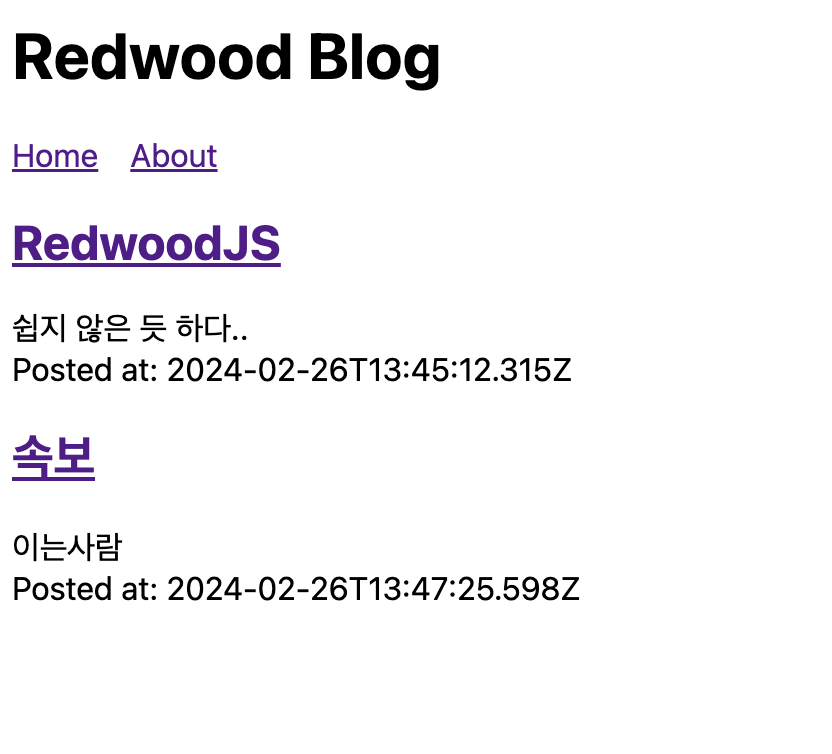
prisma에서 설정했던 DB 스키마의 모든 필드를 조회하였다. 다만 raw한 데이터라 가공이 필요하다.
적절한 형식으로 수정할 수 있다.
ArticlesCell.tsx
export const Success = ({ articles }: CellSuccessProps<ArticlesQuery>) => {
return (
<>
{articles.map((article) => (
<article key={article.id}>
<header>
<h2>{article.title}</h2>
</header>
<p>{article.body}</p>
<div>Posted at: {article.createdAt}</div>
</article>
))}
</>
)
}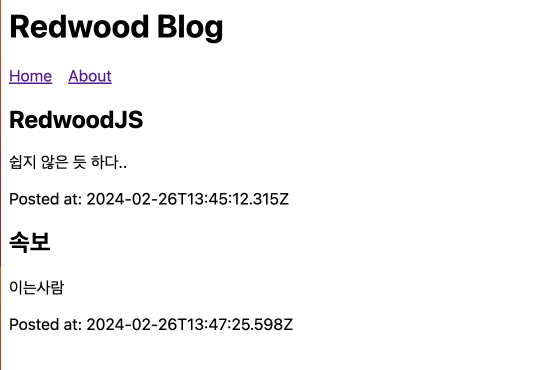 적절한 형식이 갖추어졌다.
이제 게시물 목록에서 특정 게시물을 클릭했을 때 상세 조회(파라미터 라우팅) 기능에 대해 다루어보자.
ArticlesCell.tsx
import type {ArticlesQuery} from 'types/graphql'
import type {CellSuccessProps, CellFailureProps} from '@redwoodjs/web'
import {Link, routes} from '@redwoodjs/router'

// 게시물을 가져오기 위한 쿼리
export const QUERY = gql`
  query ArticlesQuery {
    articles: posts {
      id
      title
      body
      createdAt
    }
  }
`

export const Loading = () => <div>Loading...</div> // 아직 데이터가 넘어오지 않는 동안 빈 화면을 보여주지 않고 "로딩중"

export const Empty = () => <div>Empty</div> // 빈 화면을 보여주는 대신 "Empty"

export const Failure = ({error}: CellFailureProps) => ( // 에러가 발생하면 에러 메시지를 보여줌
  <div style={{color: 'red'}}>Error: {error.message}</div>
)

export const Success = ({articles}: CellSuccessProps<ArticlesQuery>) => {
  return (
    <>
      {articles.map((article) => (
        <article key={article.id}>
          <header>
            <h2>
              <Link to={routes.article({ id: article.id })}>{article.title}</Link>
            </h2>
          </header>
          <p>{article.body}</p>
          <div>Posted at: {article.createdAt}</div>
        </article>
      ))}
    </>
  )
}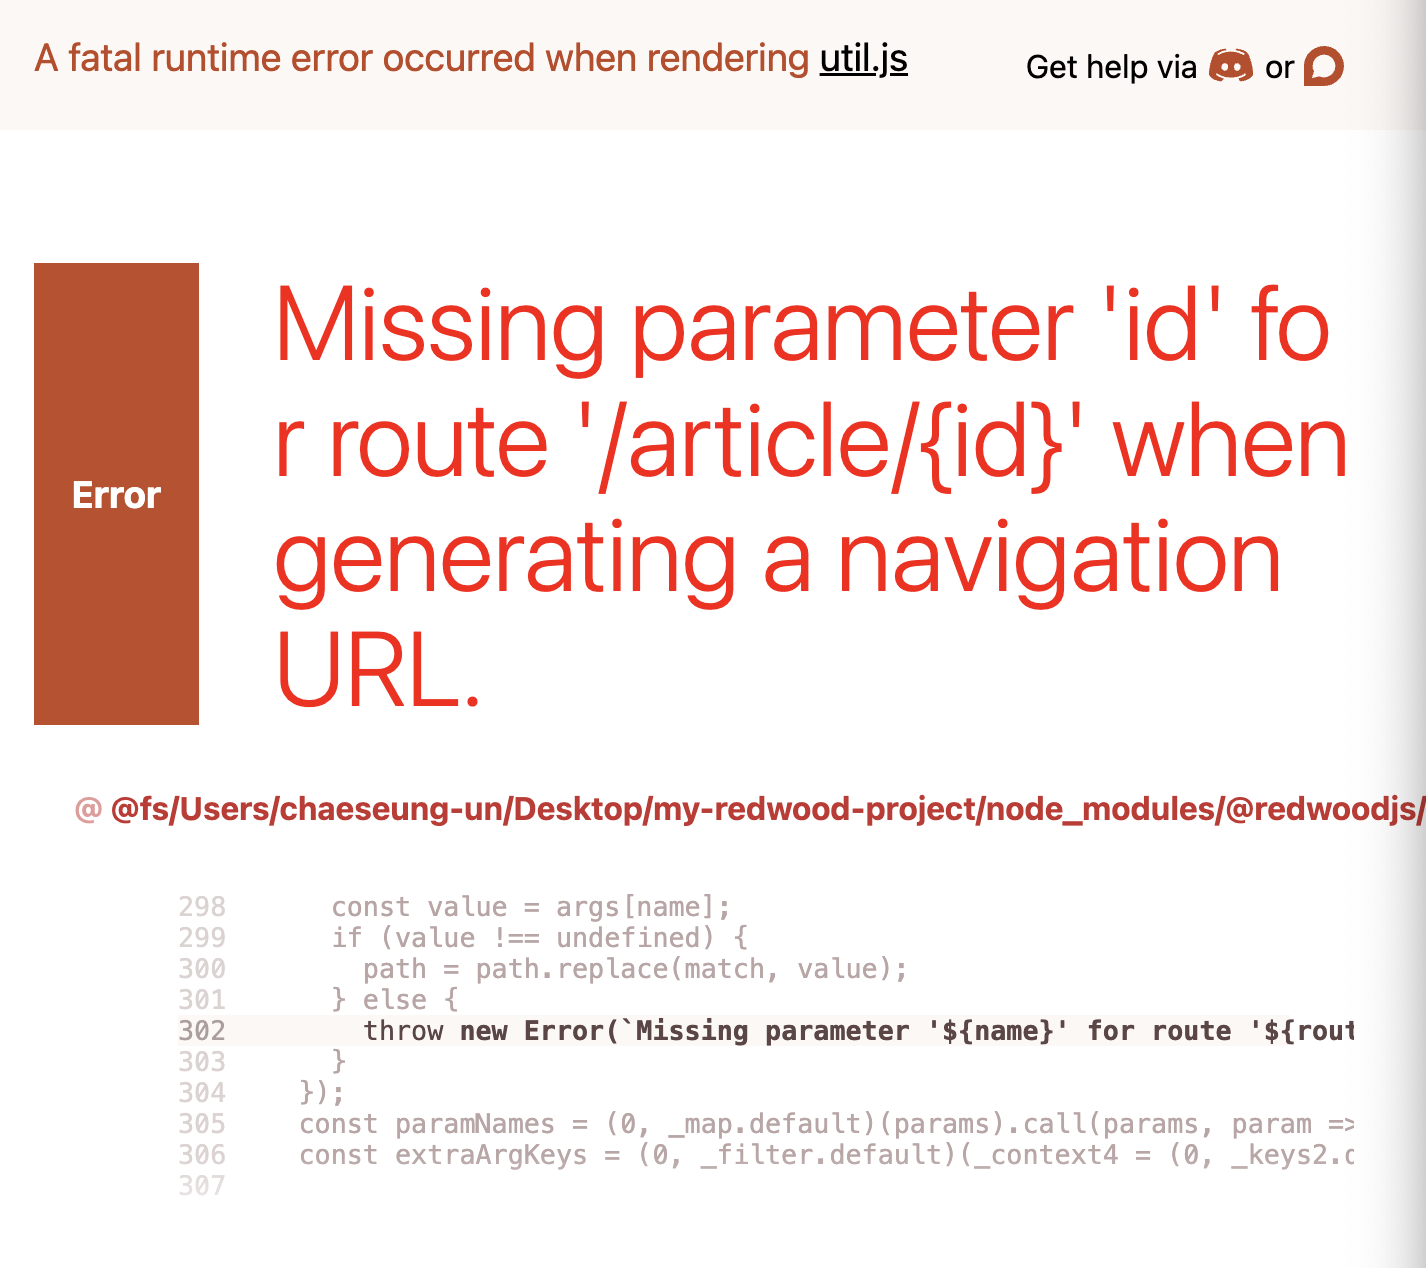
어어 이러지마세요
Routes.tsx 파일을 수정하는 것을 빼먹었다.
Routes.tsx
import { Router, Route, Set } from '@redwoodjs/router'
import ScaffoldLayout from 'src/layouts/ScaffoldLayout'
import AboutPage from './pages/AboutPage/AboutPage'
import BlogLayout from 'src/layouts/BlogLayout'
import ArticlePage from './pages/ArticlePage/ArticlePage'
const Routes = () => {
return (
<Router>
<Set wrap={ScaffoldLayout} title="Posts" titleTo="posts" buttonLabel="New Post" buttonTo="newPost">
<Route path="/posts/new" page={PostNewPostPage} name="newPost" />
<Route path="/posts/{id:Int}/edit" page={PostEditPostPage} name="editPost" />
<Route path="/posts/{id:Int}" page={PostPostPage} name="post" />
<Route path="/posts" page={PostPostsPage} name="posts" />
</Set>
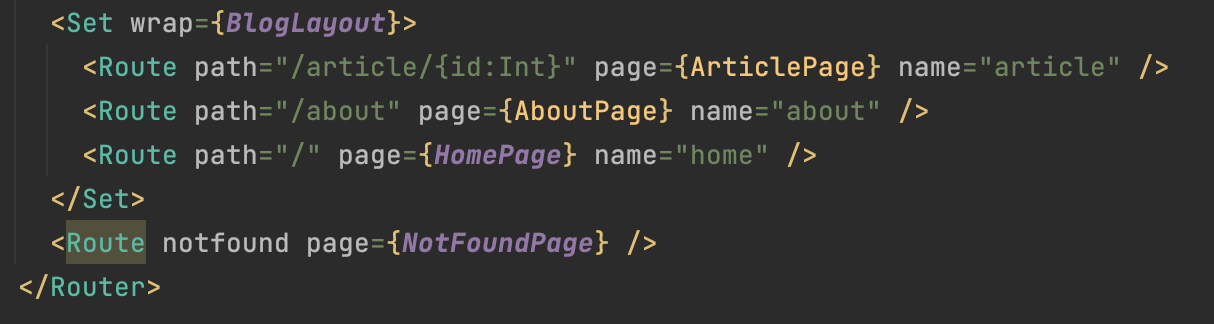
<Set wrap={BlogLayout}>
<Route path="/article/{id}" page={ArticlePage} name="article" />
<Route path="/about" page={AboutPage} name="about" />
<Route path="/" page={HomePage} name="home" />
</Set>
<Route notfound page={NotFoundPage} />
</Router>
)
}
export default Routes상세 조회를 위해서는 실제로 그 게시물을 클릭했을 때 해당 게시물에 대한 쿼리가 추가적으로 필요하다.
즉 id를 필요로 하기에 이를 매개변수로 받아 사용할 수 있도록 Cell을 수정한다.
yarn rw g cell Article
*주의: ArticleCell은 단일 게시물에 대한 cell이고, ArticlesCell은 게시물 목록에 대한 cell이다. 혼동 금지
아직 cell 사용에 굉장히 어색하다. 너무 분리주의자 만병통치약마냥 남용하면 안될 것 같은데.. 언제 cell을 쓰고 언제 cell을 지양해야 할까? 그냥 다 분리해버리는게 나으려나? 약간의 고민거리가 될 듯 싶다.
ArticlePage.tsx
import { Metadata } from '@redwoodjs/web'
import ArticleCell from 'src/components/ArticleCell'

interface Props {
  id: number
}

const ArticlePage = ({ id }: Props) => {
  return (
    <>
      <Metadata title="Article" description="Article page" />

      <ArticleCell id={id} />
    </>
  )
}

export default ArticlePage
인터페이스를 사용하여 props를 정의하고, 이를 컴포넌트의 매개변수로 사용한다.
ArticleCell.tsx
import type { FindArticleQuery, FindArticleQueryVariables } from 'types/graphql'
import type { CellSuccessProps, CellFailureProps } from '@redwoodjs/web'

// FindArticleQuery는 GraphQL에서 자체적으로 제공하는 query이다.
export const QUERY = gql`
  query FindArticleQuery($id: Int!) {
    article: post(id: $id) {
      id
      title
      body
      createdAt
    }
  }
`

export const Loading = () => <div>Loading...</div>

export const Empty = () => <div>Empty</div>

export const Failure = ({ error }: CellFailureProps) => (
  <div style={{ color: 'red' }}>Error: {error.message}</div>
)

// CellSuccessProps는 RedwoodJS에서 제공하는 일종의 타입이며, 이를 통해 쿼리 결과를 받아온 후 사용할 수 있다.
// JSON.stringify를 통해 받아온 데이터를 출력한다.
export const Success = ({ article }: CellSuccessProps<FindArticleQuery, FindArticleQueryVariables>) => {
  return <div>{JSON.stringify(article)}</div>
}
아쉽게도 400이 뜬다. ArticleCell의 failure() 함수가 발현되었다.
PK인 id가 Int이기에, Routes 파일에서 해당 변수가 정수형임을 명시적으로 표현해야 한다.
이제 특정 게시물 조회 기능을 위한 컴포넌트인 Article을 정의하고 이를 활용해서 화면에 적절한 형식이 갖춰진 게시물을 뿌려보자!
yarn rw g component Article
빨리 CLI에 익숙해져야겠다..
Articles.tsx
import { Link, routes } from '@redwoodjs/router'

import type { Post } from 'types/graphql'

interface Props { // 마찬가지로 인터페이스로 Props를 정의한다.
  article: Post
}

const Article = ({ article }: Props) => {
  return (
    <article>
      <header>
        <h2>
          <Link to={routes.article({ id: article.id })}>{article.title}</Link>
        </h2>
      </header>
      <div>{article.body}</div>
      <div>Posted at: {article.createdAt}</div>
    </article>
  )
}

export default Article
이제 Cell에도 이 컴포넌트를 활용하도록 수정한다.
ArticlesCell (게시물 목록 조회)
import Article from 'src/components/Article'

import type { ArticlesQuery } from 'types/graphql'
import type { CellSuccessProps, CellFailureProps } from '@redwoodjs/web'

export const QUERY = gql`
  query ArticlesQuery {
    articles: posts {
      id
      title
      body
      createdAt
    }
  }
`

export const Loading = () => <div>Loading...</div>

export const Empty = () => <div>Empty</div>

export const Failure = ({ error }: CellFailureProps) => (
  <div style={{ color: 'red' }}>Error: {error.message}</div>
)

export const Success = ({ articles }: CellSuccessProps<ArticlesQuery>) => {
  return (
    <>
      {articles.map((article) => (
        <Article key={article.id} article={article} />
      ))}
    </>
  )
}
ArticleCell.tsx (게시물 상세조회)
import Article from 'src/components/Article'

import type { FindArticleQuery, FindArticleQueryVariables } from 'types/graphql'
import type { CellSuccessProps, CellFailureProps } from '@redwoodjs/web'

export const QUERY = gql`
  query FindArticleQuery($id: Int!) {
    article: post(id: $id) {
      id
      title
      body
      createdAt
    }
  }
`

export const Loading = () => <div>Loading...</div>

export const Empty = () => <div>Empty</div>

export const Failure = ({ error }: CellFailureProps) => (
  <div style={{ color: 'red' }}>Error: {error.message}</div>
)

export const Success = ({ article }: CellSuccessProps<FindArticleQuery, FindArticleQueryVariables>) => {
  return <Article article={article} />
}
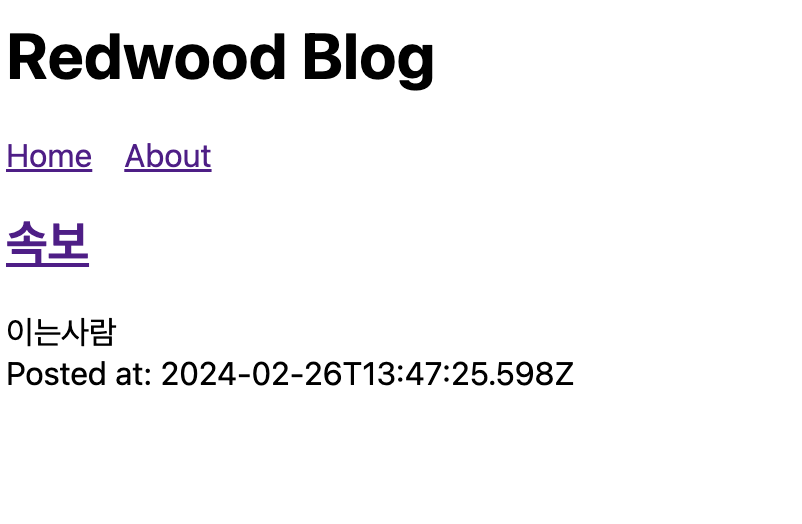
목록 조회 상황에서 제목을 눌러 상세조회에 성공하였다!
이렇게RedwoodJS에서의 DB(GraphQL, Prisma) 활용 및 접근법, RedwoodJS만의 독특한 컴포넌트인 Cell, 이를 활용한 동적 뷰 그리기 등 기본적인 튜토리얼 코드를 작성해보았다. React에 대해 익숙하다면 빠르게 이 환경에 적응할 수 있을 것이며
다음 부분은 RedwoodJS에서의 Form 작성 및 전송, Auth 등을 다뤄보자.
CLI를 통해 간단하게 패키징 및 파일을 생성해 주는 것은 분명 강점이지만, 그림자마냥 테스트코드가 따라붙는 게 Test 패키지를 따로 운영해왔던 자바 스프링과의 또다른 차이점인 듯 하다. 사실 굉장히 어색하기도 하다.
부록: RedwoodJS는 어떻게 DB에 접근하나?

공식 문서의 설명을 참고하여 접근 방식에 대해 살펴보자.
기본적으로 RedwoodJS는 GraphQL을 선호한다.
GraphQL?
- Facebook이 개발한 쿼리 언어이며, 비즈니스 도메인을 그래프로 모델링한다는 의미이다.
- REST API의 한계(유지보수의 어려움, 요청에 적합한 응답을 위해 새 API 강요, 관리해야 할 엔드포인트 폭등)를 보완하기 위한 여러 기능을 제공한다.
- 엔드포인트가 하나이며, 단 한 번의 요청으로 원하는 모든 데이터를 받아올 수 있다.
- 클라이언트 사이드에서 지원되는 라이브러리는 Apollo가 대표적이며 RedwoodJS 역시 이를 채택하였다.
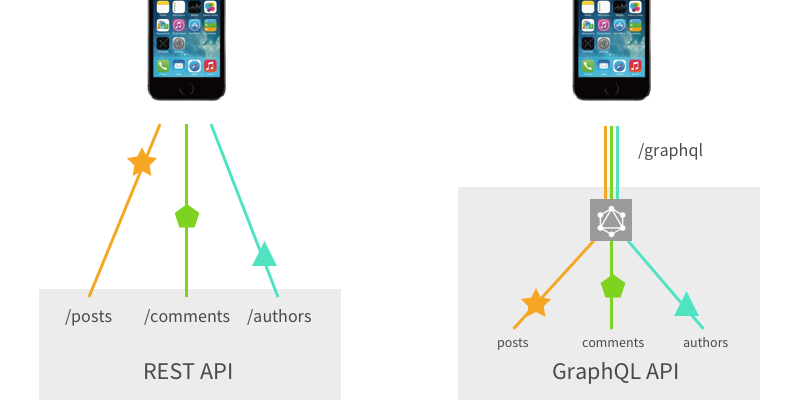
(출처: https://blog.apollographql.com/graphql-vs-rest-5d425123e34b)
다만 장점만 있는 것은은 아니다.
- HTTP 캐싱 불가: 하나의 엔드포인트만 갖기에 HTTP에서 제공하는 캐싱 전략을 그대로 사용하지 못하며, persisted query, Apollo Engine 등을 활용한다.
- 파일 업로드 기능의 완성된 명세서가 없다. 즉 직접 구현해야 한다.
- 클라이언트가 필요한 데이터를 스스로 결정하여 요청하게 되는 경우가 많은데, 잘못된 요청을 필터링하기 쉽지 않다. 필터링에 대한 자원 소모가 클 수 있다.
api/src/functions 디렉토리에 존재하는 graphql.ts 파일은 서버리스 함수로 컴파일되어 GraphQL API 엔드포인트가 된다.
프런트엔드에게 이 graphql.ts 파일이 진입점이 되며, *.sdl.ts 파일은 GraphQL의 객체, 쿼리 및 API의 인터페이스를 정의한다. (Springboot의 JPARepository와 유사한 역할을 수행하는 것으로 이해하였다.)
api/src/graphql/posts.sdl.ts
export const schema = gql`
  type Post {
    id: Int!
    title: String!
    body: String!
    createdAt: DateTime!
  }

  type Query {
    posts: [Post!]!
    post(id: Int!): Post!
  }

  input CreatePostInput {
    title: String!
    body: String!
  }

  input UpdatePostInput {
    title: String
    body: String
  }

  type Mutation {
    createPost(input: CreatePostInput!): Post! @requireAuth
    updatePost(id: Int!, input: UpdatePostInput!): Post! @requireAuth
    deletePost(id: Int!): Post! @requireAuth
  }
`
api/src/services/posts/posts.ts
import { db } from 'src/lib/db'
import type { QueryResolvers, MutationResolvers } from 'types/graphql'

export const posts: QueryResolvers['posts'] = () => {
  return db.post.findMany()
}

export const post: QueryResolvers['post'] = ({ id }) => {
  return db.post.findUnique({
    where: { id },
  })
}

export const createPost: MutationResolvers['createPost'] = ({ input }) => {
  return db.post.create({
    data: input,
  })
}

export const updatePost: MutationResolvers['updatePost'] = ({ id, input }) => {
  return db.post.update({
    data: input,
    where: { id },
  })
}

export const deletePost: MutationResolvers['deletePost'] = ({ id }) => {
  return db.post.delete({
    where: { id },
  })
}
api/src/services 디렉토리에선 추상화된 DB Layer의 메서드를 제공하고 있다.
참고로 RedwoodJS에 Service란, 단일 테이블을 넘어서 여러 테이블과 얽히는 과정을 추상화한 것을 의미한다.
(그것이 바로 복잡한 문제를 해결하는, 의미있는 비즈니스 로직이기 때문이 아닐까)
여러 테이블이 얽히는 복잡한 기능들이 GraphQL에 의해 노출될 수 있겠지만, 오직 필요한 만큼만 노출시킬 수 있기에,
실제 Service 계층에서 사용하지 않을 기능까지 모조리 들고 달려오는 Springboot에서의 JPARepository 등과 차별점이 있다.
(다만 Springboot에서도 이 점을 의식해 CrudRepository 등을 채택하거나 DB Layer에서 Domain model이 아닌 Dto를 추출하기도 한다. )
GraphQL 쿼리에 포함시키지 않은 함수는 GraphQL 입장에서 "존재하지 않는다". 즉 사용할 수 없다.
REST API의 단점을 보완하여 유연성과 효율성을 끌어올렸지만, 위에 언급했듯이 캐싱 전략 등의 Trade-Off도 존재할 것인데, 실제 서비스(특히 RedwoodJS)에선 이러한 단점을 어떻게 대응하는지 알아보는 것도 중요해보인다.
