0. 어떻게 구현할까?
-
React Query의 useInfiniteQuery를 사용해서 페이지 단위로 데이터를 불러오고
-
react-intersection-observer의 useInView 훅을 사용해서 데이터의 마지막 요소가 보이면 새로운 데이터 받아오기
위의 과정으로 1번부터 차근차근 구현해봅시다.
1. useInfiniteQuery로 페이지 단위로 데이터 불러오기
useInfiniteQuery
우선 useInfiniteQuery가 무엇인지 알아봅시다.
useInfiniteQuery는 react-query 라이브러리에서 제공하는 훅으로, 무한 스크롤이나 페이지네이션 구현을 간편하게 구현할 수 있도록 도와줍니다.
데이터를 페이지 단위로 fetching하고 각 페이지의 데이터를 관리하면서 세로운 페이지를 로드할 수 있는 기능을 구현할 수 있습니다.
useQuery에 페이징 기능이 추가된 것이 useInfiniteQuery라고 생각하면 될 것 같습니다. 몇가지 페이지 관련 옵션을 제외하고는 useQuery와 동일한 옵션을 가지고있습니다.
사용 예시
const {
  fetchNextPage,
  fetchPreviousPage,
  hasNextPage,
  hasPreviousPage,
  isFetchingNextPage,
  isFetchingPreviousPage,
  ...result
} = useInfiniteQuery({
  queryKey,
  queryFn: ({ pageParam }) => fetchPage(pageParam),
  initialPageParam: 1,
  ...options,
  getNextPageParam: (lastPage, allPages, lastPageParam, allPageParams) =>
    lastPage.nextCursor,
  getPreviousPageParam: (firstPage, allPages, firstPageParam, allPageParams) =>
    firstPage.prevCursor,
})
주요옵션
- getNextPageParam: 다음 페이지를 가져오는 데 사용할 매개변수를 결정합니다.
- getPreviousPageParam: 이전 페이지를 가져오는 데 사용할 매개변수를 결정합니다.
리턴값
- fetchNextPage: 다음 페이지를 가져오는 함수.
- fetchPreviousPage: 이전 페이지를 가져오는 함수.
- hasNextPage: 다음 페이지가 있는지 여부를 나타내는 불리언 값.
- hasPreviousPage: 이전 페이지가 있는지 여부를 나타내는 불리언 값.
- isFetchingNextPage: 다음 페이지를 가져오는 중인지 여부.
- isFetchingPreviousPage: 이전 페이지를 가져오는 중인지 여부.
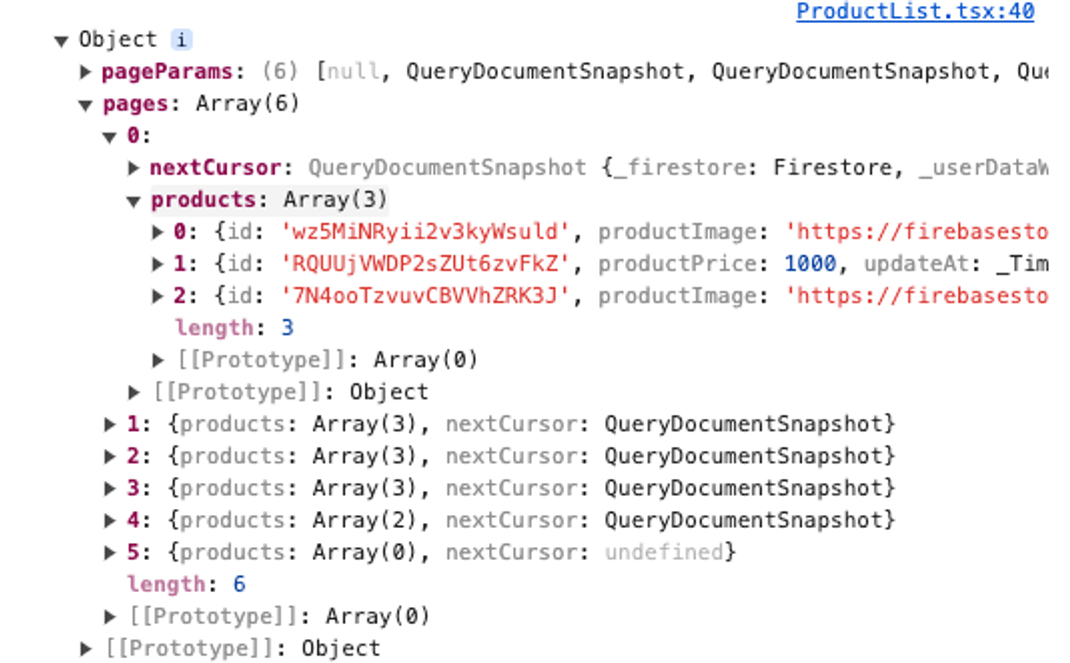
또 다른 것은 리턴되는 data의 값이 위와 같이 pageParams와 pages로 리턴됩니다.
pages에는 각 페이지별로 데이터를 저장하고 있기 때문에 데이터를 출력할때 배열을 적절한 형태로 변형하는 것이 필요합니다.
그럼 직접 프로젝트에 적용해보면서 하나씩 사용해봅시다!
프로젝트에 적용하기
// 데이터를 호출하는 함수

export const fetchProducts = async (pageParam: any) => {
  const PAGE_SIZE = 10;

  let productsQuery = query(
    collection(db, 'products'),
    orderBy('createAt', 'desc'),
    limit(PAGE_SIZE)
  );

  if (pageParam) {
    productsQuery = query(productsQuery, startAfter(pageParam));
  }

  const querySnapshot = await getDocs(productsQuery);
  const productsList: Product[] = querySnapshot.docs.map(doc => ({
    id: doc.id,
    ...doc.data()
  }) as Product);

  const lastVisible = querySnapshot.docs[querySnapshot.docs.length - 1];

  return {
    products: productsList,
    nextCursor: lastVisible,
  };
};imit로 한 페이지에서 보여줄 데이터를 설정합니다.pageParam이 있다면 데이터의 시작지점을 설정해줍니다.- 불러온 데이터의 마지막 데이터의 커서 정보를
nextCursor으로 리턴해줍니다. 다음 페이지를 가지고올 때 기준점의 역할을 합니다.
interface FetchProductsResponse {
  products: Product[];
  nextCursor: any;
}

export const useProducts = () => {
  return useInfiniteQuery<FetchProductsResponse>({
    queryKey: ['products'],
    queryFn: ({ pageParam }) => fetchProducts(pageParam ?? 1),
    getNextPageParam: (lastPage) => lastPage.nextCursor || null,
    initialPageParam: null,
  }
  );
};
useInfiniteQuery에 위에서 만든 데이터 호출 함수에서 데이터를 불러오도록 하고,getNextPageParam를 사용하여nextCursor값을pageParam으로 전달하여 다음 페이지를 요청할 수 있도록 합니다.initialPageParam는 첫 페이지의 pageParam 값입니다.
const ProductList = () => {
  const { data, isLoading, error, fetchNextPage, hasNextPage, isFetchingNextPage } = useProducts();

  if (isLoading) return <p>로딩 중...</p>;
  if (error) return <p>에러가 발생했습니다: {error.message}</p>;

  const products = data.pages.flatMap(page => page.products);

  return (
    <>
      {products.map(product => (
        <ProductItem
          key={product.id}
          product={product}
          isSelected={selectedProducts.includes(product.id)}
          onProductSelect={toggleProductSelection}
        />
      ))}
      {hasNextPage && (
        <Button onClick={() => fetchNextPage()} disabled={isFetchingNextPage}>
          {isFetchingNextPage ? '로딩 중...' : '더 보기'}
        </Button>
      )}
    </>
  );
}- 받아온
data를flatMap를 사용해서 모든 페이지의 요소를 하나의 배열로 병합합니다. hasNextPage가true라면, 다음 페이지가 있다면 ‘더 보기’ 버튼을 보여줍니다.isFetchingNextPage를 사용해서 다음 페이지를 가져오는 중인지 여부를 판단합니다.

처음에는 3개의 아이템을 보여주고 더보기 버튼을 클릭하면 3개의 아이템을 추가로 가져오는 것을 확인할 수있습니다.
2. react-intersection-observer를 사용하여 무한 스크롤 구현하기
무한 스크롤(Infinite Scroll)은 사용자가 페이지를 스크롤할 때마다 새로운 콘텐츠를 자동으로 로드하여 페이지를 계속 확장하는 기술입니다.
react-intersection-observer는 DOM 요소가 뷰포트에 들어왔는지 또는 나갔는지를 감지하는 라이브러리로, useInView hook을 사용하여 요소가 화면에 보이는지 여부를 감지할 수 있습니다.
사용 예시
import { useInView } from 'react-intersection-observer';

const Component = () => {
  const { ref, inView, entry } = useInView({
    /* options */
    threshold: 0.5,  // 요소가 화면에 50% 이상 보일 때 감지
    triggerOnce: true,  // 한 번만 감지
  });

  return (
    <div ref={ref}>
      {inView ? 'Visible' : 'Not Visible'}
    </div>
  );
};
옵션
- threshold: 요소의 가시성을 감지하는 기준. 0부터 1 사이의 값으로 설정할 수 있습니다. 예를 들어,
0.5로 설정하면 요소가 화면에 50% 이상 보일 때 감지합니다.기본값 : 0 - triggerOnce:
true로 설정하면 요소가 한 번만 가시성에 들어갈 때 한 번만 감지합니다.기본값 : false
리턴 값
- ref: 요소에 연결할 Ref 객체입니다. 이 Ref 객체를 요소의
ref프로퍼티에 전달해야 합니다. - inView: 요소가 화면에 보이는지 여부를 나타내는 boolean 값입니다.
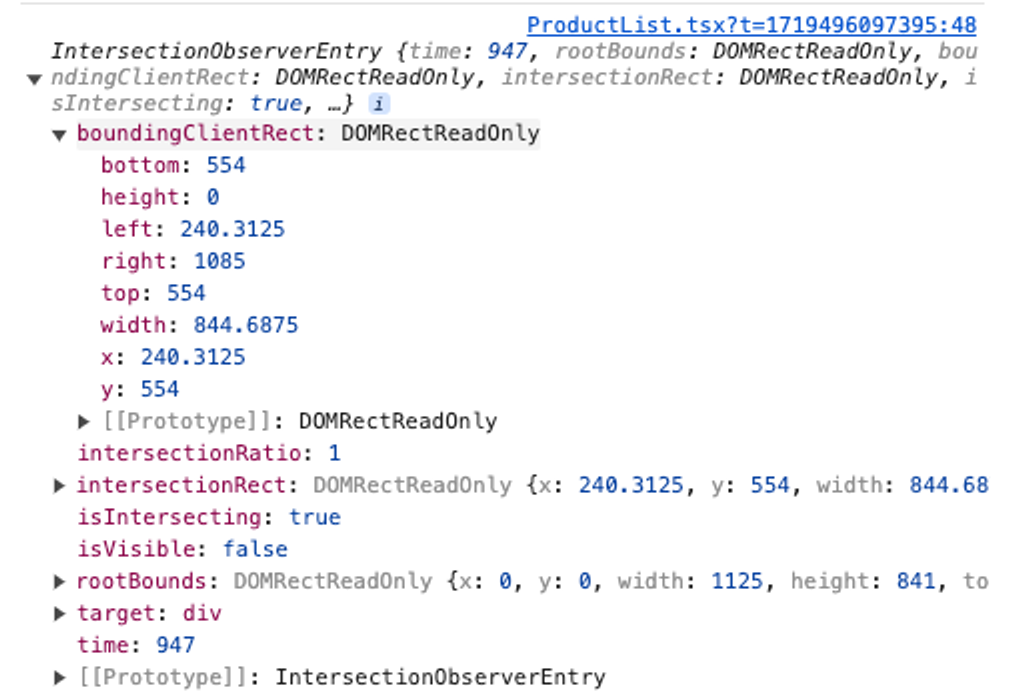
true는 요소가 화면에 보이고 있음을,false는 보이지 않음을 의미합니다. - entry: Intersection Observer의
IntersectionObserverEntry객체입니다. 이 객체에는 요소의 가시성 관련 정보가 포함됩니다. (옵션으로 제공된 경우에만 반환됩니다.)
이제 useInView를 사용해서 더보기 버튼 대신 마지막 요소가 화면에 나타나면 데이터를 가지고 올 수 있도록 개선해봅시다.
프로젝트에 적용하기
// 설치
npm install react-intersection-observer
const ProductList = () => {
const { data, isLoading, error, fetchNextPage, hasNextPage, isFetchingNextPage } = useProducts();
const { ref, inView } = useInView();
useEffect(() => {
if (inView && hasNextPage) {
fetchNextPage();
}
}, [inView, fetchNextPage, hasNextPage]);
if (isLoading) return <p>로딩 중...</p>;
if (error) return <p>에러가 발생했습니다: {error.message}</p>;
const products = data.pages.flatMap(page => page.products);
return (
<>
{products.map(product => (
<ProductItem
key={product.id}
product={product}
isSelected={selectedProducts.includes(product.id)}
onProductSelect={toggleProductSelection}
/>
))}
**{isFetchingNextPage && <div>Loading more...</div>}
<div ref={ref}></div>**
</>
);
}useInView에서 ref와 inView를 받아옵니다.useEffect로 화면에 요소가 보여지는지 여부가 변경되고, 다음 페이지가 있다면fetchNextPage로 다음 페이지 데이터를 호출합니다.- 데이터 리스트의 하단의
div에ref를 설정합니다. 리스트가 끝나고div가 화면에 보여지면inView의 값이true로 변경될 것입니다.
이것만으로 무한 스크롤의 설정이 끝났습니다!
이제 스크롤이 끝날때 마다 새로운 데이터를 불러오는 것을 확인할 수 있습니다! 👏👏👏