discord.js를 사용하여 디스코드 채팅방에 입력된 메세지에 반응하는 봇을 만들어 봅시다.
공식문서 : https://discordjs.guide/
0. 준비하기
디스코드 개발자 페이지에 접속하여 어플리케이션을 생성합니다.
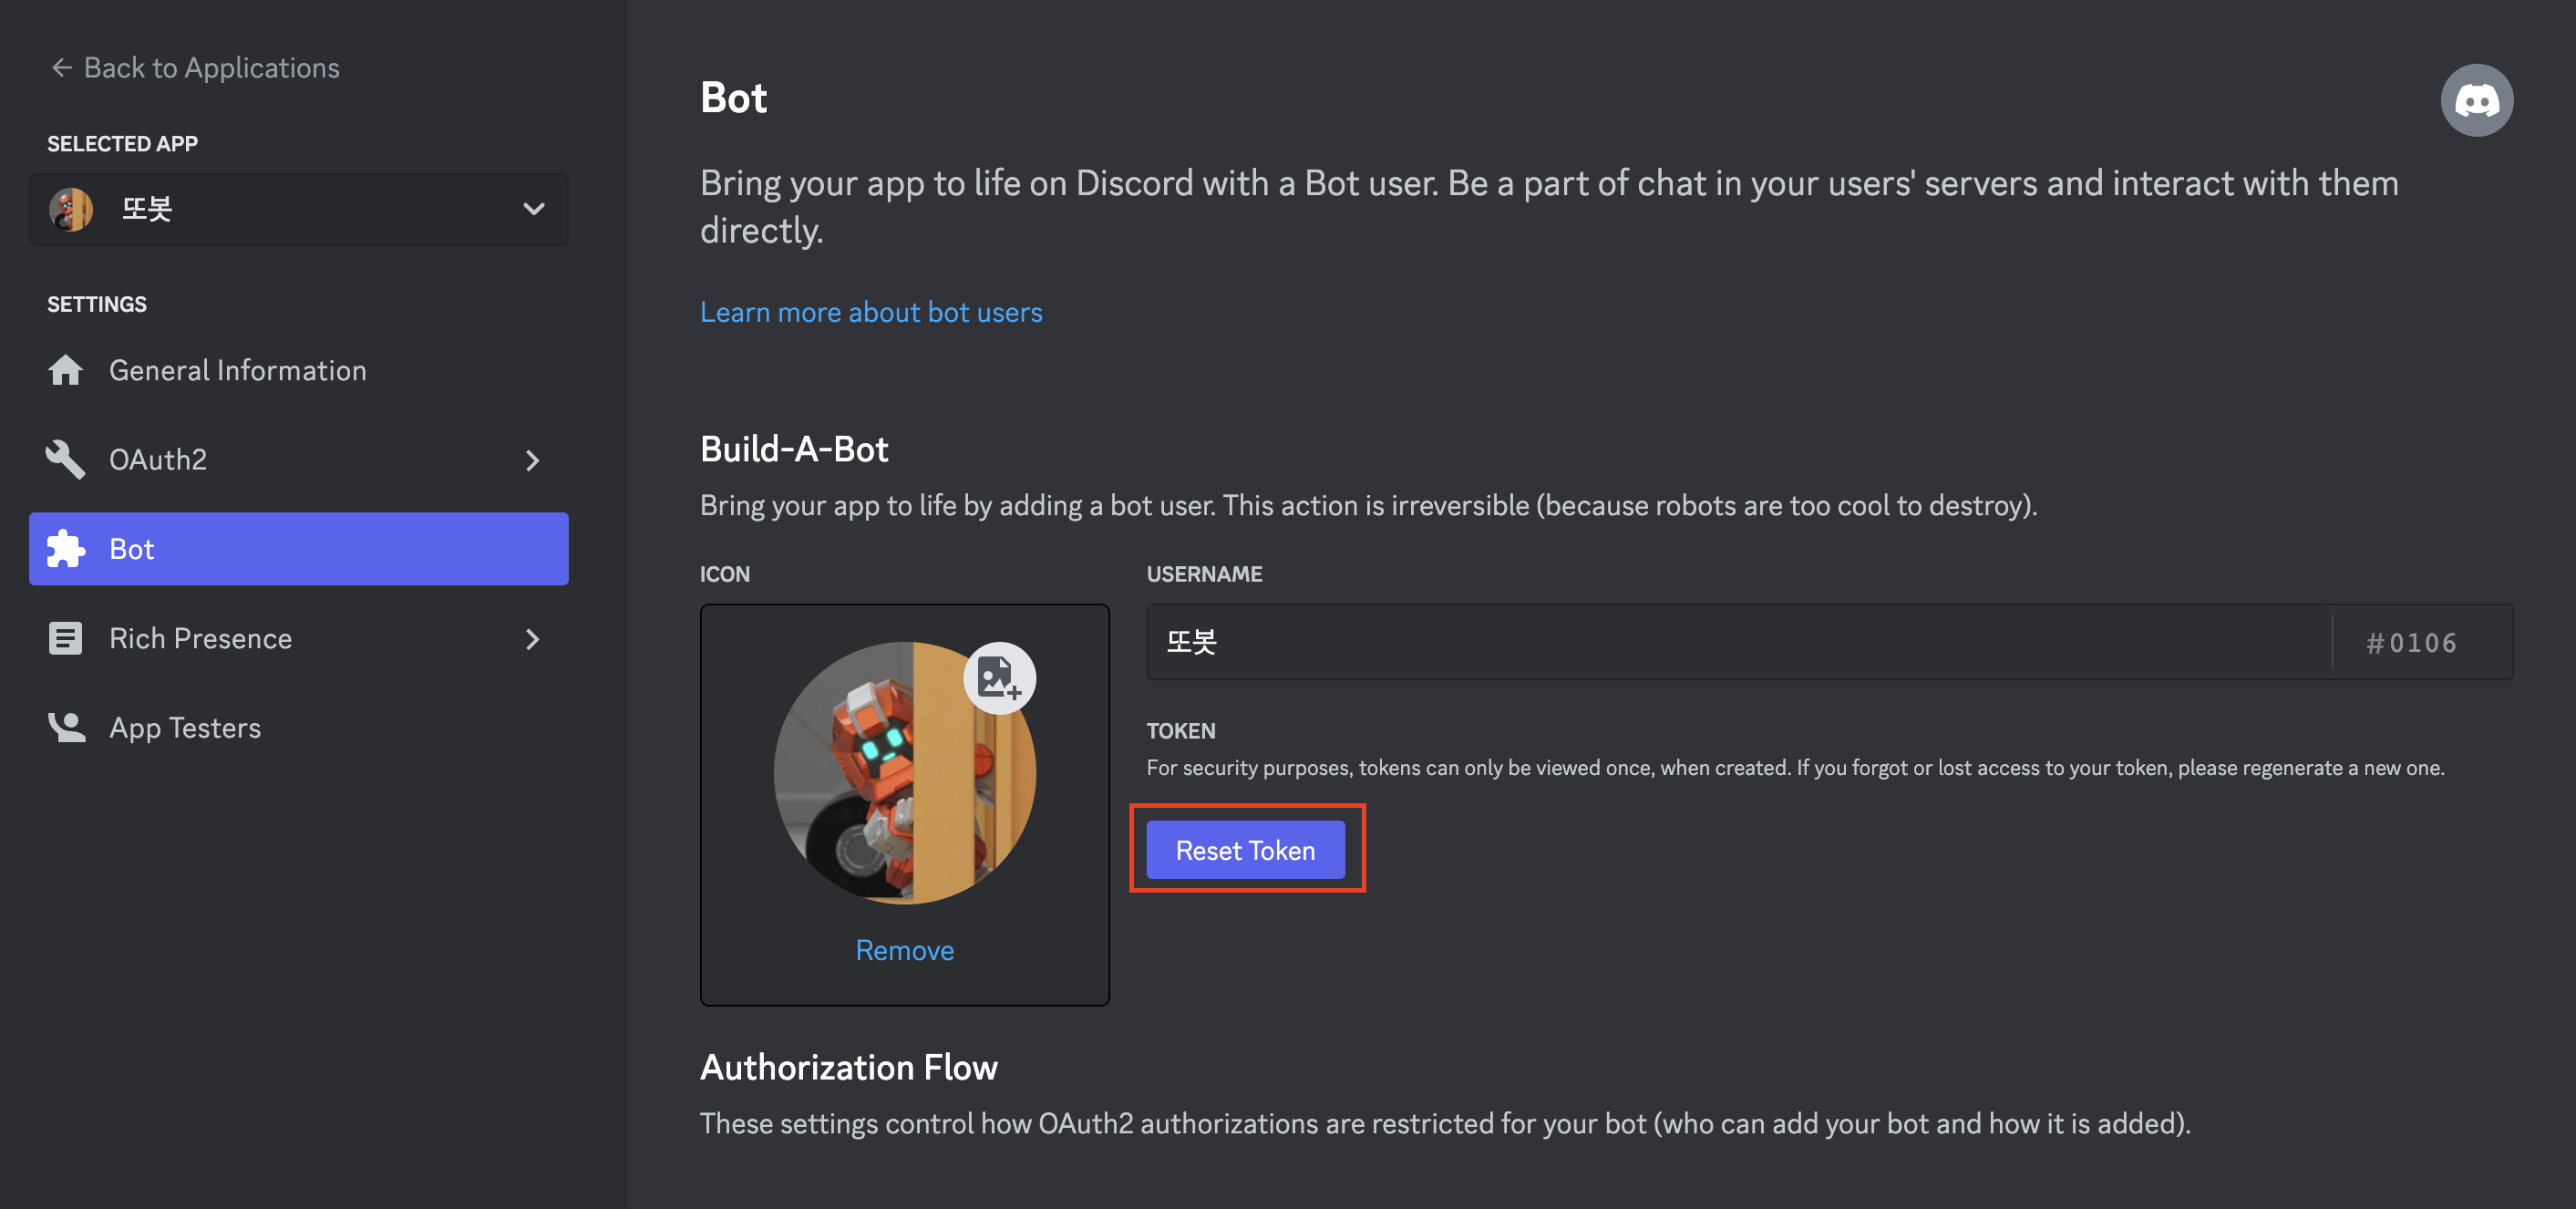
생성한 어플리케이션 페이지로 이동하여 Bot을 추가한 후 Reset Token버튼을 클릭하여 개발에 필요한 토큰 값을 생성합니다.
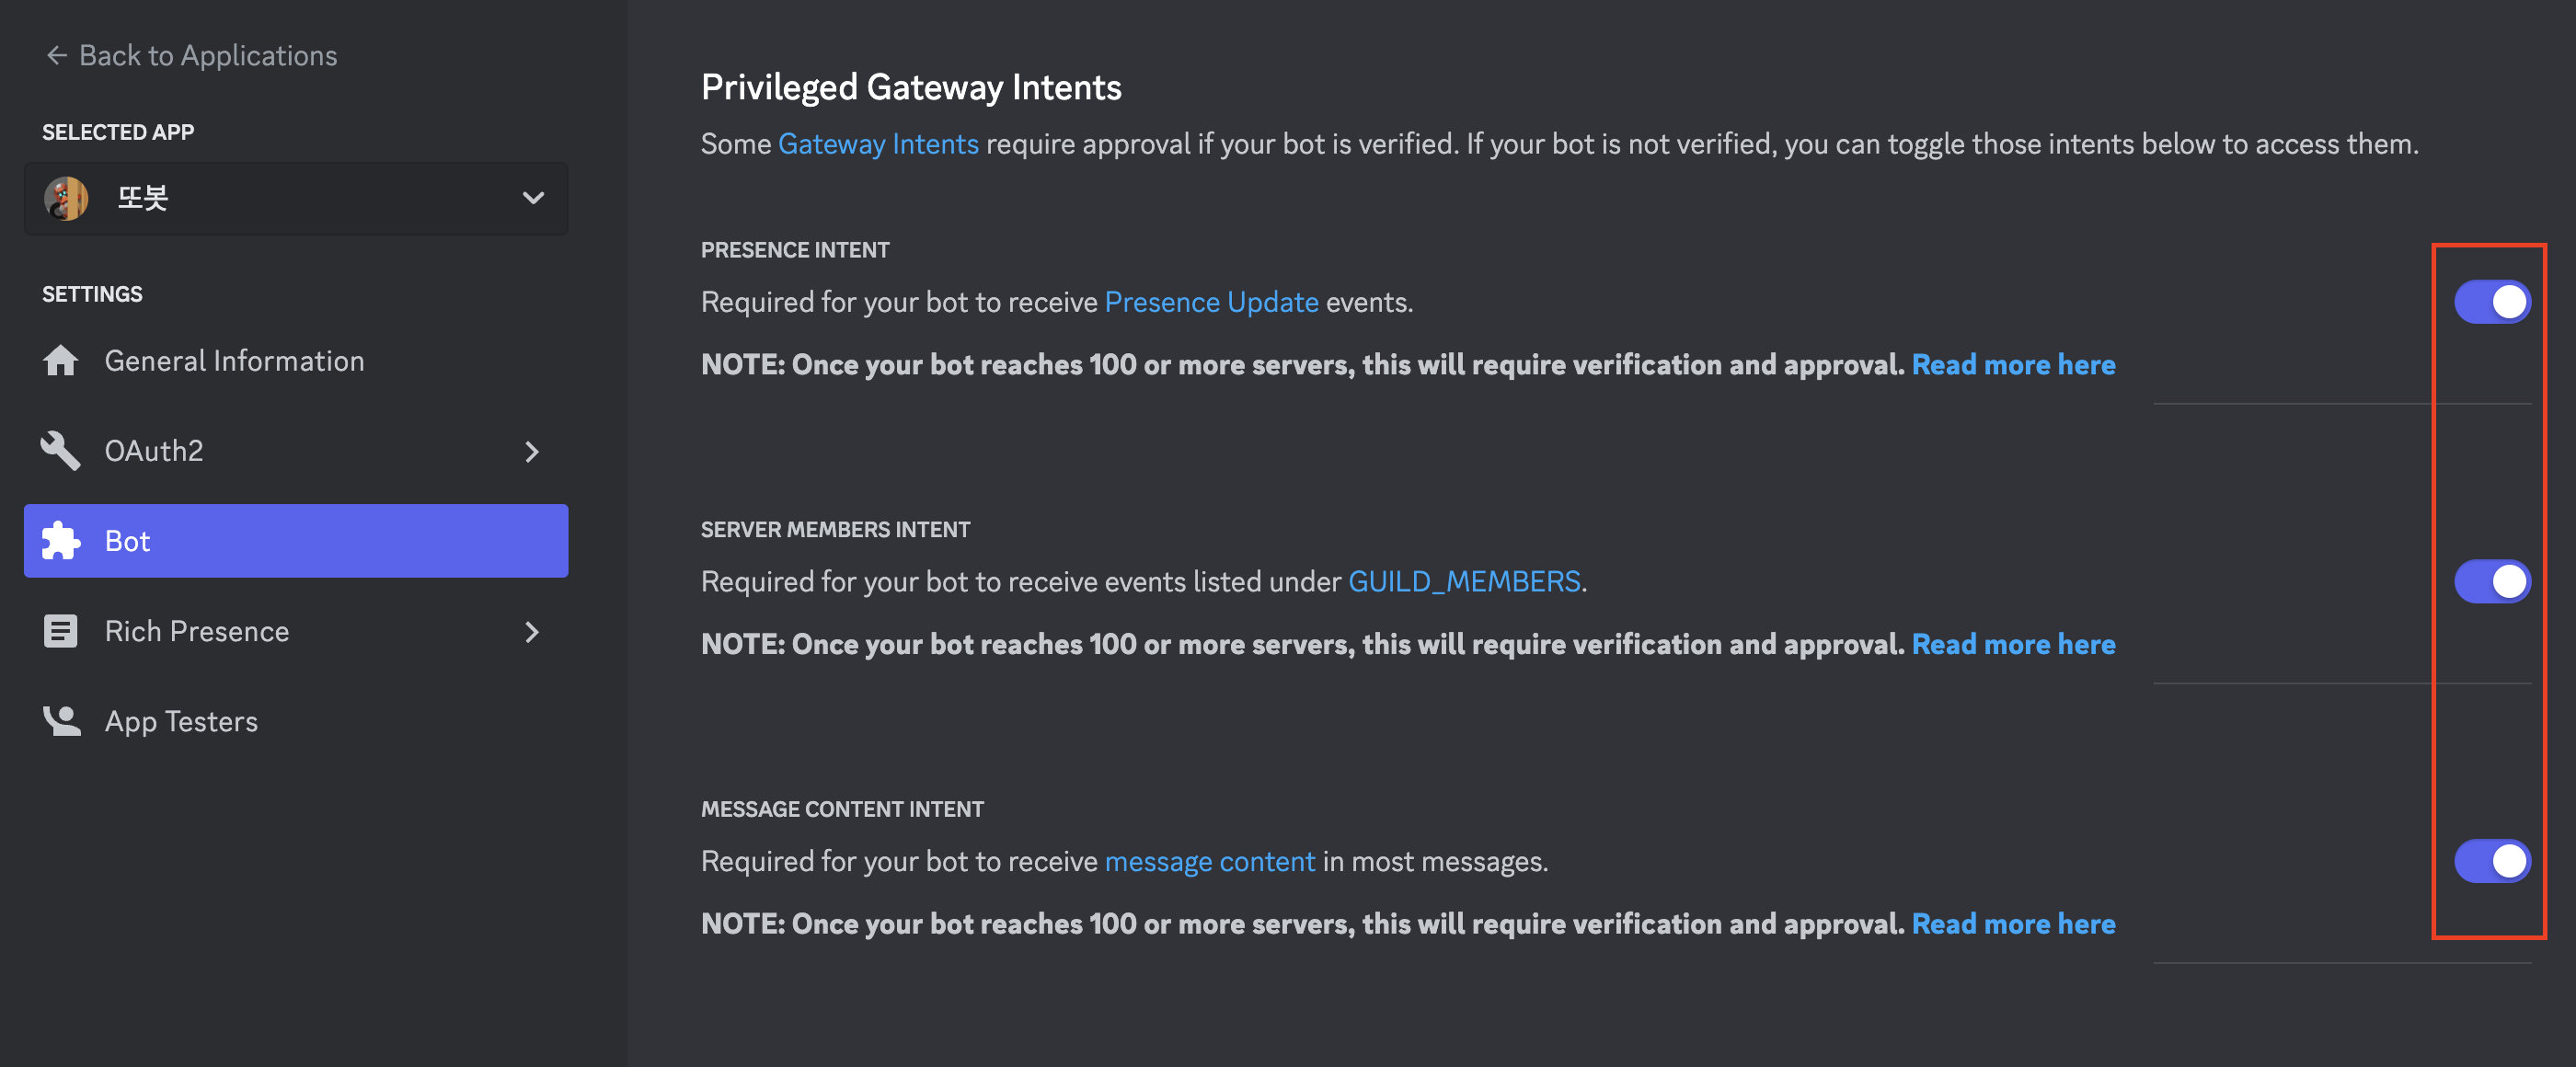
봇의 권한을 허용해주기 위해 Privileged Gateway Intents 메뉴의 항목들을 체크합니다.
OAuth2 > URL Generator 메뉴로 이동하여 bot을 선택하고 필요한 권한을 선택한 뒤 생성된 링크를 복사합니다.
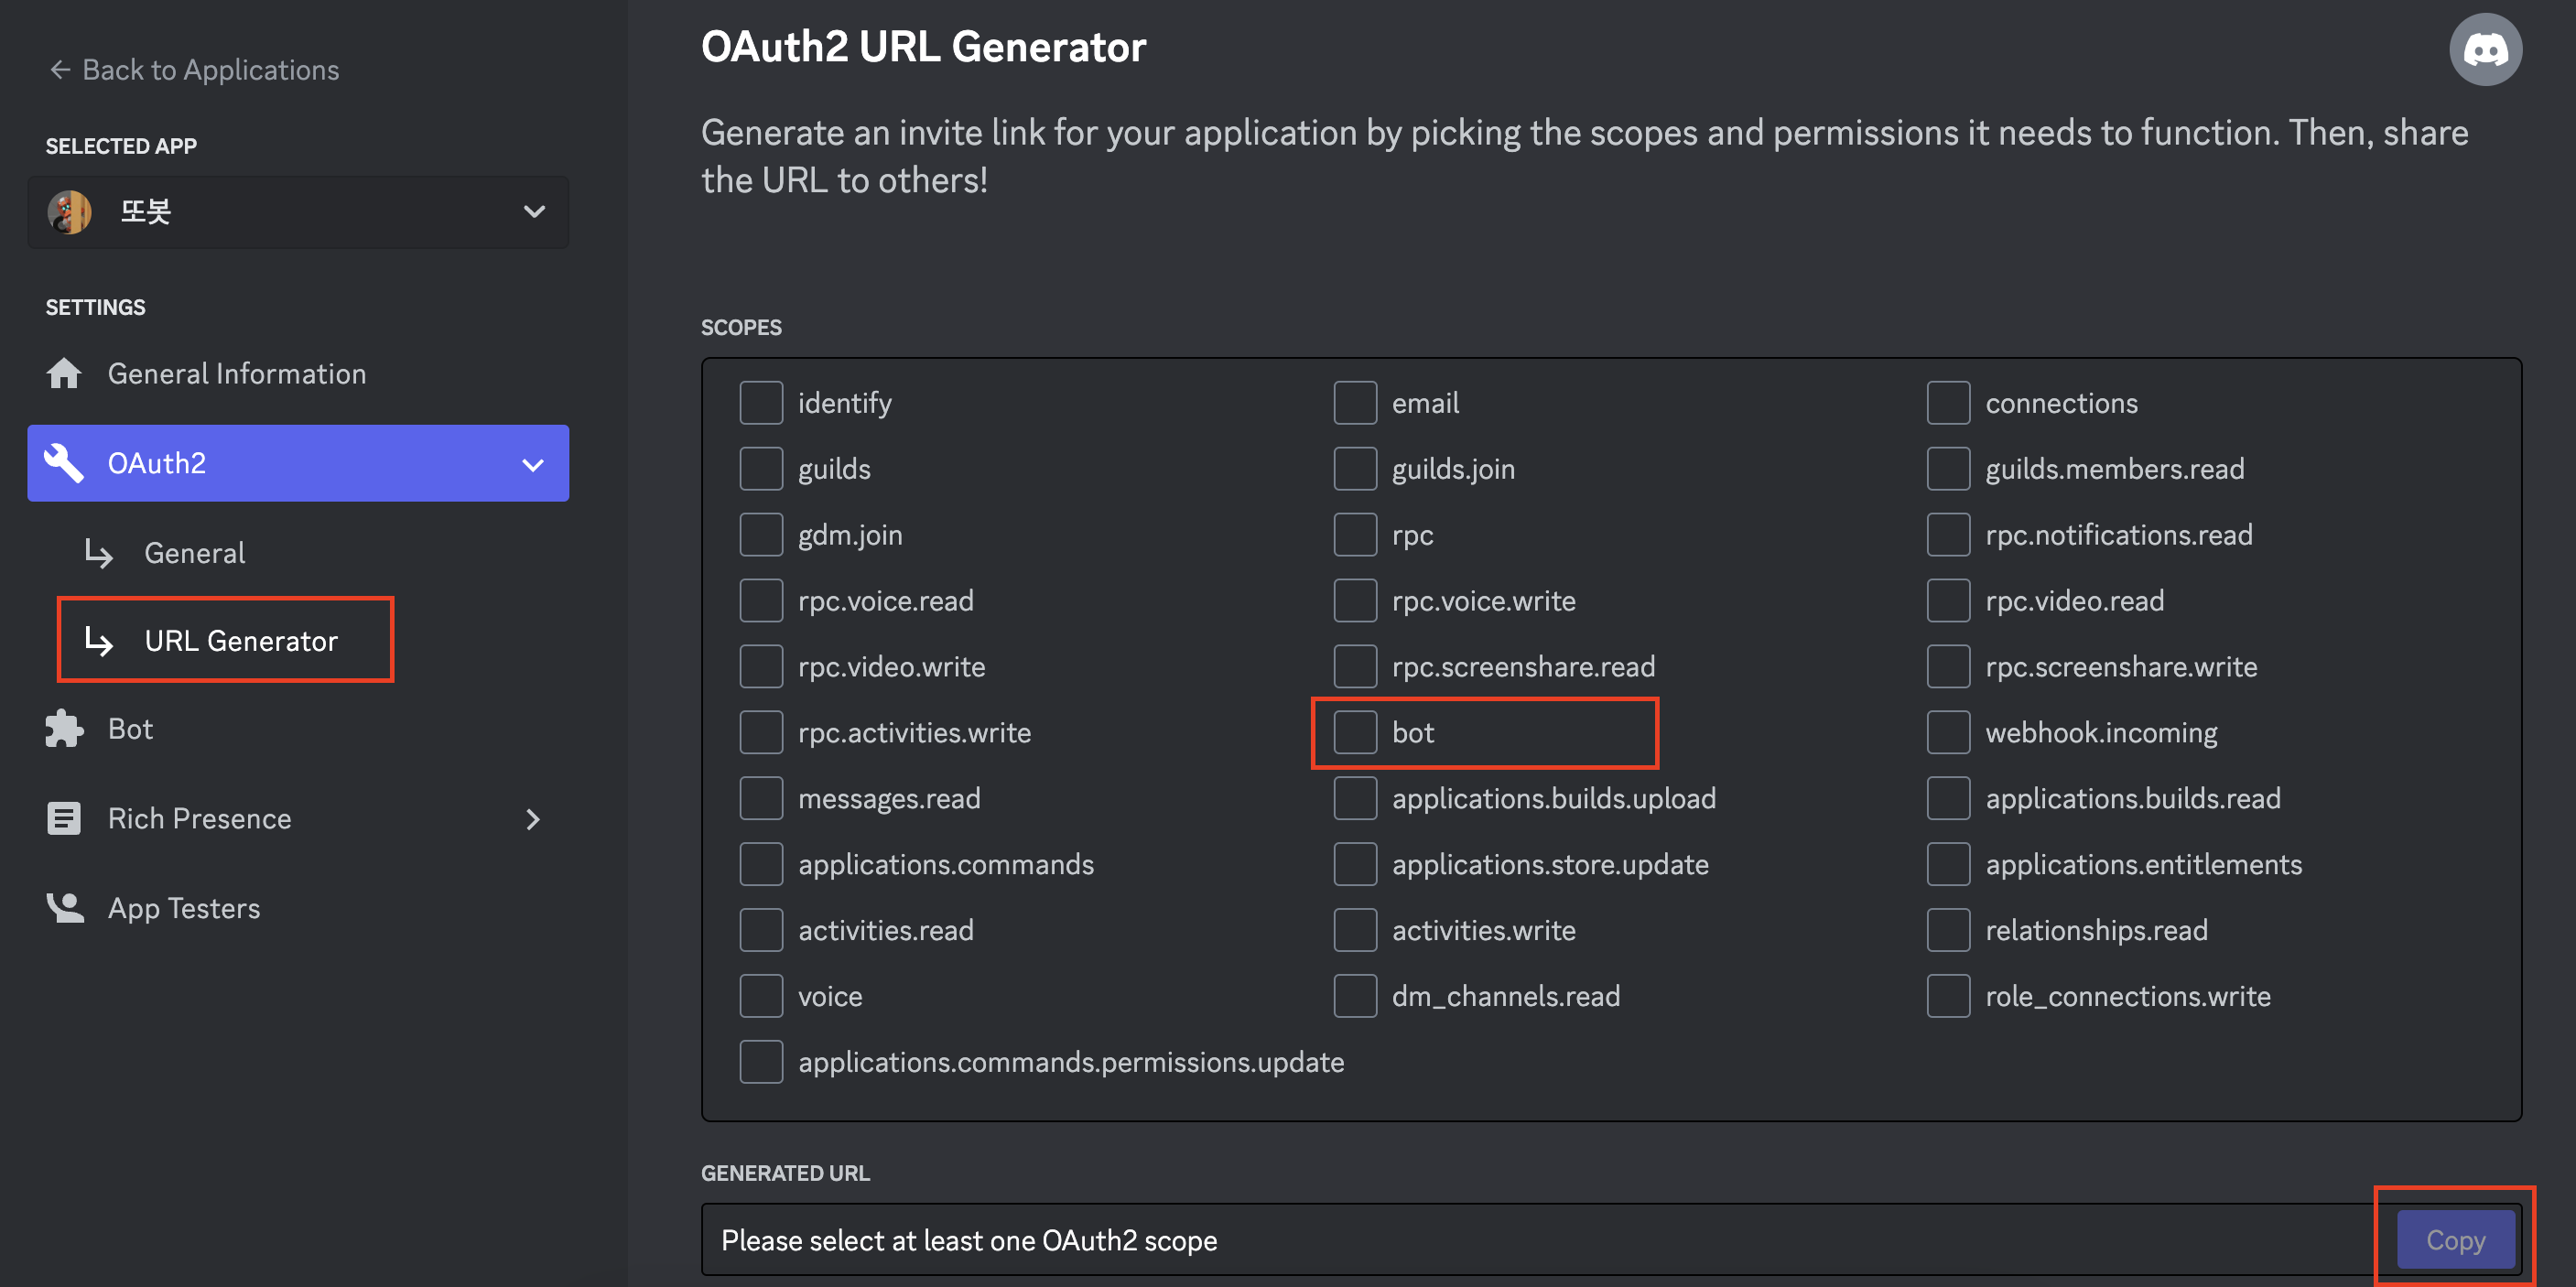
링클를 주소창에 입력하면 디스코드 채널에 내가 생성한 봇을 초대할 수 있습니다.

1. discord.js 설치하기
프로젝트를 폴더를 생성한 뒤 node와 discord.js를 설치합니다.
npm init -y
npm install discord.js
또는
yarn init -y
yarn add discord.js
최상위 경로에 config.json 파일을 생성하고 위에서 발급한 토큰을 저장합니다.
(* git에 파일이 올라가지 않도록 .gitignore에 config.json을 추가해주세요.)
// config.json

{
  "token": "your-token-goes-here"
}
2. 봇 실행하기
봇을 시작하기 위한 메인 파일을 생성해 줍니다.
// index.js
const { Client, Collection, GatewayIntentBits, Partials } = require('discord.js');
const { token } = require('./config.json');
const client = new Client({
intents: [
GatewayIntentBits.DirectMessages,
GatewayIntentBits.Guilds,
GatewayIntentBits.GuildMessages,
GatewayIntentBits.MessageContent,
],
partials: [Partials.Channel],
});
client.commands = new Collection();
// 준비
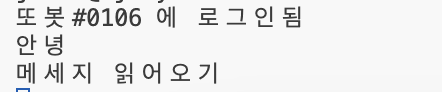
client.on('ready', () => console.log(`${client.user.tag} 에 로그인됨`));
client.login(token);파일을 저장하고 터미널에서 명령어를 실행하면 디스코드에 봇 상태가 온라인으로 변경된 것을 확인할 수 있습니다.
node index.js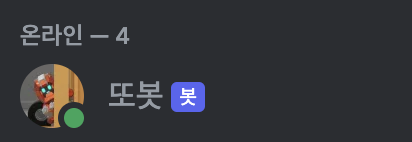
3. 메세지 읽어오기
messageCreate 명령어를 사용하면 봇이 참여하고 있는 채팅방의 메세지를 읽어올 수 있습니다. 위에서 작성한 index.js 파일 하단에 다음 코드를 추가합니다.
// 메세지
client.on('messageCreate', msg => {
  console.log(msg.content)
})
디스코드 채팅방에 메세지를 입력하면 콘솔창에서 메세지를 확인할 수 있습니다.
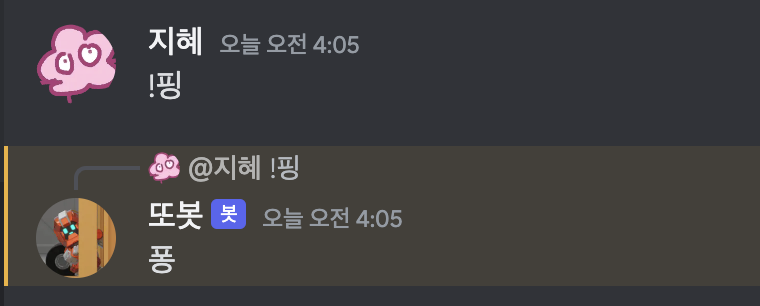
4. 키워드에 대답하기
!핑 이라는 메세지를 입력하면 봇이 퐁이라는 답장을 보낼 수 있도록 커맨드를 설정해주도록 하겠습니다
메세지를 읽어오는 코드를 아래와 같이 수정합니다.
//index.js

// 봇 명령어 구분 문자
const prefix = '!';

// 메세지
client.on('messageCreate', msg => {
  if (msg.author.bot) return;
  if (!msg.content.startsWith(prefix)) return;
  if (msg.content.slice(0, prefix.length) !== prefix) return;

  const args = msg.content.slice(prefix.length).trim().split(/ +/g);
  const command = args.shift().toLowerCase();

  let cmd = client.commands.get(command);
  if (cmd) cmd.run(client, msg, args);
})
아래 경우에만 메세지를 커맨드로 인식합니다.
- 메세지를 보내는 사람이 봇이 아님
- 봇 명령어 구분 문자로 시작하는 메세지
커맨드에 대한 반응을 개별적으로 저장하기 위해 commands 폴더를 생성합니다. 커맨드를 분류별로 나누기 위해 세부 폴더로 나눈 후 하위에 커맨드 값을 설정할 파일을 만들어 주도록 하겠습니다.
하위 폴더와 파일명은 추가할 커맨드에 따라 자유롭게 설정할 수 있습니다.
// 폴더 구조 예시

commands
ㄴ shop
  ㄴ buy.js
ㄴ play
  ㄴ ping.js
커맨드에 따른 반응을 설정하는 코드를 작성합니다.
name에는 커맨드를 입력하고 커맨드에 대한 답장을 msg.reply에 작성합니다.
// ping.js

module.exports = {
  name: '핑',
  run: (msg) => {
    msg.reply(`퐁`);
  }
};
index.js에서 commands 폴더에 만든 파일을 불러오는 코드를 추가합니다.
// index.js 전체 코드

const fs = require('node:fs');
const path = require('node:path');
const { Client, Collection, GatewayIntentBits, Partials } = require('discord.js');
const { token } = require('./config.json');
const prefix = '!';

const client = new Client({
  intents: [
    GatewayIntentBits.DirectMessages,
    GatewayIntentBits.Guilds,
    GatewayIntentBits.GuildMessages,
    GatewayIntentBits.MessageContent,
  ],
  partials: [Partials.Channel],
});

client.commands = new Collection();

// 명령어 로드
const foldersPath = path.join(__dirname, 'commands');
const commandFolders = fs.readdirSync(foldersPath);

for (const folder of commandFolders) {
  const commandsPath = path.join(foldersPath, folder);
  const commandFiles = fs.readdirSync(commandsPath).filter(file => file.endsWith('.js'));
  for (const file of commandFiles) {
    const filePath = path.join(commandsPath, file);
    const command = require(filePath);
    client.commands.set(command.name, command);
  }
}
console.log(client.commands.map(c => c.name).join(', ') + ' 명령어가 로드됨.');

// 준비
client.on('ready', () => console.log(`${client.user.tag} 에 로그인됨`));

// 메세지
client.on('messageCreate', msg => {
  if (msg.author.bot) return;
  if (!msg.content.startsWith(prefix)) return;
  if (msg.content.slice(0, prefix.length) !== prefix) return;

  const args = msg.content.slice(prefix.length).trim().split(/ +/g);
  const command = args.shift().toLowerCase();

  let cmd = client.commands.get(command);
  if (cmd) cmd.run(client, msg, args);
})

client.login(token);
다시 봇을 실행한 후, 디스코드 채팅방에 명령어를 입력하면 봇의 반응을 받을 수 있습니다.