
Spring Bean의 초기화 방식
- Eager Initialization(자동 초기화) :
。Spring Bean의 기본 초기화 방식으로서 주로 사용되는 방식.
。Application이 실행 또는 Spring Context가 실행시에 자동 초기화.
。Error 발생 시 Application이 실행 되지 않는다.
▶ Application 실행 시 발생하는 Error을 즉각 확인이 가능하므로 사용을 권장.
- Lazy Initialization(지연 초기화) :
。@Lazy로 선언하여 자동 초기화를 억제하도록 설정하며 권장되는 방식은 아님.
▶@Lazy를 지정하지 않으면Spring Context의 각각의Spring Bean은 Application이 실행되는 즉시 자동 초기화가 적용.
。초기화되는 시점은@Lazy가 선언된Spring Bean이 참조되거나 활용 시에 초기화가 적용됨.
。@Component가 선언된 Class ,@Configuration가 선언된 Class( 선언 시 내부에 정의된@Bean Method들이 모두 지연초기화 적용 ) , 개별@Bean method에 사용이 가능.
。초기화로 인해 발생되는 Error을 확인하는게 어렵다.
。 Error 발생 시Runtime Exception이 발생.import org.springframework.context.annotation.AnnotationConfigApplicationContext; import org.springframework.context.annotation.ComponentScan; import org.springframework.context.annotation.Lazy; import org.springframework.stereotype.Component; @Component class classA{ public classA(){ System.out.println("자동초기화"); } } @Component @Lazy class classB{ private classA a; // @Autowired : Dependency Injection public classB(classA a){ System.out.println("지연초기화"); this.a = a; } @Override public String toString() { return "classB{" + "a=" + a + '}'; } } @ComponentScan // 경로설정 X -> 해당 package 내에서 @Component를 scan. public class LazyInitializationLauncherApp { public static void main(String[] args) { try(var ct = new AnnotationConfigApplicationContext(LazyInitializationLauncherApp.class)){ System.out.println("context 초기화 완료"); System.out.println(ct.getBean(classB.class).toString()); } } }
。classA가 먼저 자동초기화된 후classB가Spring Bean으로서 호출되는 시점에서 지연초기화가 수행됨.
。classB는 Constructor-based 의존성 주입으로 인한classA의Spring Beaninstance가 주입되어 초기화.
▶@Lazy를 선언 했으므로 자동초기화 억제되고 지연초기화가 수행.
▶ 초기화되는 시점은classB의 Spring Bean이 참조되거나 호출되는 시점에 초기화.

Spring Bean Scope
- Spring Bean Scope 종류
。Spring Bean은 각자 다른 Scope를 가질 수 있다.
。@ScopeAnnotation을 통해 설정이 가능하다.
- Singleton :
@Scope(value= ConfigurableBeanFactory.SCOPE_SINGLETON)▶ default로 설정됨.
。Class 객체의 instance를 한개만 생성하게 하는 패턴으로서, 메모리 절약을 위해 instance가 필요할 때 동일한 instance를 일일이 생성하지 않고 기존의 instance를 가져와 활용하는 기법.
。Spring Context당 하나의Context instance만 존재.
▶ Spring의 기본 Scope로서Spring Context의 시작과 종료까지 유지되는 가장 넓은범위의 Scope.
。기본적으로 Spring Framework에서 생성되는 모든Spring Bean은 싱글톤 패턴.
▶Spring Bean을 참조 시 동일한 Spring Bean Instance가 반환
▶Spring Bean을 따로 설정하지 않았다면 Singleton으로 선언됨.
- Spring Singleton (Singleton : 디자인패턴) :
。Spring Context당 하나의 instance 할당.
- Java Singleton (GOF : Gang of Four 패턴) :
。JVM(Java Virtual Machine) 당 하나의 instance 할당.
。단일JVM에Spring Context가 한개 실행 시 Spring Singleton과 Java Singleton은 동일하지만,JVM에Spring Context가 복수 실행 시 동일하지 않다.
▶ 그러나 보통 단일JVM에 복수의Spring Context를 사용하지 않으므로 , Spring Singleton = Java Singleton 성립.
- Prototype :
。@Scope(value = ConfigurableBeanFactory.SCOPE_PROTOTYPE)를 이용하여 선언.
▶Class 객체에서 생성되는Spring Beaninstance의Scope를Prototype으로 설정.
。Spring Context당 복수의Context Instance가 존재할 수 있음.
。Spring BeanClass 객체 참조 시 매번 새로운 Spring Bean Instance가 생성되어 반환.
▶Prototype선언 시 Spring은Spring Bean의 생성 및 의존성 주입만 관여하고 더는 관리하지 않는다.Session Bean
。Business Application 구현 시 가장 많이 활용되는 Bean
- Stateless Session Bean
。Client의 상태를 유지하지않는 Bean
。Singleton:Stateless Bean참조 시 사용자 정보가 없으므로 , Application 당 intance를 한개만 구축해서 Application 전체에 적용.
- Stateful Session Bean
。Client의 상태를 유지하는 Bean
。Prototype:Stateful Bean사용 시 사용자 정보를 유지하기 위한 Bean으로서 Application이 아닌 user마다Bean을 별도생성.
- Web application 관련 Scope 종류
。일반 Spring Application이 아닌, SpringMVC Web Application에서만 사용. ( 웹환경에서만 동작하는 Scope )
- Request scope :
。HTTP Request당 하나의 instance가 할당.
- Session scope :
。사용자의HTTP Session(동일 사용자로서 여러번의Http Request가 하나의Session에 속할 경우)당 하나의 instance가 할당.
- Application scope :
。WAS(Web Application System : 웹어플리케이션 전체)당 하나의 instance가 할당
Singleton과 Prototype Scope Spring Bean 생성 실습
import org.springframework.beans.factory.config.ConfigurableBeanFactory;
import org.springframework.context.annotation.AnnotationConfigApplicationContext;
import org.springframework.context.annotation.ComponentScan;
import org.springframework.context.annotation.Scope;
import org.springframework.stereotype.Component;
// Singleton Spring Bean instance 생성
@Component
//@Scope(value= ConfigurableBeanFactory.SCOPE_SINGLETON)
class SingletonClass{}
// Prototype Spring Bean instance 생성
@Component
@Scope(value= ConfigurableBeanFactory.SCOPE_PROTOTYPE)
class PrototypeClass{}
@ComponentScan
public class BeanScopeLauncherApp {
    public static void main(String[] args) {
        try(var ct= new AnnotationConfigApplicationContext(BeanScopeLauncherApp.class)) {
            System.out.println(ct.getBean(SingletonClass.class));
            System.out.println(ct.getBean(SingletonClass.class));
            System.out.println(ct.getBean(PrototypeClass.class));
            System.out.println(ct.getBean(PrototypeClass.class));
            System.out.println(ct.getBean(PrototypeClass.class));
        }
    }
}
。Spring Scope가Singleton으로 선언된 Class객체로 생성된Spring Beaninstance는 호출 및 생성 시 동일한 instance로 반환.
▶ 기본값이므로 따로@Scope를 정의할 필요는 없다.
。Spring Scope가Prototype으로 선언된 Class객체로 생성된Spring Beaninstance는 호출 및 생성 시 별개의 instance로 반환.

Spring Bean의 Initialization과 Cleanup
。@PostConstruct , @PreDestroy
import jakarta.annotation.PostConstruct;
import jakarta.annotation.PreDestroy;
import org.springframework.context.annotation.AnnotationConfigApplicationContext;
import org.springframework.context.annotation.ComponentScan;
import org.springframework.stereotype.Component;
import java.util.Arrays;
@Component
class DependencyA{
    public void getReady(){
        System.out.println("PostConstruct : initialization 실행");
    }
}
@Component
class ClassA{
    private DependencyA dA;
    public ClassA(DependencyA dA){
        super();
        this.dA = dA;
        System.out.println("의존성 준비완료");
    }
    @PostConstruct
    public void initialize(){
        dA.getReady();
    }
    @PreDestroy
    public void cleanup(){
        System.out.println("PreDestroy : cleanup 실행");
    }
}
@ComponentScan
public class PrePostAnnotationsContextLauncherApp {
    public static void main(String[] args) {
        try(var ct = new AnnotationConfigApplicationContext(PrePostAnnotationsContextLauncherApp.class)) {
            Arrays.stream(ct.getBeanDefinitionNames()).forEach(System.out::println);
        }
    }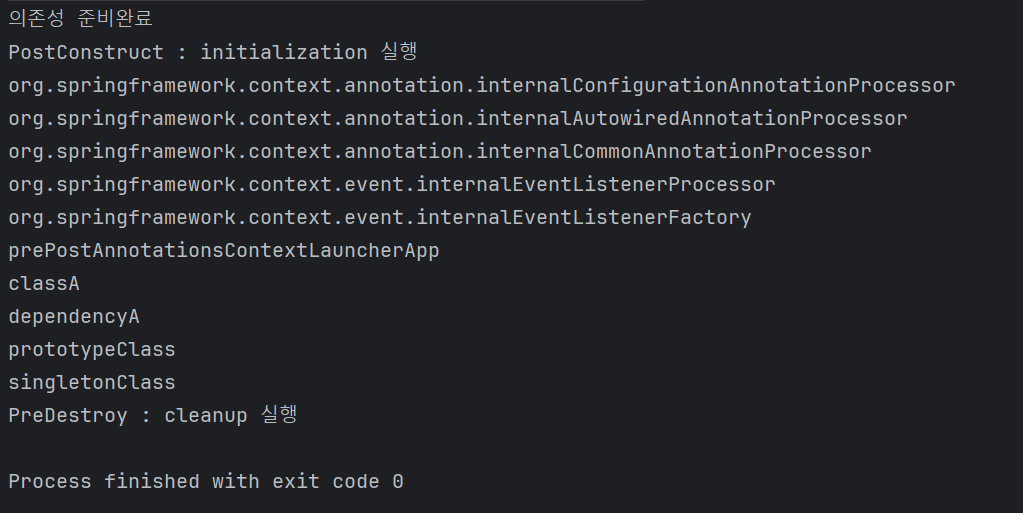
}。classA객체의 Spring Bean instance가 ct.getBeanDefinitionNames()에 의해 호출되어 생성 및 의존성이 주입되었을때, @PostConstruct에 의해 정의된 initialize method 실행.
▶ initialize method에 ClassA객체의 Spring Bean instance의 resource , default value , logging를 설정하는 기능(initialization logic)을 구현해야 한다.
。Spring Bean이 실행이 완료된 후 제거되기 전 @PreDestroy에 의해 정의된 cleanup method 실행.
▶ 만약 ClassA 객체의 Spring Bean instance가 DB에 연결이 된 경우, cleanup method에 Resource와 DB Connection을 해제하는 기능(cleanup logic)을 작성해야한다.
Spring LifeCycle Annotation
。Spring Bean의 초기화 또는cleanup을 위해 사용.
。method에 선언하여 사용.
@PostConstruct:
。Spring Bean의 instance를 생성 및 의존성 주입이 완료될 경우 자동으로@PostConstruct로 Annotation한initialization method를 호출하여Spring Bean을 초기화.
。@PostConstruct가 선언된 method는 해당 Class를 참조하기 전에 먼저 호출되어야한다.
ex ) DB에서 데이터를 가져오는 Dependency를 연결 시, 초기화를 하는 작업 수행을 수행 후 활용.
initialization logic:Spring Bean의 resource 설정, default value 설정,logging설정
▶@PostConstruct로 Annotation한initialization method에 다음 기능을 구현해야한다.
@PreDestroy:
。Spring Context에서Spring BeanInstance를 삭제하기 이전에 자동으로@PreDestroy를 Annotation한cleanup method를 호출하여cleanup을 수행.
。일반적으로@PreDestroy를 Annotation한cleanup method는Spring Context가 보유하고 있는 Resource를 해제하는데 사용된다.
▶Spring Context에서 해당Spring Bean이 삭제되기 전@PreDestory로 선언된cleanup method를 수행하여 활성화된 연결들을 모두 닫아야한다.
cleanup logic:Spring Bean의 DB Connection 해제 , Resource 해제
▶@PreDestory로 선언된cleanup method에 다음 기능을 구현해야한다.
Jarkata Contexts and Dependency Injection (
CDI) Jarkata EE 설명
- Spring Framework에서 지원하는
Jarkata EE에 속한 규격(=Interface).
。CDI는 규격(=Interface)이므로 구현이 없고 , Spring framework는CDI를 상속.
。 Java의Annotation그룹을 정의한 규격.
▶ 의존성 주입 수행 시 해당 Annotation을 활용 가능.
。CDI를 사용하기전에 Spring boot의 xml 파일 (pom.xml)에서 dependency를 추가해서 사용.<dependency> <groupId>jakarta.inject</groupId> <artifactId>jakarta.inject-api</artifactId> <version>2.0.1</version> </dependency>
- 이후 project 폴더를 우클릭 후 Maven - Reload Project 수행 시 해당 dependenct가 자동으로 다운로드되어 설치되며
CDI Injection API Annotation을 사용가능.
- Maven : XML Script를 기반으로
pom.xml파일을 통해 자동으로 library와 dependency(의존성)을 관리.- pom.xml :
。Spring Project에 필요한 library , Dependency를 설정 시 사용하는 파일.
▶ dependency가xml파일 내에 명시됨.
CDI Injection API Annotation종류
。CDIDependency를pom.xml에 정의 후 활용이 가능.
。CDI Injection API Annotation이Spring Annotation을 대체해서 사용이 가능
@Inject: Spring에서의@Autowired역할 수행.@Named: Spring에서의@Component역할 수행.@Qualifier@Scope@Singleton
import jakarta.inject.Named;
import jakarta.inject.Inject;
import org.springframework.context.annotation.AnnotationConfigApplicationContext;
import org.springframework.context.annotation.ComponentScan;
import org.springframework.context.annotation.Configuration;
import java.util.Arrays;
@Named // Spring의 @Component
class DataService{}
@Named
class BusinessService{
    private DataService dataService;
    public DataService getDataService() {
        return dataService;
    }
    @Inject // Spring의 @Autowired
    public void setDataService(DataService dataService) {
        System.out.println("setter");
        this.dataService = dataService;
    }
}
@Configuration
@ComponentScan
public class CdiContextLauncherApplication {
    static public void main(String[] args) {
        try (var ct = new AnnotationConfigApplicationContext(CdiContextLauncherApplication.class)) {
            Arrays.stream(ct.getBeanDefinitionNames()).forEach(System.out::println);
            System.out.println(ct.getBean(BusinessService.class).getDataService());
        }
    }
}
。기존 Spring의 @Component , @Autowired 를 CDI의 @Named , @Inject로 변경.
Java Spring XML 설정 (중요 X)
- Java Annotations
。class , method , variable 등을 source에 가깝게 정의하여 간결하고 쉽게 작성.
。Spring Framework를 사용하므로 POJO를 가지지 못한다.
。Annotation 수정이 간단.
- XML Configuration
。거의 사용하지 않는다.
。POJO가 단순
。Annotation 수정이 복잡하다.
=> class 의 이름 변경 시 해당 class의 package 주소를 참조하고 있는 XML 등을 모두 변경해야한다.
XML형식으로Spring bean정의하기.
。src/main/resources폴더에 xml 파일을 생성한 후 다음 구문을 입력.
- src/main/resources :
。java code에서 사용되는 resource가 위치하는 경로
( ex : html , css , 설정(properties) 파일 등 )<?xml version="1.0" encoding="UTF-8"?> <beans xmlns="http://www.springframework.org/schema/beans" xmlns:xsi="http://www.w3.org/2001/XMLSchema-instance" xmlns:context="http://www.springframework.org/schema/context" xsi:schemaLocation=" http://www.springframework.org/schema/beans http://www.springframework.org/schema/beans/spring-beans.xsd http://www.springframework.org/schema/context http://www.springframework.org/schema/context/spring-context.xsd"> <!-- bean definitions here --> </beans>。이를 통해 xml 형식으로 정의된 spring bean을 읽기 위해 java의 AnnotationConfigApplicationContext() 가 아닌 , 다음 구문을 사용.
var ct = new ClassPathXmlApplicationContext("contextConfiguration.xml")import org.springframework.context.support.ClassPathXmlApplicationContext; import java.util.Arrays; public class XmlConfigurationContextLauncherApplication { public static void main(String[] args) { try(var ct = new ClassPathXmlApplicationContext("contextConfiguration.xml")){ Arrays.stream(ct.getBeanDefinitionNames()).forEach(System.out::println); } } }
- XML로 Bean 생성하기.
。Bean 생성 시 생성자 주입이 필요한 경우 생성자 매개변수를 지정.
。constructor-arg로 생성자를 생성하여 값을 전달 시 value /
Bean을 전달 시 ref를 사용.#1.Bean을 생성하는 경우
<!-- Bean 생성! -->
<bean id="name" class="java.lang.String">
    <constructor-arg value="Jeongsu" /> <!-- 생성자 주입을 위한 생성자. -->
</bean>
<bean id="age" class="java.lang.Integer">
    <constructor-arg value="26"/>
</bean>
#2. 특정 package 내 Component를 Bean으로 선언 및 생성자를 통해 Bean을 전달하는 경우.
<!-- 특정 package 내에 있는 특정 Component만 Bean으로 추출할 경우. --> <bean id="PacMan2" class="com.wjdtn747.springframework.game.PacMan"/> <!-- class에 해당 Component 주소를 입력하면 Bean으로 추출이 가능.--> <!-- 특정 package 내 Component를 Bean으로 선언 후 생성자로 Bean을 넣는 경우--> <!-- 이때 생성자로 Bean을 전달하는 경우 value가 아닌 ref로 지정해야한다!--> <bean id="gameRunner" class="com.wjdtn747.springframework.game.GameRunner"> <constructor-arg ref="PacMan2"/> </bean>。Component Scan :
-특정 package 내에서 Component를 Scan시 사용.
-Component Scan을 할 경우 package 내에서 정의된 모든것을 조회.<!-- Component Scan : game package에서 Compnent를 scan하는 경우.--> <!-- Component Scan을 할 경우 package에서 정의된 모든것을 가져옴.--> <context:component-scan base-package="com.wjdtn747.springframework.game"/> <!-- 해당 구문 추가 시 game package 내부에 있는 Component들을 Bean으로 조회할 수 있다.-->import com.wjdtn747.springframework.game.GameRunner; import org.springframework.context.support.ClassPathXmlApplicationContext; import java.util.Arrays; public class XmlConfigurationContextLauncherApplication { public static void main(String[] args) { try(var ct = new ClassPathXmlApplicationContext("contextConfiguration.xml")){ Arrays.stream(ct.getBeanDefinitionNames()).forEach(System.out::println); System.out.println(ct.getBean("name")); ct.getBean(GameRunner.class).run(); // xml 내에서 정의된 gameRunner2가 PacMan2를 생성자로 전달받아서 실행됨! } } }Java의 @Configuration 에서 수행한 작업은 마찬가지로 XML 작업에서도 수행이 가능하다,
。그러나 현재는 Java Annotation의 도입으로 최근 spring을 사용 시 거의 사용을 하지않게된다.
。그러나 오래된 프로젝트에서는 아직 XML 설정을 사용하는 경우가 존재하므로 이해하는것은 중요하다.
