Interceptor을 통해서버에 접속한 사용자의IP 정보및단말정보가져와서DB에 저장하기
。서버에 접속한사용자정보를JPA를 통해DB에 저장
▶ 일일 방문자 수 등을 통계할 수 있음.
인터셉터( Interceptor )
。Controller기준 앞 또는 뒤에서 전달되는HTTP 요청을인터셉트하는 역할을 수행
▶인터셉터를 통해요청에 포함된사용자정보가져오기
서버 접속한사용자 정보를 저장할Entity및Repository,Service정의
Entity Class@Getter @Entity public class VisitStat extends BaseEntity { private String ip; private String userAgent; private Long userId; private LocalDateTime visitedAt = LocalDateTime.now(); public VisitStat(String ip, String userAgent, Long userId) { this.ip = ip; this.userAgent = userAgent; this.userId = userId; } }
Repository@Repository public interface VisitStatRepository extends JpaRepository<VisitStat, Long> {}
Servicepublic interface VisitStatService { void create( Long userId, String ip, String userAgent ); }@Service @Transactional @RequiredArgsConstructor public class VisitStatServiceImpl implements VisitStatService { private final VisitStatRepository visitStatRepository; @Override public void create( Long userId, String ip, String userAgent ) { visitStatRepository.save( new VisitStat(userId, userAgent, ip) ); } }
EDA를 통한이벤트 발행에 사용할POJO정의
。저수준 클래스에서인터셉터를의존하는 것을 방지하기위해 정의public record VisitorEvent( String ip, String userAgent, Long userId ) { }。
ApplicationEventPublisher에 의해 해당객체가 생성되어 발행 시@EventListener(VisitorEvent.class)가 선언된메서드 호출
인터셉터를 정의하는HadnlerInterceptor 구현체 클래스를Spring Bean으로 등록 및사용자정보를클래스객체에 포함하여이벤트발행
。HadnlerInterceptor를구현한HadnlerInterceptor 구현체작성
▶preHandle():컨트롤러전달 전의HTTP 요청을인터셉트
▶postHandle():컨트롤러전달 후의HTTP 요청을인터셉트
。저수준 클래스에서인터셉터를의존하는 것을 방지하기위해ApplicationEventPublisher를 사용하여DIP적용
▶요청에서 가져온사용자 IP,사용자 이름을 해당POJO로이벤트 발행수행
▶@EventListener(VisitorEvent.class)가 선언된메서드를 통해 다음Logic을 수행
Spring- EDA@Component @RequiredArgsConstructor public class VisitStatInterceptor implements HandlerInterceptor { private final ApplicationEventPublisher applicationEventPublisher; @Override public boolean preHandle(HttpServletRequest request, HttpServletResponse response, Object handler) throws Exception { var principal = Optional.ofNullable(request.getUserPrincipal()); var name = principal.isPresent() ? Long.parseLong(principal.get().getName()) : null; applicationEventPublisher.publishEvent( new VisitorEvent( request.getRemoteAddr(), request.getHeader("User-Agent"), name ) ); return true; } }
WebMvcConfigurer를구현하여HadnlerInterceptor 구현체를 등록할@Configuration Class작성
。WebMvcConfigurer의addInterceptors(InterceptorRegistry registry)의registry.addInterceptor(visitStatInterceptor)를 통해인터셉터를 등록@Configuration @RequiredArgsConstructor public class WebConfiguration implements WebMvcConfigurer { // Spring Bean으로 등록한 VisitStatInterceptor을 의존성주입 private final VisitStatInterceptor visitStatInterceptor; // 인터셉터 등록 @Override public void addInterceptors(InterceptorRegistry registry) { registry.addInterceptor(visitStatInterceptor); } }
EventListener 클래스정의
。해당POJO Datatype의이벤트 발행시 수신하여@EventListener(VisitorEvent.class) 메서드 호출
。@EventListener는 기본적으로동기처리이므로비동기처리시@Async를 추가선언
▶Spring에서비동기처리사용 시진입점 클래스에@EnableAsync를 추가선언@Component @RequiredArgsConstructor public class InternalEventListener { private final VisitStatService visitStatService; @Async @EventListener(VisitorEvent.class) public void onVisitorEvent(VisitorEvent event) { visitStatService.create( event.userId(), event.ip(), event.userAgent() ); } }。
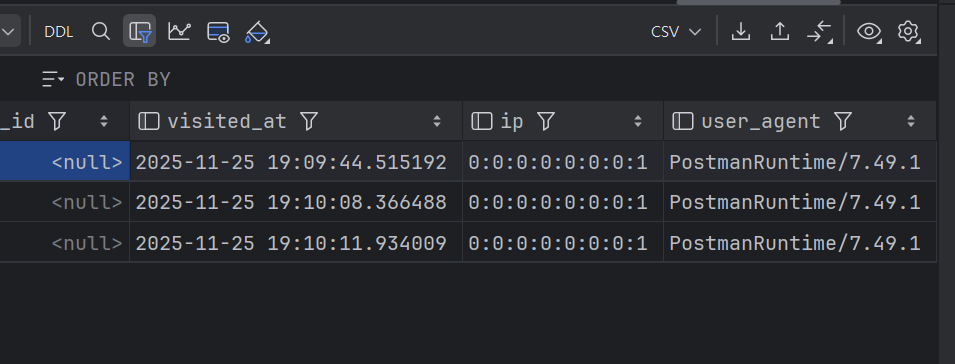
요청발생 시HadnlerInterceptor 구현체에 의해VisitorEvent객체가 생성 및ApplicationEventPublisher에 의해Event가발행
▶ 해당Listener 클래스에서이벤트를 수신 및VisitStatService를 통해사용자정보를Entity와매핑된DB Table로 저장
▶Controller를 통과하기전의요청을인터셉트하여principal정보를DB Table로 저장
HandlerIntercepter
WebMvcConfigurer
번외 : 사용자 서비스 요청기록 남기기
。AOP사용하기.
사용자 요청에 의한서비스기록을 저장할Entity및Repository,Service정의
Entity Classpublic enum HistoryType { ORDER_CREATE, LOGIN, LOGOUT, PASSWORD_CHANGE; }@Entity @Getter @NoArgsConstructor public class History extends BaseEntity { @Enumerated(value = EnumType.STRING) private HistoryType type; private String content; private Long userId; public History(HistoryType type, String content, Long userId) { this.type = type; this.content = content; this.userId = userId; } }
Repository@Repository public interface HistoryRepository extends JpaRepository<History,Long> {}
Servicepublic interface HistoryService { void create(HistoryType type, String content, Long userId); }@Service @Transactional @RequiredArgsConstructor public class HistoryServiceImpl implements HistoryService { private final HistoryRepository historyRepository; @Override public void create(HistoryType type, String content, Long userId) { historyRepository.save( new History( type, content, userId ) ); } }
Logger용커스텀 어노테이션선언
。Service Class의메서드에 선언하기위해메서드레벨에서 선언@Target({ElementType.METHOD}) @Retention(RetentionPolicy.RUNTIME) public @interface ServiceLogger { HistoryType type(); String content() default ""; }
AOP설정
。해당@ServiceLogger이 선언된메서드 호출시AOP에 의해인터셉트되어 아래 구문을 수행
▶UserDetails 객체를 가져와서principal 정보를 출력하도록 설정@Aspect @Component @RequiredArgsConstructor public class LoggerAspect { private final HistoryService historyService; @Around("@annotation(com.kt.shopping.aspect.ServiceLogger) && @annotation(serviceLogger)") public Object serviceLogger(ProceedingJoinPoint joinPoint, ServiceLogger serviceLogger) throws Throwable { // 로그인 시 UserDetails 객체 가져오기 CurrentUser principal = (CurrentUser)Arrays.stream(joinPoint.getArgs()) .filter(arg -> arg instanceof CurrentUser) .findFirst().orElse(null); Long userId = principal != null ? principal.getId() : null; HistoryType type = serviceLogger.type(); String content = serviceLogger.content(); historyService.create(type, content, userId); return joinPoint.proceed(); } }
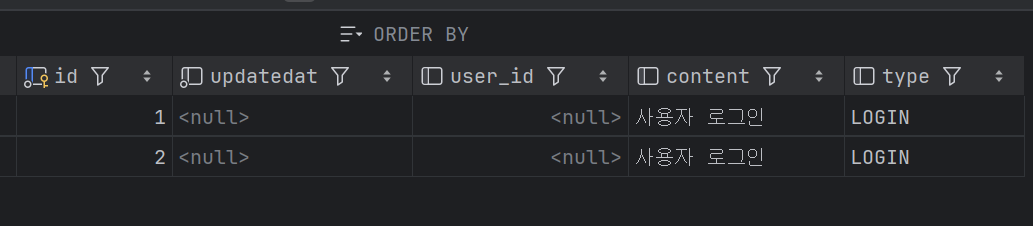
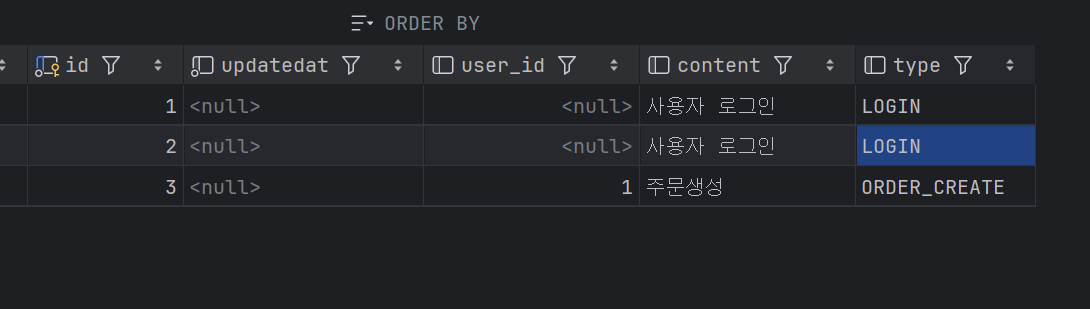
어노테이션을 선언하여 해당메서드에 대한요청를DB Table에 기록@ServiceLogger(type = HistoryType.LOGIN, content = "사용자 로그인") @PostMapping("/login") public ApiResult<LoginResponse.Login> login(@Valid @RequestBody LoginRequest.Login request){ Pair<String,String> tokenPair = authService.login(request.loginId(), request.password()); // DTO에 AccessToken 과 RefreshToken을 포함 LoginResponse.Login responseDto = new LoginResponse.Login(tokenPair.getFirst(), tokenPair.getSecond()); return ApiResult.ok(responseDto); }@ServiceLogger(type = HistoryType.ORDER_CREATE, content = "주문생성") @PostMapping public ApiResult<Void> create( @AuthenticationPrincipal CurrentUser currentUser, // Spring Security 를 통해 획득 @RequestBody @Valid OrderRequest.Create request ){ orderService.create( currentUser.getId(), // request.prodId(), request.receiverName(), request.receiverAddress(), request.receiverMobile(), request.quantity() ); return ApiResult.ok(); }
▶ 다음처럼DB Entity에매핑된DB Table

공부기록 블로그