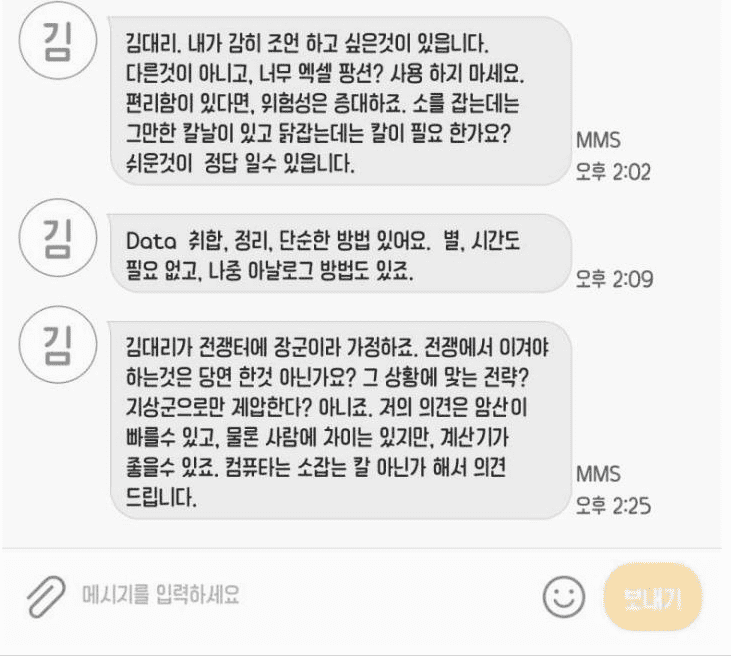
갑자기 이게 생각났다.. 떼잉,,,, Data 취합 정리,,,
근데 저말이 맞는것도 같다
왜 CRA CNA 안쓸까
npx create-react-appnpx create-next-app쓰면 진짜 편하기는 하다.
좋은거 왜안씀? 편하잖아??
- 불필요한 모듈들이 깔려 들어온다..
- 현재 나의 사수님 @jjuya가 보일러플레이트 사용하지 않고 프로젝트 세팅하는 미션을 주심
불필요한 모듈들이 깔려온다?
사실 확인해봤지만 내 입장에서는 불필요한 모듈들이 깔려오지는 않았던거같다..?
react react-router react-rouet-dom next 안쓸거임?
하지만 이건 너무 기초적인거고 webpack, babel, prettier, eslint 설정들이 남아있다..
이 설정들을 남이 짜준걸로 할거임? 라는 생각이 들었기에 이 글을 작성하고있다
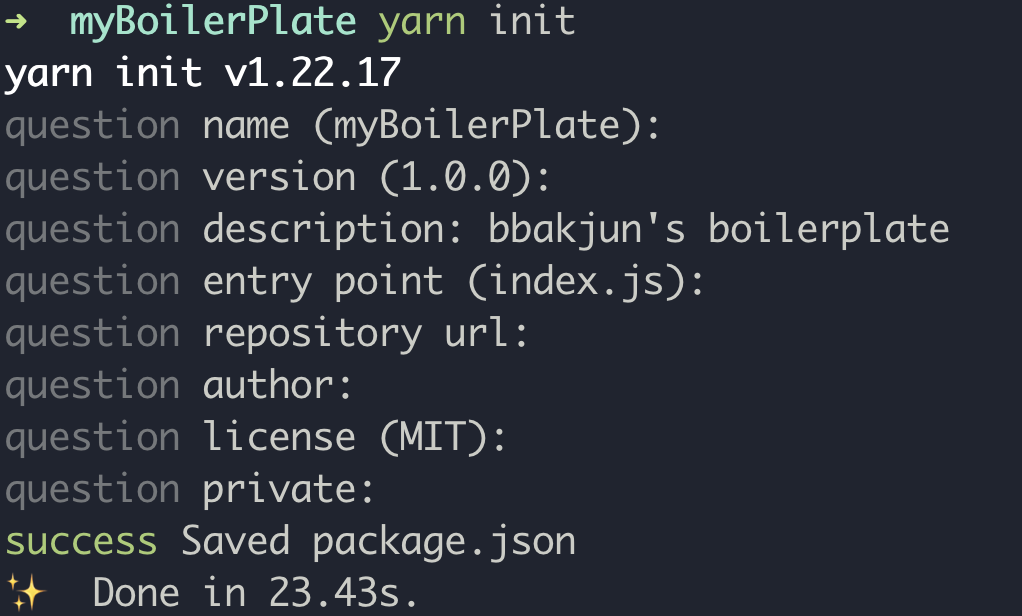
이제 진짜 시작
일단 프로젝트부터 만들어주자 (본인은 npm보다 yarn을 선호한다)
22.04.21 기준으로 Next에서 React18버젼을 완벽히 지원하지 않으니 17버젼을 사용한다
yarn add react@17.0.2 react-router react-router-dom next react-dom
yarn add --dev typescript @types/react @types/node
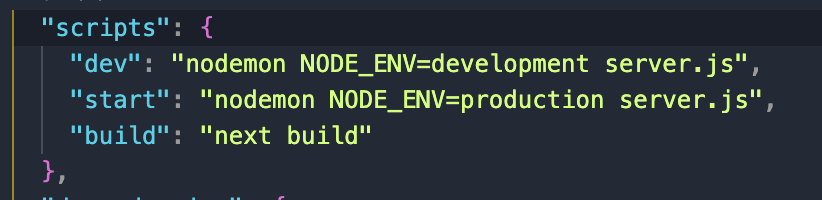
스크립트도 작성해준다
next 커스텀 서버를 사용할거고 nodemon 을 사용해줄거기 때문에 전역으로 설치후
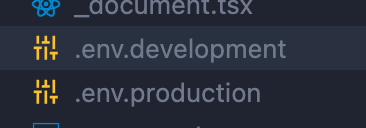
환경차이를 준다.
- 개발 버전 : development
- 배포 버전 : production
그후에 환경변수 파일을 넣어주자 (지금은 빈파일)
디렉토리를 잡아주기전에 TypeScript 설정을 해주자
tsc --init 명령어는 전역으로 타입스크립트가 설치되면 사용할수있다.
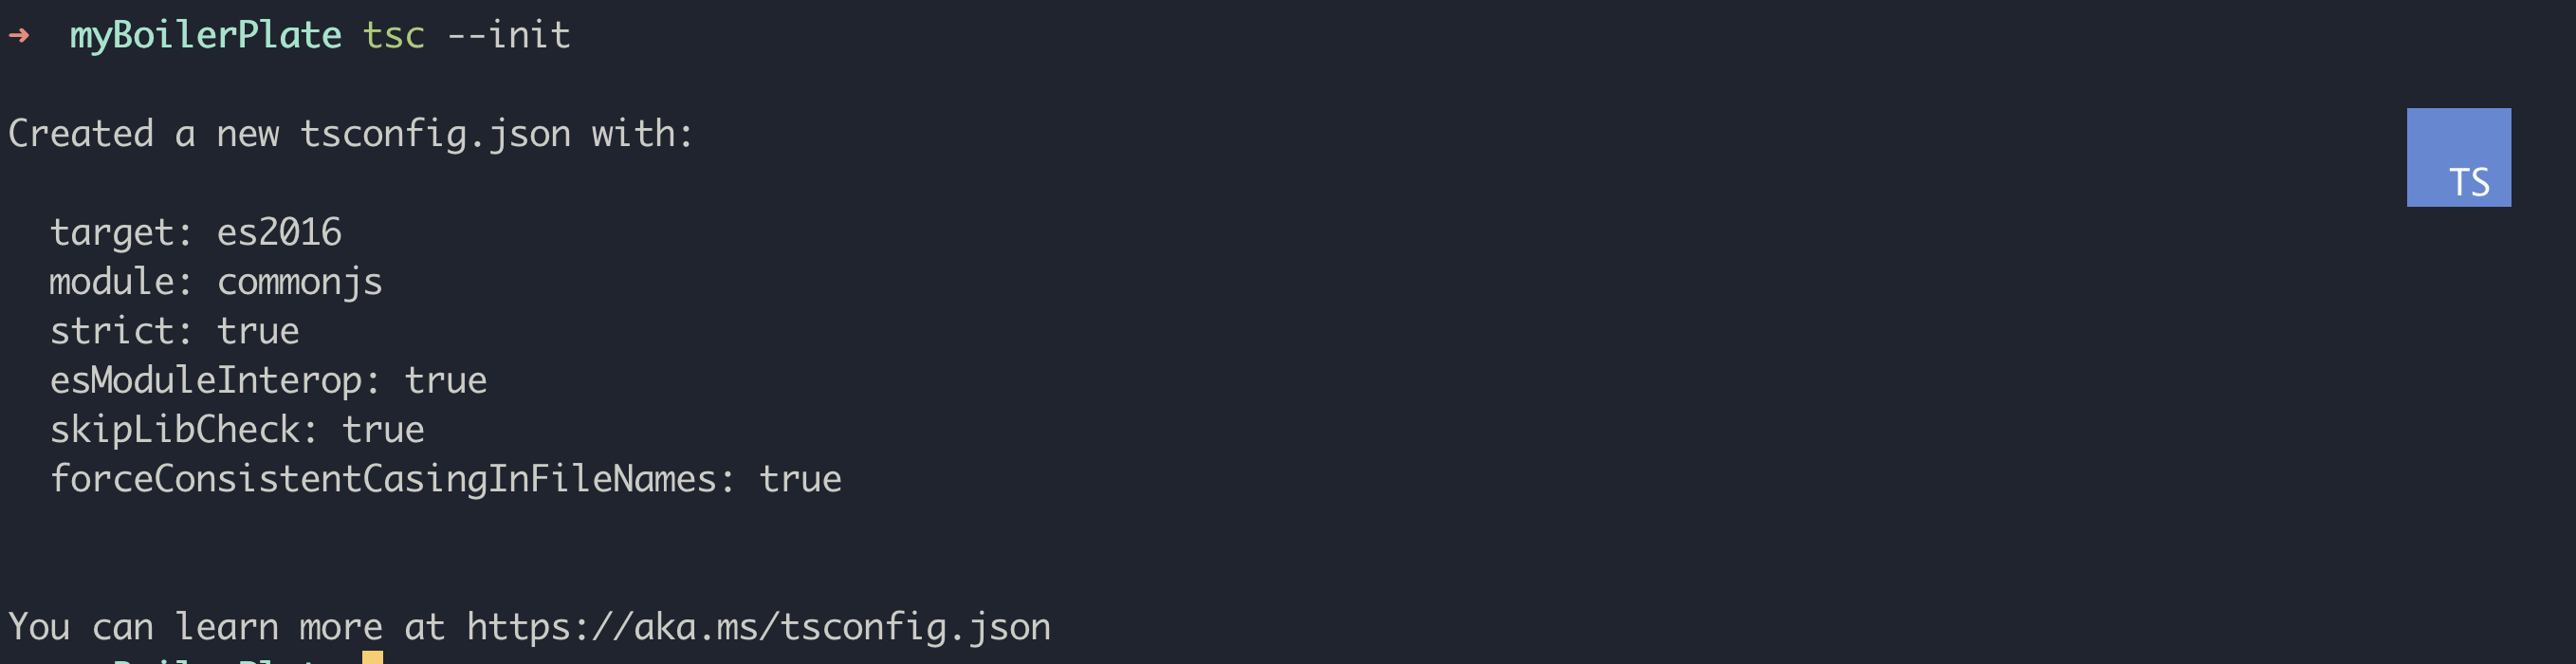
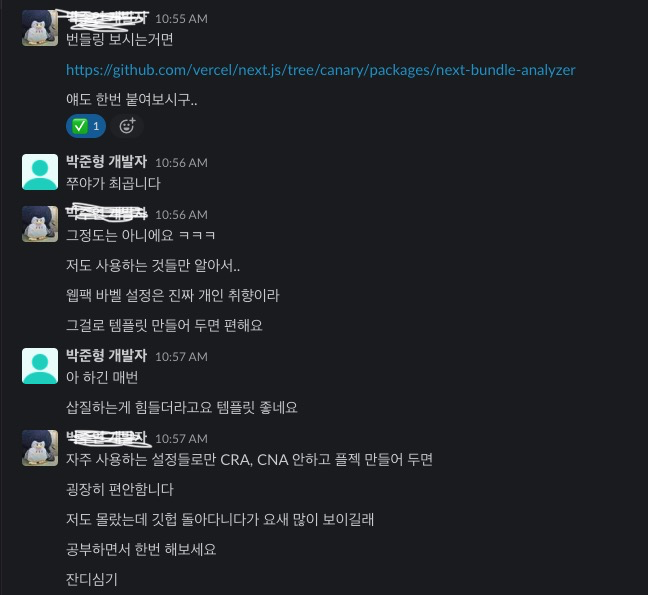
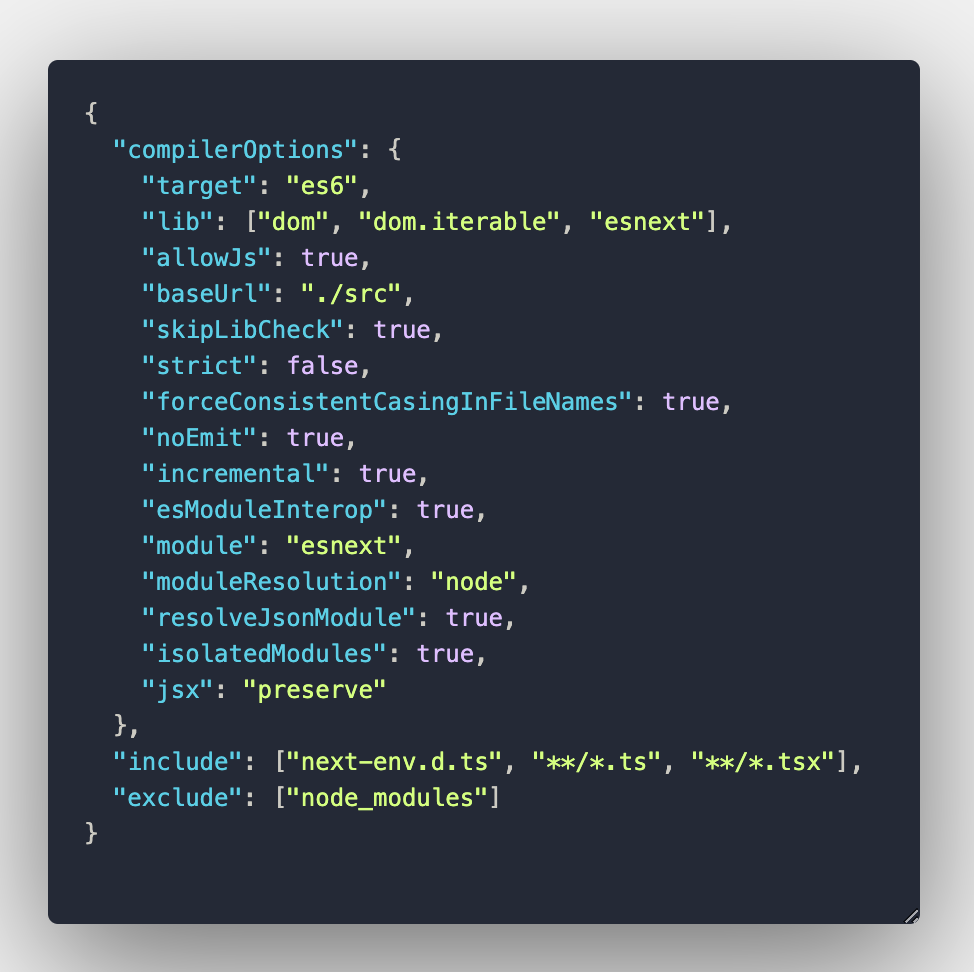
내가 자주 사용하는 설정이다.
./src 를 사용하여 절대경로를 넣어주는게 편하다
_app.tsx 는 next 어플리케이션이 돌아갈때 가장 먼저 실행되는 파일로 알고있다
context API를 사용할때는 _app.tsx에 계층을 쌓아주는게 좋다
_app.tsx -> _document.tsx 순서로 알고있음!
글로벌 스타일링도 여기서!
./src/pages/_app.tsx
import * as React from "react";
import { AppProps } from "next/app";

export default function MyApp({ Component, pageProps }: AppProps) {
  return <Component {...pageProps} />;
}
./src/pages/_document.tsx
import Document, { DocumentContext, Html, Head, Main, NextScript } from 'next/document';

export default class MyDocument extends Document {
	static async getInitialProps(ctx: DocumentContext) {
		const originalRenderPage = ctx.renderPage;

		// Run the React rendering logic synchronously
		ctx.renderPage = () =>
			originalRenderPage({
				// Useful for wrapping the whole react tree
				enhanceApp: (App) => App,
				// Useful for wrapping in a per-page basis
				enhanceComponent: (Component) => Component,
			});

		// Run the parent `getInitialProps`, it now includes the custom `renderPage`
		const initialProps = await Document.getInitialProps(ctx);

		return initialProps;
	}
	render() {
		return (
			<Html>
				<Head />
				<body style={{ margin: 0 }}>
					<Main />
					<NextScript />
				</body>
			</Html>
		);
	}
}
Next Custom Server 공식문서
프로젝트 최상단 디렉토리에 넣어준다.
// server.js
const { createServer } = require('http');
const { parse } = require('url');
const next = require('next');

const dev = process.env.NODE_ENV !== 'production';
const hostname = 'localhost';
const port = 3000;
// when using middleware `hostname` and `port` must be provided below
const app = next({ dev, hostname, port });
const handle = app.getRequestHandler();

app.prepare().then(() => {
	createServer(async (req, res) => {
		try {
			// Be sure to pass `true` as the second argument to `url.parse`.
			// This tells it to parse the query portion of the URL.
			const parsedUrl = parse(req.url, true);
			const { pathname, query } = parsedUrl;
			if (pathname === '/') {
				await app.render(req, res, '/', query);
			} else {
				await handle(req, res, parsedUrl);
			}
		} catch (err) {
			console.error('Error occurred handling', req.url, err);
			res.statusCode = 500;
			res.end('internal server error');
		}
	}).listen(port, (err) => {
		if (err) throw err;
		console.log(`> Ready on http://${hostname}:${port}`);
	});
});
next.config.js는 JSON 파일이 아닌 일반 Node.js 모듈로서
Next.js 서버 및 빌드 단계에서 사용되며 브라우저 빌드에는 포함되지 않는다고 공식문서에 나와있다.
webpack설정을 여기서 해줄수있다
const path = require('path');
const { config } = require('dotenv');

// 번들링 모듈
// const withBundleAnalyzer = require('@next/bundle-analyzer');

const prod = process.env.NODE_ENV === 'production';

// dotenv 변수를 아래 커스텀 설정에서 사용하려고 미리 env 변수를 적용
config({
	path: path.resolve(process.cwd(), prod ? '.env.production' : '.env.development'),
});

module.exports = {
	env: {
		// 환경변수를 설정해줄수있다.
	},
    webpack(config) {
        // webpack : https://nextjs.org/docs/api-reference/next.config.js/custom-webpack-config
		return {
			...config,
			devtool: prod ? 'hidden-source-map' : 'eval',
		};
	},
};