로그인 및 회원가입 기능 개발시 보안을 위해 OAuth를 사용할 수 있다.
다음 프로젝트를 위해 미리 사용해보고 정리해보자.
카카오 로그인 공식문서와 카카오 로그인 REST API에서 OAuth2.0 로그인에 대해 자세한 내용을 볼 수 있다.
1. 카카오 개발자 페이지
1.1. 회원가입 및 로그인
Kakao Developers에 접속해 회원가입을 하고 로그인한다.
1.2. 애플리케이션 추가
카카오 개발자 기능을 사용하기 위해 애플리케이션을 추가한다.
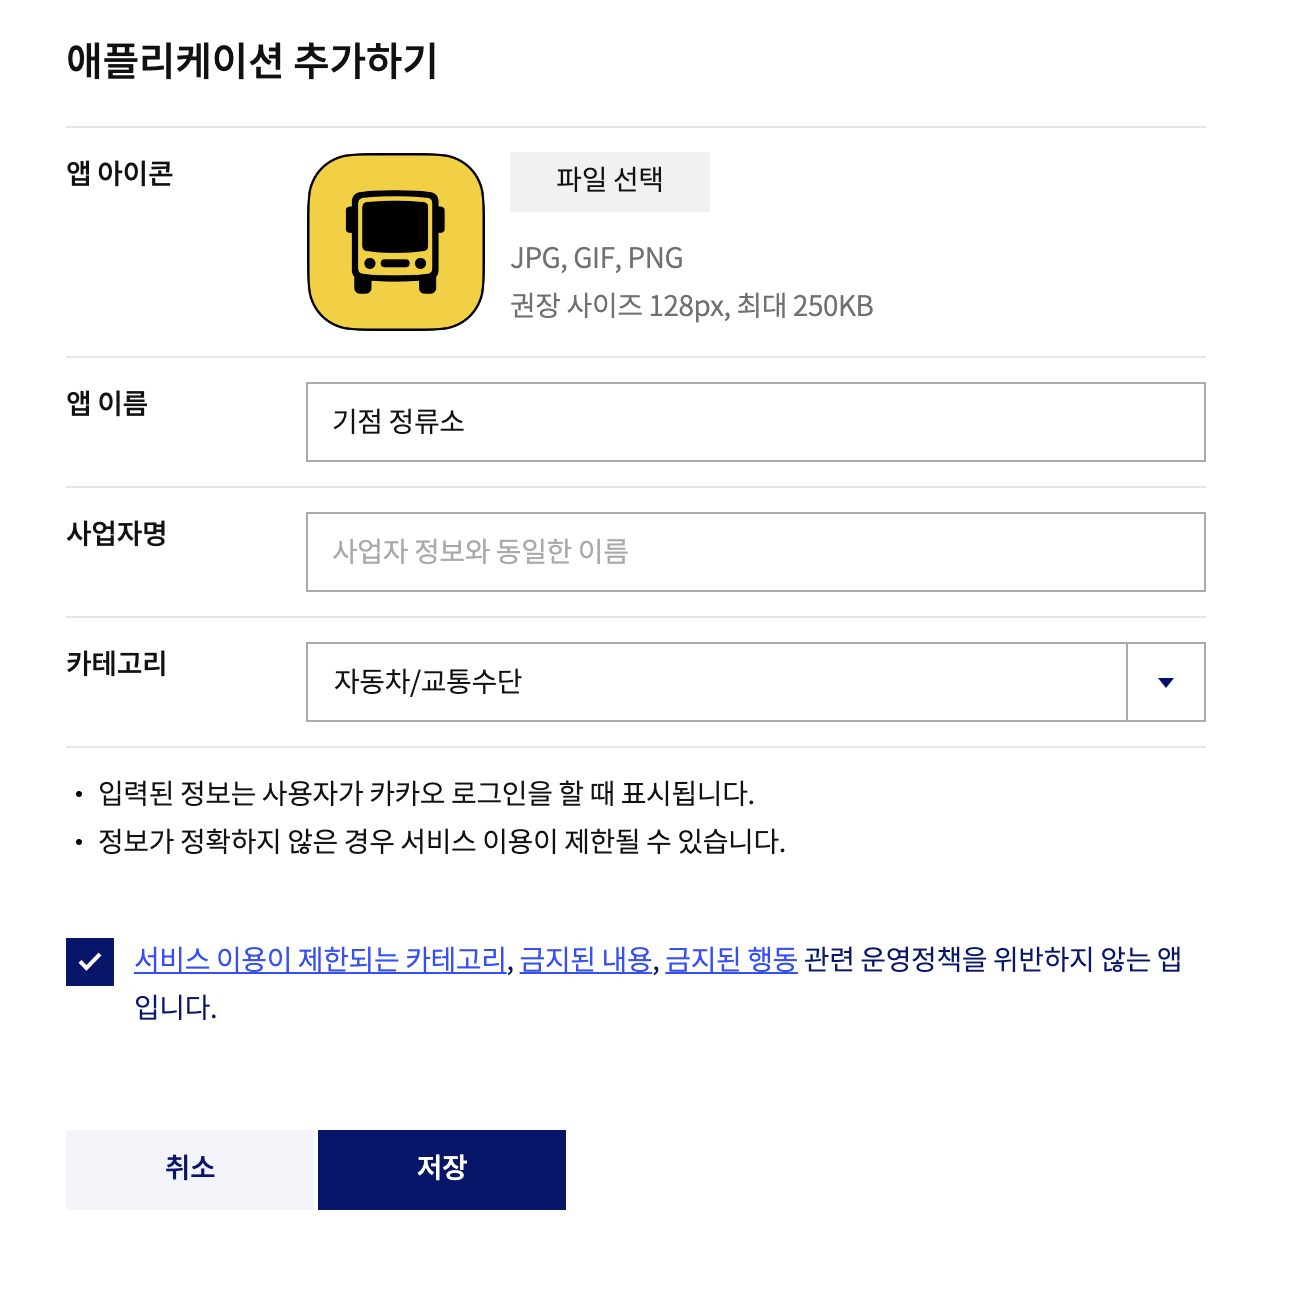
아이콘은 선택사항이며, 추후 비지니스 앱으로 전환시 아이콘은 필수다.
비지니스 앱으로 전환시 사용자의 정보를 더 요구할 수 있다.(이메일, 이름 등..)
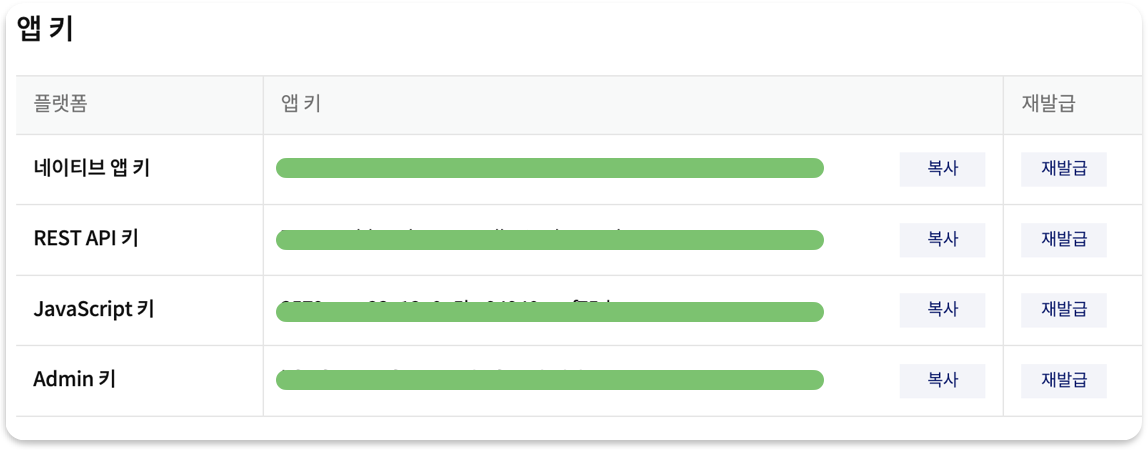
앱 설정 > 앱 키에서 Rest API 키를 확인할 수 있다.
Rest API 키가 서버에서 사용할 client_id값으로 사용된다.
1.3. 로그인 활성화 및 Redirect URI 설정

제품 설정 > 카카오 로그인에서 활성화를 설정하고 Redirect URI를 설정한다.
local 환경에서 테스트하기 위해 host와 port를 localhost와 8080으로, path는 /local/oauth2/code/kakao로 설정한다.
1.4. 보안 설정
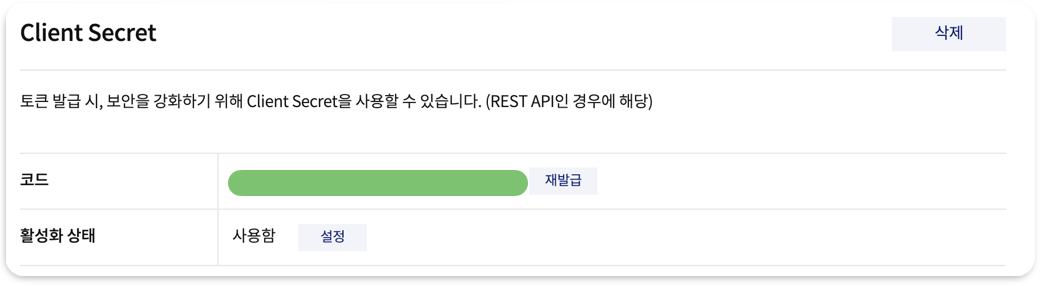
제품 설정 > 보안에서 client secret을 발급받고, 활성화 상태를 사용함으로 설정한다.
서버에서 client_secret 값으로 사용된다.
1.5. 동의항목 설정
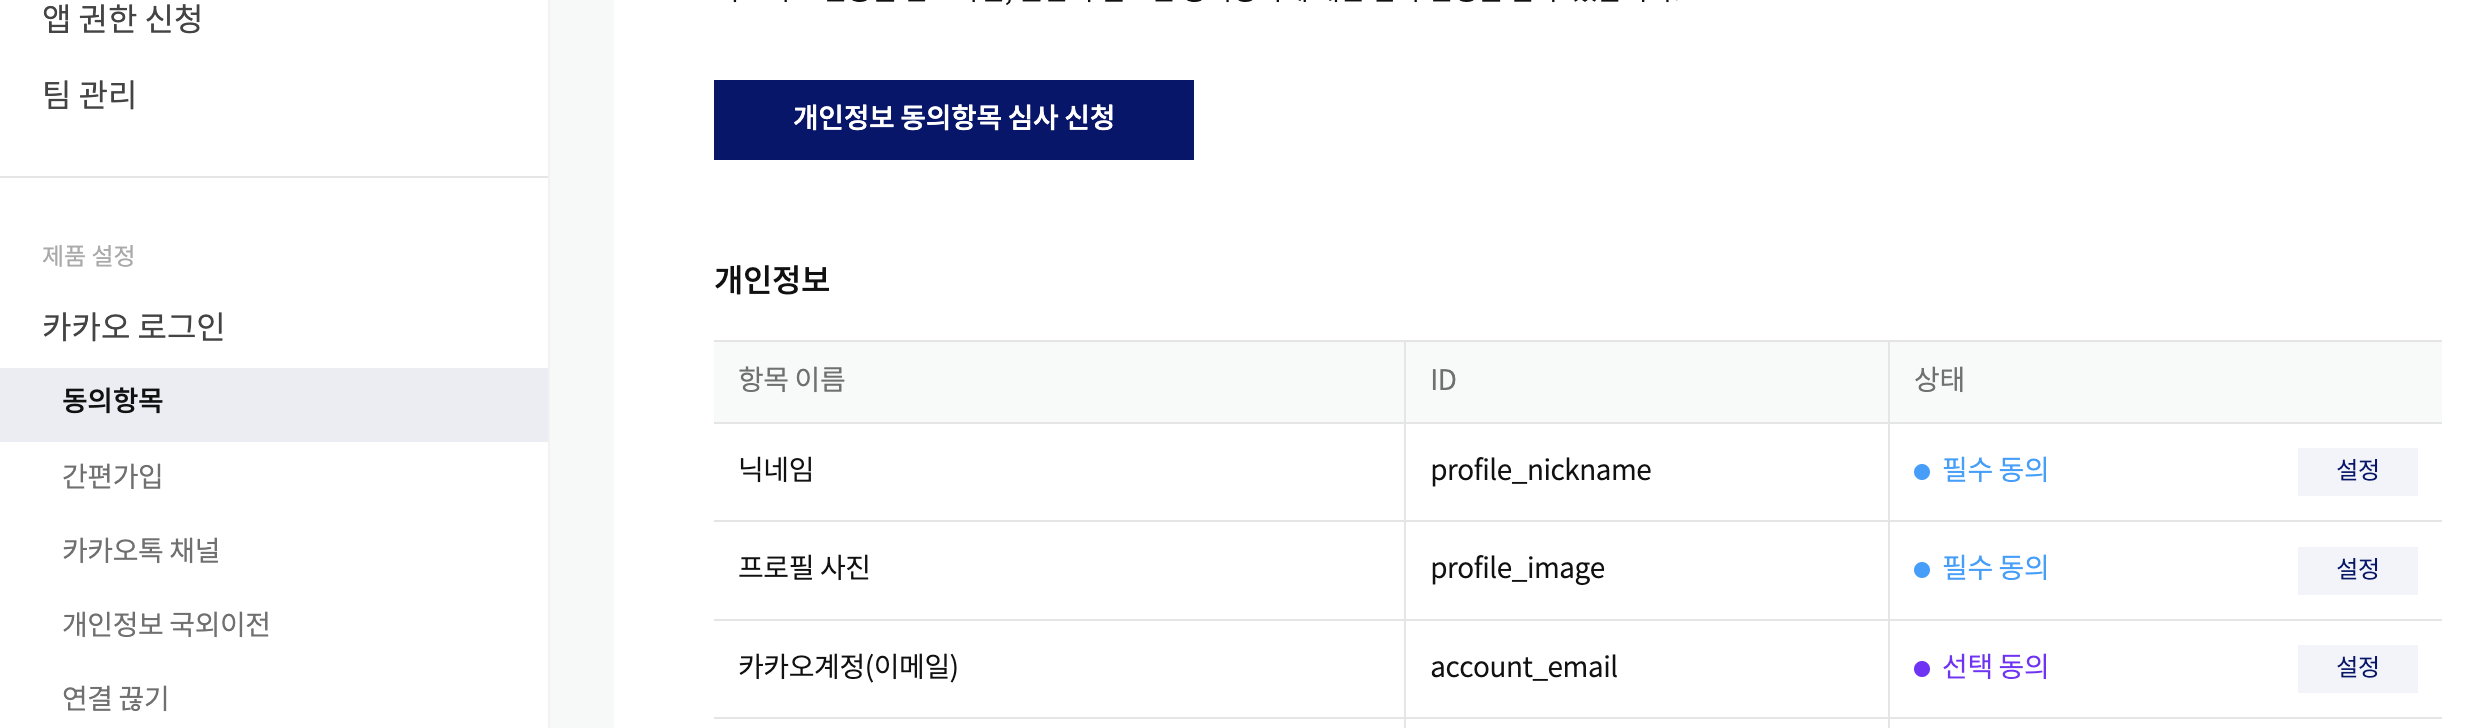
제품 설정 > 동의항목에서 필수 동의 항목과 선택 동의 항목을 설정한다.
닉네임과 프로필 사진은 접근 권한이 있으나 이메일, 이름 등 사용자의 정보를 더 얻고싶다면 비지니스 앱으로 등록해야한다.
아이콘을 등록하면 이메일까지는 얻을 수 있지만 그 이후에는 사업장을 등록해야하더라.. 우선 이메일까지만 해보자..
2. Spring boot 설정
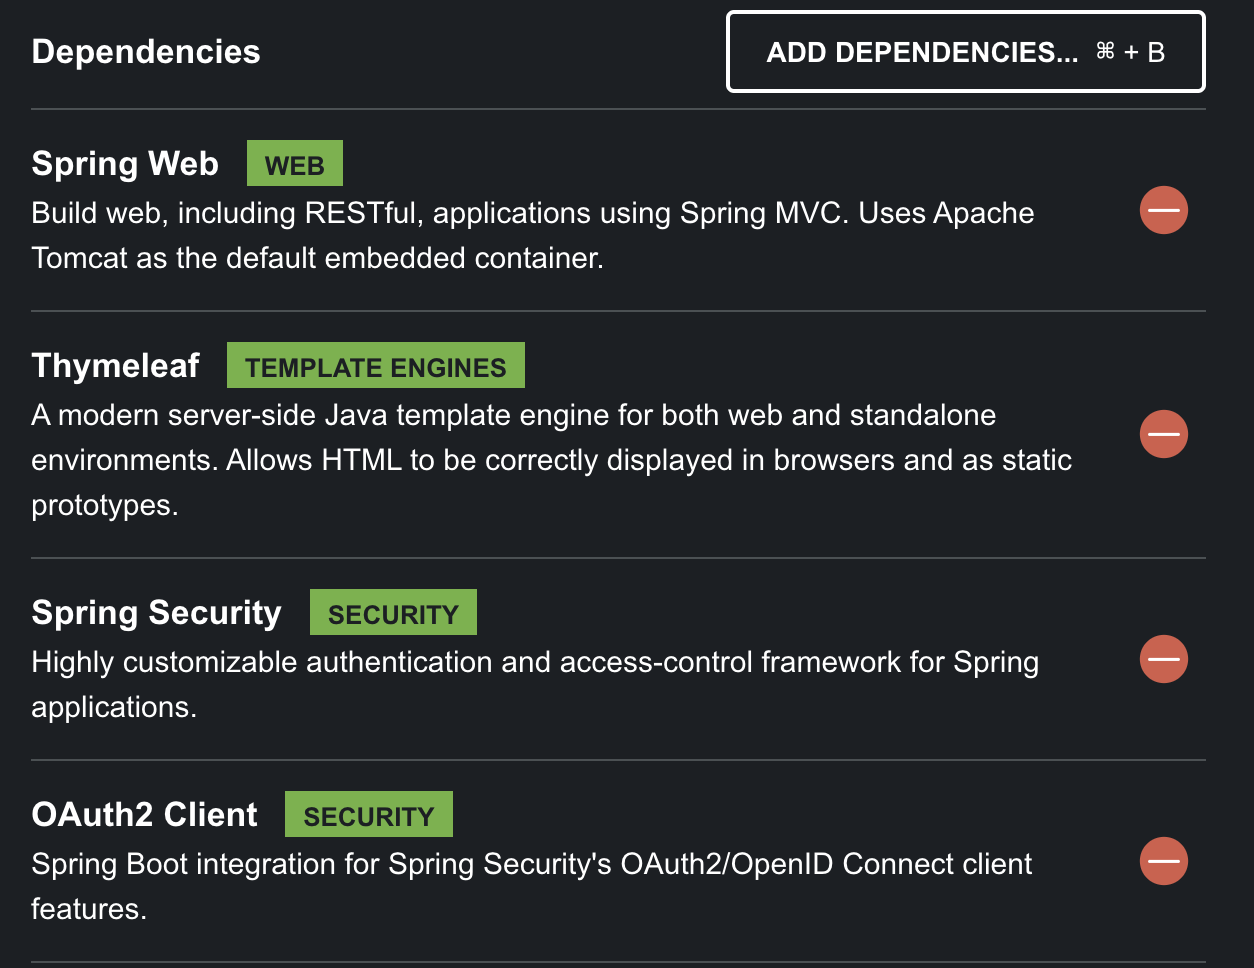
2.1. 의존성 추가
설정한 의존성은 아래와 같다.
- Spring Web
- Thymeleaf
- Spring Security
- OAuth2 Client
2.2. yml 수정
spring:
  security:
    oauth2:
      client:
        provider:
          kakao:
            authorization-uri: https://kauth.kakao.com/oauth/authorize
            token-uri: https://kauth.kakao.com/oauth/token
            user-info-uri: https://kapi.kakao.com/v2/user/me
            user-name-attribute: id
        registration:
          kakao:
            client-id: 여기에 Client Id 입력
            client-secret: 여기에 Security Id 입력
            client-authentication-method: client_secret_post
            redirect-uri: https://localhost:8080/login/oauth2/code/kakao
            authorization-grant-type: authorization_code
            client-name: kakao
            scope:
              - profile_nickname
              - profile_image
              - account_email(필요시 동의항목에서 설정한 ID 임력)
client-id와 security-id, redirect-uri를 개발자 페이지에서 설정한 것과 같은 값으로 설정하면 된다.
마지막 scope 값은 동의항목에서 필수 또는 선택으로 설정한 항목의 ID를 입력하면 된다.
비지니스 앱을 등록한 경우 profile 외의 다른 값들을 요청할 수 있다.
2.3. 로그인 페이지 렌더링: Contoller와 html

LoginContoller.java와 login.html 파일을 생성한다.
html파일의 경우 src/main/resources/templates 디렉토리에 생성한다.
카카오 로그인을 클릭시 /oauth2/autorization/kakao로 요청을 보내게 된다.
이는 OAuth2 Client 의존성 기본 설정 경로이며, 필요시 수정할 수 있다.
2.4. Service
package com.oauth_kakao.service;

import org.springframework.security.core.GrantedAuthority;
import org.springframework.security.core.authority.AuthorityUtils;
import org.springframework.security.oauth2.client.userinfo.DefaultOAuth2UserService;
import org.springframework.security.oauth2.client.userinfo.OAuth2UserRequest;
import org.springframework.security.oauth2.core.OAuth2AuthenticationException;
import org.springframework.security.oauth2.core.user.DefaultOAuth2User;
import org.springframework.security.oauth2.core.user.OAuth2User;
import org.springframework.stereotype.Service;
import java.util.List;

@Service
public class OAuth2UserService extends DefaultOAuth2UserService {
    @Override
    public OAuth2User loadUser(OAuth2UserRequest userRequest) throws OAuth2AuthenticationException {
        OAuth2User oAuth2User = super.loadUser(userRequest);

        // Role generate
        List<GrantedAuthority> authorities = AuthorityUtils.createAuthorityList("ROLE_ADMIN");

        // nameAttributeKey
        String userNameAttributeName = userRequest.getClientRegistration()
                .getProviderDetails()
                .getUserInfoEndpoint()
                .getUserNameAttributeName();

        // DB 저장로직이 필요하면 추가

        return new DefaultOAuth2User(authorities, oAuth2User.getAttributes(), userNameAttributeName);
    }
}
OAuth2UserService 클래스를 생성한다.(DefaultOAuth2UserService 클래스 상속)
package com.oauth_kakao.security;

import com.oauth_kakao.service.OAuth2UserService;
import org.springframework.context.annotation.Bean;
import org.springframework.context.annotation.Configuration;
import org.springframework.http.MediaType;
import org.springframework.security.config.annotation.method.configuration.EnableMethodSecurity;
import org.springframework.security.config.annotation.web.builders.HttpSecurity;
import org.springframework.security.oauth2.core.user.DefaultOAuth2User;
import org.springframework.security.web.SecurityFilterChain;
import org.springframework.security.web.authentication.AuthenticationSuccessHandler;
import java.io.PrintWriter;
import java.nio.charset.StandardCharsets;

@Configuration
@EnableMethodSecurity
public class SecurityConfig {
    private final OAuth2UserService oAuth2UserService;

    public SecurityConfig(OAuth2UserService oAuth2UserService) {
        this.oAuth2UserService = oAuth2UserService;
    }

    @Bean
    public SecurityFilterChain securityFilterChain(HttpSecurity http) throws Exception {
        http.csrf().disable();
        http.authorizeHttpRequests(config -> config.anyRequest().permitAll());
        http.oauth2Login(oauth2Configurer -> oauth2Configurer
                .loginPage("/login")
                .successHandler(successHandler())
                .userInfoEndpoint()
                .userService(oAuth2UserService));

        return http.build();
    }

    @Bean
    public AuthenticationSuccessHandler successHandler() {
        return ((request, response, authentication) -> {
            DefaultOAuth2User defaultOAuth2User = (DefaultOAuth2User) authentication.getPrincipal();

            String id = defaultOAuth2User.getAttributes().get("id").toString();
            String body = """
                    {"id":"%s"}
                    """.formatted(id);

            response.setContentType(MediaType.APPLICATION_JSON_VALUE);
            response.setCharacterEncoding(StandardCharsets.UTF_8.name());

            PrintWriter writer = response.getWriter();
            writer.println(body);
            writer.flush();
        });
    }
}
Security config를 작성한다.
로그인 페이지를 /login으로 설정하고, 정상 실행시 id를 반환한다.
2.5. 실행
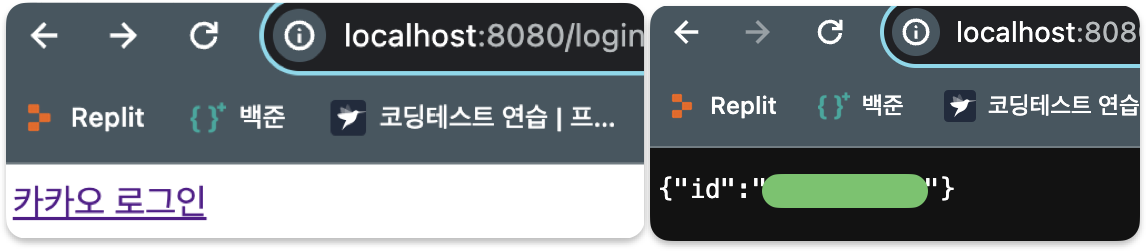
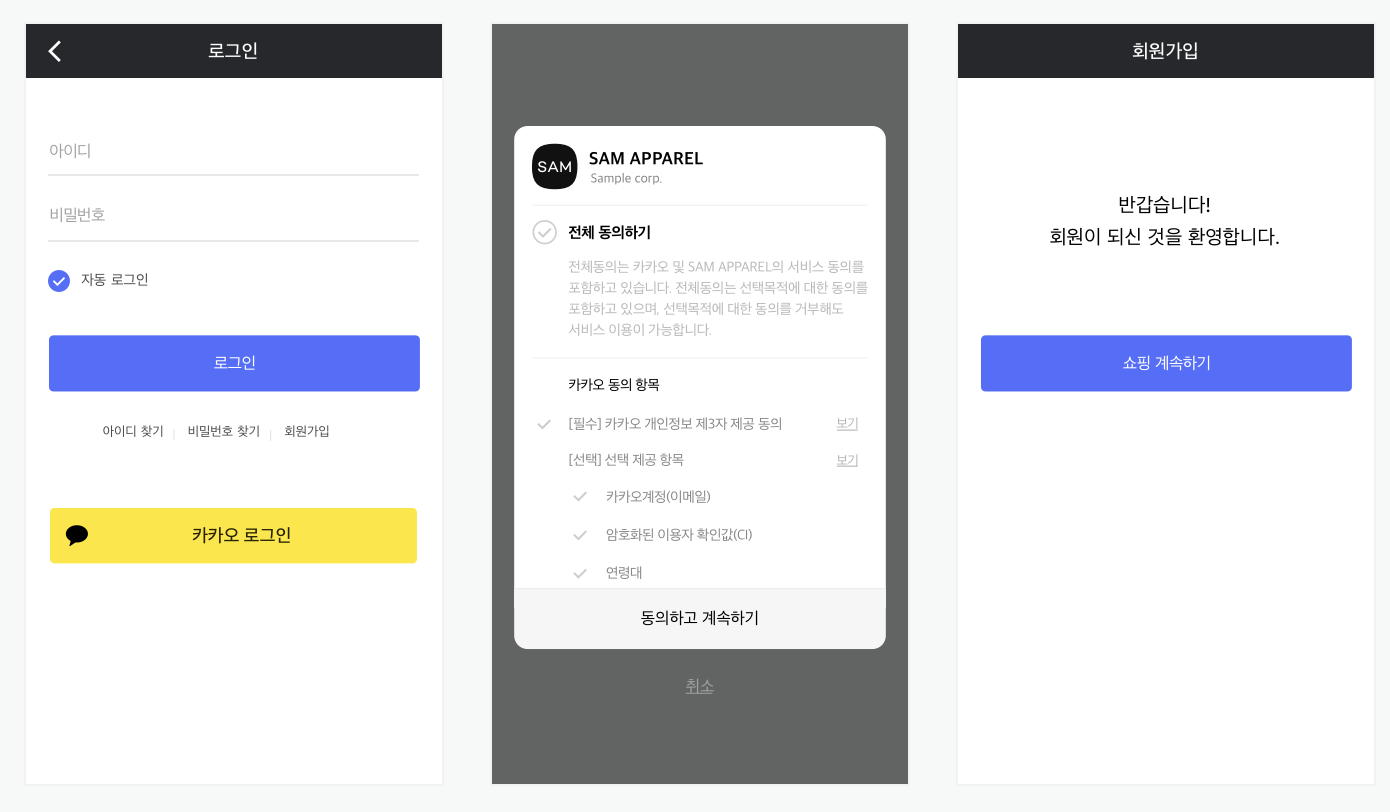
localhost:8080/login 접속시 왼쪽과 같은 창이 출력된다.
카카오 로그인 클릭후 로그인 하게 되면 우측과 같이 id값이 반환된다.
참고자료
카카오 로그인 공식문서
Spring Boot 3.x 버전에서 OAuth2 라이브러리를 이용하여 카카오 로그인 구현 및 OAuth2 동작원리 살펴보기
[Spring Boot] 카카오 OAuth2.0 구현하기

안녕하세요 작성하신 글 잘 보았습니다.
다만 걱정되는 부분이 깃허브에 들어가서 예시코드를 보았는데 secretKey 와 ID 가 노출되는 것 같습니다.
커밋 히스토리에도 남는 부분이라 레포지토리를 삭제 후 다시 만드시면 좋을 것 같습니다.