개요
텍스트 CAPTCHA를 풀기 위해 오픈 소스를 찾던 중 가장 가이드가 자세히 나와있는 Keras의 OCR 모델을 사용해보기로 했다. (해당 가이드 사이트)
자세히 나와있는 소스 코드를 그대로 따라하면 되기에 모델 구현은 아주 순조로웠다.
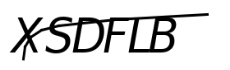
해당 가이드에서 사용하는 데이터 셋은 많은 분들이 사용하는 captcha 이미지 파일들이었고 해당 captcha는 소문자 알파벳과 숫자들의 조합이었다. 하지만 내가 풀기 원하는 captcha는 대문자 알파벳으로만 이루어져 있었기 때문에 타겟 captcha로 훈련용 데이터 셋을 만들기로 했다. 가이드에서 사용한 데이터 셋과 마찬가지로 총 1040개의 이미지를 모았고 하나 하나 직접 라벨링을 진행했다.
훈련 모델
ocrTrain.py
import os
import numpy as np
import matplotlib.pyplot as plt
from glob import glob
import tensorflow as tf
from tensorflow import keras
from keras import layers

# Preview Dataset
img_list = glob('dataset/*.png')

# PreProcessing
imgs = []
labels = []
max_length = 0

for img_path in img_list:
  imgs.append(img_path)

  label = os.path.splitext(os.path.basename(img_path))[0]
  labels.append(label)

  if len(label) > max_length:
    max_length = len(label)

#print(len(imgs), len(labels), max_length)

characters = sorted(list(set([char for label in labels for char in label])))
#print(characters)

# Encode Labels
char_to_num = layers.experimental.preprocessing.StringLookup(
    vocabulary=list(characters), num_oov_indices=0, mask_token=None
)

num_to_char = layers.experimental.preprocessing.StringLookup(
    vocabulary=char_to_num.get_vocabulary(), num_oov_indices=0, mask_token=None, invert=True
)

# Split Dataset
from sklearn.model_selection import train_test_split

x_train, x_val, y_train, y_val = train_test_split(imgs, labels, test_size=0.1, random_state=2021)

# Create Data Generator
img_width = 280
img_height = 80

def encode_single_sample(img_path, label):
  # 1. Read image
  img = tf.io.read_file(img_path)
  # 2. Decode and convert to grayscale
  img = tf.io.decode_png(img, channels=1)
  # 3. Convert to float32 in [0, 1] range
  img = tf.image.convert_image_dtype(img, tf.float32)
  # 4. Resize to the desired size
  img = tf.image.resize(img, [img_height, img_width])
  # 5. Transpose the image because we want the time
  # dimension to correspond to the width of the image.
  img = tf.transpose(img, perm=[1, 0, 2])
  # 6. Map the characters in label to numbers
  label = char_to_num(tf.strings.unicode_split(label, input_encoding='UTF-8'))
  # 7. Return a dict as our model is expecting two inputs
  return {'image': img, 'label': label}

batch_size = 32

train_dataset = tf.data.Dataset.from_tensor_slices((x_train, y_train))
train_dataset = (
    train_dataset.map(
        encode_single_sample, num_parallel_calls=tf.data.experimental.AUTOTUNE
    )
    .batch(batch_size)
    .prefetch(buffer_size=tf.data.experimental.AUTOTUNE)
)

validation_dataset = tf.data.Dataset.from_tensor_slices((x_val, y_val))
validation_dataset = (
    validation_dataset.map(
        encode_single_sample, num_parallel_calls=tf.data.experimental.AUTOTUNE
    )
    .batch(batch_size)
    .prefetch(buffer_size=tf.data.experimental.AUTOTUNE)
)

# Model
class CTCLayer(layers.Layer):
    def __init__(self, name=None, **kwargs):
        super().__init__(name=name, **kwargs)
        self.loss_fn = keras.backend.ctc_batch_cost

    def call(self, y_true, y_pred):
        # Compute the training-time loss value and add it
        # to the layer using `self.add_loss()`.
        batch_len = tf.cast(tf.shape(y_true)[0], dtype='int64')
        input_length = tf.cast(tf.shape(y_pred)[1], dtype='int64')
        label_length = tf.cast(tf.shape(y_true)[1], dtype='int64')

        input_length = input_length * tf.ones(shape=(batch_len, 1), dtype='int64')
        label_length = label_length * tf.ones(shape=(batch_len, 1), dtype='int64')

        loss = self.loss_fn(y_true, y_pred, input_length, label_length)
        self.add_loss(loss)

        # At test time, just return the computed predictions
        return y_pred

    def get_config(self):
        config = super(CTCLayer, self).get_config()
        config.update({"name":self.name})
        return config

def build_model():
    # Inputs to the model
    input_img = layers.Input(
        shape=(img_width, img_height, 1), name='image', dtype='float32'
    )
    labels = layers.Input(name='label', shape=(None,), dtype='float32')

    # First conv block
    x = layers.Conv2D(
        32,
        (3, 3),
        activation='relu',
        kernel_initializer='he_normal',
        padding='same',
        name='Conv1',
    )(input_img)
    x = layers.MaxPooling2D((2, 2), name='pool1')(x)

    # Second conv block
    x = layers.Conv2D(
        64,
        (3, 3),
        activation='relu',
        kernel_initializer='he_normal',
        padding='same',
        name='Conv2',
    )(x)
    x = layers.MaxPooling2D((2, 2), name='pool2')(x)

    # We have used two max pool with pool size and strides 2.
    # Hence, downsampled feature maps are 4x smaller. The number of
    # filters in the last layer is 64. Reshape accordingly before
    # passing the output to the RNN part of the model
    new_shape = ((img_width // 4), (img_height // 4) * 64)
    x = layers.Reshape(target_shape=new_shape, name='reshape')(x)
    x = layers.Dense(64, activation='relu', name='dense1')(x)
    x = layers.Dropout(0.2)(x)

    # RNNs
    x = layers.Bidirectional(layers.LSTM(128, return_sequences=True, dropout=0.25))(x)
    x = layers.Bidirectional(layers.LSTM(64, return_sequences=True, dropout=0.25))(x)

    # Output layer
    x = layers.Dense(
        len(char_to_num.get_vocabulary()) + 1, activation='softmax', name='dense2'
    )(x)

    # Add CTC layer for calculating CTC loss at each step
    output = CTCLayer(name='ctc_loss')(labels, x)

    # Define the model
    model = keras.models.Model(
        inputs=[input_img, labels], outputs=output, name='ocr_model_v1'
    )
    # Optimizer
    opt = keras.optimizers.Adam()
    # Compile the model and return
    model.compile(optimizer=opt)
    return model

# Get the model
model = build_model()

# Train
early_stopping = keras.callbacks.EarlyStopping(
    monitor='val_loss', patience=20, restore_best_weights=True
)

history = model.fit(
    train_dataset,
    validation_data=validation_dataset,
    epochs=100,
    callbacks=[early_stopping],
)

# Test Inference
prediction_model = keras.models.Model(
  model.get_layer(name='image').input, model.get_layer(name='dense2').output
)

# Save model
prediction_model.save('./model/model_save_test')

def decode_batch_predictions(pred):
    input_len = np.ones(pred.shape[0]) * pred.shape[1]
    # Use greedy search. For complex tasks, you can use beam search
    results = keras.backend.ctc_decode(pred, input_length=input_len, greedy=True)[0][0][
        :, :max_length
    ]
    # Iterate over the results and get back the text
    output_text = []
    for res in results:
        res = tf.strings.reduce_join(num_to_char(res)).numpy().decode('utf-8')
        output_text.append(res)
    return output_text

for batch in validation_dataset.take(1):
    batch_images = batch['image']
    print(batch_images.dtype)

    preds = prediction_model.predict(batch_images)
    pred_texts = decode_batch_predictions(preds)

    _, axes = plt.subplots(8, 4, figsize=(16, 12))

    for img, text, ax in zip(batch_images, pred_texts, axes.flatten()):
        img = img.numpy().squeeze()
        img = img.T

        ax.imshow(img, cmap='gray')
        ax.set_title(text)
        ax.set_axis_off()
plt.show()
여기서 중요한 점은 윗 부분의 chracters 이다. 이 부분은 캡챠의 Label 범위라고 생각하면 된다. 내가 사용한 캡챠 데이터의 경우는 대문자 알파벳으로만 이루어져있기 때문에 A ~ Z 인 것인데, 훈련과 실제 사용 당시의 문자 순서가 다르지 않도록 정렬이 반드시 필요하다.
위 코드대로 진행하면 100번의 훈련을 거치고 "model_save_test"라는 이름으로 OCR 모델을 저장하게 된다.
Captcha solver
captchaSolver.py
import numpy as np
import tensorflow as tf
from glob import glob
from tensorflow import keras
from keras import layers
from keras.models import load_model
from PIL import Image

max_length = 6
characters = sorted({'A', 'B', 'C', 'D', 'E', 'F', 'G', 'H', 'I', 'J', 'K', 'L', 'M', 'N', 'O', 'P', 'Q', 'R', 'S', 'T', 'U', 'V', 'W', 'X', 'Y' ,'Z'})

# Encode Labels
char_to_num = layers.experimental.preprocessing.StringLookup(
    vocabulary=list(characters), num_oov_indices=0, mask_token=None
)

num_to_char = layers.experimental.preprocessing.StringLookup(
    vocabulary=char_to_num.get_vocabulary(), num_oov_indices=0, mask_token=None, invert=True
)

lodedmodel = load_model('./model/model_save_test')

def decode_batch_predictions(pred):
    input_len = np.ones(pred.shape[0]) * pred.shape[1]
    # Use greedy search. For complex tasks, you can use beam search
    results = keras.backend.ctc_decode(pred, input_length=input_len, greedy=True)[0][0][
        :, :max_length
    ]
    # Iterate over the results and get back the text
    output_text = []
    for res in results:
        res = tf.strings.reduce_join(num_to_char(res)).numpy().decode('utf-8')
        output_text.append(res)
    return output_text

def predit(cap_img) :
    img = tf.io.read_file(glob(cap_img)[0])
    img = tf.io.decode_png(img, channels=1)
    img = tf.image.convert_image_dtype(img, tf.float32)
    img = tf.image.resize(img, [80, 280])
    img = tf.transpose(img, perm=[1, 0, 2])
    target = tf.expand_dims(img, 0)

    preds = lodedmodel.predict(target)
    return str(decode_batch_predictions(preds)[0])
위 코드중 max_length는 데이터 Label의 최대 길이이고 characters는 훈련 모델에서 설명한대로 데이터셋의 Label 문자 범위이다. 나같은 경우 캡챠의 문자 길이가 최대 6자리이고 문자 범위는 A ~ Z 인 셈이다.
해당 값들은 훈련 모델처럼 트레이닝 데이터파일을 통해 생성해도 되지만 변하지 않는 값이기 때문에 성능을 위해 하드코딩한 것이다.
따라서 실제 캡챠 예측 시에는 위 모듈중 predict()를 호출하면 되는 것이다.
테스트
captchaTest.py
import captchaSolver

print(captchaSolver.predit('capImg.png'))
위의 captchaSolver.py를 임포트하고 저장된 이미지를 파라미터로 사용해 predict()를 호출하면 된다.

안녕하세요. 올려주신 코드 똑같이 실행해 봤는데, 저는 훈련 후 모델 테스트에서도 모든 이미지 해독값을 [UNK][UNK][UNK][UNK][UNK] 라고 인식합니다... 왜 그런걸까요?ㅜ 그리고 마지막에
for batch in test_dataset.take(1):
preds = lodedmodel.predict(batch['image'])
preds_texts = decode_batch_predictions(preds)
lodedmodel --> newmodel 오타로 보여집니다^^