QuickStart for Github Actions
# Using workflow templates
- 제공되는 워크플로우 템플릿 종류
CI: 지속적 통합 워크플로우Deployments: 배포 워크플로우Automation: 자동화 워크플로우Code Scanning: 코드 스캐닝 워크플로우Pages: Pages 워크플로우
# Creating yout first workflow
github/workflows디렉토리에github-actions-demo.yml파일을 생성함- Yaml형식으로 워크플로우 정의
- push 이벤트 발생 시 실행되는 기본 워크플로우
name: GitHub Actions Demo
run-name: ${{ github.actor }} is testing out GitHub Actions 🚀
on: [push]
jobs:
  Explore-GitHub-Actions:
    runs-on: ubuntu-latest
    steps:
      - run: echo "🎉 The job was automatically triggered by a ${{ github.event_name }} event."
      - run: echo "🐧 This job is now running on a ${{ runner.os }} server hosted by GitHub!"
      - run: echo "🔎 The name of your branch is ${{ github.ref }} and your repository is ${{ github.repository }}."
      - name: Check out repository code
        uses: actions/checkout@v4
      - run: echo "💡 The ${{ github.repository }} repository has been cloned to the runner."
      - run: echo "🖥️ The workflow is now ready to test your code on the runner."
      - name: List files in the repository
        run: |
          ls ${{ github.workspace }}
      - run: echo "🍏 This job's status is ${{ job.status }}."
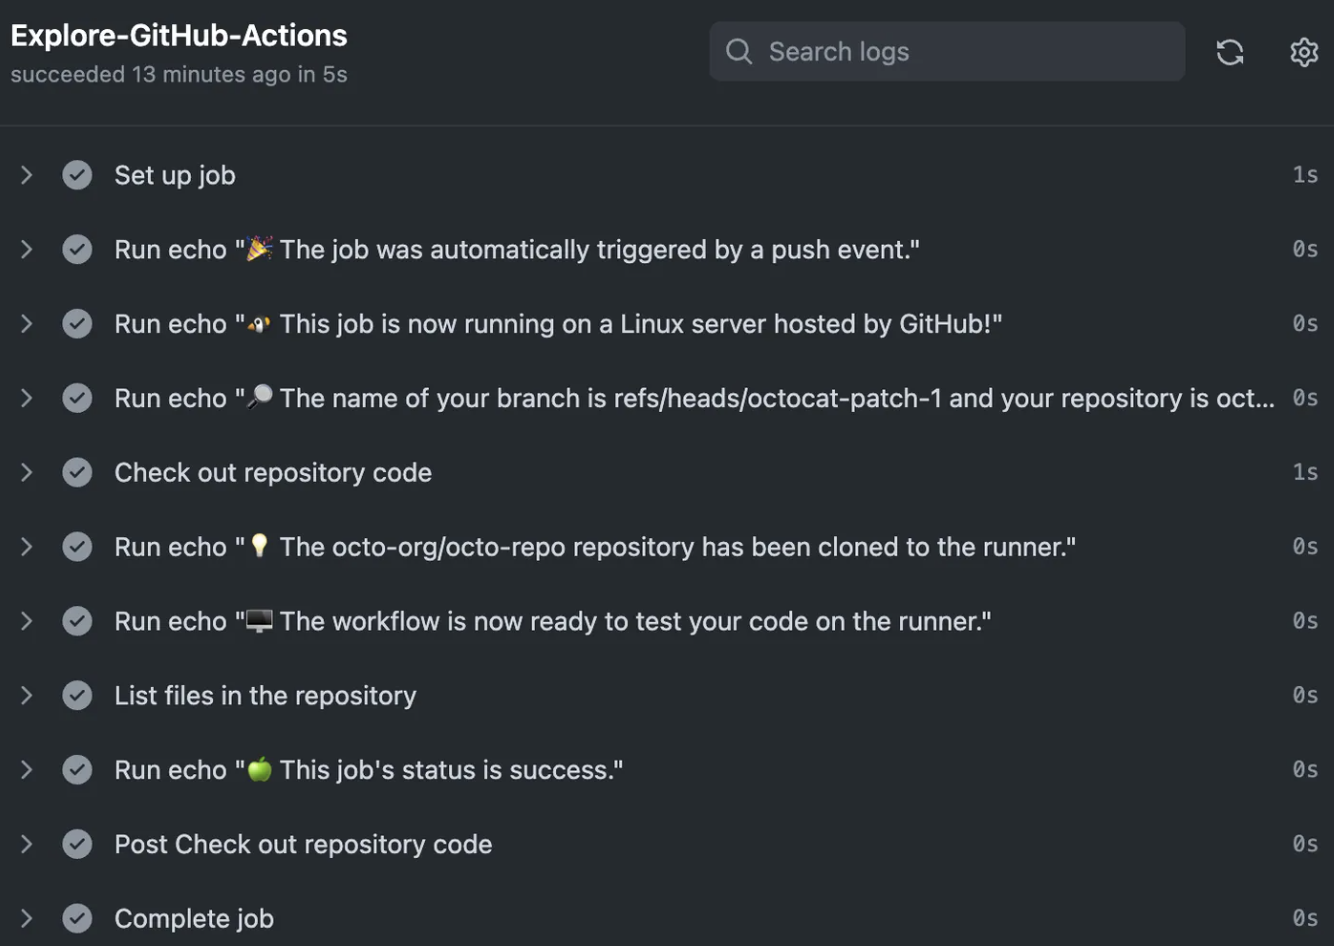
github 폴더에서 해당 yml을 작업해서 올리면 위와 같이 actions가 실행되는 것을 볼 수 있다.
워크플로우 코드
- 워크플로우 기본 설정
name : Github Actions Demo # 워크 플로우 이름
run-name : ${{ guthub.actor }} is testing out Github Actions
# ㄴ 실행될 때 표시될 이름(github.actor : 실행한 사람)
on : [push] # 트리거 조건: push이벤트가 발생할 때마다 실행- 작업 정의
jobs:
	Explore-Github-Actions: #작업이름
runs-on: ubuntu-latest #Ubuntu 최신 버전에서 실행- 실행 단계_Steps
steps:
  # 1단계: 이벤트 정보 출력
  - run: echo "🎉 The job was automatically triggered by a ${{ github.event_name }} event."

  # 2단계: 실행 환경 정보 출력
  - run: echo "🐧 This job is now running on a ${{ runner.os }} server hosted by GitHub!"

  # 3단계: 브랜치와 저장소 정보 출력
  - run: echo "🔎 The name of your branch is ${{ github.ref }} and your repository is ${{ github.repository }}."

  # 4단계: 저장소 코드 체크아웃 (중요!)
  - name: Check out repository code
    uses: actions/checkout@v4            # GitHub 제공 액션 사용

  # 5-6단계: 체크아웃 완료 메시지
  - run: echo "💡 The ${{ github.repository }} repository has been cloned to the runner."
  - run: echo "🖥️ The workflow is now ready to test your code on the runner."

  # 7단계: 저장소 파일 목록 출력
  - name: List files in the repository
    run: |
      ls ${{ github.workspace }}

  # 8단계: 작업 상태 출력
  - run: echo "🍏 This job's status is ${{ job.status }}."
4단계, 저장소 코드 체크아웃이 중요한 이유
: 코드 접근의 시작점이기 때문
- name: Check out repository code
uses:: actions/checkout@v4- 이 단계가 없으면 워크플로우는 저장소의 코드에 접근할 수 없음
- 즉, 실제로 테스트하거나 빌드할 코드가 없는 상태가 됨
jobs:
  build:
    runs-on: ubuntu-latest
    steps:
      # checkout 없이 바로 npm install을 실행한다면?
      - run: npm install  # ❌ 실패! package.json이 없음

      # 올바른 방법
      - uses: actions/checkout@v4  # ✅ 먼저 코드를 가져오고
- run: npm install # 그 다음 npm install 실행- checkout이 하는 일:
- 저장소의 코드를 러너(가상머신)에 다운로드
- git 히스토리 초기화
- github actions에서 사용할 수 있는 환경 변수 설정
- 코드를 특정 브랜치나 커밋으로 전환할 수 있게 함
실제 사용예시
jobs:
  test:
    runs-on: ubuntu-latest
    steps:
      # 1. 먼저 코드를 가져옴
      - uses: actions/checkout@v4

      # 2. 이제 코드 관련 작업 가능
      - name: Install dependencies
        run: npm install

      - name: Run tests
        run: npm test
Ubuntu 서버
jobs:
  Explore-GitHub-Actions:
    runs-on: ubuntu-latest
Github Actions에서 runs-on: ubuntu-latest를 사용하는 이유
1. 러너의 개념
- Github Actions의 워크플로우는 실제로 어떤 컴퓨터에서 실행됨
- 이 컴퓨터를 '러너_Runner'라고 부름
- Github는 이런 러너를 무료 제공함
- Github에서 제공하는 러너 종류
# 선택 가능한 운영체제들
runs-on: ubuntu-latest   # Ubuntu
runs-on: windows-latest  # Windows
runs-on: macos-latest # macOS- Ubuntu를 주로 사용하는 이유
- 대부분의 개발/ 배포 환경이 Linux기반이기 때문
- 오픈소스 도구들과의 호환성이 좋음
- 가볍고 빠름
- ⭐️무료 사용량⭐️이 많음
- 실제 동작과정
jobs:
  build:
    runs-on: ubuntu-latest  # GitHub가 Ubuntu 가상머신을 생성
    steps:
      - uses: actions/checkout@v4  # 이 가상머신에 코드를 내려받고
      - run: npm install          # 필요한 작업을 수행하고
      - run: npm test            # 작업이 끝나면 가상머신은 삭제됨
즉, github는 매번 새로운 가상머신을 만들어서 제공함.
작업이 끝나면 이 가상머신은 삭제되어 다음 실행 시에는 새로운 가상머신이 만들어짐

Developer Wondi