
📌 API First Design이란?
API First Design은 API를 먼저 설계하고 문서화한 후에 구현을 시작하는 접근 방식입니다. 이는 초기 단계에서 API 명세서를 중심으로 모든 이해관계자가 API의 기능, 구조, 동작 방식에 대한 명확한 합의를 이루는 것을 목표로 합니다.
기존의 개발 방식에서는 개발 전에 작성한 API 명세서와 개발된 후에 API 명세서가 요구사항의 변경사항으로 인해 문서 사이에 불일치가 생기기도 했습니다. 그러나 API First Design을 사용하면 API 명세서(예: OpenAPI 형식의 YAML 파일)가 개발의 중심 '계약서' 역할을 하게 됩니다.
📌 API First Design의 주요 단계
1. OpenAPI 명세서 설계 (YAML 형식)
첫 번째 단계는 API 명세서를 설계하는 것입니다. API 정의를 엑셀 파일이나 기타 비표준 파일로 관리하는 대신, OpenAPI 명세서는 YAML 형식으로 API를 구조화하고 표준화된 방식으로 정의합니다. 명세서에는 다음과 같은 주요 정보가 포함됩니다.
Info: 제목, 버전, 라이센스 등 메타 데이터
Servers: API 서버 접근 정보
Paths: URL 경로, 메서드(GET, POST 등), 요청 파라미터 및 응답 정의
Components: 재사용 가능한 스키마와 응답 등, 중복을 줄임
Security: 인증 또는 보안 스키마 정의
이러한 정보가 사전에 명확하게 문서화됨으로써 모든 팀원이 API 구조와 동작 방식을 명확하게 이해할 수 있습니다.
OpenAPI 명세서 설계
openapi: 1.0.0
info:
  title: E-Commerce API
  description: e-커머스 상품 주문 서비스 API 문서입니다.
  version: 1.0.0
servers:
  - url: https://api.ecommerce.com
tags:
  - name: Balance
    description: 잔액 관리

paths:
  /api/balances:
    post:
      operationId: chargeBalance
      tags:
        - Balance
      summary: 잔액 충전
      description: 사용자의 잔액을 충전한다.
      requestBody:
        required: true
        content:
          application/json:
            schema:
              $ref: '#/components/schemas/chargeBalanceRequest'
      responses:
        200:
          description: 잔액 충전 성공
          content:
            application/json:
              schema:
                $ref: '#/components/schemas/balanceResponse'
        400:
          description: 잔액 충전 실패 - 잘못된 요청
    get:
      operationId: getBalance
      tags:
        - Balance
      summary: 잔액 조회
      description: 사용자의 잔액을 조회한다.
      parameters:
        - in: header
          name: Authorization
          schema:
            type: string
            example: 'Bearer {token}'
          required: false # 인증인가 일단 무시
      responses:
        200:
          description: 잔액 조회 성공
          content:
            application/json:
              schema:
                $ref: '#/components/schemas/balanceResponse'
        401:
          description: 인증 실패
        400:
          description: 잘못된 요청

components:
  schemas:
    chargeBalanceRequest:
      type: object
      properties:
        userId:
          type: integer
          example: 1
        amount:
          type: number
          format: float
          example: 100.00
      required:
        - userId
        - amount

    balanceResponse:
      type: object
      properties:
        userId:
          type: integer
          example: 1
        balance:
          type: number
          format: float
          example: 150.00
      required:
        - userId
        - balance
2. 반복적 설계 (토론 + 공유)
그 다음 단계는 반복적인 설계입니다. API 명세서는 살아있는 문서처럼 다루어지며, 팀원 간의 지속적인 토론과 피드백을 통해 진화합니다. 이를 통해 발생할 수 있는 새로운 요구사항에 유연하게 대처할 수 있고, 설계 초기 단계부터 API가 실제 필요에 맞게 조정됩니다.
3. OpenAPI 도구 활용 및 구현
명세서가 확정되면, OpenAPI 도구를 활용해 API를 구현할 수 있습니다. 이 도구들은 서버 및 클라이언트 코드를 자동으로 생성해 주어, API 명세서와 실제 코드 간의 일관성을 유지하게 해줍니다. 이렇게 하면 수동 작업을 최소화하고 문서와 코드 간의 불일치를 줄일 수 있습니다. 또한 API 명세서의 변화가 즉시 문서에 반영되므로, 따로 수동으로 수정할 필요가 없습니다.
4. API 문서 전달
OpenAPI와 같은 도구를 활용하면 최신 상태로 유지되는 API 문서를 쉽게 전달할 수 있습니다. 이 문서는 항상 API 명세서와 일치하도록 자동으로 생성되기 때문에, API가 진화해도 별도의 수정 없이 최신 문서가 유지됩니다.
📌 OpenAPI CodeGenerator를 통해 API문서 구현
1. API 설계서(yaml)
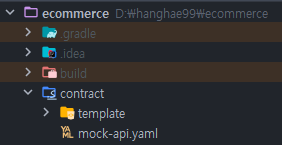
루트 > contract > yaml파일
위 경로에 API설계서를 구현합니다.
2. build.gradle 설정
import org.openapitools.generator.gradle.plugin.tasks.GenerateTask
plugins {
id 'java'
id 'org.springframework.boot' version '3.3.4'
id 'io.spring.dependency-management' version '1.1.6'
// openapi.generator 플러그인을 추가한다.
id 'org.openapi.generator' version '7.0.1'
}
group = 'com.study'
version = '0.0.1-SNAPSHOT'
java {
toolchain {
languageVersion = JavaLanguageVersion.of(17)
}
}
configurations {
compileOnly {
extendsFrom annotationProcessor
}
}
repositories {
mavenCentral()
}
// 이 설정을 해줌으로써 build/generated 내부에 있는 코드를 import하고 사용할 수 있게된다.
sourceSets {
main {
java.srcDirs("$buildDir/generated")
}
}
ext {
dirs = [
'contract' : "$rootDir/contract",
'openApiGenerate': "$buildDir/openapi"
]
openApiPackages = ['openapi.api', 'openapi.invoker', 'openapi.model']
generateOpenApiTasks = fileTree(dirs.get("contract"))
.files
.findAll { file -> file.name.endsWith('.yaml') }
.collect(file -> createOpenApiGenerateTask(file.name))
}
dependencies {
//생략...
// CodeGenerator로 작성되는 코드에 대해 다음과 같은 의존성이 필요하다
implementation 'org.springframework.boot:spring-boot-starter-validation'
implementation 'org.springdoc:springdoc-openapi-starter-webmvc-ui:2.2.0'
}
tasks.named('test') {
useJUnitPlatform()
}
tasks.register("createOpenApi") {
doFirst {
println("Creating Code By OpenAPI...")
}
doLast {
println("OpenAPI Code created.")
}
dependsOn(generateOpenApiTasks)
}
tasks.register("moveGeneratedSources") {
doFirst {
println("Moving generated sources...")
}
doLast {
openApiPackages.each { packageName ->
def packagePath = packageName.replace(".", "/")
def originDir = file("${dirs.get('openApiGenerate')}/src/main/java/${packagePath}")
def destinationDir = file("$buildDir/generated/${packagePath}")
copy {
originDir = file("${dirs.get('openApiGenerate')}/src/main/java/${packagePath}")
destinationDir = file("$buildDir/generated/${packagePath}")
from originDir
into destinationDir
}
}
println 'Generated sources moved.'
}
dependsOn("createOpenApi")
}
tasks.register("cleanGeneratedDirectory") {
doFirst {
println("Cleaning generated directory...")
}
doLast {
def openApiGenerateDir = file(dirs.get('openApiGenerate'))
if (openApiGenerateDir.exists()) {
openApiGenerateDir.deleteDir()
println "Directory ${openApiGenerateDir} deleted."
} else {
println "Directory ${openApiGenerateDir} does not exist."
}
}
dependsOn("moveGeneratedSources")
}
tasks.named("compileJava") {
dependsOn("cleanGeneratedDirectory")
}
def createOpenApiGenerateTask(String fileName) {
tasks.register("openApiGenerate_$fileName", GenerateTask) {
getGeneratorName().set("spring")
getInputSpec().set("${dirs["contract"]}/$fileName")
getOutputDir().set(dirs.get("openApiGenerate") as String)
getApiPackage().set(openApiPackages[0] as String)
getInvokerPackage().set(openApiPackages[1] as String)
getModelPackage().set(openApiPackages[2] as String)
getConfigOptions().set(
[
"dateLibrary" : "spring",
"useSpringBoot3" : "true",
"useTags" : "true",
"openApiNullable": "false",
"interfaceOnly" : "true"
]
)
getTemplateDir().set("${dirs.get('contract')}/template")
}
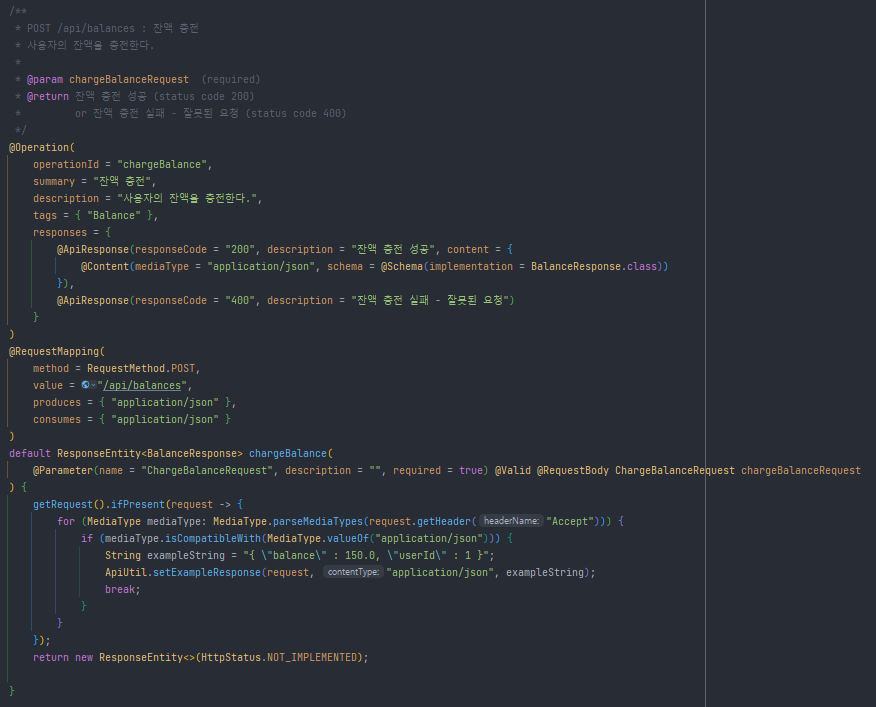
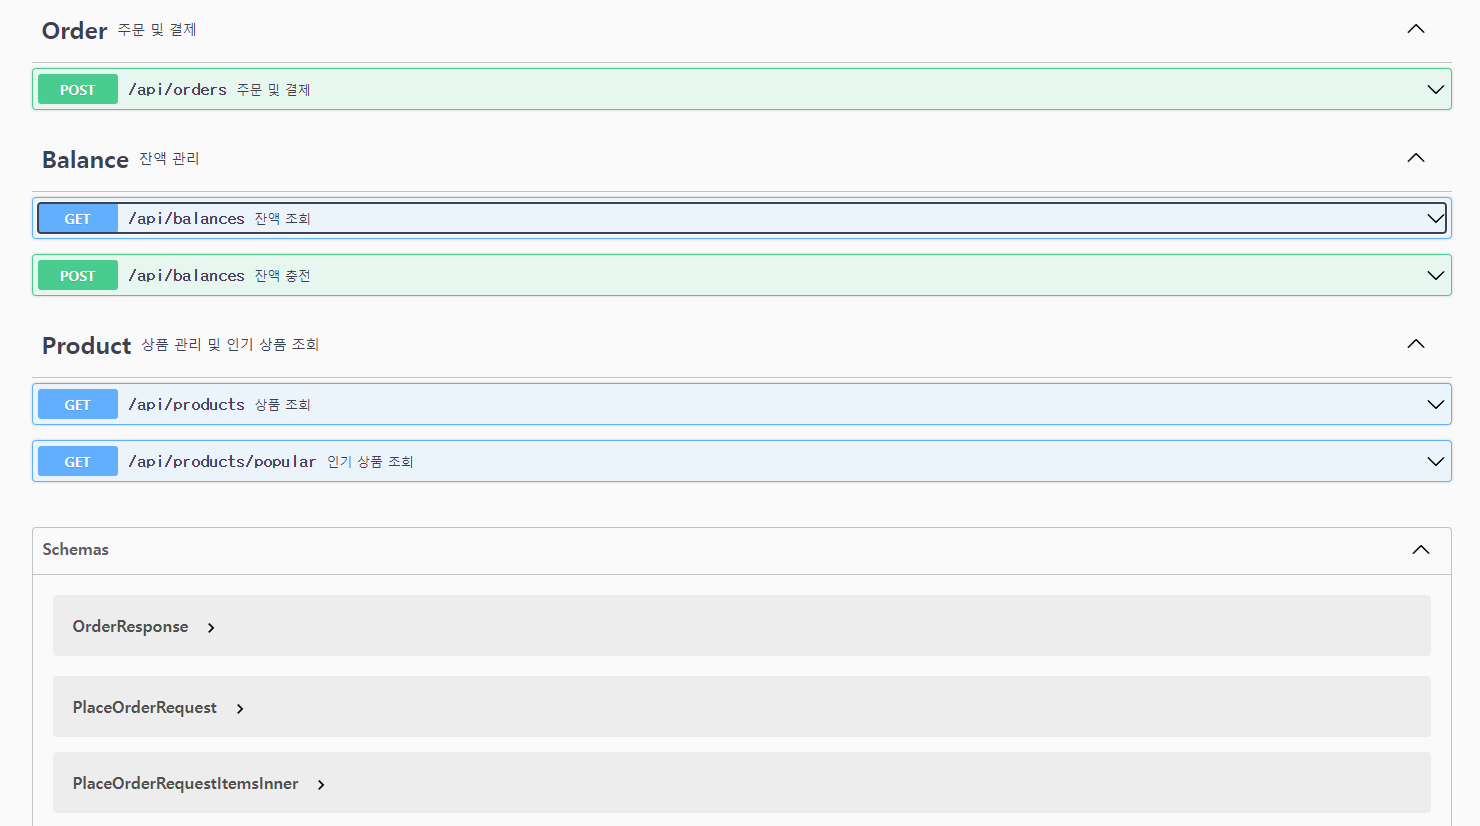
}3. API 명세서 구현
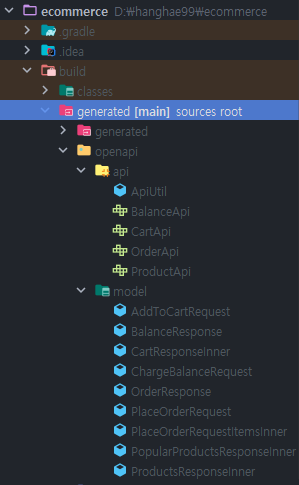
위와같이 yaml에 정의된 규격을 기반으로 API Interface 및 DTO들이 생성됩니다.
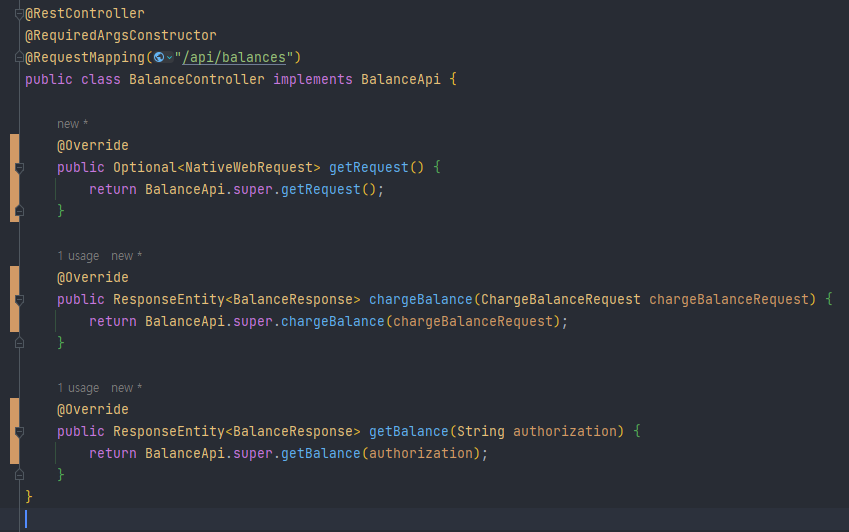
이를 상속 받아서 프로젝트를 실행시키면 아래와 같이 Swagger를 통해 HTTP요청을 보낼 수 있는 API명세서를 확인할 수 있습니다.
📌 API First Design의 장점
1. 일관된 메시지와 통일성
API First Design의 가장 큰 장점 중 하나는 단일 진실 공급원(SSOT: Single Source of Truth)을 제공한다는 점입니다. 백엔드 개발자, 프론트엔드 개발자, 이해관계자 모두 동일한 명세서를 참고하기 때문에 용어, 요청/응답 메시지 형식, 데이터 구조 등이 일관되게 유지됩니다.
2. 버전 관리 및 협업
API First Design을 도입하면 API 변경 내역을 명확하게 관리할 수 있습니다. 이를 통해 여러 팀이 API 변경 사항을 추적하고 협업을 더 투명하게 진행할 수 있습니다. 공통 API 문서를 사용하면 여러 팀이 명확하게 API에 대해 이해하고 작업을 진행할 수 있어, 혼선 없이 협업할 수 있습니다.
3. 단일 소스, 다중 활용
API First Design의 또 다른 중요한 이점은 "One Source, Multi Using"입니다. 동일한 명세서를 통해 코드, 문서, 클라이언트 라이브러리 등을 자동으로 생성할 수 있어, 모든 플랫폼에서 동일한 명세서를 바탕으로 다양한 구현을 쉽게 만들 수 있습니다. 예를 들어, 모바일 개발자, 프론트엔드 개발자, 제3의 서비스 개발자 모두 같은 API 명세서를 이용해 각자의 플랫폼에 맞는 구현을 할 수 있습니다.
더 나은 API 협업을 위한 API First Design
API First Design의 가장 큰 장점 중 하나는 다양한 이해관계자들과 함께 풍성한 API를 개발할 수 있다는 점입니다. 초기 설계 단계에서부터 비즈니스 로직, 데이터 구조, API 상호작용에 대한 피드백을 받을 수 있어, 이후 수정과정이 최소화됩니다. 이를 통해 API의 유지보수와 확장이 더 쉬워지고, 더욱 견고하고 실용적인 API를 개발할 수 있습니다.
✨ 마무리
API First Design은 API 설계와 문서화가 우선되는 중요한 개발 패러다임입니다. 이를 통해 팀 간의 협업을 촉진하고, 개발 시간을 단축하며, 혼선을 줄일 수 있습니다. OpenAPI와 같은 도구를 통해 API 품질을 높이고, 문서와 구현의 일관성을 유지할 수 있어 개발 경험을 크게 개선할 수 있습니다.
API 개발 프로세스를 개선하고 싶다면, API First Design을 채택하고 API 명세서를 우선적으로 작성하는 방식을 도입해보세요.
참고자료
https://www.youtube.com/watch?v=mhGz8q-aOZ0&t=1733s
https://velog.io/@junho5336/OpenAPI-CodeGenerator-%ED%99%9C%EC%9A%A9%ED%95%98%EA%B8%B0