개요
문제 파일은 다음 github 페이지에서 받을 수 있다.
문제
문제파일을 실행하면
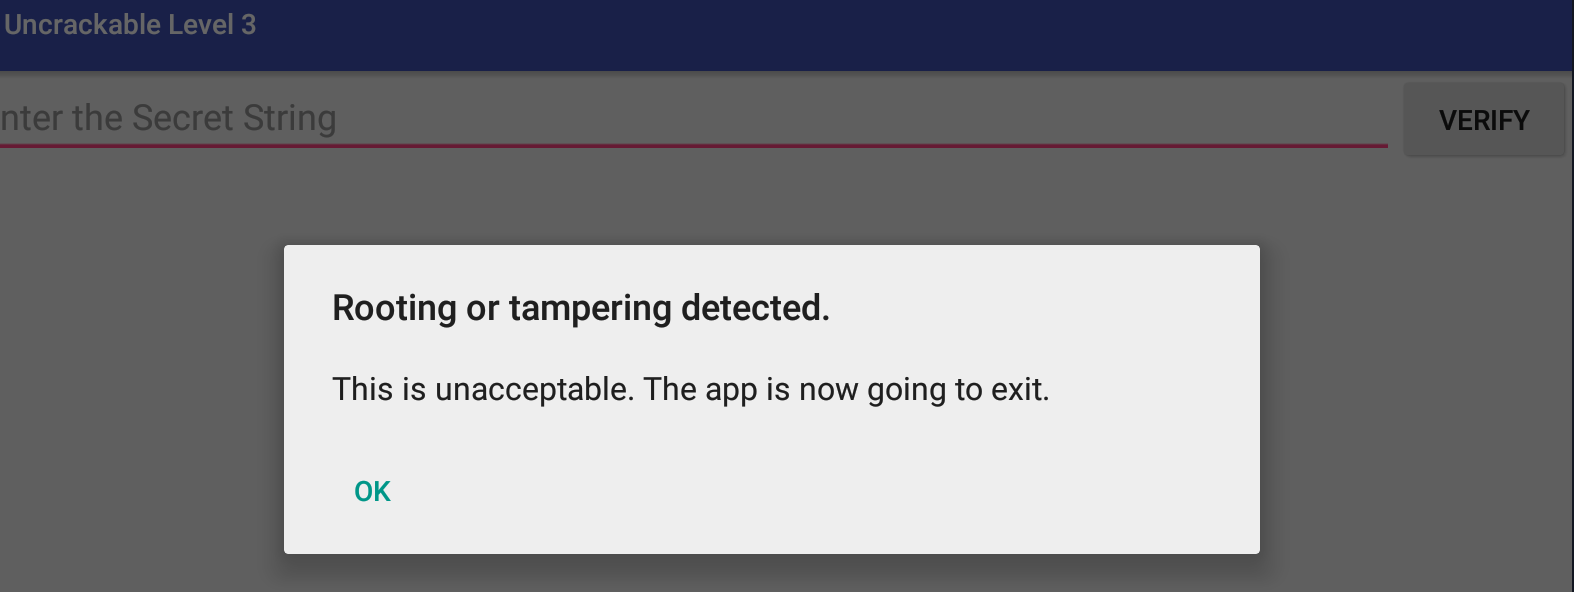
이전 문제들과 비슷하게 루팅 또는 tampering이 감지되었다고 출력된 후 확인을 누르면 앱이 종료된다.
풀이
소스 분석
MainActivity
package sg.vantagepoint.uncrackable3;
import android.app.AlertDialog;
import android.content.DialogInterface;
import android.os.AsyncTask;
import android.os.Bundle;
import android.os.Debug;
import android.os.SystemClock;
import android.support.v7.app.AppCompatActivity;
import android.util.Log;
import android.view.View;
import android.widget.EditText;
import java.io.IOException;
import java.util.HashMap;
import java.util.Map;
import java.util.zip.ZipEntry;
import java.util.zip.ZipFile;
import owasp.mstg.uncrackable3.R;
import sg.vantagepoint.util.IntegrityCheck;
import sg.vantagepoint.util.RootDetection;

public class MainActivity extends AppCompatActivity {
    private static final String TAG = "UnCrackable3";
    static int tampered = 0;
    private static final String xorkey = "pizzapizzapizzapizzapizz";
    private CodeCheck check;
    Map<String, Long> crc;

    private native long baz();

    private native void init(byte[] bArr);

    /* access modifiers changed from: private */
    public void showDialog(String str) {
        AlertDialog create = new AlertDialog.Builder(this).create();
        create.setTitle(str);
        create.setMessage("This is unacceptable. The app is now going to exit.");
        create.setButton(-3, "OK", new DialogInterface.OnClickListener() {
            public void onClick(DialogInterface dialogInterface, int i) {
                System.exit(0);
            }
        });
        create.setCancelable(false);
        create.show();
    }

    private void verifyLibs() {
        this.crc = new HashMap();
        this.crc.put("armeabi-v7a", Long.valueOf(Long.parseLong(getResources().getString(R.string.armeabi_v7a))));
        this.crc.put("arm64-v8a", Long.valueOf(Long.parseLong(getResources().getString(R.string.arm64_v8a))));
        this.crc.put("x86", Long.valueOf(Long.parseLong(getResources().getString(R.string.x86))));
        this.crc.put("x86_64", Long.valueOf(Long.parseLong(getResources().getString(R.string.x86_64))));
        try {
            ZipFile zipFile = new ZipFile(getPackageCodePath());
            for (Map.Entry next : this.crc.entrySet()) {
                String str = "lib/" + ((String) next.getKey()) + "/libfoo.so";
                ZipEntry entry = zipFile.getEntry(str);
                Log.v(TAG, "CRC[" + str + "] = " + entry.getCrc());
                if (entry.getCrc() != ((Long) next.getValue()).longValue()) {
                    tampered = 31337;
                    Log.v(TAG, str + ": Invalid checksum = " + entry.getCrc() + ", supposed to be " + next.getValue());
                }
            }
            ZipEntry entry2 = zipFile.getEntry("classes.dex");
            Log.v(TAG, "CRC[" + "classes.dex" + "] = " + entry2.getCrc());
            if (entry2.getCrc() != baz()) {
                tampered = 31337;
                Log.v(TAG, "classes.dex" + ": crc = " + entry2.getCrc() + ", supposed to be " + baz());
            }
        } catch (IOException unused) {
            Log.v(TAG, "Exception");
            System.exit(0);
        }
    }

    /* access modifiers changed from: protected */
    public void onCreate(Bundle bundle) {
        verifyLibs();
        init(xorkey.getBytes());
        new AsyncTask<Void, String, String>() {
            /* access modifiers changed from: protected */
            public String doInBackground(Void... voidArr) {
                while (!Debug.isDebuggerConnected()) {
                    SystemClock.sleep(100);
                }
                return null;
            }

            /* access modifiers changed from: protected */
            public void onPostExecute(String str) {
                MainActivity.this.showDialog("Debugger detected!");
                System.exit(0);
            }
        }.execute(new Void[]{null, null, null});
        if (RootDetection.checkRoot1() || RootDetection.checkRoot2() || RootDetection.checkRoot3() || IntegrityCheck.isDebuggable(getApplicationContext()) || tampered != 0) {
            showDialog("Rooting or tampering detected.");
        }
        this.check = new CodeCheck();
        super.onCreate(bundle);
        setContentView((int) R.layout.activity_main);
    }

    public void verify(View view) {
        String obj = ((EditText) findViewById(R.id.edit_text)).getText().toString();
        AlertDialog create = new AlertDialog.Builder(this).create();
        if (this.check.check_code(obj)) {
            create.setTitle("Success!");
            create.setMessage("This is the correct secret.");
        } else {
            create.setTitle("Nope...");
            create.setMessage("That's not it. Try again.");
        }
        create.setButton(-3, "OK", new DialogInterface.OnClickListener() {
            public void onClick(DialogInterface dialogInterface, int i) {
                dialogInterface.dismiss();
            }
        });
        create.show();
    }

    static {
        System.loadLibrary("foo");
    }
}
먼저 onCreate에서 verifyLibs을 호출한다.
verifyLibs에서는 HashMap으로 생성한 crc에 각 아키텍처에 따른 libfoo.so 파일의 crc를 저장한다.
private void verifyLibs() {
    this.crc = new HashMap();
    this.crc.put("armeabi-v7a", Long.valueOf(Long.parseLong(getResources().getString(R.string.armeabi_v7a))));
    this.crc.put("arm64-v8a", Long.valueOf(Long.parseLong(getResources().getString(R.string.arm64_v8a))));
    this.crc.put("x86", Long.valueOf(Long.parseLong(getResources().getString(R.string.x86))));
    this.crc.put("x86_64", Long.valueOf(Long.parseLong(getResources().getString(R.string.x86_64))));
그리고 apk가 실행되는 실제 환경에서 libfoo.so 파일을 찾고, 해당 파일의 crc 값과 앞서 저장한 crc 값을 비교한 후, 다르다면 tampered 값을 31337로 설정한다.
    try {
        ZipFile zipFile = new ZipFile(getPackageCodePath());
        for (Map.Entry next : this.crc.entrySet()) {
            String str = "lib/" + ((String) next.getKey()) + "/libfoo.so";
            ZipEntry entry = zipFile.getEntry(str);
            Log.v(TAG, "CRC[" + str + "] = " + entry.getCrc());
            if (entry.getCrc() != ((Long) next.getValue()).longValue()) {
                tampered = 31337;
                Log.v(TAG, str + ": Invalid checksum = " + entry.getCrc() + ", supposed to be " + next.getValue());
            }
        }
        ZipEntry entry2 = zipFile.getEntry("classes.dex");
        Log.v(TAG, "CRC[" + "classes.dex" + "] = " + entry2.getCrc());
        if (entry2.getCrc() != baz()) {
            tampered = 31337;
            Log.v(TAG, "classes.dex" + ": crc = " + entry2.getCrc() + ", supposed to be " + baz());
        }
그 다음으로 onCreate에서 native 메소드인 init 호출로 어떤 값을 세팅하고
init(xorkey.getBytes());AsyncTask를 이용하여 디버깅을 검사한다.
new AsyncTask<Void, String, String>() {
            /* access modifiers changed from: protected */
            public String doInBackground(Void... voidArr) {
                while (!Debug.isDebuggerConnected()) {
                    SystemClock.sleep(100);
                }
                return null;
            }

            /* access modifiers changed from: protected */
            public void onPostExecute(String str) {
                MainActivity.this.showDialog("Debugger detected!");
                System.exit(0);
            }
        }.execute(new Void[]{null, null, null});
그리고 따로 구현한 루팅 검사 함수를 이용해 루팅을 검사하고, 앞서 확인했던 crc 검사결과로 파일의 변조 유무를 확인한다.
if (RootDetection.checkRoot1() || RootDetection.checkRoot2() || RootDetection.checkRoot3() || IntegrityCheck.isDebuggable(getApplicationContext()) || tampered != 0) {
            showDialog("Rooting or tampering detected.");
}
모두 pass할 경우, MainActivity를 활성화한다.
        this.check = new CodeCheck();
        super.onCreate(bundle);
        setContentView((int) R.layout.activity_main);
최종적으로는 verify 함수에서 CodeCheck 클래스의 check_code()를 이용하여 시리얼 체크를 하게된다.
    public void verify(View view) {
        String obj = ((EditText) findViewById(R.id.edit_text)).getText().toString();
        AlertDialog create = new AlertDialog.Builder(this).create();
        if (this.check.check_code(obj)) {
            create.setTitle("Success!");
            create.setMessage("This is the correct secret.");
        } else {
            create.setTitle("Nope...");
            create.setMessage("That's not it. Try again.");
        }
        create.setButton(-3, "OK", new DialogInterface.OnClickListener() {
            public void onClick(DialogInterface dialogInterface, int i) {
                dialogInterface.dismiss();
            }
        });
        create.show();
}code_check()에서는 native 메소드인 bar()의 결과값을 반환한다.
package sg.vantagepoint.uncrackable3;

public class CodeCheck {
    private static final String TAG = "CodeCheck";

    private native boolean bar(byte[] bArr);

    public boolean check_code(String str) {
        return bar(str.getBytes());
    }
}
libfoo.so 분석
※apk 실행환경은 x86이지만, IDA에서 심볼이 제대로 해석되지 않아 정적분석은 x86_64로 진행하였다.※
시작 코드를 찾기 위해, IDA에 libfoo.so를 로드한 뒤 ctrl+s를 눌러 섹션 목록을 보면 .init_array를 확인할 수 있다.

sub_38a0()가 entry point로 실행된다.
.init_array
.init_array:0000000000006CE8 _init_array     segment para public 'DATA' use64
.init_array:0000000000006CE8                 assume cs:_init_array
.init_array:0000000000006CE8                 ;org 6CE8h
.init_array:0000000000006CE8                 dq offset sub_38A0
.init_array:0000000000006CE8 _init_array     ends
sub_38a0()에서는 monitor_frida_xposed() 함수를 쓰레드로 실행시킨다.
sub_38a0
__int64 sub_38A0()
{
  pthread_t newthread; // [sp+8h] [bp-10h]@1
  __int64 v2; // [sp+10h] [bp-8h]@1

  v2 = *MK_FP(__FS__, 40LL);
  pthread_create(&newthread, 0LL, (void *(*)(void *))monitor_frida_xposed, 0LL);
  *(_OWORD *)&dest[9] = 0LL;
  *(_OWORD *)dest = 0LL;
  ++dword_705C;
  return *MK_FP(__FS__, 40LL);
}
monitor_frida_xposed()는 로드된 모듈 목록(/proc/self/maps)에 frida나 xposed가 존재할 경우 "Tampering detected! Terminating..." 문자열을 출력시키고 goodbye() 함수를 호출하여 프로그램을 종료시킨다.
goodbye() 함수는 SIGABRT를 발생시키고 exit()를 호출한다.
goodbye
void __noreturn goodbye(void)
{
  raise(6);
  _exit(0);
}
실제로 level2에서 사용한 ex.py를 실행시키면 위 코드에서 출력시키는 로그를 확인할 수 있다.
# adb logcat
...
...
...
V/UnCrackable3( 4481): Tampering detected! Terminating...
F/libc    ( 4481): Fatal signal 6 (SIGABRT), code -6 in tid 4495 (tg.uncrackable3)
또한, native 메소드인 init에서는 안티디버깅 코드를 확인할 수 있었다.
init
int __fastcall Java_sg_vantagepoint_uncrackable3_MainActivity_init(__int64 a1, __int64 a2, __int64 a3)
{
  __int64 v3; // r14@1
  const char *v4; // rax@1
  const char *v5; // r15@1
  int result; // eax@1

  v3 = a3;
  anti_debug();
  LODWORD(v4) = (*(*a1 + 1472LL))(a1, v3, 0LL);
  v5 = v4;
  strncpy(xorKey, v4, 0x18uLL);
  result = (*(*a1 + 1536LL))(a1, v3, v5, 2LL);
  ++dword_705C;
  return result;
}
anti_debug()의 코드를 보면 ptrace()를 이용해 디버거에 의해 attach되지 않도록 설정하고 있다.
anti_debug
__int64 anti_debug()
{
  __int64 v0; // rbx@3
  pthread_t newthread; // [sp+8h] [bp-20h]@2
  __int64 v3; // [sp+10h] [bp-18h]@1

  v3 = *MK_FP(__FS__, 40LL);
  if ( fork() )
  {
    pthread_create(&newthread, 0LL, start_routine, 0LL);
  }
  else
  {
    v0 = getppid();
    if ( !ptrace(PTRACE_ATTACH, v0, 0LL, 0LL) )
    {
      waitpid(v0, &newthread, 0);
      ptrace(PTRACE_CONT, v0, 0LL, 0LL);
      while ( waitpid(v0, &newthread, 0) )
      {
        if ( (newthread & 0x7F) != 127 )
          _exit(0);
        ptrace(PTRACE_CONT, v0, 0LL, 0LL);
      }
    }
  }
  return *MK_FP(__FS__, 40LL);
}
에뮬레이터에서 ps 명령어를 이용해 실행중인 프로세스를 출력해보면, uncrackable3이 두 개가 실행중인 것을 확인할 수 있다.
root@shamu:/ # ps | grep uncrackable3
u0_a39    4931  1447  861108 78052 ffffffff b744d185 S owasp.mstg.uncrackable3
u0_a39    4955  4931  849808 62348 ffffffff b744b611 S owasp.mstg.uncrackable3
frida 탐지 우회
참조글에는 두 가지의 탐지우회 방법을 소개하고 있다.
strstr을 후킹하여 'frida'라는 문자열이 검색되지 않은 것처럼 속이는 방법, 그리고 pthread_create를 후킹하여 검사 쓰레드 자체를 바꿔치기 하는 방법이다.
strstr Hook
strstr은 탐색하려는 문자열('frida') 검색될 경우 해당 인덱스를 반환하고, 그렇지 않을 경우 0을 반환한다.
strstr을 후킹을 하여 0을 반환하게 만들면 탐지가 우회될 것이다.
console.log("[*] Starting script");
Interceptor.attach(Module.findExportByName("libc.so", "strstr"), {
onEnter: function (args) {
var haystack = Memory.readUtf8String(args[0]);
if(haystack.indexOf('frida')!==-1 || haystack.indexOf('xposed')!==-1)
    this.frida = Boolean(1);
},
onLeave: function (retval) {
if(this.frida)
    retval.replace(0);
return retval;
}
});
send("Done with native hooks....");
Java.perform(function () {
    send("Hooking calls to System.exit");
    var sys = Java.use("java.lang.System");
    sys.exit.implementation = function() {
        send("System.exit called");
    };
    send("Done Java hooks installed.");
});
"""
해당 코드를 실행하면 다음처럼 정상적으로 후킹되는 것을 확인할 수 있다.
root@kali:/work/ctf/owasp_mstg/Crackmes/Android/Level_03# python ex.py
[*] Running Frida
[*] Starting script
value: Done with native hooks....
value: Hooking calls to System.exit
value: Done Java hooks installed.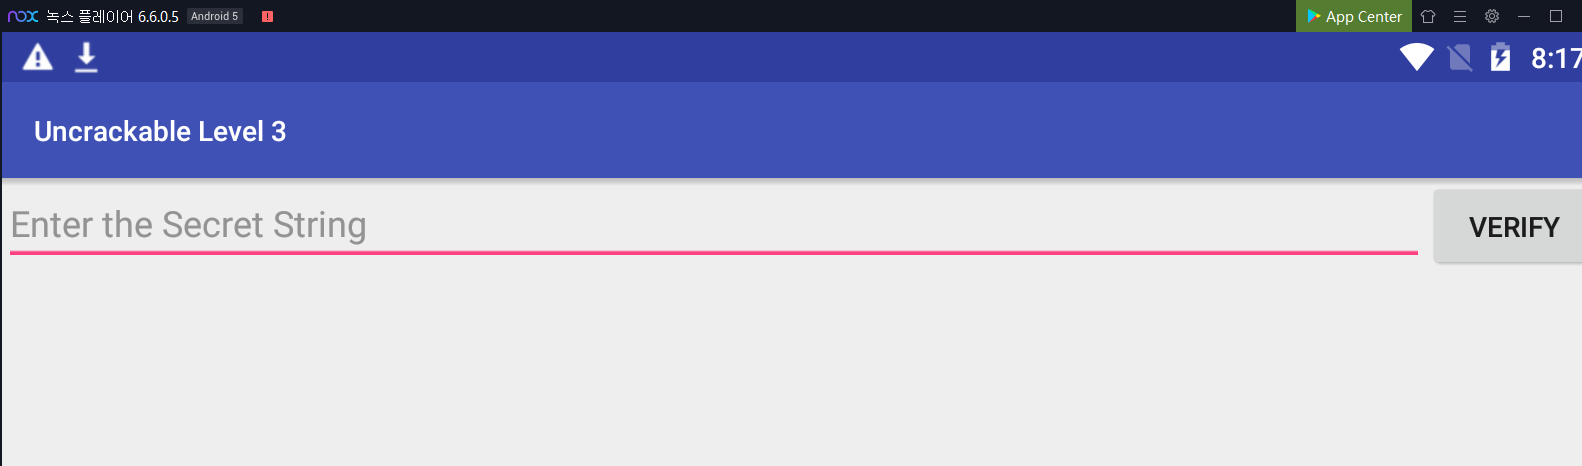
pthread_create Hook
정확히는 replace를 이용한 방법이다.
pthread_create와 동일한 fake 함수를 만든 뒤, pthread_create 를 fake 함수로 바꾼다.
fake 함수는 frida 검사를 위해 실행된 pthread_create일 경우에 0을 반환시킨다.
var p_pthread_create = Module.findExportByName("libc.so", "pthread_create");
var pthread_create = new NativeFunction( p_pthread_create, "int", ["pointer", "pointer", "pointer", "pointer"]);
send("NativeFunction pthread_create() replaced @ " + pthread_create);

Interceptor.replace( p_pthread_create, new NativeCallback(function (ptr0, ptr1, ptr2, ptr3) {
    send("pthread_create() overloaded");
    var ret = ptr(0);
    if (ptr1.isNull() && ptr3.isNull()) {
        send("loading fake pthread_create because ptr1 and ptr3 are equal to 0!");
    } else {
        send("loading real pthread_create()");
        ret = pthread_create(ptr0,ptr1,ptr2,ptr3);
    }

    //do_native_hooks_libfoo();


    send("ret: " + ret);
    return ret;
}, "int", ["pointer", "pointer", "pointer", "pointer"]));
하지만, 이 방법은 실제 테스트해본 결과 메모리 문제인지 코드상 문제는 없으나 안되는 경우가 있었다.
또한, attach와 차이가 없다.
따라서, frida 검사를 우회하기 위해 앞서 수행했던 strstr 후킹을 이용한 방법을 사용하겠다.
시리얼 획득
MainActivity.class를 다시 보면, 시리얼 비교를 위해 native 메소드인 bar()가 호출됬었다.
return bar(str.getBytes());이 때 인자로 전달되는 값은 같은 클래스 내에 선언되어 있는 xorkey의 값이다.
이제 bar 함수를 확인해보자.
libfoo.so::bar
char __fastcall Java_sg_vantagepoint_uncrackable3_CodeCheck_bar(__int64 a1, __int64 a2, __int64 a3)
{
  __int64 v3; // r14@1
  __int64 v4; // rax@2
  __int64 v5; // rbx@2
  unsigned __int64 v6; // rcx@3
  char result; // al@8
  __int64 v8; // rcx@10
  char v9[25]; // [sp+0h] [bp-48h]@1
  __int64 v10; // [sp+28h] [bp-20h]@1

  v10 = *MK_FP(__FS__, 40LL);
  v3 = a3;
  *&v9[9] = 0LL;
  *v9 = 0LL;
  if ( dword_705C == 2 )
  {
    sub_12C0(v9);
    LODWORD(v4) = (*(*a1 + 1472LL))(a1, v3, 0LL);
    v5 = v4;
    if ( (*(*a1 + 1368LL))(a1, v3) == 24 )
    {
      v6 = 0LL;
      while ( *(v5 + v6) == (v9[v6] ^ xorKey[v6])
           && *(v5 + v6 + 1) == (v9[v6 + 1] ^ xorKey[v6 + 1])
           && *(v5 + v6 + 2) == (v9[v6 + 2] ^ xorKey[v6 + 2]) )
      {
        v6 += 3LL;
        if ( v6 >= 0x18 )
        {
          result = 1;
          if ( v6 == 24 )
            goto LABEL_10;
          break;
        }
      }
    }
  }
  result = 0;
LABEL_10:
  v8 = *MK_FP(__FS__, 40LL);
  return result;
}
앞서 전달했던 xorkey가 xorKey에 저장되어 있으며, 이 값과 v9가 xor된 값이 v5(입력한 시리얼 값)와 동일한지 검사하고 있다.
총 24개를 검사하므로 시리얼의 길이는 24이다.
후킹
나는 정적분석을 64bit so 파일로 진행을 했는데, x86에서는 실행되는 코드가 다르다.
앞서 64bit에서는 단순히 xor연산을 수행했지만, x86에서는 xor 기능을 수행하는 함수를 호출하는 것 같다.
참조글에서는 radare2라는 도구를 사용하여 심볼을 복구해 xor함수의 주소를 알아낸 후, 이것을 후킹하는 방식을 사용했는데, 나는 심볼 분석이 안되기 때문에 비교를 수행할 때의 레지스터 값을 확인하여 시리얼을 알아내겠다.
시리얼 값을 설정할 때 esp를 사용하여 접근한다.
비교 코드가 실행되는 부분을 후킹하여 esp를 확인하면 xor로 연산된 시리얼 값을 확인할 수 있다.
var address = 0x00003446;
function hook(){
    //libfoo.so Address
    var p_foo = Module.findBaseAddress('libfoo.so');
    send("libfoo.so @ " + p_foo.toString());
    var target_address = p_foo.add(address);
    send("target_Address @ " + target_address.toString());
    Interceptor.attach(target_address, {
        onEnter: function (args) {
        var esp = this.context.esp;
        send("esp:"+esp);
        send(hexdump(esp,{
            offset: 0,
            length: 24,
            header: false,
            ansi:false
        }));
     },
     onLeave: function (retval) {
        send("onLeave() p_strncmp_xor64");
        send(retval);
     }

    });
}root@kali:/work/ctf/owasp_mstg/Crackmes/Android/Level_03# python ex.py
App is Starting.... pid : 5979
[*] Running Hook
[*] Starting script
[*] Done with native hooks....
[*] Hooking calls to System.exit
[*] System.exit called
[*] esp:0xbfc5c410
[*] bfc5c410 1d 08 11 13 0f 17 49 15 0d 00 03 19 5a 1d 13 15 ......I.....Z...
bfc5c420 08 0e 5a 00 17 08 13 14 ..Z.....apk에서 확인했던 xorkey와 이 값을 xor 연산하면 원래 시리얼을 얻을 수 있다.
secret = "1d0811130f1749150d0003195a1d1315080e5a0017081314".decode("hex")
xorkey = "pizzapizzapizzapizzapizz"

def xor_strings(xs, ys):
    return "".join(chr(ord(x) ^ ord(y)) for x, y in zip(xs, ys))

user_input = xor_strings(secret,xorkey)
print "The flag is: " + user_input
위 코드를 실행하면
root@kali:/work/ctf/owasp_mstg/Crackmes/Android/Level_03# python getFlag.py
The flag is: making owasp great again
root@kali:/work/ctf/owasp_mstg/Crackmes/Android/Level_03#
시리얼 값이 출력된다.
Full Exploit Code
import sys, frida
def on_message(message, data):
    if message['type'] == 'send':
        print("[*] {0}".format(message['payload']))
    else:
        print(message)
PACKAGE_NAME = "owasp.mstg.uncrackable3"
jscode = """
send("Starting script");
// char *strstr(const char *haystack, const char *needle);
Interceptor.attach(Module.findExportByName("libc.so", "strstr"), {
onEnter: function (args) {
var haystack = Memory.readUtf8String(args[0]);
if(haystack.indexOf('frida')!==-1 || haystack.indexOf('xposed')!==-1)
    this.frida = Boolean(1);
},
onLeave: function (retval) {
if(this.frida)
    retval.replace(0);
return retval;
}
});

var address = 0x00003446;
function hook(){
    //libfoo.so Address
    var p_foo = Module.findBaseAddress('libfoo.so');
    send("libfoo.so @ " + p_foo.toString());
    var target_address = p_foo.add(address);
    send("target_Address @ " + target_address.toString());
    Interceptor.attach(target_address, {
        onEnter: function (args) {
        var esp = this.context.esp;
        send("esp:"+esp);
        send(hexdump(esp,{
            offset: 0,
            length: 24,
            header: false,
            ansi:false
        }));
     },
     onLeave: function (retval) {
        send("onLeave() p_strncmp_xor64");
        send(retval);
     }

    });
}
    send("Done with native hooks....");
Java.perform(function () {
    send("Hooking calls to System.exit");
    var sys = Java.use("java.lang.System");
    sys.exit.overload("int").implementation = function(var_0) {
        send("System.exit called");
    };
    hook();
    send("Done Java hooks installed.");
});
"""
try:
    device = frida.get_usb_device(timeout=5)
    pid = device.spawn([PACKAGE_NAME])
    print("App is Starting.... pid : {}".format(pid))
    process = device.attach(pid)
    device.resume(pid)
    script = process.create_script(jscode)
    script.on('message', on_message)
    print("[*] Running Hook")
    script.load()
    sys.stdin.read()
except Exception as e:
    print(e)
부록
로드시점에 후킹
이전 문제와 다르게 이번 level3에서는 앱이 실행된 후 frida를 동적으로 검사하고 있다.
따라서 기존의 방법처럼
device = device.get_use_device().attach(PID already running)이미 실행중인 프로세스의 pid를 attach한다면, 이미 실행중인 탐지에 frida가 차단될 것이다.
이 경우에 로드된 시점에 후킹을 시도하여 탐지보다 후킹코드가 우선 실행되야 한다.
다음의 코드를 실행해보자.
device = frida.get_usb_device()
pid = device.spawn([PACKAGE_NAME])
p = device.attach(pid)
device.resume(pid)

script = p.create_script(jscode)device.spawn으로 프로세스를 재실행한다.
그리고 재실행된 프로세스에 attach한 후, 프로세스를 resume 시킨다.
탐지 쓰레드는 후킹이 된 이후에 실행될 것이므로 후킹코드에 탐지우회 기능이 있다면 탐지 쓰레드는 위와 같은 방법으로 우회될 것이다.
참조
http://www.vantagepoint.sg/blog/89-more-android-anti-debugging-fun
https://enovella.github.io/android/reverse/2017/05/20/android-owasp-crackmes-level-3.html
https://github.com/enovella/androidtrainings/tree/master/owasp-crackmes/level3/hooks