개요
arm 에뮬레이터 설치를 위해 하드디스크를 늘려야 했다.
하지만, linux에서는 다소 복잡한 절차가 필요해서 정리하는 글이다.
기존에 찾은 pv를 만들고 파티션을 복잡하게 설정하는 방법 외에 간단한 방법을 찾아서 수정했다.
디스크 확장
vmware-vdiskmanager.exe를 이용하여 사용중인 디스크의 용량을 늘릴 수 있다.
게스트 OS를 종료한 상태에서 다음의 명령어를 실행.
PS C:\Users\suij4\Documents\kali64> vmware-vdiskmanager.exe -x 80Gb .\kali64.vmdk
Disk expansion completed successfully.

WARNING: If the virtual disk is partitioned, you must use a third-party
         utility in the virtual machine to expand the size of the
         partitions. For more information, see:
         http://www.vmware.com/support/kb/enduser/std_adp.php?p_faqid=1647
http://www.virtualizationteam.com/server-virtualization/resizing-a-virtual-disk-with-vmware.html
위 명령을 실행하기 위해서는 해당 게스트 OS의 스냅샷이 존재하지 않는 상태여야 한다.

게스트 OS를 부팅 후 확인해보면 용량이 증가되어 있다.
root@kali:~# fdisk -l
Disk /dev/sda: 80 GiB, 85899345920 bytes, 167772160 sectors
Disk model: VMware Virtual S
Units: sectors of 1 * 512 = 512 bytes
Sector size (logical/physical): 512 bytes / 512 bytes
I/O size (minimum/optimal): 512 bytes / 512 bytes
Disklabel type: dos
Disk identifier: 0xd9cfb197

Device     Boot    Start      End  Sectors Size Id Type
/dev/sda1  *        2048 54527999 54525952  26G 83 Linux
/dev/sda2       54530046 62912511  8382466   4G  5 Extended
/dev/sda5       54530048 62912511  8382464   4G 82 Linux swap / Solaris
파티션 설정
gparted 도구를 이용하여 파티션을 확장할 것이다.
#apt install gpartedgparted를 실행하면 그래픽 인터페이스로 파티션을 설정할 수 있다.
#gparted확장한 하드디스크 용량이 할당되지 않은 상태로 표시되어 있다.
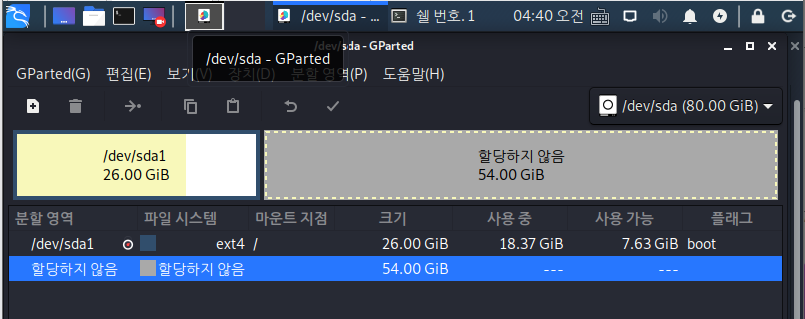
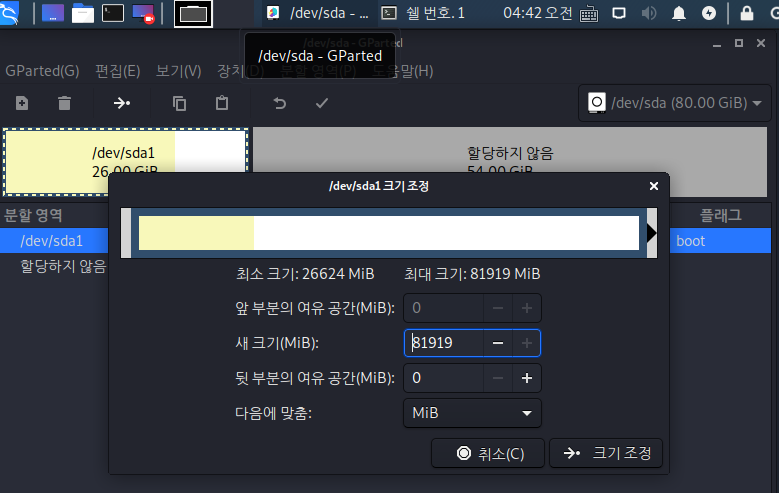
ext4를 우클릭하여 파티션을 확장해주면 된다.
작업이 끝난 후 파티션이 합쳐져서 확장된 것을 확인할 수 있다.
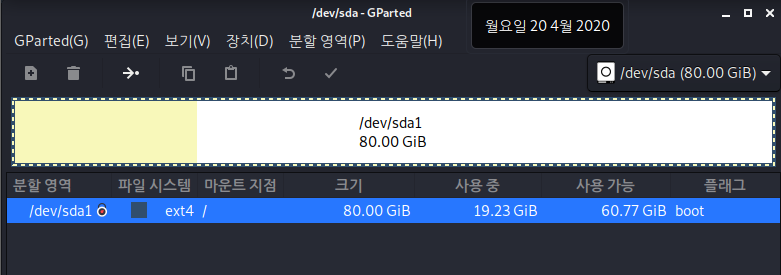
쉘에서 확인해보자.
다음은 파티션을 확장하기 전이다.
root@kali:~# df -h
Filesystem      Size  Used Avail Use% Mounted on
udev            3.9G     0  3.9G   0% /dev
tmpfs           794M  1.2M  793M   1% /run
/dev/sda1        26G   18G  6.4G  74% /
tmpfs           3.9G     0  3.9G   0% /dev/shm
tmpfs           5.0M     0  5.0M   0% /run/lock
tmpfs           3.9G     0  3.9G   0% /sys/fs/cgroup
tmpfs           794M  8.0K  794M   1% /run/user/0
다음은 작업이 끝난 후 상태이다.
root@kali:~# df -h
Filesystem      Size  Used Avail Use% Mounted on
udev            3.9G     0  3.9G   0% /dev
tmpfs           794M  1.2M  793M   1% /run
/dev/sda1        79G   18G   58G  24% /
tmpfs           3.9G     0  3.9G   0% /dev/shm
tmpfs           5.0M     0  5.0M   0% /run/lock
tmpfs           3.9G     0  3.9G   0% /sys/fs/cgroup
tmpfs           794M  8.0K  794M   1% /run/user/0
root@kali:~#
파티션 삭제
파티션을 위에서처럼 병합하기 위해서는 파티션 목록에서 확장할 파티션과 병합될 파티션이 연이어 있어야 한다.
하지만, 리눅스 기본 환경에서 /dev/sda1 외에 /dev/sda2 이상의 파티션이 예약되어있다.
이 때는 fdisk를 이용하여 파티션을 직접 삭제해줘야한다.
#fdisk /dev/sda2 #삭제할 장치명
elcome to fdisk (util-linux 2.34).
Changes will remain in memory only, until you decide to write them.
Be careful before using the write command.

The old ext4 signature will be removed by a write command.

Device does not contain a recognized partition table.
Created a new DOS disklabel with disk identifier 0x8051cf8f.

Command (m for help):
fdisk 인터페이스에서 d를 입력하여 파티션을 삭제해준다.
그 후 w를 입력하여 상태를 저장하고 빠져나온다.
참조
https://miiingo.tistory.com/221
http://www.joshi.co.kr/index.php?mid=board_Szhe52&document_srl=681