RecyclerView 란?
사용자가 관리하는 많은 수의 DataSet 을 개별 아이템 단위로 구성하여 화면에 출력해주는 뷰그룹. 제한된 영역에서 유연하게 표시할 수 있도록 만들어졌다.
즉, 많은 데이터를 스크롤 가능한 리스트 형태로 표시해주는 위젯을 말한다.
왜 RecyclerView일까?
먼저 Recycle 의미를 생각해보자.
말 그대로 재활용한다~ 라는 의미다. 도대체 무엇을 재활용하고 왜 재활용이라는 개념이 나왔을까?
사실 무엇을 재활용하는지 나도 참 어려웠다.......친구가 질문했는데 제대로 답을 못해줘서 열심히 찾아봤다...
이를 알기 위해서는 ListView 에 대해 이야기를 해보자고 한다.
ListView 는 getView()를 사용하여 View에 접근하는데 리스트의 개수만큼 호출되기 때문에 리스트가 많아질수록 비효율적이다.
반면, RecyclerView는 ViewHolder 패턴을 통해 만든 객체를 재사용하기 때문에 훨씬 효율적이다.
객체를 재사용하게 되면서 효과적으로 속도가 개선되는 장점이 있다.
이에 관한 ViewHolder 패턴에 관해서는 밑에서 이야기를 해볼게여~!
알아보는김에,,왜 ListView 보다는 RecyclerView 인지
아래 그림에서 ListView 와 RecyclerView의 차이점을 알아보자~
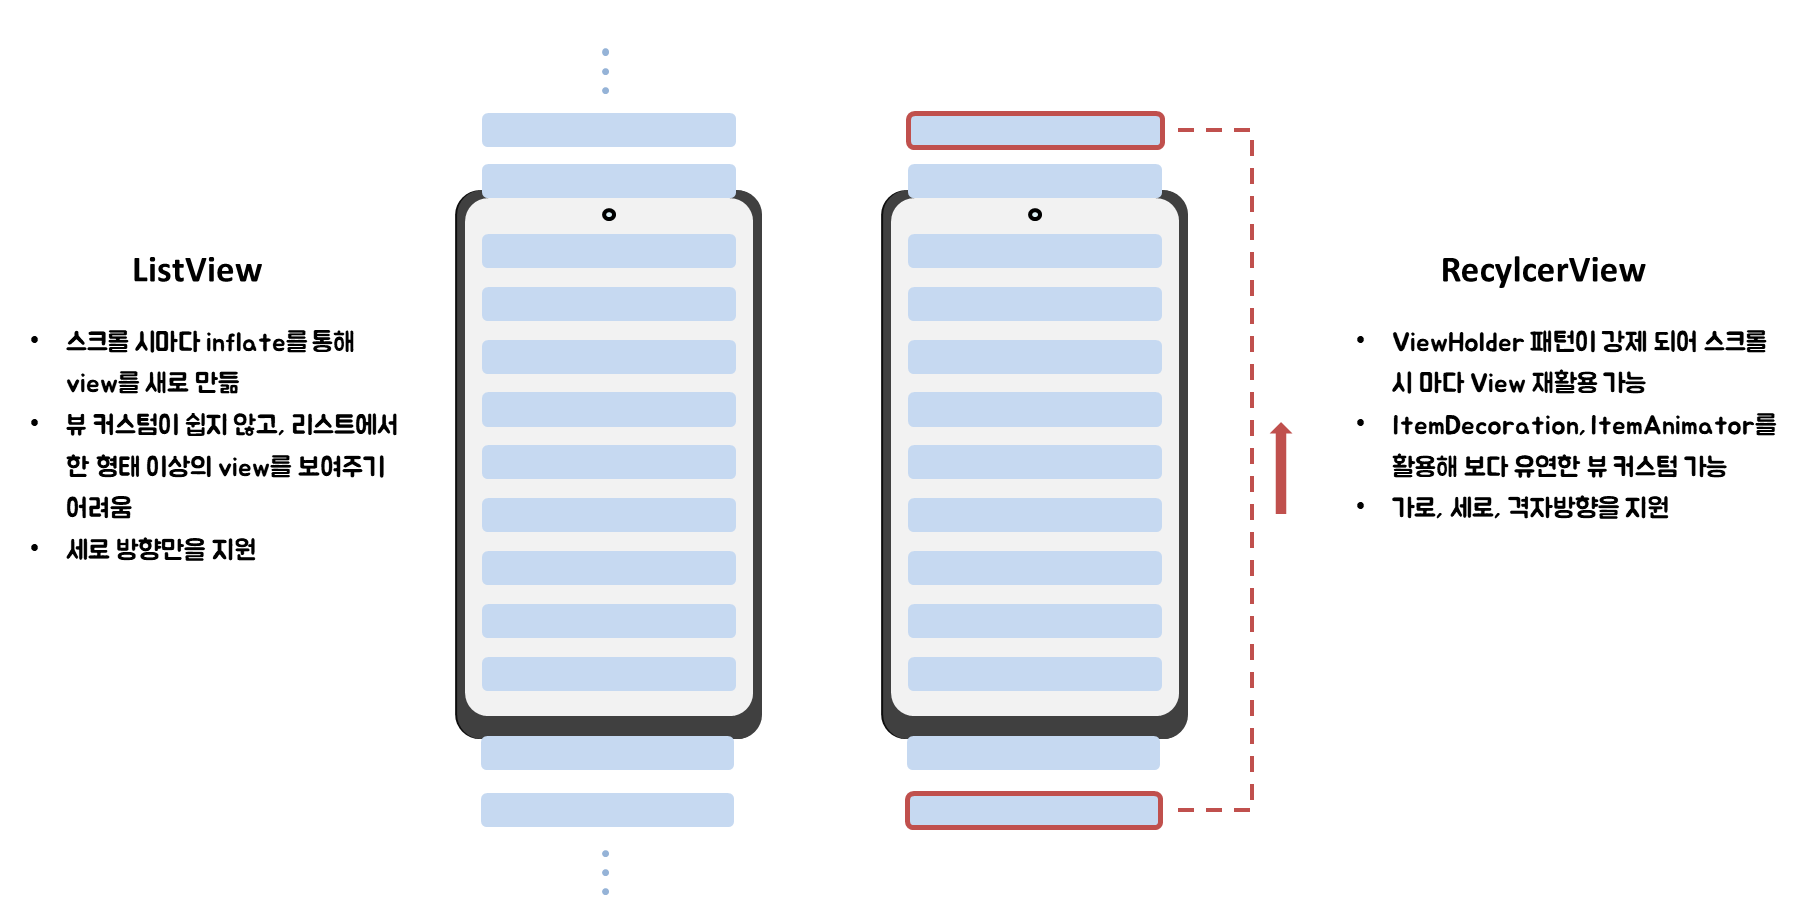
이걸 만들어준 지현이에게 무한한 감사를^^
위의 차이점을 보면 리스트를 보여주고자 할 때 ListView 보다는 RecyclerView 를 사용하는 것이 훨씬 많은 장점을 가지고 있다!
RecyclerView 를 만들어보자
에 있는 다양한 형태의 RecyclerView 를 만들어보고자 한다.
RecyclerView 작업 순서
- item Layout 만들기
- item data class 만들기
- UI 요소가 들고 있는 ViewHolder 만들기
- RecyclerView Adapter 만들기
- RecyclerView 배치하기
- ReclcerView Adapter 연결해서 데이터 갱신하기
위와 같은 순서로 RecyclerView 를 만들어보려고 한다!
1. item Layout 만들기
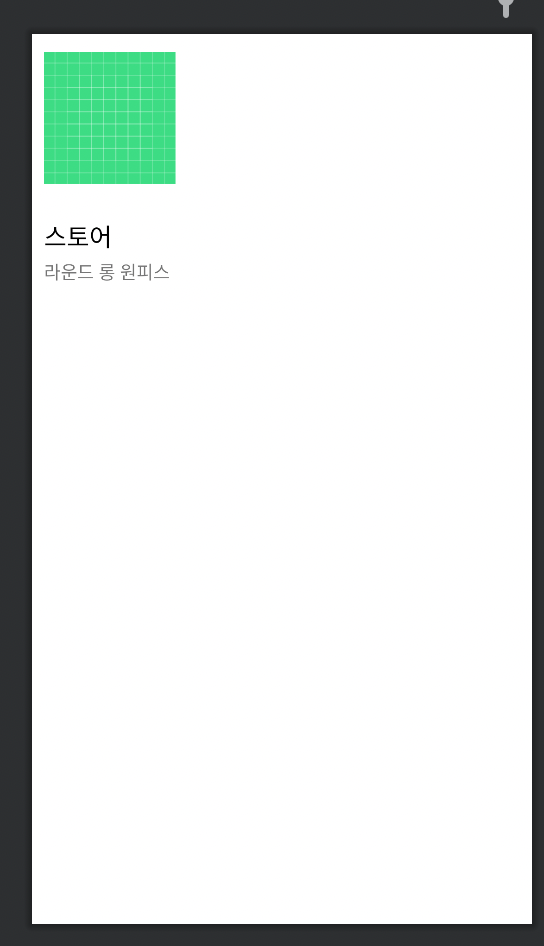
아래와 같은 UI 를 가진 itemLayout 을 만들어보고자 한다.
itemLayout.xml
<?xml version="1.0" encoding="utf-8"?>
<androidx.constraintlayout.widget.ConstraintLayout xmlns:android="http://schemas.android.com/apk/res/android"
    xmlns:tools="http://schemas.android.com/tools"
    xmlns:app="http://schemas.android.com/apk/res-auto"
    android:layout_width="wrap_content"
    android:layout_height="wrap_content">

    <ImageView
        android:id="@+id/iv_clothes_img"
        android:layout_width="match_parent"
        android:layout_height="wrap_content"
        android:src="@drawable/ic_launcher_background"
        app:layout_constraintStart_toStartOf="parent"
        app:layout_constraintTop_toTopOf="parent"
        android:layout_marginTop="15dp"
        android:layout_marginStart="10dp"/>

    <TextView
        android:id="@+id/tv_clothes_item_title"
        android:layout_width="wrap_content"
        android:layout_height="wrap_content"
        android:layout_marginTop="5dp"
        android:textColor="@color/black"
        app:layout_constraintBottom_toBottomOf="parent"
        app:layout_constraintStart_toStartOf="@+id/iv_clothes_img"
        app:layout_constraintTop_toBottomOf="@+id/iv_clothes_img"
        tools:text="스토어"
        tools:textSize="20sp" />

    <TextView
        android:id="@+id/tv_clothes_item_contents"
        android:layout_width="wrap_content"
        android:layout_height="wrap_content"
        android:layout_marginTop="5dp"
        android:textSize="15sp"
        app:layout_constraintStart_toStartOf="@+id/iv_clothes_img"
        app:layout_constraintTop_toBottomOf="@+id/tv_clothes_item_title"
        tools:text="라운드 롱 원피스" />


</androidx.constraintlayout.widget.ConstraintLayout>
2. item data class 만들기
위에서 만든 Layout 에 들어갈 data 의 형태를 정하는 data class 를 만들어 준다.
data class ClothesData(
    val clothes_img : String,
    val clothes_store : String,
    val clothes_contents :String
)
3. UI 요소가 들고 있는 ViewHolder 만들기
ViewHodler 란?
각 view를 보관하는 객체를 말한다. viewHolder 객체는 각 구성 요소를 저장하여 반복적으로 조회하지 않고도 즉시 엑세스 할 수 있다. -> 계속해서 재활용 된다!
ViewHolder 패턴이란?
데이터가 많지 않을 경우 findViewById() 를 호출해서 뷰에 적용시킬 수 있지만 데이터가 많아질 경우 findViewById() 를 많이 호출하게 되면 속도가 느려지고 무거운 작업이 될 것이다.
이것을 위해 나온 패턴이 viewHolder패턴이고 각 view 를 보관한 객체를 뷰 홀더에 보관함으로서 효과적으로 속도 개선을 할 수 있다.
이런 ViewHolder 패턴을 강제하는 것이 RecyclerView 여서 단점을 효과적으로 없앨 수 있었다.
이제 UI 요소가 들고 있는 ViewHolder 를 만들어보자~!
    class ClothesViewHolder(
        private val binding: ItemHomeRv01Binding
    ) : RecyclerView.ViewHolder(binding.root) {
        fun bind(clothesData: ClothesData) {
            binding.tvClothesItemTitle.text = clothesData.clothes_store
            binding.tvClothesItemContents.text = clothesData.clothes_contents
        }
    }
위와 같이 view 와 data를 연결해주었다~
4. RecyclerView Adapter 만들기
Adapter 는 무슨 역할을 할까?
data 와 RecyclerView 를 연결하고, ViewHolder 에 리스트로 보여줄 data 를 전달해준다. 또한 뷰에서 만들고 업데이트 한 것을 넣어주기도 한다. ViewHolder 는 Adapter 안에 있다.
RecyclerView 에서는 아래 3가지 메서드는 필수 오버라이딩 되어야 한다!
- onCreateViewHolder()
새로운 viewHolder 를 새로 만들어야 할 때 호출된다. 뷰홀더와 연결된 뷰를 만들고 초기화 한다. 아직 데이터바인딩이 되지 않아 아직 내용이 채워져 있지 않다.
- onBindViewHolder()
뷰홀더의 data 를 연결하기 위해 RecyclerView 가 호출한다. 이 메서드를 통해 데이터를 가져오고 사용하여 뷰 홀더의 레이아웃을 채워준다.
- getItemCount()
data set 의 size 를 가져온다.
    //만들어진 뷰홀더가 없을 때 여분 뷰 홀더를 만드는 함수
    override fun onCreateViewHolder(parent: ViewGroup, viewType: Int): ClothesViewHolder {
        val binding =
            ItemHomeRv01Binding.inflate(LayoutInflater.from(parent.context), parent, false)
        return ClothesViewHolder(binding)
    }

    //데이터를 넣어주기
    override fun onBindViewHolder(viewholder: ClothesViewHolder, position: Int) {
        viewholder.bind(data[position])
    }

    // RecyclerView 로 보여줄 데이터 개수 반환
    override fun getItemCount(): Int = data.size
위와 같이 3가지 메소드를 adapter에서 오버라이딩 해준다. 아래는 adapter 전체 코드이다.
//RecyclerView.Adapter()를 상속받음, <> 안에 adapter 가 전달할 ViewHolder 클래스 작성
// 생성자로 데이터 넘겨줌
class ClothesAdapter(private val data: List<ClothesData>) :
    RecyclerView.Adapter<ClothesAdapter.ClothesViewHolder>() {


    //view 와 data 연결
    class ClothesViewHolder(
        private val binding: ItemHomeRv01Binding
    ) : RecyclerView.ViewHolder(binding.root) {
        fun bind(clothesData: ClothesData) {
            binding.tvClothesItemTitle.text = clothesData.clothes_store
            binding.tvClothesItemContents.text = clothesData.clothes_contents
        }
    }

    //만들어진 뷰홀더가 없을 때 여분 뷰 홀더를 만드는 함수
    override fun onCreateViewHolder(parent: ViewGroup, viewType: Int): ClothesViewHolder {
        val binding =
            ItemHomeRv01Binding.inflate(LayoutInflater.from(parent.context), parent, false)
        return ClothesViewHolder(binding)
    }

    //데이터를 넣어주기
    override fun onBindViewHolder(viewholder: ClothesViewHolder, position: Int) {
        viewholder.bind(data[position])
    }

    // RecyclerView 로 보여줄 데이터 개수 반환
    override fun getItemCount(): Int = data.size

}
5. RecyclerView 배치하기
이제 만들어준 RecycelrView 를 Layout 상에 배치해보쟈~!
<androidx.recyclerview.widget.RecyclerView
   android:id="@+id/rv_clothes"
   android:layout_width="match_parent"
   android:layout_height="match_parent"
   android:layout_marginTop="16dp"
   app:layoutManager="androidx.recyclerview.widget.GridLayoutManager"
   app:layout_constraintTop_toTopOf="parent"
   app:spanCount="2"
   tools:itemCount="15"
   tools:listitem="@layout/item_home_rv01" />
LayoutManager 란?
item 의 배치 규칙을 관리하는 클래스
이중에서도 나는 GridLayoutManager 를 만들어보려고 한다~
- LinearLayoutManager
선형(수평/수직) 으로 보여줄 때 사용- GridLayoutManager
격자식으로 보여줄 때 사용, 가로로 몇개를 보여줄지는 spanCount 속성을 사용하여 보여줌- StaggeredGridLayoutManger
높이가 불규칙한 형태의 격자식 item list 를 보여줄 때 사용
- listItem
어떤 listLayout 을 리스트에 띄울지 결정 - itemCount
몇개의 아이템을 띄어줄 지 결정
위에 2가지는 tools 속성이여서 앱의 반영되지 않고 미리보기가 가능하다~
6. ReclcerView Adapter 연결하기
이제 Fragment 에서 Adapter 를 연결해보자~
//adaper 초기화
private lateinit var clothesAdapter: ClothesAdapter
private var clothesList = mutableListOf<ClothesData>()

 @SuppressLint("NotifyDataSetChanged")
    private fun initAdapter() {

        //adaper 초기화
        clothesAdapter = ClothesAdapter(clothesList)
        //adapter 와 recyclerView 연동
        binding.rvClothes.adapter = clothesAdapter


		//adpater 에 data 넣어주기
		clothesList.addAll(
            	ClothesData("", "스토어1", "스퀘어 블라우스"),
                ClothesData("", "스토어2", "스퀘어 블라우스"),
                ClothesData("", "스토어3", "스퀘어 블라우스"),
                ClothesData("", "스토어4", "스퀘어 블라우스"),
                ClothesData("", "스토어5", "스퀘어 블라우스"),
                ClothesData("", "스토어6", "스퀘어 블라우스"),
                ClothesData("", "스토어7", "스퀘어 블라우스"),
                ClothesData("", "스토어8", "스퀘어 블라우스"),
                ClothesData("", "스토어9", "스퀘어 블라우스"),
                ClothesData("", "스토어10", "스퀘어 블라우스"),
                ClothesData("", "스토어11", "스퀘어 블라우스"),
                ClothesData("", "스토어12", "스퀘어 블라우스"),
                ClothesData("", "스토어13", "스퀘어 블라우스"),
                ClothesData("", "스토어14", "스퀘어 블라우스"),
                ClothesData("", "스토어15", "스퀘어 블라우스")
        )

		//adapter 에 리스트가 갱신되었다고 알려줌
		clothesAdapter.notifyDataSetChanged()

}
위와 같이 adapter를 초기화하여 adapter와 recyclerView 를 연동하고
adapter 에 데이터를 갱신해준다.
notifyDataSetChanged() 를 통해 adapter에 리스트가 갱신되었다고 알려준다!!
notifyDataSetChanged() 에 문제점이 있는데,,이건 다음시간에 알아볼래잉..
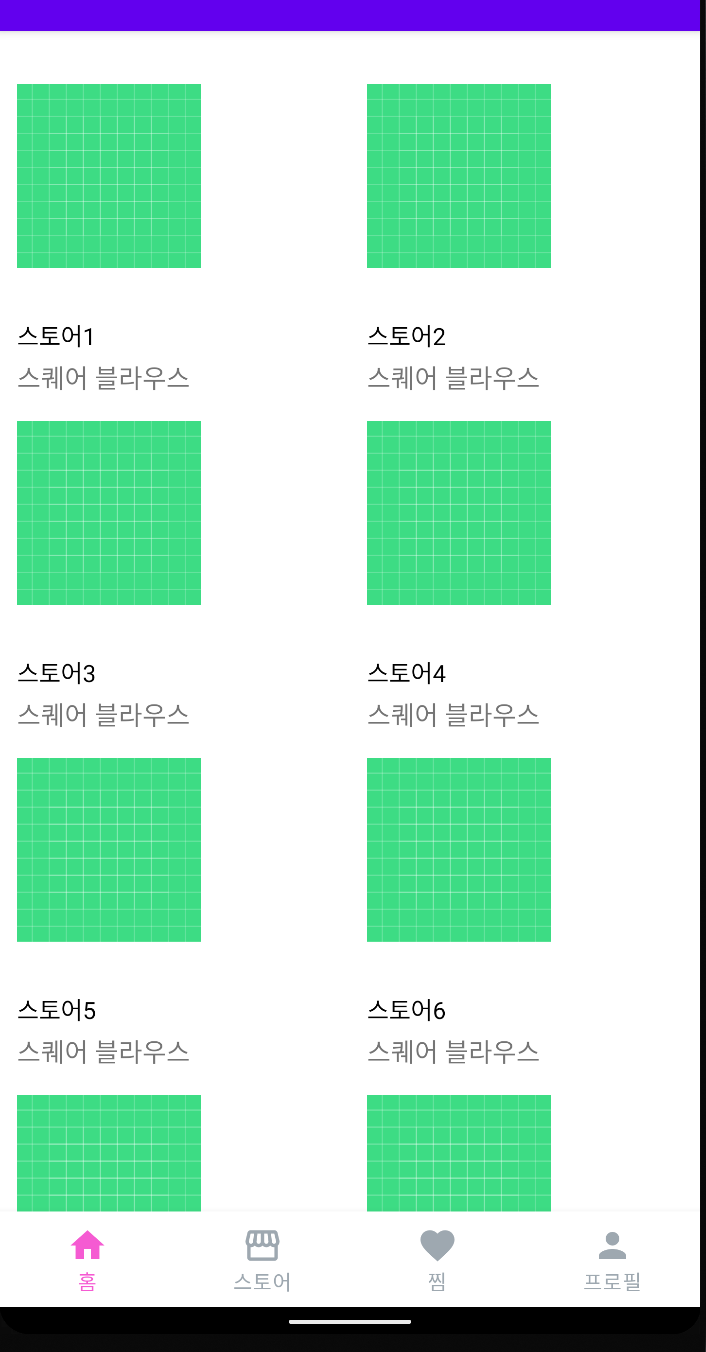
이렇게 하면 밑에 사진과 같은 결과물을 볼 수 있다!!!
RecyclerView 끝~!
참고
리싸이클러뷰
https://developer.android.com/develop/ui/views/layout/recyclerview
뷰홀더패턴관련
https://velog.io/@jaeyunn_15/Android-%EB%B7%B0%ED%99%80%EB%8D%94-%ED%8C%A8%ED%84%B4
https://jcchu.medium.com/viewholder-pattern%EC%97%90-%EB%8C%80%ED%95%B4-%EC%95%8C%EC%95%84%EB%B3%B4%EA%B8%B0-9838e66ea9a5

너무 유익한 내용입니다^^ recyclerview와 listview의 차이점을 나타낸 사진이 이해가 쏙 가서 좋군요!^^